
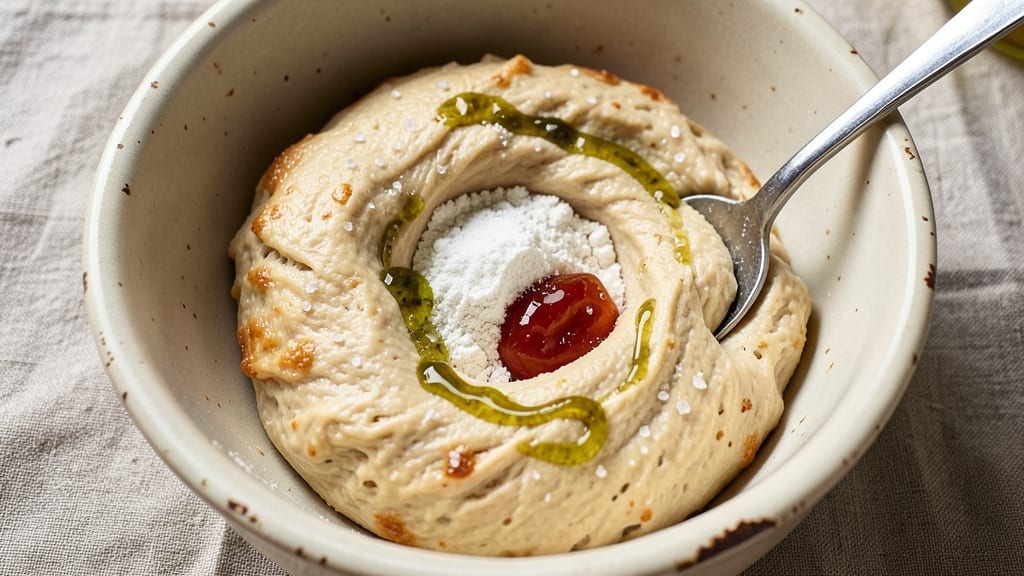
This 6-cup flour bread recipe delivers restaurant-quality texture with minimal effort—no kneading required. The secret lies in a slow, cold rise that develops deep flavor and an open crumb structure, while baking in a Dutch oven creates that coveted artisan crust. I perfected this method after years of experimenting with commercial bread machines, and it consistently produces results that rival artisanal bakeries.
The recipe uses simple ingredients you likely already have: all-purpose flour, instant yeast, salt, and water, plus a touch of honey for subtle sweetness. What sets it apart is the 48-hour cold proof—this extended fermentation builds complex flavors and creates that signature open crumb.
The Dutch oven traps steam during baking, giving you a crispy bottom crust and tender interior without requiring special equipment.
By the time you pull it from the oven, you’ll have a loaf with a golden, crackly crust and an interior filled with airy pockets—perfect for sandwiches, toast, or serving alongside soups.
The bread stays fresh for days when wrapped properly, making it ideal for meal prep. This is the kind of bread that transforms ordinary meals into something special.
For variations, try adding seeds or nuts to the dough before shaping, or brush the baked loaf with garlic butter for extra flavor. The recipe scales easily for larger batches, and the no-knead method makes it accessible even for beginners. Let’s get started on creating your perfect loaf.
Ingredients for 6 cup flour bread
Six simple ingredients transform into artisan bread with that signature open crumb and crispy crust.
| Ingredient | Amount | Notes |
|---|---|---|
| All-Purpose Flour 🌾 | 6 cups | Sifted for even texture |
| Instant Yeast 🍞 | ½ tsp | Active dry works too |
| Fine Sea Salt 🧂 | 1 ½ tsp | Diamond Crystal preferred |
| Honey 🍯 | 1 tbsp | For subtle sweetness |
| Warm Water 💧 | 3 cups | 110°F for yeast activation |
| Olive Oil 🫒 | ¼ cup | Extra-virgin for richness |
| White Whole Wheat Flour 🌾 | ½ cup | Optional for structure |
| Cornmeal 🌽 | ¼ cup | For Dutch oven base |
The flour is the foundation—stick with all-purpose for the best rise, but King Arthur or Gold Medal brands yield the most consistent results. If you want to experiment, white whole wheat flour adds subtle nuttiness without overpowering the dough. For the yeast, instant yeast is ideal since it dissolves directly in the water, but active dry works too—just let it bloom in the water first. Honey adds just enough sweetness to balance the yeast’s tang, and local raw honey from farmers markets has more complex flavors. The olive oil isn’t just for flavor; it keeps the dough supple during the long cold proof. I always grab California extra-virgin for its fruity notes, but any good quality brand works.
No instant yeast? Active dry yeast at the same amount works, but bloom it first in warm water with a pinch of sugar. Running short on honey? Maple syrup or agave in equal measure keeps things vegan-friendly. Substituting whole wheat flour? Reduce by 1/4 cup since it absorbs more moisture. The cornmeal is optional but worth it—it creates that perfect crispy bottom crust. If you’re baking without a Dutch oven, a heavy oven-safe skillet with a lid works in a pinch. For the water, filtered is best—tap water with strong chlorine can inhibit yeast activity.
This dough is all about patience—48 hours in the fridge develops maximum flavor. Once shaped, cover tightly with plastic wrap and store in the fridge. The dough keeps for up to 72 hours this way, giving you flexibility. After baking, let the loaf cool completely on a wire rack before slicing—at least 2 hours—or you’ll end up with gummy bread. For longer storage, wrap tightly in foil and freeze for up to 3 months. To revive, thaw at room temperature and reheat wrapped in foil at 350°F for 10 minutes.
Why You’ll Love This Recipe
- Five-Ingredient Magic: I swear by this—just flour, yeast, salt, honey, and water. No fancy starters, no waiting hours. Mix it, let it rise, bake it. That’s it. The simplicity makes it my go-to when I’m too tired to think.
- Sweet-Savory Balance: That honey isn’t just for flavor—it caramelizes into a subtle richness while the sea salt cuts through. The result? A crust with depth, soft inside, and just enough natural sweetness to make it irresistible. (Yes, even on a Tuesday night.)
- Meal Prep MVP: Bake a loaf on Sunday, and you’ve got breakfast, sandwiches, or toast for days. It reheats beautifully—toss slices in a toaster or warm them in the oven. I freeze leftovers too; they thaw faster than store-bought bread and taste fresh.
- Budget-Friendly Staple: Six cups of flour, a pinch of yeast, and a drizzle of honey? This bread costs pennies per slice. Honestly, it’s the kind of recipe that makes me feel like I’m feeding my family gourmet meals without breaking the bank. Plus, it stretches further than any artisanal loaf I’ve tried.
Step-by-step instructions for no-knead bread with artisan texture
This method delivers professional-quality bread with minimal effort—just mix, rest, and bake.
Mix the Dough with Minimal Effort
In a large bowl, combine the 6 cups all-purpose flour and 0.5 cup white whole wheat flour. Whisk to eliminate any lumps—this ensures even texture throughout the dough. Create a well in the center and add the 0.5 tsp instant yeast, 1.5 tsp fine sea salt, and 1 tbsp honey. Mix these dry ingredients just until the yeast is evenly distributed.
Next, pour in the 3 cups warm water (test temperature by ensuring it doesn’t feel hot to your wrist—around 110°F). Slowly drizzle in the 0.25 cup olive oil while stirring with a wooden spoon. The dough will begin to form a shaggy mass. Once combined, let it rest for 5 minutes—this allows the flour to fully hydrate and the gluten to begin developing naturally.
Shape and Rest for Optimal Texture
After resting, use a dough scraper to gently fold the dough over itself 4-5 times, just until it comes together into a loose ball. Avoid overworking it—this is a no-knead method, and excessive handling develops too much gluten, which can make the bread dense. Place the dough in a lightly oiled bowl, cover it tightly with plastic wrap, and let it rest at room temperature for 1 hour.
During this time, the dough will rise slightly and develop a smooth, elastic surface. If you notice it’s still shaggy after an hour, give it 5 more minutes of gentle folds before proceeding. The goal is to create a dough with just enough structure to hold its shape during baking without becoming tough.
Prep the Dutch Oven for Perfect Crust
Preheat your oven to 450°F. Place a 5-quart Dutch oven (with lid) inside the oven while it preheats. Sprinkle 0.25 cup cornmeal evenly on the bottom of the Dutch oven—this prevents sticking and adds a subtle crunch to the bread’s base. While the oven heats, transfer the rested dough to a piece of parchment paper and gently shape it into a round loaf, about 8 inches in diameter.
Carefully lift the dough (with parchment) into the preheated Dutch oven. The dough will rise slightly during the initial 20 minutes of baking, creating that iconic artisan dome. Avoid opening the oven during this time—sudden temperature drops can cause the dough to collapse.
Bake for a Crispy Crust and Soft Interior
Cover the Dutch oven with its lid and bake for 30 minutes. After 30 minutes, remove the lid and continue baking for another 10-15 minutes until the bread is deep golden brown and sounds hollow when tapped on the bottom. The internal temperature should reach 190-200°F—this ensures a fully baked, tender crumb.
Here’s the thing—if the top browns too quickly, tent it loosely with aluminum foil to prevent over-browning while the interior finishes baking. The bread is done when it pulls away from the sides of the Dutch oven and has a crisp crust with a soft, airy interior.
Cool and Slice for Maximum Freshness
Remove the bread from the Dutch oven and place it on a wire rack to cool completely for at least 1 hour. This step is crucial—cutting into the bread too soon releases steam and makes the crumb gummy. The longer you wait, the more the gluten relaxes, and the cleaner each slice will be.
Once cooled, slice the bread with a sharp serrated knife. You’ll notice the open crumb structure and crispy crust—hallmarks of a well-made no-knead loaf. Store any leftovers in an airtight container at room temperature for up to 3 days, or freeze slices for up to 3 months to preserve freshness.
Pro Tips For Making 6 Cup Flour Bread
- Measure Honey Precisely: That ¼ cup honey isn’t just sweetener—it’s the dough’s lifeline. Use a kitchen scale if you’re nervous about eyeballing it, because too little makes the bread dry, and too much throws off the yeast’s timing. I learned this after a batch turned out gummy and sad.
- Bloom Yeast in Warm Water: Don’t just toss the yeast into the dry ingredients. Mix it with the warm water (110°F) and 1 tsp honey first, then let it sit for 5 minutes until foamy. This guarantees the yeast wakes up properly—no last-minute surprises when the dough flops.
- Knead Until Silky: Stop when the dough pulls cleanly away from the bowl and springs back slowly. Over-kneading makes bread tough, but under-kneading leaves it dense. I used to rush this, but now I count 8–10 minutes by hand or 5–6 minutes in a stand mixer with a dough hook.
- Proof in a Cooler Spot: If your kitchen’s warm, proof the dough in a slightly cooler area (like the fridge) for 1–2 hours before shaping. This gives you control—no sudden ballooning that collapses when you try to handle it. Works especially well if you’re short on time.
Regional styles of this dish
Italian Focaccia Style
Transform this bread into a rustic Italian focaccia by adding 2 tbsp olive oil directly to the dough before shaping. After baking, press your fingers into the loaf to create dimples, then drizzle with extra-virgin olive oil and sprinkle with flaky sea salt and dried rosemary.
Bake uncovered at 425°F for 20 minutes after removing the lid for a crispy, aromatic loaf perfect for dipping. 🌿
German Pretzel Twist
For a pretzel variation, dissolve 1 tbsp baking soda in 1 cup water and boil for 30 seconds to create a lye bath.
Shape the dough into a long braid, dip it in the boiling solution, then bake in the Dutch oven for 35 minutes covered, followed by 10 minutes uncovered. Brush with butter and sprinkle with coarse salt for a classic pretzel crust. 🥨
French Baguette Adaptation
To make a baguette-style loaf, divide the dough into 3 equal pieces and shape each into a long oval. Place them on a baking sheet lined with parchment, sprinkle with semolina flour, and bake uncovered at 450°F for 25 minutes.
Score the tops with a razor blade before baking for that iconic French crust. Brush with garlic butter after baking for extra flavor. 🥖
Southern Cornbread Hybrid
Replace 1 cup of all-purpose flour with 1 cup fine cornmeal and add 1 cup buttermilk to the dough. Shape into a round loaf and bake as directed. The result is a tender, slightly sweet bread with a moist crumb—ideal for serving with chili or as a side to BBQ.
Top with honey butter after baking for a Southern-inspired twist. 🌽
Mediterranean Herb Loaf
Add 2 tbsp chopped fresh herbs (like thyme, oregano, or basil) to the dough before shaping. For extra flavor, mix 1 tsp dried herbs with the salt.
After baking, brush the crust with olive oil and sprinkle with sesame seeds or poppy seeds for a fragrant, aromatic loaf that pairs beautifully with Mediterranean dishes. 🌿
Savory Cheese Bread
Stretch the dough by adding 1 cup shredded cheddar or Gruyère to the mix. Shape into a round loaf and bake as usual. The cheese melts slightly during baking, creating pockets of gooey goodness.
For a spicy kick, add ½ tsp smoked paprika to the dough. This version is perfect for sandwiches or serving with soups. 🧀
Nutrition facts
Frequently asked questions
Can I use this recipe without a Dutch oven?
A Dutch oven is ideal for that perfect crust, but you can use a heavy oven-safe skillet with a lid instead. Place it in the oven while preheating, then transfer the shaped dough to a piece of parchment paper on top of the skillet. The bread won’t be quite as crispy on the bottom, but it will still have great texture. For even better results, try a cast-iron skillet or a baking stone.
How do I know when the dough is ready for shaping?
The dough is ready when it forms a smooth, elastic ball that springs back slightly when poked. After the initial 1-hour room-temperature rest, it should look cohesive and no longer shaggy. If it feels sticky, let it rest another 10-15 minutes uncovered to absorb excess moisture. The key is patience—rushing leads to dense bread.
What if my bread turns out dense instead of airy?
Dense bread usually happens from overworking the dough or skipping the cold proof. For future batches, handle the dough minimally during shaping and always complete the 48-hour cold rise. If you’re short on time, try a 24-hour cold proof instead. Also ensure your yeast is fresh—old yeast loses potency and can’t properly develop gluten.
Can I make this bread without honey?
Replace the honey with 1 tbsp maple syrup or 1 tbsp sugar—both work equally well to feed the yeast. For a completely sugar-free version, omit it entirely, though you may notice slightly less browning on the crust. The bread will still have great flavor, just with a more neutral sweetness profile.
How should I store leftover bread?
Wrap the cooled loaf tightly in plastic wrap or foil, then place it in an airtight container. Store at room temperature for up to 3 days for best freshness. For longer storage, slice the bread and freeze the slices in a sealed bag for up to 3 months. To revive frozen slices, reheat wrapped in foil at 350°F for 5-10 minutes until warm and crisp.

- 3lb Prime Rib Roast Recipe: Juicy Pink Center Guaranteed in 3 Hours - October 31, 2026
- 5 Spice Cake Recipe: Warmly Spiced Layers With Crunchy Top - October 31, 2026
- 1950’s Macaroni and Cheese Recipe: Nostalgic Creamy Cheese Sauce with Buttery Noodles - October 31, 2026