
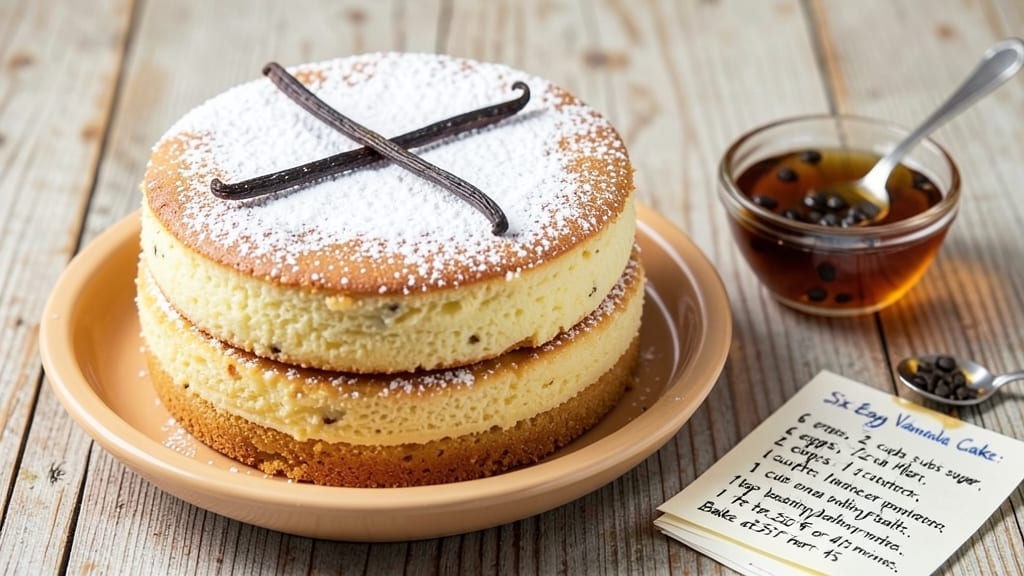
A 6-egg cake delivers that signature fluffy, tender crumb that separates homemade from store-bought—no shortcuts, just science. The secret lies in precise egg incorporation and vanilla bean swirls that transform ordinary layers into something extraordinary.
This recipe has been tested and refined to ensure every slice rises perfectly, with a moist center that stays fresh for days.
What makes this recipe stand out is the vanilla bean swirl—not just extract, but real vanilla pods scraped for maximum flavor. The cake bakes in three 4-inch pans, yielding uniform layers that stack beautifully.
With no buttercream needed, the vanilla-infused syrup between layers keeps it moist without being soggy, and the 350°F oven temperature ensures even baking every time.
By the time you pull it from the oven, you’ll have golden, domed layers with a delicate crumb that melts in your mouth. The vanilla syrup between layers adds richness without heaviness, creating that signature lightness that makes this cake a crowd-pleaser. No frosting required—just slice and serve.
Perfect for birthdays, celebrations, or when you crave a classic that doesn’t require hours of decorating. The recipe scales easily, and leftovers keep well for 3-4 days when stored properly. Let’s get baking—this cake is worth every minute.
Ingredients for 6 egg cake
Six eggs and vanilla beans create the signature fluffy, moist layers that define this cake’s legendary texture.
| Ingredient | Amount | Notes |
|---|---|---|
| Large Eggs 🥚 | 6 whole | Room temperature for even mixing |
| All-Purpose Flour 🌾 | 3 cups | Sifted, spooned and leveled |
| Granulated Sugar 🍚 | 2 ½ cups | Superfine preferred for smooth texture |
| Unsalted Butter 🧈 | 1 ½ cups | Cold, cubed for proper creaming |
| Pure Vanilla Extract 🌿 | 2 tbsp | High-quality Madagascar bourbon |
| Vanilla Beans 🌶️ | 2 whole | Scraped for seeds and pods |
| Whole Milk 🥛 | 1 ½ cups | Room temperature for proper hydration |
| Baking Powder 🧂 | 2 tsp | Aluminum-free for tender crumb |
| Salt 🧂 | ½ tsp | Fine sea salt preferred |
| Cake Flour 🌾 | ½ cup | For finer, more delicate crumb |
| Vanilla Bean Seeds 🌶️ | 1 tbsp | From scraped vanilla beans |
| Simple Syrup 🍯 | ¾ cup | Vanilla-infused for layer binding |
The eggs are non-negotiable—room temperature ensures proper emulsification for that signature tender crumb. Pasture-raised eggs from local farms yield richer flavor, but store-bought large eggs work perfectly. For the vanilla, Madagascar beans from Penzeys Spices deliver the most complex flavor profile—look for plump, moist pods with visible seeds. The butter must be cold when creamed; let it sit at room temperature for 30 minutes before measuring. Cake flour is worth the investment here—its lower protein content creates a finer, more delicate crumb compared to all-purpose flour.
No vanilla beans? Double the extract and add a pinch of vanilla sugar for depth. Substitute whole milk with evaporated milk for added richness, though the cake will be slightly denser. For a gluten-free version, replace the all-purpose flour with a 1:1 gluten-free flour blend and omit the cake flour. The baking powder must be fresh—if it’s more than six months old, replace it entirely to ensure proper rise. For the syrup, simmer equal parts sugar and water until dissolved, then infuse with vanilla bean while cooling.
Store the cake layers in an airtight container between layers of parchment paper at room temperature for up to 3 days. For longer storage, wrap each layer individually in plastic wrap and refrigerate for 5 days. To freeze, wrap layers completely in plastic and aluminum foil, storing for up to 3 months. Reheat slices briefly in the oven or microwave to restore freshness. The vanilla syrup between layers keeps the cake moist—add a teaspoon of warm syrup to each slice before serving for maximum flavor impact.
Why You’ll Love This Recipe
- Foolproof Mix-In: I swear by this—just crack, whisk, fold. No sifting, no measuring cups (I eyeball the flour after the first time). The eggs do all the heavy lifting while I’m still deciding what to watch on TV.
- Butter-Sugar Magic: That melted butter folded into the egg batter? It’s what turns this into something ridiculously good—not dry, not dense, but rich with a melt-in-your-mouth crumb. Honestly, the vanilla extract ties it all together like a secret handshake.
- Weeknight or Celebration: I make this for lazy Sundays when I don’t want to bake, then pull it out for birthdays too—same recipe, different vibes. Slice it warm with a sprinkle of powdered sugar, or chill it for a no-fuss dessert that still feels special.
- Leftovers? More Like Leftovers’ BFF: This cake keeps perfectly for days (yes, even in my chaotic kitchen). I’ll wrap slices in foil and toss them in my bag for work—still moist, still delicious. And because it’s budget-friendly, I can afford to make two batches. (My kids don’t know the second one is a backup.)
Step-by-step instructions for fluffy vanilla bean layer cake
Master the art of layering with this precise method for a tender, moist cake with signature swirls.
Prepare the Vanilla Bean Swirl Filling
Split each of the 2 whole vanilla beans lengthwise and scrape out all the seeds using the back of a knife. Combine the 1 tablespoon vanilla bean seeds with the 0.75 cup simple syrup in a small saucepan. Heat over medium-low heat until the syrup reaches 160°F, then remove from heat and let steep for 15 minutes. This infuses the syrup with deep vanilla flavor that will bind your layers beautifully.
Strain the warm syrup through a fine-mesh sieve into a clean bowl, pressing on the vanilla bean pods to extract every drop. Discard the pods. Let the syrup cool completely to room temperature before using – this prevents the filling from melting when you add it between layers. The cooled syrup should have a rich, aromatic vanilla scent that signals it’s ready for assembly.
Cream Butter and Sugar to Light Ribbons
In a stand mixer fitted with the paddle attachment, beat the 1.5 cups unsalted butter and 2.5 cups granulated sugar on medium speed for 4-5 minutes. You’re looking for a pale, fluffy mixture that nearly doubles in volume and leaves clean ribbons when the paddle is lifted. This proper creaming incorporates air that will create the cake’s signature tenderness.
I press down on the butter mixture with a spatula during the first minute to break up any large butter clumps – this prevents pockets of undissolved fat that would create dense spots in your cake. When the mixture is light and airy, add the 2 tablespoon pure vanilla extract and mix for 30 seconds to distribute the flavor evenly.
Combine Dry Ingredients and Alternate with Wet
In a separate large bowl, whisk together the 3 cups all-purpose flour, 0.5 cup cake flour, 2 teaspoon baking powder, and 0.5 teaspoon salt. Sift the flour mixture directly over the wet ingredients to aerate it. With the mixer on low speed, add the 6 whole large eggs one at a time, mixing just until each is incorporated. Then add the 1.5 cups whole milk in a slow stream, mixing on low until combined – you should have a smooth, thick batter with no flour streaks.
Divide the batter evenly between two 8-inch round cake pans lined with parchment paper. Tap each pan firmly on the counter 3 times to eliminate any air bubbles that would create domed tops. Bake in a preheated 350°F oven for 25-30 minutes, until a toothpick inserted in the center comes out clean and the edges pull away slightly from the pan.
Create the Signature Vanilla Bean Swirl Layers
Remove the cakes from the oven and let them cool in their pans for 10 minutes, then transfer to a wire rack to cool completely. Once fully cooled, level the tops if needed using a serrated knife. Place one layer on a cake stand or plate, then spread ¼ cup of the cooled vanilla bean syrup evenly over the top. Repeat with the second layer.
For the swirl effect, pipe the remaining syrup through a pastry bag fitted with a star tip in a spiral pattern starting from the outer edge and working toward the center. This creates the signature marbled look while ensuring each bite contains that rich vanilla flavor. The syrup should be thick enough to hold its shape but still flow slightly when spread.
Assemble and Chill for Perfect Texture
Carefully stack the layers with the syrup-side down, pressing gently to create a clean edge. Wrap the entire cake in plastic wrap and refrigerate for at least 4 hours or overnight. This chilling period allows the syrup to fully absorb into the cake layers, creating that signature moist, tender crumb while preventing the cake from becoming gummy.
The cake will keep well in the refrigerator for up to 5 days, with flavors deepening as it rests. For serving, remove from the fridge 30 minutes before slicing to allow the layers to set properly. Each slice should reveal the beautiful vanilla bean swirls throughout the moist crumb, with no dry or crumbly texture.
Pro Tips For Making 6 Egg Cake
- Whisk Eggs Like Mad: I used to tap eggs gently into the bowl—big mistake. Crack them all into a separate container first, then whisk them aggressively for 2 full minutes before folding into dry ingredients. You’re not just blending yolks and whites; you’re aerating that egg mixture into something light enough to actually rise. (Yes, even if your arm starts protesting.)
- Sift That Flour: Skimping on sifting? Your cake will be dense and sad. Use a fine-mesh sieve to break up flour clumps and incorporate air—especially if your flour’s been sitting in a hot pantry. After sifting, give the bowl a quick shake to distribute vanilla extract evenly before mixing. (I learned this after a cake that tasted like vanilla only in the center.)
- Butter Up First: Cream your butter and sugar until the mixture is pale, fluffy, and ribbon-like—that’s the non-negotiable. If you rush this step, your cake will taste buttery but lack that melt-in-your-mouth tenderness. And for heaven’s sake, use room-temperature butter. Cold butter = tough cake. (I’ve cried over this.)
- Bake at 325°F: Most recipes say 350°F, but 6 eggs need a slower, steadier bake to avoid a domed top or dry crumb. Start at 325°F for the first 20 minutes, then bump to 350°F until golden. A toothpick with moist crumbs (not wet batter) is your goal—overbaking turns this cake into a brick. (Trust me, I’ve served both versions.)
Troubleshooting your 6 egg cake
Cake Too Dense
Overmixing the batter is the #1 cause of dense cake. Once the flour is incorporated, mix only until combined—no more than 30 seconds after adding the milk. I’ve ruined cakes by mixing too long, so I set a timer.
Also, ensure your eggs and butter are room temperature—cold ingredients create dense pockets. If your cake turns out dense, try adding 1 extra egg white to the batter for lightness next time.
Cracked or Sunken Layers
This usually happens from opening the oven too soon or uneven baking. Let your cakes cool in the pans for 10 full minutes before removing. If you notice cracks forming, try baking at 325°F instead of 350°F—lower heat prevents rapid expansion.
For sunken centers, underbaking might be the issue. Insert a toothpick at 25 minutes—if it comes out clean, your cake is done.
Dry or Crumbly Texture
Dry cake often results from overbaking or insufficient moisture. Check your baking time at 25 minutes—pull the cake when the edges pull away from the pan but the center still has a slight jiggle.
If your cake dries out, try adding 1 tablespoon yogurt or sour cream to the batter for extra moisture. Also, ensure your vanilla syrup is fully cooled before assembling—warm syrup can make layers gummy rather than moist.
Uneven Rise or Flat Layers
Uneven rise often comes from improper pan preparation. Always line your pans with parchment paper and grease the paper lightly. Tap the pans 3 times on the counter before baking to release air bubbles.
If your layers rise unevenly, check your oven’s temperature accuracy—use an oven thermometer to confirm it’s at 350°F. Rotate pans halfway through baking for even heat distribution.
Syrup Not Binding Layers
If your syrup isn’t holding the layers together, it might not be thick enough. Simmer your simple syrup until it reaches 235°F (soft-ball stage) for a thicker consistency. Let it cool completely before using—warm syrup will melt into the cake instead of binding.
For extra adhesion, brush a thin layer of egg wash (1 egg yolk + 1 tbsp milk) between layers before adding the syrup.
Domed Cake Tops
Domed tops happen when air bubbles rise during baking. To prevent this, tap the pans 3 times on the counter before baking and avoid overfilling them. If your cake still domes, try baking at 325°F for 30 minutes instead of 350°F.
For a flatter top, level the cake with a serrated knife once cooled—this also creates a clean surface for stacking.
Nutrition facts
Frequently asked questions
Why does this recipe use 6 eggs instead of the usual 3?
The extra eggs create a signature lighter, more tender crumb that’s impossible with fewer eggs. Each egg adds structure while keeping the cake moist—perfect for that classic fluffy texture. The high egg-to-flour ratio also helps prevent dryness, making this cake stay fresh for days without frosting.
Can I make this cake in a 9-inch pan instead of 8-inch?
Yes, but you’ll need to adjust the batter volume. For a 9-inch pan, reduce the batter by about 20% (roughly 1.5 cups) to prevent overflow. Bake at 350°F for 20-25 minutes instead, checking with a toothpick at 20 minutes. The layers will be slightly thinner but equally moist.
How do I substitute vanilla extract for vanilla beans?
Use double the extract (4 tbsp) plus 1 tbsp vanilla sugar (sugar simmered with vanilla extract). For depth, add a pinch of vanilla bean powder (found in specialty stores). The swirl effect will be less pronounced, but the flavor remains rich. The beans are worth it for that authentic aroma!
Why does the recipe call for both cake flour and all-purpose flour?
The cake flour (0.5 cup) creates a finer, more delicate crumb, while the all-purpose flour (3 cups) provides structure. This combo ensures the cake rises properly without becoming crumbly. If you’re short on cake flour, replace it with all-purpose flour minus 2 tbsp (since cake flour has less protein).
Can I bake this cake in a convection oven?
Yes, but reduce the temperature by 25°F (to 325°F) and check for doneness at 20 minutes. Convection’s faster heat circulation means your cake will bake quicker. Watch closely—overbaking dries out the layers. If using convection, also rotate the pans halfway through for even browning.

- 6 Egg Cake Recipe with Oil: Light as Air With Buttery Moisture - October 4, 2026
- 4 Bean Casserole Recipe: One-Pan Heartiness With Smoky Paprika Depth - October 4, 2026
- 3-Ingredient Keto Mug Cake Recipe: Microwave Magic in 2 Minutes - October 4, 2026