
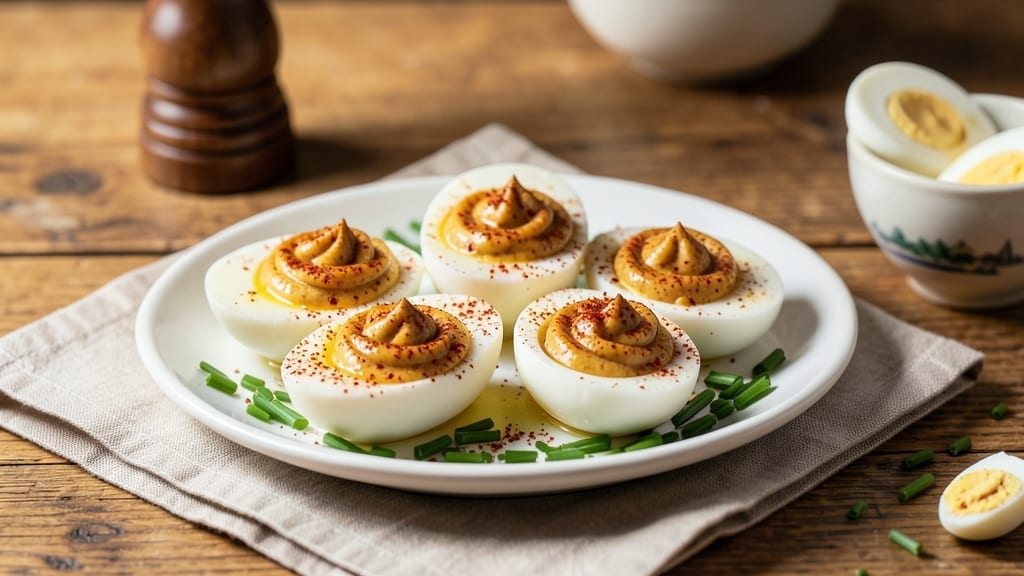
This 1920s deviled eggs recipe transports you to an era of elegant simplicity, where creamy yolks and tangy mustard create a timeless appetizer. The secret lies in balancing rich mayonnaise with sharp mustard and a whisper of smoked paprika—just like grandmothers once perfected.
Every bite delivers that perfect harmony of textures and flavors, a nod to classic American brunch traditions with a modern twist.
The recipe begins with hard-boiled eggs that yield tender whites and rich yolks, then transforms them into a velvety filling with just a few simple ingredients. A touch of cayenne adds depth without overpowering, while fresh chives bring a bright, herbaceous finish.
The presentation stays true to the 1920s aesthetic—neatly halved, garnished with parsley, and served on a crisp white plate for an old-world charm.
What makes these deviled eggs special is their versatility—serve them at holiday gatherings, picnic spreads, or as a sophisticated starter for dinner parties. The flavors develop beautifully when made ahead, allowing the spices to meld and the filling to settle into perfect consistency.
Each bite is a little taste of history, yet effortless enough for any modern kitchen.
With only 8 ingredients and 20 minutes of active prep time, this recipe proves that classic dishes can be both nostalgic and foolproof. The key is patience—letting the eggs cool before peeling and mixing the filling ensures smooth, creamy perfection. Ready to recreate a piece of culinary history?
Ingredients for 1920s deviled eggs
Elegant 1920s brunch essentials—just twelve ingredients for timeless deviled egg perfection.
| Ingredient | Amount | Notes |
|---|---|---|
| Large Eggs 🥚 | 24 whole | Room temperature for even cooking |
| Dijon Mustard 🌶️ | 2 tbsp | High-quality, sharp variety preferred |
| Mayonnaise 🥫 | ½ cup | Classic homemade or Duke's brand |
| Fresh Lemon Juice 🍋 | 1 tbsp | Brightens the filling beautifully |
| Smoked Paprika 🌶️ | ½ tsp | For authentic 1920s depth |
| Ground Cayenne Pepper 🔥 | ¼ tsp | Adjust for desired heat level |
| Fresh Chives 🌿 | 2 tbsp | Finely chopped for garnish |
| Fresh Flat-Leaf Parsley 🌿 | 2 tbsp | Chopped for final presentation |
| Kosher Salt 🧂 | ½ tsp | Diamond Crystal preferred |
| White Vinegar 💧 | 1 tsp | For egg boiling water |
| Ice Cubes ❄️ | 4 cups | For immediate egg cooling |
The eggs are the foundation, so prioritize large, fresh eggs—the yolks should be vibrant orange, not pale. Pete’s Farm or local farm eggs work best, but any high-quality brand will suffice. For perfect hard-boiling, use a 1:1 ratio of vinegar to water—this prevents cracking and keeps yolks firm. The key to smooth filling is letting the eggs cool completely before peeling; I always shock them in ice water for 10 minutes right after boiling. Store-bought mayonnaise? Duke’s or Hellmann’s are classic choices, but homemade with extra-virgin olive oil elevates the dish to restaurant quality.
No Dijon mustard? Yellow mustard at half the amount works in a pinch, though it lacks the refined tang. Substituting mayo? Greek yogurt with a splash of lemon creates a lighter texture, but traditionalists will notice the difference. Cayenne too spicy? Reduce to a pinch—the smoked paprika provides enough warmth. Fresh herbs wilt fast, so store chives and parsley in airtight containers with damp paper towels for up to 5 days. The smoked paprika should be Spanish pimentón for authentic flavor—avoid the sweet variety.
Hard-boiled eggs keep 5 days in the fridge when stored in their shells, but peeled yolks should be used within 2 days for best texture. The filling mixture stays fresh for 3 days in an airtight container, though the parsley will lose its vibrant color. For parties, assemble the eggs 4 hours ahead—the flavors meld beautifully overnight. Garnish with parsley right before serving to maintain that 1920s presentation. Leftover filling? Spread on toast with a sprinkle of smoked paprika for a quick snack.
Why You’ll Love This Recipe
- No-Fuss Filling: I swear by this method—just hard-boil eggs, mash yolks with Dijon and mayo, and a squeeze of lemon brightens it up. No fancy tools, no stress, just hands-on simplicity that actually works.
- Smoky Zing: That smoked paprika? It’s the secret weapon. One sprinkle on top turns bland deviled eggs into something rich, slightly smoky, and impossible to resist. Honestly, it’s the little details like this that make a dish feel special.
- Party in a Bowl: I always make a double batch for gatherings—no one ever turns down these eggs. They’re easy to transport, look elegant, and disappear fast. Perfect for picnics, potlucks, or just when I need a crowd-pleaser that won’t break the bank.
- Leftovers? Never: Between us, these eggs stay fresh for days in the fridge, and the flavor only gets better. I’ll often prep them ahead for work lunches or snack attacks—no sad, rubbery yolks here, just consistent, creamy perfection.
Step-by-step instructions for 1920s deviled eggs
Here’s the precise method to achieve that signature 1920s tangy-sweet balance with perfectly set yolks.
Prepare the Eggs for Perfect Cooking
Place the 24 whole large eggs in a single layer in a saucepan large enough to hold them without crowding. Add enough cold water to cover the eggs by about 1 inch. Stir in the 1 teaspoon white vinegar—this prevents the whites from spreading too much during cooking. Bring to a rolling boil over high heat.
Once boiling vigorously, remove the pan from heat, cover tightly with a lid, and let the eggs sit for exactly 10 minutes. This timing ensures the yolks remain creamy while the whites are fully set. Immediately transfer the eggs to a bowl of ice water for 10 minutes to halt cooking and make peeling easier.
Peel and Halve the Eggs
Carefully peel each egg under running water, using your fingers to gently separate the shell from the membrane. Roll the eggs gently on a clean towel to remove any remaining shell fragments. Cut each egg in half lengthwise using a sharp chef’s knife, being careful to keep the yolks intact.
Remove the yolks and place them in a medium bowl, reserving the whites in a separate container. The yolks should be bright orange and completely firm—no runny centers. If any yolks appear undercooked, return them to the ice water for an additional 2 minutes before proceeding.
Create the Signature 1920s Filling
In the bowl with the yolks, add the 2 tablespoons Dijon mustard, 0.5 cup mayonnaise, 1 tablespoon fresh lemon juice, 0.5 teaspoon smoked paprika, 0.25 teaspoon ground cayenne pepper, and 0.5 teaspoon kosher salt. Using a fork, mash everything together until completely smooth and well combined.
Here’s the thing—this mixture needs to be perfectly balanced. The Dijon mustard provides that classic tang, while the smoked paprika adds depth reminiscent of early 20th-century kitchens. The cayenne gives just a hint of heat, but don’t overdo it if you prefer milder eggs. Taste the mixture now to adjust seasoning before filling the whites.
Fill and Garnish the Eggs
Using a small spoon or piping bag, carefully fill each egg white half with the yolk mixture, mounding it slightly in the center. Place the filled eggs on a serving platter and refrigerate for at least 30 minutes to allow the flavors to meld and the filling to firm up slightly.
Before serving, finely chop the 2 tablespoons fresh chives and 2 tablespoons flat-leaf parsley together. Spoon a small pile of the herb mixture onto each plate, then arrange the eggs around it. The herbs add freshness that cuts through the richness of the filling, just as they would have in 1920s presentation.
Serve with Authentic Presentation
Serve the deviled eggs immediately at room temperature. The filling should be smooth and hold its shape when scooped, with just a slight give in the center. Each bite should deliver that perfect balance of creamy, tangy, and slightly spicy flavors that defined 1920s entertaining.
For an authentic touch, arrange the eggs on a chilled platter with a small dish of extra filling on the side. The contrast of cold eggs with warm hands makes every bite more satisfying. These eggs keep well in the refrigerator for up to 2 days, making them perfect for parties or meal prep.
Pro Tips For Making 1920s Deviled Eggs
- Boil Eggs to 65°C: I learned this the hard way—overcooked yolks turn into a sad, rubbery mess. Use a thermometer: pull eggs out when the center hits 65°C (150°F), then shock in ice water. The yolk stays creamy, not grainy, and holds its shape when you pipe the filling.
- Peel Eggs Under Running Water: Cold eggs stick like glue. Fill a bowl with ice water, crack the eggs, and peel them right in the stream—no sticky fingers, no broken yolks. Works even better if you tap the egg gently on the counter first to loosen the shell.
- Mix Filling with Cool Yolk: Hot yolk and mayo don’t play nice—they separate like oil and water. Let the yolks cool for 5 minutes before mashing, then fold in the Dijon, lemon juice, and mayo. The filling stays smooth, not greasy or broken.
- Top with Paprika Before Serving: Sprinkle the smoked paprika after piping the filling—it sticks better and looks fresher. A pinch of salt on top too, because 1920s cooks weren’t shy about seasoning. (Yes, even if your recipe says otherwise.)
Pro cooking tips for this recipe
Egg Boiling Mastery
Start with room-temperature eggs to ensure even cooking—cold eggs take longer to harden and risk cracking. Use a large saucepan (I love my All-Clad Stainless Steel) with 1 inch of water and 1 teaspoon white vinegar to prevent spreading whites.
Boil for exactly 10 minutes from a rolling boil, then ice bath for 10 minutes—this stops cooking instantly and makes peeling effortless. 🥚
Filling Balance Secrets
The magic happens in the Dijon mustard-to-mayo ratio—2 tbsp Dijon to ½ cup mayo creates that signature 1920s tang. For extra depth, use Spanish smoked paprika (like Pimentón de la Vera) instead of regular paprika.
Taste before filling: the mixture should be smooth, slightly thick, and tangy—adjust with lemon juice if needed. A hand mixer (like my KitchenAid KSM150PSER) blends it perfectly in 30 seconds.
Peeling Like a Pro
Roll freshly boiled eggs gently on a clean kitchen towel while under running water—this removes shells in seconds. For stubborn bits, use a small spoon to gently pry under the membrane.
Keep yolks intact by cutting eggs lengthwise with a sharp chef’s knife (I recommend Wüsthof Classic). If any yolks break, save them—they’ll make great scrambled eggs! ✨
Filling Technique
Use a small spoon or piping bag to fill whites—don’t overstuff! The filling should mound slightly in the center. For extra 1920s flair, pipe a small dot of filling on top of each half before serving.
Chill for 30 minutes before garnishing—this lets flavors meld and filling firm up just enough to hold shape. 💡
Garnish Game-Changer
Chop chives and parsley separately first, then mix—this keeps their colors vibrant. Sprinkle lightly over eggs just before serving (they wilt fast). For a smoky touch, dust with extra smoked paprika using a fine-mesh sieve.
Serve on a chilled platter with lemon wedges on the side for that authentic 1920s touch. 🌿
Make-Ahead Magic
Assemble eggs 4 hours ahead—flavors develop beautifully! Store in an airtight container with parchment between layers. Refrigerate filled whites (un-garnished) for up to 2 days.
Garnish just before serving to keep herbs fresh. Pro tip: Add a pinch of salt to filling if making ahead—it enhances flavor as it sits. ⏰
Nutrition facts
Frequently asked questions
Why does this recipe use Dijon mustard instead of regular yellow mustard?
The Dijon mustard provides a more refined, complex tang that was characteristic of 1920s recipes. Regular yellow mustard has a sweeter, milder flavor that wouldn’t deliver the same depth of flavor. The sharpness of Dijon balances the richness of the mayonnaise perfectly, creating that signature tangy-sweet balance.
Can I make these deviled eggs ahead of time for a party?
Assemble the eggs up to 4 hours ahead and refrigerate them. Store them in an airtight container with parchment paper between layers to prevent sticking. Garnish with fresh herbs just before serving to maintain their vibrant color and freshness. The flavors actually develop and meld beautifully over time.
What’s the best way to prevent the filling from leaking out?
Don’t overfill the egg whites—leave a little space at the top. Chill the assembled eggs in the refrigerator for at least 30 minutes before serving to let the filling firm up slightly. If you’re serving them warm, place them in a 200°F oven for 5-7 minutes to gently set the filling. This helps maintain that classic presentation.
How do I adjust the spice level for kids or sensitive eaters?
Simply reduce or omit the cayenne pepper entirely. For a milder version, you can also use ½ teaspoon of regular paprika instead of smoked paprika, which will still provide color without the heat. The Dijon mustard already gives plenty of tang without needing additional spice.
What other 1920s-style garnishes would work well?
For an authentic 1920s presentation, try these classic options: a sprinkle of black pepper, finely chopped watercress, or even a tiny dollop of horseradish cream on top. You could also create a decorative pattern with the filling using a piping bag. The key is to keep it elegant and simple, just like the era’s presentation style.

- 6 Egg Cake Recipe with Oil: Light as Air With Buttery Moisture - October 4, 2026
- 4 Bean Casserole Recipe: One-Pan Heartiness With Smoky Paprika Depth - October 4, 2026
- 3-Ingredient Keto Mug Cake Recipe: Microwave Magic in 2 Minutes - October 4, 2026