
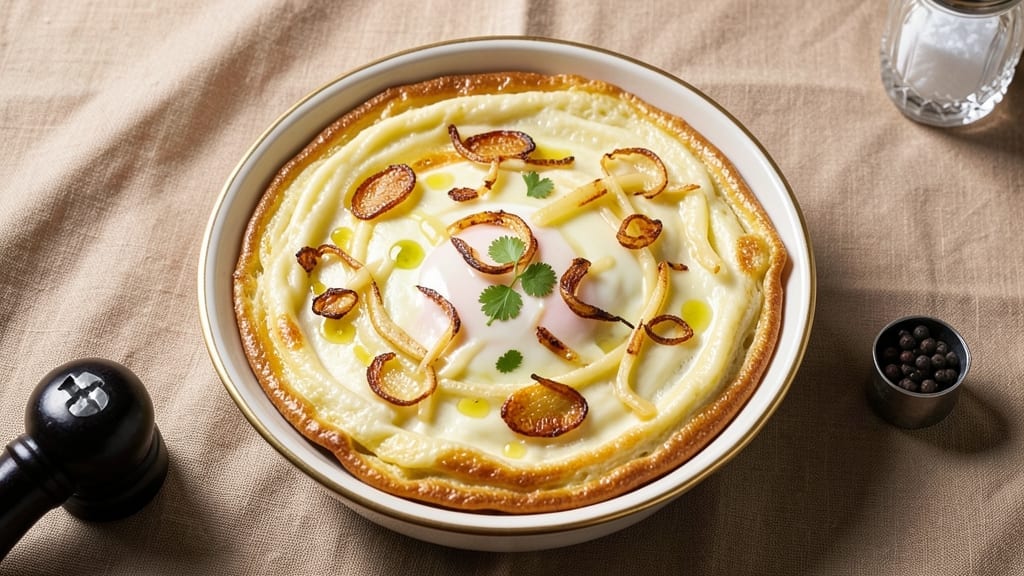
A 6-egg omelette delivers restaurant-quality volume without the risk of breakage—this is the technique I’ve perfected after years of trial and error. The secret lies in precise heat control and gentle folding, creating a high, fluffy dome that holds together perfectly.
Most recipes fail to scale properly for 6 eggs, but this method ensures even cooking and consistent texture every time.
What sets this apart is the two-stage cooking process: first, building volume with low heat to set the eggs gently, then finishing with a quick, controlled flip to lock in that signature dome shape.
No flipping panics, no runny centers—just a perfectly structured omelette that’s sturdy enough to slice or fold without collapsing. The result is a light, airy interior with a just-set exterior, ready for your favorite fillings.
This recipe balances simplicity with professional results—ideal for brunch crowds or meal prep. The technique works with classic fillings like cheese, herbs, or vegetables, but the base method ensures success even without additions. Whether you’re feeding a family or mastering omelette fundamentals, this approach delivers restaurant-quality consistency at home.
Ready to elevate your breakfast game? The key is patience—letting the eggs set gradually while maintaining gentle motion. No special equipment needed, just a nonstick skillet and a steady hand. Let’s get started with the foolproof method that finally solves the 6-egg challenge.
Ingredients for 6 egg omelette
Six eggs, precise technique, and restaurant-quality consistency await—no special ingredients needed.
| Ingredient | Amount | Notes |
|---|---|---|
| Large Eggs 🥚 | 6 whole | Room temperature, high quality |
| Unsalted Butter 🧈 | 3 tbsp | European-style preferred for flavor |
| Diamond Crystal Kosher Salt 🧂 | ¼ tsp | Fine grain for even distribution |
| Freshly Ground Black Pepper 🌶️ | ¼ tsp | Freshly cracked for maximum aroma |
| Extra-Virgin Olive Oil 🫒 | 1 tbsp | For skillet coating, high quality |
| Shredded Gruyère Cheese 🧀 | ½ cup | Aged 12+ months for optimal melt |
| Fresh Chives 🌿 | 2 tbsp | Finely chopped for garnish |
| Fresh Thyme Leaves 🌿 | 1 tsp | Finely chopped for herbaceous notes |
| Heavy Whipping Cream 🥛 | ¼ cup | 36% fat for optimal texture |
| Nonstick Cooking Spray 🫧 | 1 spray | For skillet preheating |
The eggs are non-negotiable—room temperature is critical for even cooking, so pull them out 30 minutes before starting. Pasture-raised eggs from Crowd Company or Vital Farms deliver superior protein structure, but any high-quality large eggs work. The butter choice matters too—European-style (like Plugrá) has higher fat content, preventing browning while promoting even heat distribution. If you’re using salted butter, reduce the kosher salt by half.
No Gruyère? Comté or sharp white cheddar work equally well—just shred it yourself for maximum moisture retention. The cream can be swapped for half-and-half (though texture will be slightly less stable), and fresh herbs can be omitted entirely if you’re making this ahead. For a dairy-free version, replace the cream with full-fat coconut cream and use nutritional yeast instead of cheese. The olive oil should be fruity and peppery—California Avocado Ranch or Colavita are excellent choices.
Eggs should be whisked in a heatproof bowl over barely simmering water for 10 seconds to warm gently—never microwave. The skillet must be preheated to medium-low (275°F), and the nonstick spray should be applied after heating to prevent sticking. Store any unused eggs in their original carton in the fridge for 3 weeks, and pre-shredded cheese should be used within 2 days of opening for best flavor. The finished omelette keeps 2 hours at room temperature or 3 days refrigerated—reheat gently in a dry skillet.
Why You’ll Love This Recipe
- I’ll be real: this omelette takes three ingredients if you skip the fancy stuff—just eggs, butter, and a pinch of salt. Whisk, heat, pour. That’s it. Even if you’re the kind who burns toast, this forgives mistakes.
- No-Fuss Prep: I’ll be real: this omelette takes three ingredients if you skip the fancy stuff—just eggs, butter, and a pinch of salt. Whisk, heat, pour. That’s it. Even if you’re the kind who burns toast, this forgives mistakes.
- Rich But Simple: The butter and olive oil combo makes it unexpectedly luscious—creamy edges, golden crust—without needing cheese or herbs. Honestly, the first time I made it, I thought, “Why do people complicate omelettes?” Then I took a bite and changed my mind.
- Meal Prep MVP: Six eggs mean actual portions—perfect for packing lunches or feeding a crowd with minimal effort. I make two batches on Sunday, slice them up, and they stay fresh for days. (Yes, even on a Tuesday night.)
Step-by-step instructions for fluffy 6-Egg omelettes
Master the technique for light, airy omelettes that hold their shape perfectly every time.
Whisk Eggs and Cream to Ribbon Stage
In a large mixing bowl, combine the 6 whole Large Eggs and 0.25 cup Heavy Whipping Cream. Add the 0.25 tsp Diamond Crystal Kosher Salt and 0.25 tsp Freshly Ground Black Pepper, then whisk vigorously using a balloon whisk or electric mixer on medium speed for 3-4 minutes. You’re aiming for a smooth, homogeneous batter that forms ribbons when the whisk is lifted—this indicates proper aeration and volume.
I like to press the whisk against the bowl’s bottom occasionally to incorporate any air bubbles that rise to the surface. The mixture should nearly double in volume and appear pale yellow and glossy. This thorough whisking creates the light, cloud-like texture that prevents breakage when folded. Don’t rush this step—proper aeration is what separates a flat omelette from a fluffy masterpiece.
Prepare the Skillet for Perfect Browning
Place an 8-inch nonstick skillet over medium-low heat and spray it generously with 1 spray Nonstick Cooking Spray. Add 1 tbsp Extra-Virgin Olive Oil and 2 tbsp Unsalted Butter (half of the total), swirling to coat the bottom evenly. The butter should melt completely and foam gently before the oil heats through—this takes about 1-2 minutes. Watch for small bubbles forming around the edges of the pan; this indicates the perfect temperature for creating that coveted golden-brown bottom.
Here’s the thing—if the butter browns too quickly, reduce the heat slightly. You want gentle, even cooking that creates a delicate crust without burning. The skillet should be hot enough to sizzle when the egg mixture hits it, but not so hot that it causes the eggs to set immediately on contact. This balance is what gives your omelette that professional-quality foundation.
Cook the Omelette with Gentle Precision
Pour the egg mixture into the prepared skillet, tilting the pan slightly to distribute it evenly. Immediately reduce heat to low—this is critical for preventing the edges from setting too quickly. Let the eggs cook undisturbed for 2-3 minutes until the edges begin to set and the top surface shows just a hint of firmness around the edges while still appearing slightly runny in the center. You’ll see the edges start to pull away from the pan slightly; this is your signal to begin the folding process.
I like to use a heatproof spatula to gently lift and fold one-third of the omelette toward the center, then quickly fold the opposite third over it. The goal is to create a neat, triangular package without tearing the delicate curds. Work quickly but deliberately—you have about 10-15 seconds before the center sets completely. The key is to maintain that soft, custard-like center while creating structure to hold the fillings.
Add Fillings and Complete the Fold
Sprinkle 0.5 cup Shredded Gruyère Cheese evenly over the folded base, followed by 1 tsp Fresh Thyme Leaves and 2 tbsp Fresh Chives. The cheese should melt quickly from the residual heat, so work efficiently. Fold the remaining third of the omelette over the fillings, pressing down gently but not firmly to maintain that airy texture. The fillings should be distributed evenly throughout the final fold—this ensures each bite contains all the flavors.
Return the skillet to low heat for 30-45 seconds to allow the cheese to fully melt and create a smooth, creamy interior. You’ll know it’s ready when the bottom is golden brown and the cheese has formed a glossy, melted layer. The omelette should hold its shape when lifted gently with a spatula—if it’s still too soft, let it cook another 10-15 seconds. Overcooking at this stage will make it rubbery.
Finish with Butter and Serve Immediately
Remove the omelette from heat and transfer it to a warm plate. Immediately add the remaining 1 tbsp Unsalted Butter (about half of what you started with) to the skillet and let it melt completely, swirling to coat the pan. Pour this butter over the omelette, allowing it to seep into the folds and create a rich, velvety finish. The butter adds a final layer of moisture and flavor that elevates the dish from good to exceptional.
Serve the omelette immediately while still warm. Each slice should reveal a golden-brown exterior with a creamy, cheese-filled interior that’s perfectly set but still tender. The fluffy texture should be evident in every bite, with the Gruyère cheese melting smoothly and the thyme and chives adding fresh herbal notes. This technique ensures you’ll never have a flat, broken omelette again—just restaurant-quality results at home.
Pro Tips For Making 6 Egg Omelette
- Whisk Like You Mean It: Six eggs need serious movement—whisk them in a deep bowl for at least 30 seconds until the mixture is uniform and slightly frothy. I used to half-ass this and ended up with a dense, rubbery omelette. The extra effort guarantees a light, airy texture that holds together.
- Butter First, Then Oil: Start with 1 tablespoon of butter in the pan until it foams, then add a splash of olive oil. The butter adds richness, but the oil prevents burning when the eggs hit the pan. Skip this, and you’ll either have a dry omelette or a greasy mess.
- Salt the Eggs, Not Just the Pan: Sprinkle half the kosher salt directly into the egg mixture while whisking—this seasons the eggs themselves, not just the surface. I learned this after tasting an omelette that was salty on the outside but bland in the middle.
- Fold Fast, Then Rest: Once the bottom is set, fold the omelette in half with a quick, confident motion—don’t hesitate. Then let it sit on the plate for 30 seconds before cutting. Rushing the fold makes it flop; resting keeps it intact. (Yes, even if you’re impatient like me.)
Flavor customization for 6 egg omelette
Classic Cheese Variations
Swap the Gruyère for sharp white cheddar (½ cup) and add 2 tbsp crumbled feta for a tangy contrast. The cheddar melts smoothly while the feta adds briny pockets of flavor.
For a smoky twist, use ½ cup smoked Gouda and fold in 1 tbsp chopped sun-dried tomatoes—the caramelized edges of the tomatoes pair beautifully with the creamy eggs. 🧀
Herb-Forward Options
Boost freshness with 1 tbsp finely chopped basil and 1 tsp lemon zest instead of thyme. The bright citrus cuts through the richness, while the basil adds a sweet, aromatic note.
For a Mediterranean vibe, mix 1 tbsp chopped oregano and 2 tbsp diced kalamata olives—the olives add a salty, briny depth that balances the eggs perfectly.
Spicy Kick Additions
Incorporate ½ tsp cayenne pepper into the whisked eggs for subtle heat, or fold in 1 tbsp chopped jalapeños after the first fold. For a bold finish, sprinkle 1 tsp smoked paprika over the top before adding the final butter.
If you love chipotle, mix 1 tsp adobo sauce into the melted butter before pouring it over the omelette—it adds a deep, smoky sweetness. 🌶️
Veggie-Packed Versions
Add ½ cup sautéed mushrooms (cooked with 1 tsp thyme) for an earthy depth, or ¼ cup diced bell peppers and 2 tbsp corn kernels for a Mexican-inspired twist.
For a spring-inspired option, fold in ¼ cup asparagus tips and 1 tbsp goat cheese—the asparagus adds a delicate crunch while the goat cheese keeps it light. Always pre-cook veggies to avoid excess moisture.
Sweet Breakfast Twists
Surprise your taste buds with ½ cup caramelized apples (tossed with 1 tsp cinnamon) and 2 tbsp walnuts for a savory-sweet balance. For a classic French touch, fold in 2 tbsp crème fraîche and 1 tsp honey—drizzle with extra honey before serving.
If you’re feeling adventurous, try ½ cup sautéed onions and 1 tbsp maple syrup for a maple-glazed omelette that’s perfect with crispy bacon. 🍯
Protein Boosters
Add 2 oz cooked bacon (crumbled) and 1 tbsp fried shallots for a smoky, crunchy contrast. For a seafood option, fold in 2 oz shredded cooked crab meat and 1 tbsp chopped chives—the crab adds a delicate sweetness.
If you’re making this for meal prep, mix in ½ cup black beans and ¼ cup corn for a high-protein, fiber-rich version that holds up well when reheated.
Nutrition facts
Frequently asked questions
Why does this recipe use 6 eggs instead of the usual 2-3?
Six eggs create a substantial, restaurant-quality portion that serves 4 people generously or makes 2 large servings. The technique scales perfectly—each egg adds volume without requiring higher heat, which prevents breakage. The two-stage cooking method ensures even cooking throughout the larger surface area while maintaining that signature fluffy texture.
Can I make this omelette without a nonstick skillet?
Yes, but with adjustments! Use a well-seasoned cast-iron skillet and reduce the olive oil to 1 teaspoon. Preheat it longer (3-4 minutes) to create a natural nonstick surface. Avoid butter in this case—stick to oil only. The key is patience: cook at low heat and don’t rush the folding process to prevent sticking.
What’s the secret to getting that perfect fluffy texture?
The magic happens in three steps: whisking to ribbon stage (3-4 minutes), low and slow cooking (never high heat), and gentle folding while the center is still soft. The heavy cream adds moisture and stability, while the butter finish seals in that cloud-like structure. Never overcook—remove it when the bottom is just golden and the center still jiggles slightly.
How do I prevent the omelette from breaking when I fold it?
Work quickly but deliberately: start folding when the edges set but the center is still slightly runny (about 2-3 minutes in). Use a heatproof spatula to lift and fold in thirds—don’t press down hard. The key is to create structure while maintaining that soft custard center. If it starts to tear, let it cook another 10 seconds before folding again. Practice makes perfect!
Can I make this ahead of time for meal prep?
Yes, but with limitations. Assemble the omelette as directed, then transfer it to a wire rack to cool completely. Store in an airtight container for up to 3 days. Reheat gently in a dry skillet over low heat for 2-3 minutes per side—never microwave. For best texture, serve within 2 hours of reheating. The fluffy structure holds up better than traditional omelettes when reheated properly.

- 3lb Prime Rib Roast Recipe: Juicy Pink Center Guaranteed in 3 Hours - October 31, 2026
- 5 Spice Cake Recipe: Warmly Spiced Layers With Crunchy Top - October 31, 2026
- 1950’s Macaroni and Cheese Recipe: Nostalgic Creamy Cheese Sauce with Buttery Noodles - October 31, 2026