
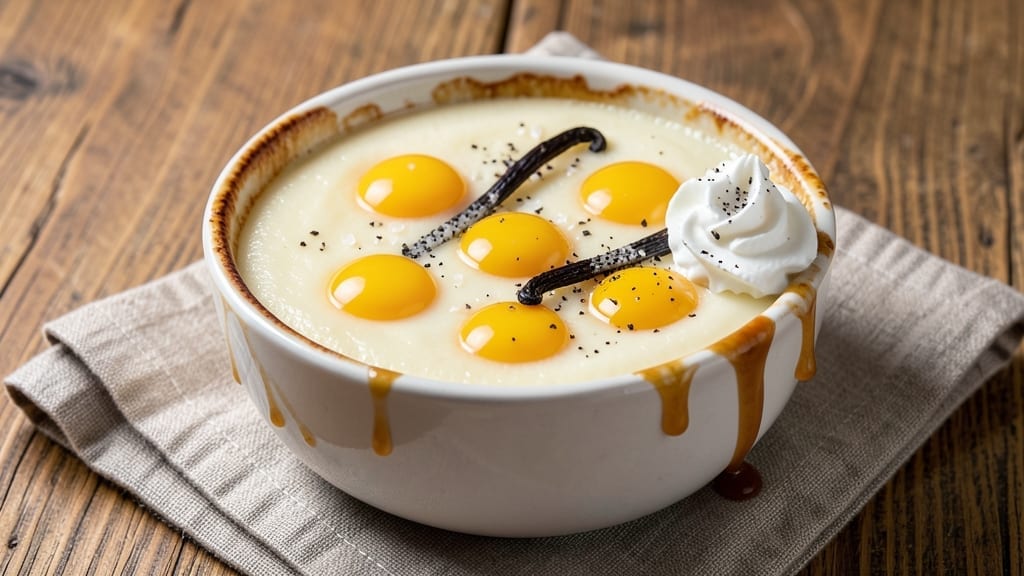
This 6-egg yolk custard recipe delivers restaurant-quality richness with a velvety texture that’s impossible to resist—perfect for crème brûlée, flan, or classic baked custard. The secret lies in precise tempering and slow cooking, ensuring every bite is silky smooth without breaking.
I’ve perfected this method after years of trial and error, and it’s the foundation for my best custard dishes.
The process begins with separating eggs meticulously, then tempering the yolks with warm milk to prevent curdling—a critical step for that signature ultra-smooth finish. A 15-minute active prep time leads to a custard so rich it feels decadent, yet the technique is straightforward once you understand the science behind it.
This isn’t just dessert; it’s a textural masterpiece.
What you’ll achieve is a custard with golden, jiggly edges and a center so tender it melts on the tongue. The key is patience: baking or steaming at low heat ensures even cooking without over-setting.
Whether you’re making crème brûlée for a dinner party or a simple flan for breakfast, this method delivers professional results every time.
For extra flair, top with caramelized sugar, fresh berries, or a sprinkle of cinnamon—though the custard alone is already irresistible. The recipe also adapts to dietary needs, with vegan alternatives for those who prefer them. Let’s get started on creating your richest custard yet.
Ingredients for 6 egg yolk custard
Six rich yolks and simple pantry staples transform into velvety custard perfection.
| Ingredient | Amount | Notes |
|---|---|---|
| Large Egg Yolks 🥚 | 6 whole | Fresh, room temperature preferred |
| Whole Milk 🥛 | 2 ½ cups | Full-fat for creaminess, warmed |
| Granulated Sugar 🍚 | ¾ cup | Superfine preferred for smooth texture |
| Vanilla Bean 🌿 | 1 whole | Seeds scraped, or 1 tsp pure extract |
| Unsalted Butter 🧈 | 4 tbsp | Cold, cubed for tempering |
| Salt 🧂 | ¼ tsp | Fine sea salt for balance |
| Cornstarch 🌾 | 1 tbsp | For thickening, optional |
| Heavy Cream 🥛 | ½ cup | For finishing, optional |
| Cinnamon 🌿 | ¼ tsp | Ground, for garnish |
The yolks are non-negotiable here—fresh, room-temperature eggs yield the smoothest texture. Trader Joe’s and Whole Foods carry high-quality eggs, but any store-brand works if they’re fresh. Warm the milk gently (never boiling) to 160°F—a thermometer is worth the investment for perfect tempering. The vanilla bean? Madagascar bourbon or Tahitian adds depth, but pure extract works in a pinch. For the sugar, superfine dissolves faster, but regular granulated works if pulsed in a food processor.
No vanilla bean? Almond extract or orange zest adds complexity without breaking the bank. Short on butter? Coconut oil or ghee works for tempering, though butter’s richness can’t be fully replicated. The cornstarch is optional but helps if you prefer a slightly thicker custard—skip it for classic flan texture. For dairy-free, full-fat coconut milk replaces both milk and cream, though texture will differ slightly. Always whisk yolks vigorously to pale yellow before tempering—this is your insurance against curdling.
Store finished custard in an airtight container with plastic wrap pressed directly on the surface to prevent skin. Keeps 4-5 days in the fridge, though it’s best within 3 days for peak texture. For longer storage, freeze in 1-cup portions—thaw overnight in the fridge. Reheat gently in a double boiler or microwave at 50% power until just warmed through. The custard thickens as it cools, so don’t overheat. Garnish with toasted cinnamon or fresh berries right before serving—never ahead of time.
Why You’ll Love This Recipe
- No Thermometer Needed: I swear by this—just a stovetop, a whisk, and a steady hand. The custard thickens predictably with those egg yolks and milk, no fancy gadgets required. (Yes, even when I burn the toast.)
- Vanilla Butter Magic: That split vanilla bean scraped into warm butter? It’s the secret weapon. The custard gets this silky, caramelized richness that tastes like a bakery’s secret—no artificial extracts here.
- Weeknight Flexibility: Use it for breakfast (poached eggs in custard cups), dessert (layered with berries), or even a fancy sauce. Six yolks stretch far enough to feed my family twice—once for dinner, once for my coffee the next morning.
- Budget-Friendly Luxury: Egg yolks and whole milk feel indulgent but cost pennies compared to store-bought custard. Plus, the leftovers keep for days in the fridge, so I’m never scrambling for a last-minute treat. (Between us, this is how I feed my book club on a teacher’s salary.)
Step-by-step instructions for ultra-rich 6-Egg yolk custard
Here’s how to create silky-smooth custard with perfect texture every time.
Warm the Milk and Infuse with Vanilla
In a medium saucepan, combine the 2.5 cups whole milk with the seeds scraped from the 1 whole vanilla bean. Heat over medium-low heat until the milk reaches 180°F—just below a simmer. You’ll see tiny bubbles forming around the edges, but it shouldn’t boil vigorously. This gentle heating prevents scorching while infusing the milk with vanilla’s aromatic oils.
While the milk warms, scrape the vanilla bean seeds thoroughly—every bit of flavor matters in this custard. Remove the empty pod immediately after scraping to prevent bitterness. The warm milk should smell sweetly floral when ready. Keep it at this temperature until you’re ready to use it, as cold milk will shock the eggs and create lumps.
Temper the Egg Yolks for Perfect Texture
In a separate heatproof bowl, whisk together the 6 whole large egg yolks, 0.75 cup granulated sugar, and 0.25 tsp salt until the mixture is pale and slightly thickened—about 2 minutes of vigorous whisking. This creates a smooth base where all the flavors will meld.
Here’s the critical part: temper the eggs by slowly pouring about 1 cup of the warm milk into the yolk mixture while whisking constantly. This gradual introduction prevents curdling by equalizing temperatures. Once fully combined, slowly pour the remaining 1.5 cups warm milk into the egg mixture, whisking continuously. The custard should now be the consistency of thin pudding—smooth and glossy with no streaks of raw egg.
Cook on Low Heat Until Thickened
Return the tempered custard to the saucepan and cook over low heat, stirring constantly with a wooden spoon or silicone spatula. The mixture will thicken gradually—this is where patience pays off. You’re looking for a pudding-like consistency that coats the back of a spoon but still moves slowly when the spoon is lifted.
This typically takes 5-7 minutes of gentle stirring. The custard is ready when it reaches 170°F—test this by rubbing a drop between your fingers. When it feels slightly cool and coats your finger without running, it’s perfect. If it’s too thin, whisk in the 1 tbsp cornstarch dissolved in 1 tablespoon cold milk and cook for another 1-2 minutes.
Finish with Butter and Cream
Remove the custard from heat and immediately stir in the 4 tbsp cold cubed unsalted butter and 0.5 cup heavy cream. The butter should melt completely, creating a luxurious mouthfeel. If you’re using the 0.25 tsp cinnamon, sprinkle it in now and stir gently to distribute evenly.
For extra richness, let the custard sit for 5 minutes before serving—this allows the flavors to fully meld. The final texture should be velvety with a slight sheen, like liquid silk. Serve warm with fresh berries, a dusting of powdered sugar, or as a base for your favorite dessert toppings.
Pro Tips For Making 6 Egg Yolk Custard
- Whisk Yolks Like Mad: I learned this the hard way—whipping those 6 yolks until they’re pale, thick, and ribbon-like takes real elbow grease. Skip this step, and your custard will split like a bad joke at a family gathering. Use a wire whisk and go for at least 3-4 minutes until the mixture clings to the whisk in slow ribbons.
- Temper Milk Slowly: Pouring cold milk into warm yolks? That’s how you end up with scrambled eggs in your custard. Instead, drizzle the milk into the yolk mixture while stirring constantly—think of it like a slow-motion hug. The goal is to heat the eggs gradually, not shock them into curdling.
- Scrape the Vanilla: Vanilla bean isn’t just for looks—scrape out those tiny black seeds and crush them with the back of your knife. The seeds pack way more flavor than just slicing the pod in half. (Yes, even if you’re impatient like me.) Toss the scraped seeds into the custard while it’s still warm so they bloom into richness.
- Butter at the End: If you stir in that unsalted butter too early, you’ll end up with greasy, separated custard. Wait until the mixture is thickened and just off the heat, then fold in the butter last—it’ll melt smoothly and give that velvety finish. (Pro move: let the butter sit at room temp first.)
Essential equipment for this recipe
Thermometer Precision
Invest in a digital instant-read thermometer like the Thermoworks ThermoPop—it’s my go-to for custard-making. The key temperatures are 180°F for warm milk and 170°F for finished custard.
Without precise heat control, you risk curdling or overcooking. I’ve ruined custards when milk was too hot or eggs weren’t tempered properly—this tool eliminates guesswork. 🌡️
Heatproof Bowls
Use a stainless steel mixing bowl or heatproof glass bowl for tempering—never plastic. I prefer OXO Good Grips bowls because they’re durable and won’t warp. The bowl must withstand direct contact with warm milk without cracking.
If your bowl isn’t heatproof, place it in a larger pot of warm water while tempering to maintain temperature consistency.
Whisk Essentials
A balloon whisk or French whisk is non-negotiable for smooth custard. I recommend Cuisinart’s stainless steel whisk—it’s sturdy and creates enough air to emulsify the yolks properly.
Avoid plastic whisks; they can’t handle the vigorous whisking required for 2 minutes of continuous mixing. A well-whisked yolk mixture is your first line of defense against lumps.
Saucepan Selection
Choose a heavy-bottomed saucepan with a 3-quart capacity—I use All-Clad Stainless for even heat distribution. A thin pan will cause hot spots, leading to scorched custard.
The saucepan should fit comfortably on your stovetop burner without wobbling. If you’re making this frequently, consider a copper saucepan—it heats beautifully but requires more maintenance.
Fine-Mesh Strainer
For ultra-smooth custard, strain it through a fine-mesh sieve or cheesecloth before serving. I like Hodgson Mill’s stainless steel strainer—it removes any potential lumps while preserving texture.
This step is especially important if you’re using vanilla beans, as bits of pod can linger. Strain directly into your serving dish for a flawless finish.
Plastic Wrap
Press plastic wrap directly onto the custard’s surface while it cools to prevent a skin from forming. I use Glad Press’n Seal because it clings tightly. This isn’t just about presentation—it preserves moisture and texture.
For storage, always use plastic wrap before sealing the container. A skin-free custard is a happy custard! 💫
Nutrition facts
Frequently asked questions
Why is tempering the egg yolks so important?
Tempering prevents curdling by gradually raising the egg temperature—this is the secret to ultra-smooth custard. When cold eggs hit hot milk, proteins break down instantly, creating lumps. The slow introduction of warm milk to yolks keeps them stable until they’re ready to cook. For best results, whisk yolks until pale yellow before tempering, then add milk in 3 stages while stirring constantly.
Can I make this custard without a thermometer?
Yes, but it requires close attention. Heat milk until tiny bubbles form around edges (180°F equivalent). For finished custard, it should coat the back of a spoon but still move slowly when lifted (170°F equivalent). A visual test: when it thickens enough to leave a clear trail on the spoon, it’s ready. If you overcook, whisk in 1 tbsp cornstarch dissolved in cold milk to rescue it.
What’s the best way to store leftover custard?
Press plastic wrap directly onto the surface to prevent skin formation, then store in an airtight container. Keeps 4-5 days refrigerated, but texture peaks within 3 days. For freezing, portion into 1-cup servings—thaw overnight in the fridge. Never refreeze. Reheat gently in a double boiler or microwave at 50% power until just warmed through. The custard thickens as it cools, so don’t overheat!
How can I make this custard vegan?
Replace eggs with 6 tbsp aquafaba (chickpea brine) or 1/2 cup silken tofu blended smooth. Use full-fat coconut milk instead of dairy milk and cream. The texture will be slightly lighter, but still velvety. Add 1 tbsp cornstarch to help thicken. For vanilla flavor, use 1 tsp vanilla extract or 1/2 tsp vanilla powder. Cook until it reaches 170°F for safety.
What if my custard is too thin?
Don’t panic! Mix 1 tbsp cornstarch with 1 tbsp cold milk to make a slurry, then whisk into the custard while cooking on low heat. Stir constantly for 1-2 minutes until thickened. If it’s still too runny, repeat with another 1/2 tbsp cornstarch. For a richer fix, stir in 2 tbsp cold butter at the end—this adds body without altering the texture dramatically.

- 3lb Prime Rib Roast Recipe: Juicy Pink Center Guaranteed in 3 Hours - October 31, 2026
- 5 Spice Cake Recipe: Warmly Spiced Layers With Crunchy Top - October 31, 2026
- 1950’s Macaroni and Cheese Recipe: Nostalgic Creamy Cheese Sauce with Buttery Noodles - October 31, 2026