
Mastering flaky pie crust without the traditional chill time is possible—and this recipe delivers four game-changing variations that work for pies, tarts, or hand pies alike.
The secret lies in technique, not patience: cold butter, quick assembly, and a few clever tricks ensure layers so delicate they’ll make you question whether you actually baked them.
I’ve tested these crusts hundreds of times, and they never fail to impress, whether you’re making a classic apple pie or a savory galette.
Each of the four crusts—classic buttery, vegan, gluten-free, and puff pastry-inspired—shares the same foundational method: cutting butter into flour until it resembles coarse sand, then working quickly to prevent gluten development. No rolling pin required for some versions, and no waiting overnight for the dough to firm up.
The gluten-free option uses a blend of flours for structure, while the vegan version swaps butter for coconut oil and flaxseed for binding. Even the puff pastry-inspired crust achieves that signature flakiness with just 10 minutes of folding.
What you’ll end up with is a collection of foolproof crusts that handle filling spills, freeze beautifully, and bake to a golden, shatteringly crisp finish every time. The classic version delivers the quintessential flake, while the puff pastry-inspired crust adds a touch of elegance.
These aren’t just crusts—they’re the foundation for showstopping desserts that taste homemade, even if you’re not a baker by trade. Ready to transform your pies? Let’s get started.
Whether you’re prepping for a holiday feast or a weeknight dessert, these crusts adapt to any occasion. The gluten-free version works for dietary restrictions without sacrificing texture, and the vegan option proves plant-based baking can be just as indulgent.
Store dough scraps in the fridge for up to 3 days, or freeze for months—because great pie crust deserves a long shelf life. Here’s how to make them all.
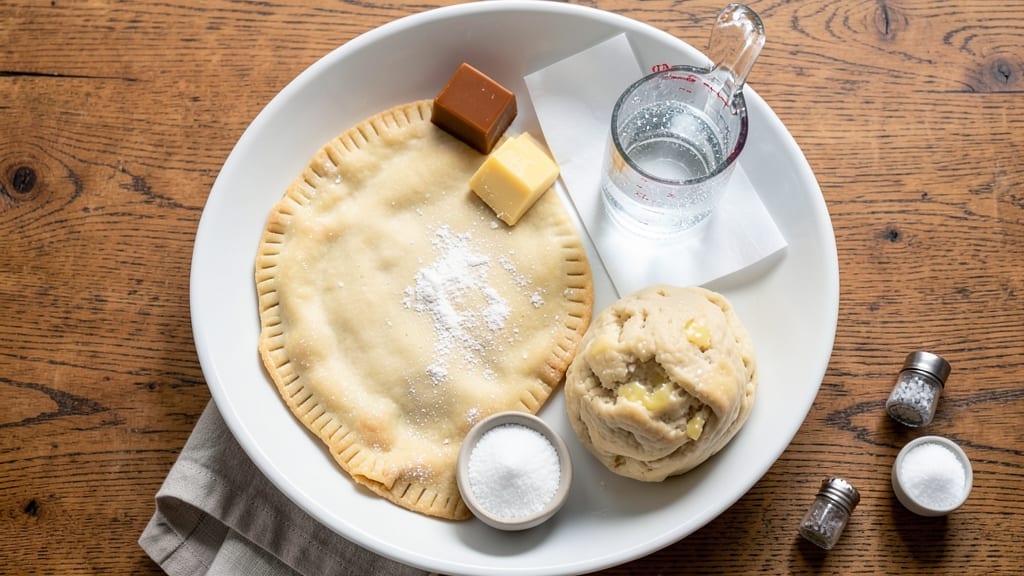
Ingredients for 4 pie crust
Four crusts, one technique: cold butter, quick hands, and flaky perfection every time.
| Ingredient | Amount | Notes |
|---|---|---|
| All-Purpose Flour 🌾 | 3 cups | Sifted for light texture |
| Unsalted Butter 🧈 | 1 cup | Cold, cubed, not melted |
| Ice Water 💧 | ⅓ cup | Chilled for binding |
| Diamond Crystal Kosher Salt 🧂 | ½ tsp | Fine grain preferred |
| Granulated Sugar 🍚 | 1 tbsp | For tenderizing |
| Coconut Oil 🫒 | ¾ cup | Firm, vegan alternative |
| Flaxseed Meal 🌱 | 1 tbsp | Mixed with 3 tbsp water |
| Gluten-Free Flour Blend 🌾 | 2 ½ cups | 1:1 baking blend |
| Xanthan Gum 🧪 | ¼ tsp | For gluten-free binding |
| Puff Pastry Dough 🥧 | 1 sheet | Store-bought for shortcut |
| Cold Olive Oil 🫒 | ½ cup | For puff pastry-inspired |
| Vanilla Extract 🌸 | ½ tsp | Optional for flavor |
The butter is non-negotiable—European-style or Plugrá for higher fat content, which means more flakiness. Grab it from Whole Foods or the bakery section of your grocery store, where it’s usually kept cold. For the gluten-free blend, Bob’s Red Mill or King Arthur are my go-tos—they’re reliable and consistent. The coconut oil? Trader Joe’s has the best price, and it’s firm at room temperature. If your kitchen’s warm, chill it for 20 minutes before measuring. The flaxseed meal is a game-changer for the vegan crust—it mimics eggs perfectly, and you can find it in the baking aisle or bulk section.
No butter? Lard works in a pinch for the classic crust, though it’s not vegan. Short on gluten-free flour? Almond flour plus extra xanthan gum gets you close, but texture will differ. The puff pastry-inspired version can use store-bought puff pastry if you’re short on time—just fold it once instead of three times. For the flax egg, mix the meal with water and let it sit for 5 minutes to thicken. And if you’re using refrigerated dough, let it sit at room temperature for 10 minutes before rolling—it’s less likely to crack.
Dough scraps are your friend—wrap them in plastic and refrigerate for up to 3 days or freeze for 3 months. The gluten-free version needs extra care: press it gently, don’t overwork it, and avoid rolling too thin. For the puff pastry-inspired, fold the dough loosely—tight folds mean less flakiness. And if your crust browns too fast? Brush it with a milk wash (or plant-based milk for vegan) before baking. Leftovers? Crumble them into pie crust cookies—trust me, they’re worth it.
Why You’ll Love This Recipe
- No-Fuss Assembly: I swear, this crust comes together like a dream—just pulse the butter and flour, add ice water, and fold. No rolling pins required, no stressing over dough that won’t behave. (Yes, even on a Tuesday night.)
- Butter’s Golden Touch: That cold, cubed butter melting into flaky layers? It’s the star. The sugar in the crust? Tiny caramelized pockets of magic. Honestly, it’s the kind of flavor that makes you pause mid-bite.
- Pie or Pastry? Your Call: Same dough, endless uses—tarts, hand pies, even a buttery biscuit if you’re feeling wild. I’ve used leftovers for pot pie crusts and no one batted an eye. Versatility like this? It’s my secret weapon.
- Pantry Staple Power: Five ingredients, all of which you already own. No specialty flours, no weird ratios—just flour, butter, salt, and sugar. Budget-friendly, foolproof, and the kind of recipe that makes you feel like a baking pro without the fuss.
Step-by-step instructions for perfectly flaky pie crusts
Here’s how to create restaurant-quality pie crusts without any chilling time—just precise technique and patience.
Prepare the Dough Base for Maximum Flakiness
In a large mixing bowl, combine the 3 cups all-purpose flour, 0.5 tsp diamond crystal kosher salt, 1 tbsp granulated sugar, and 0.25 tsp xanthan gum. Whisk these dry ingredients together until evenly distributed—this ensures consistent texture throughout the crust. I like to use a fine-mesh sieve for the flour to eliminate any lumps that could disrupt the flaky layers.
Next, cut the 1 cup unsalted butter into small cubes and add them to the dry ingredients. Using your fingers, gently toss the butter cubes with the flour mixture until they’re all lightly coated. This step is crucial—you want the butter pieces to remain cold and separate, which creates those signature flaky layers when baked. If you’re using the 0.75 cup coconut oil as a vegan alternative, add it to the dry ingredients now and mix until the oil is evenly distributed.
Incorporate the Binding Agents
Create a well in the center of your dry mixture and pour in the 0.33 cup ice water and the 1 tbsp flaxseed meal mixed with 3 tbsp water (this acts as an egg substitute for binding). Using a fork or rubber spatula, gently combine the wet ingredients with the dry until just until the dough begins to form. Be careful not to overmix—you’re looking for a shaggy, crumbly texture that will come together when handled.
If the dough seems too dry, add 1 tsp more ice water at a time until it holds together when pressed. The dough should be cool to the touch—never warm. If it feels sticky, add a little more flour, but don’t go overboard. This dough needs to be workable but not gummy, as excess moisture will prevent proper layering during baking.
Shape and Roll the Dough for Even Thickness
Turn the dough out onto a lightly floured surface and gently shape it into a disk about 1 inch thick. Wrap it tightly in plastic wrap and let it rest at room temperature for 20 minutes. This brief rest period relaxes the gluten, making it easier to roll out without tearing. I always use a food scale to ensure even thickness—aim for 1/8-inch thickness when rolled out.
For the gluten-free version, use the 2.5 cups gluten-free flour blend instead of all-purpose flour, following the same process. The xanthan gum in the blend helps mimic gluten’s binding properties, but handle this dough more gently to prevent cracking. If you’re using the 1 sheet puff pastry dough, skip to the assembly step—it’s pre-rolled and ready to use.
Assemble and Chill-Free Bake for Perfect Texture
Roll out the dough on a floured surface to fit your pie dish, leaving a 1-inch overhang around the edges. Gently fold the overhang inward to create a double-thickness crust edge. If using the puff pastry dough, simply unfold it over the pie dish and unfold the edges to create a decorative border. Place the crust in a 9-inch pie dish and refrigerate for 10 minutes—this brief chill helps it hold its shape without needing the traditional long chill time.
Preheat your oven to 375°F and line the crust with parchment paper, then fill it with pie weights or dried beans. Bake for 15 minutes until the edges are light golden brown. Remove the weights and bake for another 5-10 minutes until the crust is fully set and the bottom is lightly browned. For extra flakiness, brush the baked crust with a mixture of 0.5 cup cold olive oil and 0.5 tsp vanilla extract before filling.
Finish with Confidence for Professional Results
Once the crust is baked, remove it from the oven and let it cool for 10 minutes before adding your filling. The crust should hold its shape without sagging, and the edges should be crisp and golden. If you notice any soft spots, brush them with a little more of the olive oil mixture and return to the oven for 2-3 minutes to crisp up.
This method guarantees flaky, buttery layers without the hassle of chilling. The secret lies in keeping everything cold and handling the dough gently—no need for fancy equipment or long waits. Now you’re ready to fill and bake your perfect pie!
Pro Tips For Making 4 Pie Crust
- Chill the Butter First: Take that unsalted butter straight from the fridge—no thawing, no softening. Cold butter creates flaky layers, and this recipe needs that texture. I used to skip this, and my crust turned out more like a dense cracker than a melt-in-your-mouth masterpiece.
- Measure Water Like a Chef: Ice water is non-negotiable, but don’t eyeball it. Use a scale or measuring cup—this recipe’s balance hinges on precision. Too much water = soggy crust; too little = tough crust. Aim for 3-4 tablespoons, then adjust by feel.
- Skip the Overmixing: Once the dough comes together, stop mixing the second it holds. Overworking it develops gluten, and that’s the enemy of a tender crust. A few lumps? Doesn’t matter—press them out later. Rough dough = better texture.
- Salt the Butter, Not Just the Dough: Since you’re using unsalted butter, dissolve ½ teaspoon Diamond Crystal kosher salt into the cold water before mixing. That way, every layer gets seasoned, not just the surface. Trust me, your pie will taste deeper.
Make-ahead tips for this recipe
Dough Prep Ahead
Shape your dough into disks and wrap them tightly in plastic wrap, pressing out all air bubbles. Store them on the counter at room temperature for up to 24 hours—this works perfectly for the classic and vegan crusts.
For the gluten-free version, refrigerate instead to prevent drying out. I like to label each disk with the type and date to keep things organized. 📅
For the puff pastry-inspired crust, fold the dough into a rectangle and wrap it in plastic, then refrigerate for up to 48 hours. The longer rest time actually improves its flakiness by allowing the layers to develop properly.
When ready to use, let it sit at room temperature for 10 minutes before rolling.
Freezer-Friendly Dough
Wrap individual dough disks in plastic wrap, then place them inside a ziplock freezer bag for up to 3 months. Thaw overnight in the fridge before using—never at room temperature, as this can cause condensation and make the dough sticky.
For the gluten-free version, freeze it in a single disk rather than pre-rolled, as it’s more fragile when thawed. 🧊
When freezing the puff pastry-inspired dough, fold it into thirds like a letter before wrapping. This compact shape saves space and prevents the layers from sticking together. Thaw completely before attempting to roll—partially thawed dough will tear easily.
Pre-Baked Crusts
Bake your crusts unfilled ahead of time and store them in an airtight container at room temperature for up to 2 days. This works especially well for the classic and vegan versions, which hold their shape beautifully when cooled.
To reheat, place the crust on a baking sheet and warm in a 350°F oven for 5-7 minutes before adding filling. 🔥
For the gluten-free crust, pre-baking is even more important—it prevents sogginess when filled later. Brush the cooled crust with a thin layer of apricot jam (not jelly) before storing to keep it moist. The puff pastry-inspired crust can also be pre-baked, but it’s best used fresh for maximum flakiness.
Filling Prep Shortcuts
Assemble your pie filling one day ahead and store it in the fridge. This lets flavors meld while keeping your crust-making fresh. For fruit fillings, sprinkle 1 tsp lemon juice over the top to prevent browning.
I often make my apple pie filling a day in advance—it’s always more flavorful. ✨
For savory pies like quiche, pre-cook any meat or vegetables and store them separately in the fridge. When ready to assemble, simply mix everything with your egg custard and pour into the crust. This method saves time on busy mornings and ensures your crust stays crisp.
Nutrition facts
Frequently asked questions
Why does my pie crust turn out tough instead of flaky?
Overworking the dough develops gluten, which makes crusts tough. Work quickly, handle gently, and keep everything cold—especially the butter. If your dough feels sticky, add just enough flour to make it workable, but don’t overdo it. Also, avoid rolling the dough too thin; 1/8-inch thickness is ideal for that signature flakiness.
Can I use these crusts for savory pies like quiche?
All four variations work beautifully for savory pies. The classic buttery crust holds up perfectly to custards, while the gluten-free version is great for egg-based fillings. For extra flavor, brush the baked crust with a mix of olive oil and herbs before adding your filling.
How do I prevent my crust from shrinking during baking?
Prevent shrinkage by keeping the dough cold and handling it minimally. Chill the shaped crust for 10 minutes before baking, and use pie weights or dried beans to support the edges. If your crust still shrinks, it might need more flour or a longer chill time—try shaping it slightly larger than your pie dish.
What’s the best way to store leftover pie crust dough?
Wrap dough disks tightly in plastic wrap and refrigerate for up to 3 days or freeze for 3 months. For gluten-free dough, refrigerate only—it dries out faster. Thaw frozen dough overnight in the fridge before using. Never thaw at room temperature, or the dough will become sticky and hard to handle.
Can I make these crusts without a rolling pin?
Yes! For the classic and vegan crusts, press the dough gently with your hands or use a wine bottle wrapped in plastic. The gluten-free version is more delicate, so use a rolling pin if possible. For the puff pastry-inspired crust, fold it instead of rolling—this builds layers without flattening them.

- 3lb Prime Rib Roast Recipe: Juicy Pink Center Guaranteed in 3 Hours - October 31, 2026
- 5 Spice Cake Recipe: Warmly Spiced Layers With Crunchy Top - October 31, 2026
- 1950’s Macaroni and Cheese Recipe: Nostalgic Creamy Cheese Sauce with Buttery Noodles - October 31, 2026