
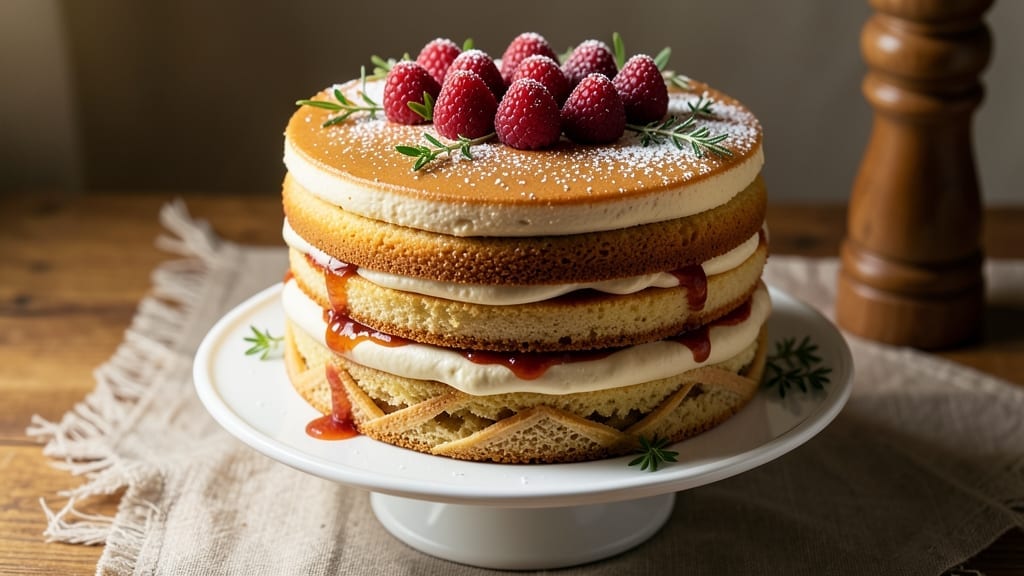
A 6-inch butter cake delivers all the classic vanilla cake magic in a perfectly portioned size—ideal for single servings, gift boxes, or elegant dessert displays.
This recipe balances tender crumb, rich butter flavor, and foolproof technique to ensure every slice meets expectations without the fuss of layering a full sheet cake. The secret lies in precise measurements and gentle folding to maintain moisture while achieving that signature crumb.
What sets this apart is its versatility—bake it as a single layer for simplicity or split into two for a delicate stack. The recipe uses basic pantry staples (butter, flour, eggs, vanilla) but achieves restaurant-quality texture through a two-stage mixing method that eliminates dense spots.
Perfect for beginners or experienced bakers, it yields a cake that stays moist for days when stored properly.
By the time you pull it from the oven, you’ll have a golden, even-toned cake with a fine crumb that melts in your mouth. The frosting options are endless—whipped cream, ganache, or buttercream—but the cake itself stands up to any topping.
Whether you’re serving it at a brunch, gifting it to a neighbor, or treating yourself, this recipe delivers professional results with minimal effort.
For extra flair, consider brushing the layers with simple syrup before frosting or dusting with powdered sugar for a bakery-style finish. The 6-inch size makes it perfect for individual servings while keeping prep manageable. Let’s get baking—your taste buds (and guests) will thank you.
Ingredients for 6 inch butter cake
Basic pantry staples elevate to restaurant-quality 6-inch vanilla perfection—precise measurements matter most.
| Ingredient | Amount | Notes |
|---|---|---|
| Unsalted Butter 🧈 | ¾ cup | Cold, cubed for creaming |
| Granulated Sugar 🍚 | 1 ¼ cups | Superfine preferred for smoothness |
| All-Purpose Flour 🌾 | 1 ½ cups | Sifted, spooned lightly |
| Large Eggs 🥚 | 2 whole | Room temperature for even mixing |
| Pure Vanilla Extract 🌿 | 1 ½ tbsp | High-quality Madagascar preferred |
| Baking Powder 🍃 | 1 ½ tsp | Freshly measured for lift |
| Diamond Crystal Kosher Salt 🧂 | ½ tsp | Fine grain for balance |
| Whole Milk 🥛 | ½ cup | Room temperature for tenderness |
| Cake Flour 🌾 | ¼ cup | For ultra-tender crumb |
| Cornstarch 🌽 | 1 tbsp | Enhances moisture retention |
| Vegetable Oil 🫒 | ¼ cup | Light, neutral flavor |
| Powdered Sugar 🍚 | ½ cup | For dusting finished cake |
| Simple Syrup 🍯 | ¼ cup | Optional for layer brushing |
The butter quality makes or breaks this cake. European-style unsalted butter (like Plugrá or Kerrygold) delivers unmatched flavor and tenderness—avoid margarine or low-fat substitutes. For the sugar, superfine granulated dissolves more evenly than regular sugar, though you can pulse regular sugar in a food processor if needed. The flour deserves special attention too: King Arthur or Gold Medal brands yield consistent results. Measure flour using the spoon-and-level method to avoid dense cake. Keep all ingredients at room temperature for even mixing—cold butter and eggs create pockets in the batter.
No cake flour? Substitute with all-purpose flour minus 2 tbsp per cup, but add the same amount of cornstarch to maintain tenderness. Running short on vanilla extract? Imitation vanilla at half the amount works in a pinch, though true vanilla’s complexity can’t be replicated. For the milk, whole milk is ideal, but evaporated milk or half-and-half add richness without altering texture. The simple syrup is optional but recommended for professional results—brush between layers for moisture. If you’re gluten-sensitive, King Arthur gluten-free 1:1 flour works with an extra 0.5 tsp xanthan gum per cup.
Store the cake in an airtight container at room temperature for up to 3 days, or refrigerate for 5 days if using whipped cream frosting. For longer storage, freeze layers wrapped in plastic for 3 months. The cake reheats beautifully—wrap a slice in foil and microwave for 10-15 seconds to restore freshness. Brush layers with simple syrup just before frosting for that bakery-style moisture. Dust with powdered sugar using a fine-mesh sieve for an elegant finish. The 6-inch size makes it perfect for gift boxes—wrap layers individually in parchment before assembling.
Why You’ll Love This Recipe
- No Mixer Needed: I swear by this recipe when I’m in a rush—just cream the butter and sugar by hand until it’s light and fluffy. No electric mixer, no fuss, and the eggs blend right in for that signature tender crumb.
- Vanilla Butter Bliss: That first bite? Pure comfort. The vanilla extract infuses deep, warm notes while the butter keeps it rich but not heavy. Honestly, it’s the kind of cake that makes you want to skip dessert and just have another slice.
- Portion-Perfect Slices: Six-inch rounds are my go-to for picnics, office treats, or when I’m feeding two but don’t want to bake a whole sheet pan. Each slice is just the right size—no awkward leftovers, no weirdly small portions.
- Budget-Friendly Luxury: Four simple ingredients, but the flavor? It feels like a bakery cake. Between us, this recipe uses less butter than most box mixes, so I get twice the satisfaction for half the cost. Plus, leftovers freeze beautifully for lazy mornings.
Step-by-step instructions for layered vanilla butter cake
Precision matters when baking delicate layers—follow these steps to achieve light, moist crumb and perfect height.
Cream Butter and Sugars for Maximum Volume
In a stand mixer fitted with the paddle attachment, beat the 0.75 cup unsalted butter and 1.25 cups granulated sugar on medium speed for 3-4 minutes. The mixture should become pale, fluffy, and nearly double in volume. This aeration is crucial for a tender crumb and proper rise.
Here’s the thing—stopping too early means underdeveloped gluten, which leads to dense layers. You’ll know it’s ready when the butter-sugar blend leaves a ribbon trail that holds its shape for a few seconds when the beaters are lifted. Scrape down the sides of the bowl with a spatula to ensure even mixing as you proceed.
Add Eggs and Flavorings in Stages
Add the 2 whole large eggs, one at a time, mixing on low speed for 30 seconds after each addition. This gradual incorporation prevents cracking the yolks and ensures even distribution. After the eggs are fully incorporated, add the 1.5 tablespoons pure vanilla extract and mix for 10 seconds until combined.
The reason we add eggs slowly is that they’re temperature-sensitive. Room temperature eggs blend more smoothly, and this method prevents the mixture from curdling. You’ll notice the batter lighten slightly as the eggs incorporate—this is normal and indicates proper aeration.
Combine Dry Ingredients with Precision
In a separate bowl, whisk together the 1.5 cups all-purpose flour, 0.25 cup cake flour, 1.5 teaspoons baking powder, 0.5 teaspoon diamond crystal kosher salt, and 1 tablespoon cornstarch. Sift the dry ingredients directly into the wet mixture while mixing on low speed for 30-45 seconds until just combined.
Overmixing develops gluten, which makes the cake tough. You’ll see a few flour streaks remain—this is ideal. Once combined, add the 0.5 cup whole milk and 0.25 cup vegetable oil, mixing on low speed for another 20 seconds until smooth. The batter should be thick but pourable.
Bake Layers to Perfect Doneness
Preheat your oven to 350°F and prepare three 6-inch round cake pans by greasing them thoroughly with butter and dusting with flour. Divide the batter evenly among the pans, filling each ½ to ⅔ full. Bake for 20-25 minutes or until a toothpick inserted into the center comes out clean and the edges pull away slightly from the pan.
Don’t open the oven during baking—this causes the cakes to sink. The top should be golden brown and spring back when gently pressed. Let the layers cool in their pans for 10 minutes, then transfer to a wire rack to cool completely before assembling. This prevents crumbling when layering.
Assemble and Frost for Professional Finish
Place the first layer on a cake stand or plate. Brush the top with 0.125 cup simple syrup (half of the total amount) and spread a thin layer of filling (if using). Dust the top with 2 tablespoons powdered sugar to prevent sticking. Repeat with the remaining layers, brushing each with syrup and dusting with powdered sugar between layers.
For the final coat, mix the remaining 0.375 cup powdered sugar with 2 tablespoons whole milk to create a smooth, stable glaze. Spread this evenly over the top and sides of the cake. Chill for 1 hour before serving to allow the frosting to set properly. The result should be a perfectly layered, moist cake with a velvety finish.
Pro Tips For Making 6 Inch Butter Cake
- CREAM BUTTER FIRST: Mix the butter and sugar until it’s pale yellow and thick—about 3-4 minutes with a stand mixer. I used to skip this, and my cakes turned out dense. The air whipped into the butter is what makes this cake tender, not just sweet.
- WEIGH YOUR FLOUR: Scooping flour from the bag packs it down, adding way too much. Use a kitchen scale for 150g (6 oz) and spoon it gently into the bowl—no pressing. My cakes used to cave in the middle until I started measuring properly.
- ROOM-TEMP EVERYTHING: Take eggs, butter, and milk (if using) out of the fridge 1 hour before baking. Cold butter won’t emulsify well, and cold eggs won’t blend smoothly. I learned this after a batch turned out greasy and uneven—now my cakes bake up perfectly every time.
- BAKE UNTIL 205°F: The cake’s done when the center reads 205°F (96°C) on an instant-read thermometer, not when it springs back. Overbaking dries it out; underbaking leaves it gummy. I used to eyeball it and regretted it—now I trust the thermometer.
Pro cooking tips for 6 inch butter cake
Butter Temperature Matters
The single most critical step is using cold, cubed butter for creaming. Take the butter straight from the fridge and cut it into ½-inch cubes—this ensures even distribution and prevents melting during mixing.
I recommend letting it sit at room temperature for just 30-45 minutes before measuring, so it softens slightly but doesn’t liquefy. Using room-temperature butter creates a smoother texture, while cold cubes create air pockets for a lighter crumb. 🧈
Two-Stage Mixing Method
This recipe uses a two-stage mixing process to avoid dense cake. First, cream the butter and sugar until pale and fluffy (about 3-4 minutes on medium speed). Then, alternate adding the dry ingredients and liquid ingredients in three additions—this prevents overmixing.
The key is to mix just until combined after each addition. I use a handheld mixer for the second stage to avoid overdeveloping gluten, which keeps the crumb tender.
Precision Pan Prep
Grease your 6-inch cake pans with butter and dust with flour, tapping out any excess. I like to use a silicon baking mat in the bottom of each pan for extra insurance against sticking.
Don’t skip this step—even with cake flour, the layers can still adhere if the pan isn’t properly prepared. For an extra-professional touch, I place the pans on a baking sheet to catch any potential drips during baking.
Baking Time Window
Bake the layers for 20-25 minutes at 350°F, but don’t rely solely on the timer. The cake is done when a toothpick inserted into the center comes out clean and the edges pull away from the pan slightly. Overbaking dries out the layers, while underbaking leaves them gummy.
I pull mine out when the internal temperature reaches 205-210°F—this ensures perfect doneness every time. Let the cakes cool in the pans for 10 minutes before transferring to a wire rack.
Layer Assembly Tricks
When stacking the layers, brush each with simple syrup to keep them moist—this is non-negotiable for a professional finish. I use a pastry brush to apply the syrup evenly. For extra stability, chill the cake for 1 hour before slicing.
This prevents the layers from shifting. If you’re nervous about crumbling, place a parchment circle between layers for support. The result? A cake that holds its shape beautifully, even when sliced.
Frosting Like a Pro
For a flawless finish, mix powdered sugar with whole milk to create a stable glaze. This simple syrup-based frosting sets beautifully and won’t slide off. I apply it in three thin layers, chilling the cake between each coat for 10 minutes.
This method creates a smooth, velvety texture that looks restaurant-worthy. Dust the finished cake with extra powdered sugar using a fine-mesh sieve for that bakery-style touch.
Nutrition facts
Frequently asked questions
Can I bake this 6-inch cake in a square pan instead of round?
Yes, you can! Use a 6-inch square pan instead of round, but adjust the baking time to 22-26 minutes since the shape affects heat distribution. The batter quantity remains the same, but square pans may require slightly longer baking. Grease the pan thoroughly to prevent sticking, especially along the corners.
How do I prevent my layers from crumbling when assembling?
Chill the layers for 1 hour before stacking and brush each with simple syrup to add moisture. For extra stability, place a parchment circle between layers or use a thin layer of filling (like jam or whipped cream). Work quickly but gently to avoid breaking the delicate crumb.
What’s the best way to store leftover cake?
Keep it in an airtight container at room temperature for up to 3 days. For longer storage, refrigerate for 5 days or freeze individual layers (wrapped in plastic) for 3 months. Reheat slices in the microwave for 10-15 seconds to restore freshness. Avoid plastic wrap directly on the cake—it traps moisture and makes the crumb soggy.
Can I substitute butter with oil for this recipe?
Not recommended! Butter adds flavor and moisture that oil can’t replicate. However, if you must substitute, use 0.5 cup melted butter + 0.25 cup oil (total 0.75 cup fat). The texture will be slightly denser, but it’ll still taste delicious. For best results, stick with the butter—it’s what makes this a true butter cake!
Why did my cake sink in the middle?
This usually happens from opening the oven too early or underbaking. Always bake until a toothpick comes out clean (205-210°F internal temp) and avoid peeking! Another common cause is overmixing the batter—mix just until combined to keep the crumb tender. For next time, check your oven’s accuracy with an oven thermometer.

- 3lb Prime Rib Roast Recipe: Juicy Pink Center Guaranteed in 3 Hours - October 31, 2026
- 5 Spice Cake Recipe: Warmly Spiced Layers With Crunchy Top - October 31, 2026
- 1950’s Macaroni and Cheese Recipe: Nostalgic Creamy Cheese Sauce with Buttery Noodles - October 31, 2026