
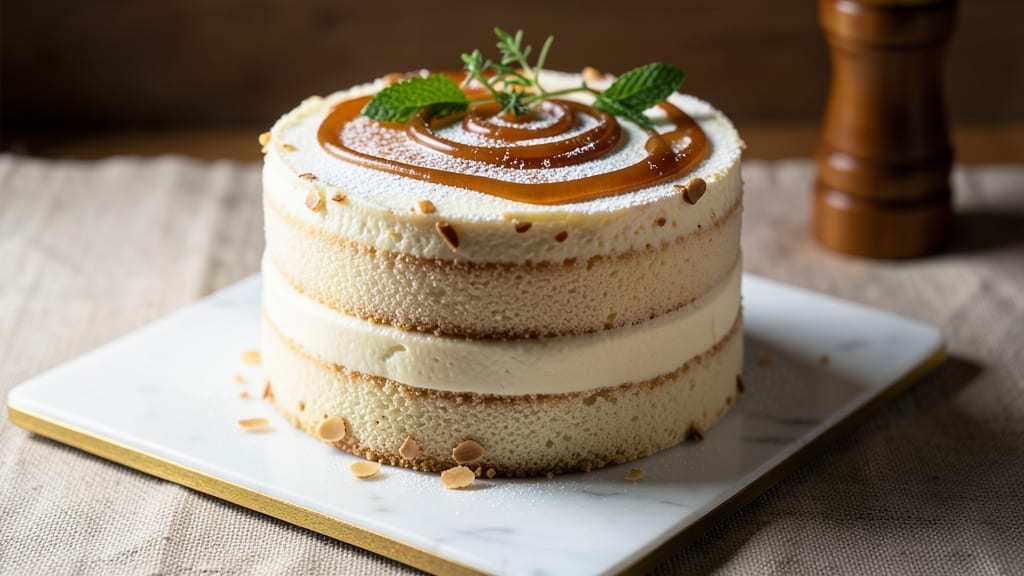
A 6-inch by 3-inch cake recipe is your secret weapon for elegant gatherings where full-size desserts feel overwhelming. These mini layers deliver restaurant-quality texture and flavor while fitting perfectly on tiered stands, dessert boards, or individual plates.
The key lies in precise measurements and gentle baking—no overmixing, no rushing—just foolproof technique that yields tender crumb and clean layers every time.
This recipe uses a simple vanilla butter cake base that stays moist for hours, making it ideal for layered designs or single-serving elegance. The 350°F oven temperature and 25-30 minute bake time ensure consistent results, while a light coating of buttercream between layers keeps them distinct.
Perfect for showers, corporate events, or intimate celebrations, these cakes require just 6×3-inch pans—no specialty equipment needed.
What you’ll achieve is a professional-looking dessert with minimal effort: perfectly domed layers, clean sides, and a finish that rivals bakery displays. The recipe scales easily—double for a full tiered cake or keep it small for personalized favors.
Whether you’re decorating with fresh flowers, chocolate ganache, or simple dusting powder, the base delivers the clean canvas every decorator dreams of.
For dietary flexibility, substitute butter with coconut oil for vegan versions or use gluten-free flour blends without compromising texture. The frosting can be adjusted to American, Swiss, or Italian buttercream styles—your choice determines the final elegance. Let’s create these party-perfect mini cakes that impress without the bulk.
Ingredients for 6 inch by 3 inch cake
Six essential ingredients create flawless mini cake layers perfect for tiered displays or elegant servings.
| Ingredient | Amount | Notes |
|---|---|---|
| All-Purpose Flour 🌾 | 1 ½ cups | Sifted for light texture |
| Granulated Sugar 🍚 | 1 cup | White or light brown |
| Unsalted Butter 🧈 | 1 cup | Cold, cubed, room temperature |
| Large Eggs 🥚 | 2 whole | Room temperature for even baking |
| Pure Vanilla Extract 🌿 | 1 tbsp | High-quality, pure vanilla |
| Milk 🥛 | ½ cup | Whole milk preferred |
| Baking Powder 🧂 | 1 ½ tsp | Diamond Crystal brand recommended |
| Salt 🧂 | ½ tsp | Fine sea salt preferred |
| Buttercream Frosting 🍰 | 1 ½ cups | American buttercream preferred |
| Powdered Sugar 🍚 | 2 cups | Sifted for smooth texture |
| Heavy Whipping Cream 🥛 | ½ cup | Cold for stability |
| Vanilla Extract 🌿 | 1 tsp | Same brand as cake |
| 3×6-Inch Round Cake Pans 🍰 | 6 whole | Non-stick or parchment lined |
Flour quality matters—King Arthur or Gold Medal brands yield the best texture. The baking powder must be fresh; Diamond Crystal has twice the leavening power of other brands, so use half the amount if your recipe calls for it. Unsalted butter ensures consistent flavor, and Plugrá or Land O’Lakes are reliable choices. Room-temperature eggs prevent cracks, so let them sit out for 30 minutes before using. Vanilla extract should be pure, not imitation—McCormick or Nielsen-Massey are industry standards for consistent quality.
No baking powder? Baking soda plus cream of tartar works at a 3:1 ratio, but test your leavening agents first. Substitute brown sugar for white at a 1:1 ratio, though the cake will darken slightly. For dairy-free needs, coconut oil replaces butter at a 1:1 ratio, but chill the batter longer. The frosting can be adjusted to Swiss or Italian styles by adding meringue or whipped cream, though American buttercream remains the most forgiving for beginners. If you lack powdered sugar, blend granulated sugar in a food processor until fine—it won’t be as smooth, but it works in a pinch.
Store cake layers wrapped in parchment at room temperature for 2 days or refrigerate for 5 days. Frosting keeps 3 days refrigerated or 1 month frozen in an airtight container. For assembly, bring layers to room temperature before frosting to prevent condensation. These mini cakes freeze beautifully—wrap each layer individually for 3 months of storage. The frosting can be tinted with food coloring for themed events, though add it gradually to avoid over-saturation.
Why You’ll Love This Recipe
- No Mixer Needed: I swear by this one—just cream butter and sugar by hand (or use a fork in a pinch) until it’s light and fluffy. The eggs fold right in, and the vanilla ties everything together without overpowering.
- Buttery Vanilla Bliss: That rich butter-to-sugar ratio? It’s the secret. The crumb is tender but sturdy, with vanilla so bright it tastes homemade—no artificial shortcuts here.
- Batch-and-Freeze Ready: Bake a double batch, slice them into bars, and freeze half. Pull out a piece for a quick breakfast or snack—no reheating needed, just fresh out of the freezer.
- Pantry Staple Magic: Four ingredients, zero weird substitutions. If you’ve got flour, sugar, butter, and eggs, you’ve got cake. Honestly, it’s the kind of recipe that makes me feel like I’m baking something special without the fuss.
Step-by-step instructions for 6-Inch by 3-Inch cake layers
Here’s the professional method for baking flawless mini layers that deliver restaurant-quality texture and appearance.
Prepare Pans and Preheat Oven
Line each of the six 3×6-inch round cake pans with parchment paper, pressing the paper firmly against the bottom and sides to prevent sticking. Lightly grease the parchment with baking spray or a thin layer of the unsalted butter to ensure easy release. Preheat your oven to 350°F—this temperature ensures even baking without over-browning.
I always recommend using parchment paper instead of greasing directly, as it creates a non-stick barrier that prevents tearing when removing the cakes. The butter layer helps with release but doesn’t replace the parchment’s structural support. Position the pans on the middle rack for consistent heat distribution throughout the baking process.
Cream Butter and Sugar to Lighten the Mixture
In a stand mixer fitted with the paddle attachment, beat the cold, cubed unsalted butter and granulated sugar on medium speed for 3-4 minutes until light and fluffy. You’ll notice the mixture nearly double in volume and become pale in color—this incorporates air that creates a tender crumb structure. Scrape down the sides of the bowl with a spatula to ensure even mixing.
This creaming process is critical for achieving that classic cake texture. If you rush it, you’ll end up with dense, cakey layers instead of the light, airy crumb we’re aiming for. The butter should be at room temperature but not melted—it should hold its shape when pressed but leave a slight indentation.
Add Eggs and Dry Ingredients Alternately
Add the large eggs one at a time, mixing on low speed for 30 seconds after each addition until fully incorporated. Then, in three separate additions, alternate between adding the sifted all-purpose flour and the milk, beginning and ending with the flour. Mix on low speed just until combined after each addition—overmixing develops gluten and makes the cake tough.
After adding all the dry ingredients, mix in the 1 tablespoon pure vanilla extract and 1.5 teaspoons baking powder, followed by the 0.5 teaspoon salt. The batter should be smooth but still slightly thick. If it appears too stiff, add 1-2 tablespoons additional milk to achieve a pudding-like consistency. This alternating method ensures even distribution of ingredients for consistent texture throughout each layer.
Bake Until Golden and Springy
Divide the batter evenly among the six prepared pans, filling each about ⅔ full. Tap each pan firmly on the counter twice to release any air bubbles. Bake for 20-25 minutes or until a toothpick inserted into the center comes out clean and the tops are golden brown. Rotate the pans halfway through baking for even heat exposure.
I recommend checking for doneness at the 18-minute mark—the cakes are done when they spring back gently when pressed in the center and the edges begin to pull away slightly from the pan. Overbaking dries out the cake, so remove them promptly when they pass this test. Let the cakes cool in their pans for 10 minutes before transferring to a wire rack to cool completely.
Frost and Assemble the Mini Layers
Once completely cooled, level the tops of the cakes if necessary using a serrated knife. In a mixing bowl, combine the 2 cups powdered sugar, 0.5 cup heavy whipping cream, and 1 teaspoon vanilla extract for the buttercream frosting. Beat with an electric mixer on medium-high speed until light and fluffy, about 2-3 minutes, then gradually add the 1.5 cups buttercream frosting and mix until smooth and spreadable.
To assemble, place one cake layer on a cake stand or plate. Spread a thin layer of frosting on top, then add the next layer. Repeat this process, alternating with a slightly thicker layer of frosting between each cake to create visible separation. For the top layer, spread frosting evenly and smooth with a spatula. Chill the assembled cake for 30 minutes before serving to allow the frosting to set properly.
Pro Tips For Making 6 Inch By 3 Inch Cake
- MEASURE BUTTER COLD: Take the butter straight from the fridge—no thawing, no softening at room temp. I learned this the hard way when my cake turned out dense and greasy after using butter that was too warm. For this small pan, pat it into the flour with your fingers until it looks like coarse crumbs, not melted pudding.
- WHISK EGGS ROOM TEMP: Let those eggs sit in warm water for 5 minutes before cracking them. Cold eggs incorporate air poorly, and this tiny pan won’t forgive under-mixed batter. I skip this when I’m lazy, but the cake rises noticeably better when the eggs are at room temperature—especially in a small, shallow mold.
- DON’T OVERMIX THE BATTER: Stop folding the flour into the butter-egg mixture as soon as it’s just combined—no streaks, no dry bits, but no overworking either. I used to beat this like I was punishing the batter, and my cakes turned out tough. For this size, 10-12 gentle folds with a spatula is all it takes.
- BAKE UNTIL TOOTHPICK COMES OUT CLEAN: This isn’t a guess-your-luck situation—insert that toothpick in the center and wait the full 5 seconds. My first few attempts pulled the cake out too early because I thought “mostly clean” was good enough, but it left a gummy mess. For a 6×3 pan, 25-30 minutes at 350°F is your baseline, but always check.
Storing and reheating your leftovers
Room Temperature Storage
Keep your baked cake layers at room temperature for up to 2 days by wrapping them individually in parchment paper and placing them in an airtight container. This method preserves moisture without causing condensation.
I like to stack them with parchment between each layer to prevent sticking. Store in a cool, dry place away from direct sunlight—your pantry works perfectly. 🌟
Refrigerator Preservation
For longer storage, refrigerate the layers for up to 5 days. Wrap each layer tightly in plastic wrap before placing them in an airtight container to prevent drying.
The cold temperature slows moisture loss, keeping the cake tender. Let layers sit at room temperature for 30 minutes before frosting to avoid condensation between layers.
Freezing for Later Use
These mini cakes freeze beautifully for up to 3 months! Wrap each cooled layer tightly in plastic wrap, then place them in a freezer bag with all air removed.
Label with the date to track freshness. When ready to use, thaw overnight in the refrigerator before assembling. For best results, bring all components to room temperature before frosting. ❄️
Frosting Storage Tips
Store your buttercream frosting separately in an airtight container at room temperature for 3 days or refrigerate for 5 days. For longer storage, freeze the frosting in portions for up to 1 month.
To soften, let it sit at room temperature for 15-20 minutes before using. I find that chilling the frosting for 10 minutes before spreading helps create cleaner layers.
Reheating Assembled Cakes
If you need to warm an assembled cake, place it on a baking sheet and heat in a 200°F oven for 5-8 minutes. This gentle method restores moisture without overcooking the frosting.
For individual layers, warm in the oven for 3-5 minutes before frosting. Never microwave—it causes the frosting to melt unevenly and makes the cake gummy. 🔥
Decorating After Storage
After storage, let your cakes sit at room temperature for 15-20 minutes before decorating. This helps the frosting soften slightly for easier piping. For extra shine, brush the top with a tiny bit of milk or lemon juice before adding decorations.
I love using this trick for floral designs—they adhere better to slightly damp frosting. Always decorate on a cool surface to prevent the frosting from melting too quickly.
Nutrition facts
Frequently asked questions
Can I use these mini cake layers for individual servings instead of a tiered cake?
These 6×3-inch layers are perfect for individual servings. Simply frost each layer with a thin layer of buttercream, then decorate with fresh berries, chocolate shavings, or edible flowers. They make elegant single-serving desserts for weddings, corporate events, or baby showers—just place one on a small plate or cake stand.
What if I don’t have 3×6-inch pans? Can I use square or rectangular pans?
You can adapt this recipe to 6×6-inch square pans or 6×4-inch rectangular pans, but the baking time may vary slightly. For square pans, bake for 22-27 minutes and check for doneness at 20 minutes. Rectangular pans may require 25-30 minutes—always use a toothpick test. The key is to fill pans only ⅔ full to prevent overflowing.
How do I prevent cracks in the cake layers?
Cracks usually happen from overmixing or sudden temperature changes. To avoid them: 1) Mix just until combined after adding dry ingredients, 2) Don’t overfill pans (keep batter ⅔ full), and 3) Avoid opening the oven door during the first 15 minutes of baking. Also, let eggs and butter come to room temperature before mixing.
Can I make these cakes gluten-free or vegan?
Yes! For gluten-free, substitute the all-purpose flour with a 1:1 gluten-free blend (like Bob’s Red Mill) and add ½ teaspoon xanthan gum. For vegan cakes, replace butter with coconut oil (chilled) and use flax eggs (1 tbsp ground flax + 3 tbsp water per egg). The baking time may increase by 2-3 minutes—monitor closely. The frosting can be made vegan with plant-based butter and cream.
What’s the best way to transport these mini cakes?
For short trips (1 hour), place each frosted cake in an individual box with a layer of parchment paper on top and bottom. For longer transport, wrap each layer separately in plastic wrap, then place in a sturdy box with dividers. Keep them at room temperature—never refrigerated during transport. If transporting unfrosted layers, store them in an airtight container with parchment between layers.

- 3lb Prime Rib Roast Recipe: Juicy Pink Center Guaranteed in 3 Hours - October 31, 2026
- 5 Spice Cake Recipe: Warmly Spiced Layers With Crunchy Top - October 31, 2026
- 1950’s Macaroni and Cheese Recipe: Nostalgic Creamy Cheese Sauce with Buttery Noodles - October 31, 2026