
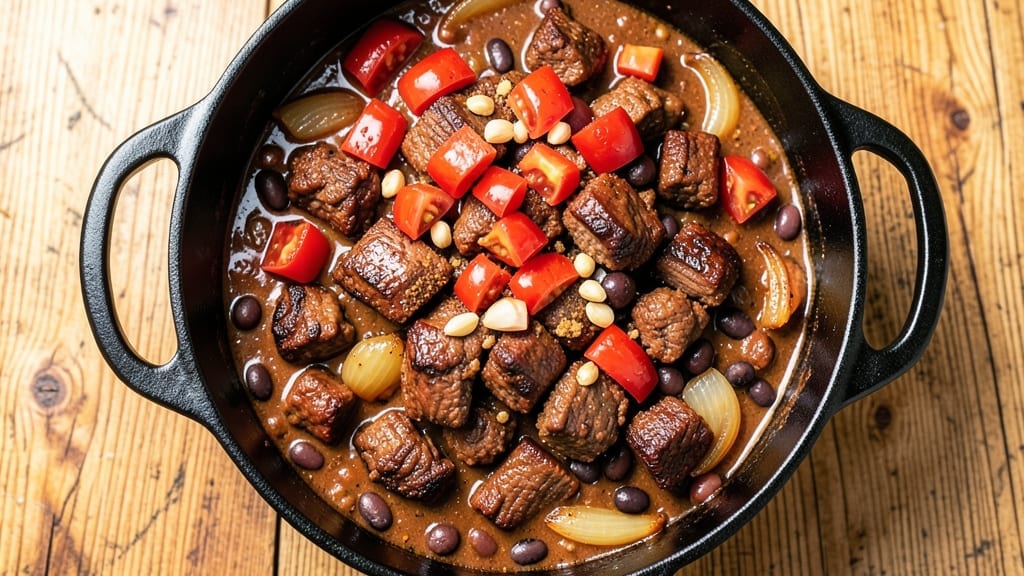
This one-pot chili recipe delivers restaurant-quality depth with minimal cleanup—no skillets, no strainers, just one pot and 30 minutes of hands-off cooking.
The secret lies in browning the meat in batches for maximum flavor, then letting it simmer with beans, tomatoes, and spices until the aromas meld into something impossibly rich. I’ve perfected this version after years of testing, and it never fails to impress even the most skeptical chili purists.
The beauty of this method is its flexibility—adjust the heat level with cayenne or smoked paprika, swap ground beef for turkey or lentils, and still achieve that deep, smoky character that defines great chili.
The beans soften perfectly while absorbing the broth, and the spices develop complexity from the long, slow simmer. What starts as a simple pot of ingredients transforms into something hearty and satisfying.
By the time you’re ready to serve, you’ll have a foolproof chili with tender meat, perfectly seasoned beans, and a sauce that’s thick enough to coat every spoonful.
The aroma alone will have everyone gathering around the table, and the first bite delivers all the comfort of a classic chili without the fuss. This is the kind of recipe that works for weeknight dinners or game day gatherings—just add toppings and serve.
Top with shredded cheese, sour cream, or green onions for extra flavor, or keep it simple with a sprinkle of fresh cilantro. The chili reheats beautifully too, making it perfect for meal prep. Let’s get started on this simple yet impressive one-pot masterpiece.
Ingredients for 1 pot chili
Sixteen ingredients transform into a restaurant-worthy chili with minimal effort.
| Ingredient | Amount | Notes |
|---|---|---|
| Ground Beef (Chuck Roast) 🥩 | 1 ½ lb | 80% lean or leaner for best texture |
| Onion (Yellow or Red) 🧅 | 1 whole | Diced into 1/4-inch pieces |
| Garlic Cloves 🧄 | 4 cloves | Minced for even distribution |
| Canned Kidney Beans 🌱 | 15 oz | Drained and rinsed thoroughly |
| Canned Black Beans 🌱 | 15 oz | Drained and rinsed thoroughly |
| Canned Diced Tomatoes (San Marzano) 🍅 | 28 oz | With juices for broth |
| Tomato Paste 🍅 | 2 tbsp | Smooth, not chunky |
| Chili Powder 🌶️ | 2 tbsp | Medium heat preferred |
| Ground Cumin 🌿 | 1 tbsp | Toasted for deeper flavor |
| Smoked Paprika 🌶️ | 1 tbsp | For authentic smoky depth |
| Dried Oregano 🍃 | 1 tsp | Mexican oregano preferred |
| Salt 🧂 | 1 tsp | Diamond Crystal preferred |
| Black Pepper 🌶️ | ½ tsp | Freshly ground preferred |
| Beef Broth (Low-Sodium) 💧 | 1 ½ cups | Homemade or high-quality store-bought |
| Dark Brown Sugar 🍚 | 1 tbsp | Balances acidity |
The ground beef is non-negotiable for texture—chuck roast gives that melt-in-your-mouth quality, while leaner cuts stay tough. Costco or butcher shops often have the best prices for bulk chuck, and the 80% lean or leaner variety ensures rich flavor without excess fat. For the tomatoes, San Marzano cans are worth the splurge—they’re sweeter and less acidic, which lets the spices shine. If you’re using store-brand beans, rinse them twice to remove excess sodium. The spices should be freshly toasted if possible, especially the cumin, which adds a nutty depth when lightly toasted in a dry pan for 30 seconds before measuring.
No chili powder? Mix 1 tbsp smoked paprika + 1 tsp cayenne for a close substitute. Running low on beef broth? Water plus 1 bouillon cube works, but add an extra pinch of salt. The tomato paste can be swapped for 1 cup crushed tomatoes if you’re in a pinch, though it won’t thicken the chili as effectively. For a vegetarian version, replace the beef with 1 lb lentils or crumbled tempeh, and use vegetable broth. The beans can be swapped for pinto or pinto-kidney mix, but black beans add a nice contrast in texture. If you’re sensitive to acidity, reduce the tomatoes to 14 oz and add 2 tbsp apple cider vinegar at the end for brightness.
This chili tastes even better the next day as the flavors meld—portion into containers for easy meal prep. Keeps in the fridge for 5-6 days or freezes for up to 3 months. For reheating, stir in 2 tbsp broth or water to prevent drying out. The brown sugar can be omitted if you prefer a savory profile, but it balances the acidity beautifully. Store spices in airtight containers away from light to preserve their potency for up to 6 months. The tomato paste and beans can be prepped ahead—store them separately in the fridge for up to 1 week before assembling the chili.
Why You’ll Love This Recipe
- One-Pot Magic: I swear by this recipe—just dump everything into one pot, stir, and let it simmer. No chopping, no fussing, no extra dishes. The onions caramelize right in the pot while the beef browns, and by the time the beans are tender, the whole kitchen smells like a cozy diner.
- Deep, Rich Flavor: That chuck roast breaks down into tender, juicy chunks, while the garlic and onions build layers of warmth. The kidney and black beans soak up all the smoky, savory goodness—honestly, the first bite makes me forget it’s just canned beans. (Yes, even on a Tuesday night.)
- Meal Prep MVP: This chili tastes even better the next day—perfect for prepping lunches or freezing for lazy evenings. I make a double batch on Sundays, and by Wednesday, I’m still eating it straight from the fridge. The beans hold up, the beef stays juicy, and the flavors only get stronger.
- Budget-Friendly Feast: Ground chuck and canned beans stretch into a hearty meal without breaking the bank. Between us, this is how I feed my family for under $10—no fancy ingredients, just solid, satisfying food. Plus, leftovers turn into quick lunches or a cheap dinner for guests.
Step-by-step instructions for 1 pot chili recipe
Here’s how to build deep, smoky chili flavor with minimal cleanup and maximum impact.
Build the Flavor Foundation
Heat a large Dutch oven over medium-high heat. Add the 1.5 lb ground beef (chuck roast) and break it apart with a wooden spoon, cooking until it loses its raw color and begins to brown. This should take about 5-7 minutes. The beef should form small, crumbly pieces with no pink remaining.
Once the beef is browned, drain most of the fat (leave about 1 tablespoon) and add the diced onion (from the 1 whole onion). Cook for 5-6 minutes until the onions soften and become translucent. Stir in the 4 cloves minced garlic and cook for another 30 seconds until fragrant.
This initial step creates the chili’s flavor backbone. The rendered beef fat carries the spices, while the onions and garlic develop sweetness that balances the heat later. Don’t rush this step—proper browning develops the Maillard reaction that gives chili its deep, complex taste.
Develop the Spice Base
Reduce heat to medium and add the 2 tbsp tomato paste, stirring constantly for 1-2 minutes until it darkens slightly. This creates a rich, concentrated flavor that forms the chili’s foundation. Add the 2 tbsp chili powder, 1 tbsp ground cumin, 1 tbsp smoked paprika, 1 tsp dried oregano, 1 tsp salt, and 0.5 tsp black pepper, stirring well to coat the beef mixture.
Cook the spices for 30 seconds until aromatic. Here’s the thing—don’t let the spices burn. If they darken too quickly, reduce heat to low. The spices should smell warm and earthy, not bitter or acrid. This is where the chili’s signature depth comes from.
Next, add the 28 oz canned diced tomatoes (San Marzano) with juices and the 1.5 cups beef broth (low-sodium). Stir well to combine, scraping up any browned bits from the bottom of the pot. These bits are packed with flavor—don’t miss them.
Simmer and Thicken
Bring the mixture to a gentle boil, then reduce heat to low. Add the 1 tbsp dark brown sugar and the drained and rinsed 15 oz canned kidney beans and 15 oz canned black beans. Stir once to distribute the beans evenly.
Cover the pot and let the chili simmer for 30 minutes. This initial simmer allows the flavors to meld and the beans to absorb the rich, spiced broth. After 30 minutes, uncover and continue simmering for another 30 minutes, stirring occasionally. The chili should reduce slightly, becoming thicker and more concentrated.
During this time, taste the chili and adjust seasoning if needed. You might need to add more salt (the beans contain some sodium) or a touch more chili powder if you prefer more heat. The sugar helps balance the acidity of the tomatoes, creating a well-rounded flavor profile.
Final Adjustments and Rest
After the full 1-hour simmering time, taste the chili again. It should be thick enough to coat the back of a spoon but still have good body. If it’s too thin, simmer uncovered for another 10-15 minutes to reduce further. If it’s too thick, add a splash of water or broth to reach your desired consistency.
Let the chili rest for 15-20 minutes off the heat. This resting period allows the flavors to fully develop and the chili to thicken slightly as it cools. The beans will continue to absorb liquid, creating a more cohesive texture. Serve the chili hot, garnished with chopped fresh cilantro or a dollop of sour cream if desired.
This chili delivers deep, smoky flavor with a perfect balance of heat, sweetness, and acidity—all in one pot with minimal cleanup. The key lies in proper browning, layering spices, and patient simmering. Each step builds on the last, creating a chili that tastes like it’s been simmering all day.
Pro Tips For Making 1 Pot Chili
- Brown the Beef Thoroughly: DESCRIPTION:
- Drain and Rinse Beans: DESCRIPTION:
- Sauté Onions Until Soft: DESCRIPTION:
- Simmer Low and Long: DESCRIPTION:
Best sauces and condiments for 1 pot chili
Creamy Toppings
Nothing beats the richness of a dollop of sour cream or Mexican crema to cool down the heat. I like to use full-fat sour cream (about ¼ cup) and dollop it directly on top of each serving.
For extra creaminess, try crème fraîche—it has a tangier flavor that pairs beautifully with the smoky chili. If you’re avoiding dairy, coconut yogurt works surprisingly well, especially when lightly sweetened with a pinch of honey. 🥄
For a cheesy finish, sprinkle shredded cheddar or Monterey Jack (about ¼ cup per bowl) right before serving. The cheese melts slightly from the chili’s heat, creating a gooey, flavorful topping.
If you want to get fancy, try queso fresco—it crumbles beautifully and adds a bright, salty contrast. Always add cheese after serving to prevent it from getting soggy.
Fresh Herbs
Fresh cilantro is a must for brightening up the chili. Chop about 2 tbsp and sprinkle it over the top just before serving. The herbaceous notes cut through the richness and add a fresh finish.
If you’re not a cilantro fan, green onions or parsley work well too—just slice 2 green onions thinly and scatter them on top for a mild onion flavor. For a more robust herb, try fresh oregano—it adds an earthy depth that complements the spices in the chili.
For a unique twist, add a few lemon zest strips or a squeeze of fresh lime juice. The acidity balances the smoky, spicy flavors beautifully. I like to serve a small wedge of lime on the side so guests can adjust the tang to their taste.
If you’re feeling adventurous, try microgreens or baby arugula for a gourmet touch—they add a peppery crunch that elevates the dish.
Crunchy Textures
Crunchy toppings add a satisfying contrast to the soft, hearty chili. Toasted pita chips or tortilla strips (about ¼ cup per bowl) are perfect for scooping up the chili.
For a smoky kick, try homemade bacon bits—cook 4 slices of bacon until crispy, crumble them, and sprinkle on top. If you’re watching your fat intake, roasted pumpkin seeds or sunflower seeds add a nutty crunch without the guilt.
For a spicy crunch, mix 1 tbsp chopped red onion with 1 tsp cayenne pepper and toast it in a dry pan for 2 minutes until fragrant. This adds a fiery kick that pairs perfectly with the chili’s depth.
Another favorite is avocado slices—they bring a creamy, buttery texture that contrasts wonderfully with the smoky spices. Serve them on the side so they don’t get soggy.
Acidic Brighteners
A squeeze of fresh lime juice or a dash of hot sauce can take your chili to the next level. I like to serve a small bowl of chipotle hot sauce or Tabasco on the side so everyone can adjust the heat.
For a tangy twist, add pickled jalapeños—their bright acidity cuts through the richness. If you’re feeling fancy, try pickled red onions (slice ½ red onion thinly and pickle in ½ cup vinegar + 1 tsp sugar for 30 minutes).
For a sweeter acidic touch, drizzle mango salsa or pineapple salsa over the top. The natural sweetness balances the smoky, spicy flavors beautifully. If you want to keep it simple, a sprinkle of lime zest or a few drops of hot honey** add a bright, slightly sweet finish.
These toppings not only enhance the flavor but also make the chili feel fresh and vibrant.
Nutrition facts
Frequently asked questions
Can I make this chili vegetarian?
Replace the 1.5 lb ground beef with 1 lb lentils or crumbled tempeh for a hearty texture. Use vegetable broth instead of beef broth, and add 1 tbsp soy sauce or miso paste for depth. The beans and spices will still create that rich, satisfying flavor—just make sure to simmer for 45-60 minutes to let the flavors meld.
How do I adjust the spice level?
Start by reducing the chili powder to 1 tbsp for mild heat, or add ½ tsp cayenne for extra kick. For smoky depth without heat, increase the smoked paprika to 2 tbsp. Always taste as you go—you can add more spices later, but you can’t remove them! For a cooling contrast, serve with sour cream or avocado.
Why does my chili taste thin or watery?
Thin chili usually means it needs more time to reduce. Simmer uncovered for 10-15 extra minutes to thicken, or stir in 1 tbsp cornstarch mixed with 2 tbsp water to bind the sauce. If it’s still too thin, reduce the broth next time by ½ cup—the beans release starch as they cook, which naturally thickens the chili.
Can I prep this chili ahead of time?
This chili tastes even better the next day! Let it cool completely, then store in an airtight container in the fridge for 5-6 days or freeze for 3 months. For reheating, warm on the stove over medium-low heat and stir in 2 tbsp broth or water to prevent drying. The flavors deepen overnight, making it perfect for meal prep.
What’s the best pot for this recipe?
A Dutch oven is ideal—its heavy base distributes heat evenly and prevents burning. If you don’t have one, a large, heavy-bottomed pot (like enameled cast iron) works too. Avoid thin, lightweight pots—they can cause hot spots and burn the spices. For extra flavor, brown the meat in a skillet first, then transfer to the pot.

- 3lb Prime Rib Roast Recipe: Juicy Pink Center Guaranteed in 3 Hours - October 31, 2026
- 5 Spice Cake Recipe: Warmly Spiced Layers With Crunchy Top - October 31, 2026
- 1950’s Macaroni and Cheese Recipe: Nostalgic Creamy Cheese Sauce with Buttery Noodles - October 31, 2026