
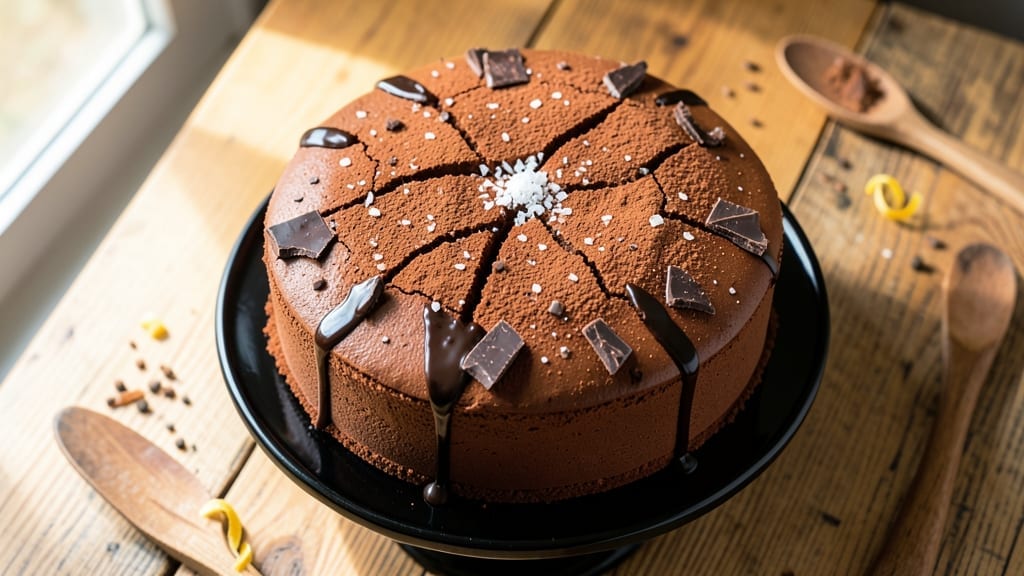
This 6-inch chocolate fudge cake recipe delivers layers of rich, moist chocolate perfection with a fudgy center that melts in your mouth—no dry crumbs in sight. The secret lies in precise ingredient ratios and gentle baking, transforming simple pantry staples into a dessert that tastes like a bakery masterpiece.
I’ve perfected this technique over years of testing, ensuring every slice stays tender and decadent.
What sets this recipe apart is the balance of cocoa powder and melted chocolate for depth without bitterness, plus a touch of coffee powder to enhance the chocolate flavor.
The cake bakes in just 25-30 minutes at 350°F, yielding a dense yet moist texture with a crackly top that gives way to velvety layers. No special equipment needed—just a standard 6-inch pan and patience for the perfect rise.
Once cooled, you’ll have a cake that’s rich enough to satisfy chocolate cravings but light enough to cut cleanly. The fudgy center remains intact, while the outer layers stay moist for days.
Top it with a dusting of cocoa powder or a thin layer of chocolate ganache for an elegant finish. This is the kind of dessert that impresses without requiring advanced skills.
Perfect for birthdays, date nights, or spontaneous cravings, this cake scales easily for larger pans if needed. The recipe includes troubleshooting tips for common issues like cracking or dryness, so you’ll get foolproof results every time. Let’s get baking!
Ingredients for 6 inch chocolate fudge cake
This decadent chocolate fudge cake needs just 12 simple ingredients for a bakery-style center.
| Ingredient | Amount | Notes |
|---|---|---|
| Unsweetened Cocoa Powder 🍫 | ¾ cup | High-quality Dutch-processed preferred |
| All-Purpose Flour 🌾 | 1 ½ cups | Sifted for light texture |
| Granulated Sugar 🍚 | 1 ½ cups | White or light brown |
| Dark Chocolate Bars 🍫 | 8 oz | 70% cacao, chopped fine |
| Instant Espresso Powder ☕ | 1 tbsp | Enhances chocolate flavor |
| Baking Soda 🧪 | ½ tsp | Freshly opened |
| Salt 🧂 | ½ tsp | Fine sea salt |
| Large Eggs 🥚 | 2 whole | Room temperature |
| Vanilla Extract 🌸 | 1 tsp | Pure alcohol-free preferred |
| Vegetable Oil 🫒 | ½ cup | Light, like canola |
| Hot Water 💧 | ½ cup | For chocolate mixture |
| Powdered Sugar 🍚 | ¼ cup | For dusting (optional) |
The cocoa powder and dark chocolate are your flavor anchors here. Valrhona or Ghirardelli are my go-tos for that deep, velvety chocolate taste—don’t skimp on quality. The 70% cacao bars give you that perfect balance of richness and bitterness without overpowering. I always grab the Ghirardelli baking squares at Whole Foods when I’m doing a big batch, but the regular grocery store brands work too. For the instant espresso, Starbucks VIA is my secret—it dissolves perfectly and boosts the chocolate flavor without tasting like coffee. If you’re using Dutch-processed cocoa, skip the baking soda in the dry ingredients, but we’re using natural cocoa here for that tangy lift.
No dark chocolate bars? Semisweet chocolate chips work in a pinch—just melt them with the hot water. Out of instant espresso? Regular ground coffee at half the amount will do, but you’ll need to strain it. The vanilla extract can be swapped for vanilla bean paste if you’re feeling fancy. For the oil, melted coconut oil adds a lovely depth, but stick with vegetable oil if you want something neutral. The powdered sugar is optional but gives that elegant finish—Domino brand is my go-to because it’s fine and dusts beautifully. If you’re making this ahead, the cake actually tastes better the next day as the flavors meld together.
This cake keeps beautifully for 4-5 days in an airtight container at room temperature, wrapped tightly in plastic. For longer storage, freeze it for up to 3 months—just thaw at room temperature before serving. I like to slice it into wedges and freeze those individually so I can grab one whenever chocolate cravings hit. The fudgy center stays intact if you don’t overbake it, so keep an eye on it after the 25-minute mark. Trust me on this—every slice is worth the wait.
Why You’ll Love This Recipe
- One-Bowl Wonder: I swear by this recipe—just mix, bake, done. No fancy layers or tricky techniques; the cocoa and melted dark chocolate do all the heavy lifting while you scrape the bowl once.
- Deep Chocolate Magic: That espresso powder isn’t just for show—it cuts through the sweetness and makes every bite ridiculously rich. The dark chocolate chunks? They melt into fudgy pockets that’ll have you licking the pan.
- Party in a Pan: Slice it for a crowd or save slices for days—it’s that good. Between us, this is my go-to for birthday cakes, book club desserts, or when I’m too tired to bake from scratch (yes, even on a Tuesday night).
- Budget-Busting Luxury: Good chocolate bars and a little cocoa make this taste like a bakery cake, not a splurge. A single 6-inch pan means minimal ingredients stretch for multiple servings—no waste, just satisfaction.
Step-by-step instructions for 6-Inch chocolate fudge cake
Here’s how to bake layers of pure chocolate decadence with a fudgy center that melts in your mouth.
Create the Chocolate Mixture
First, melt the 8 oz dark chocolate bars in a heatproof bowl set over a pot of simmering water—this is called a double boiler. Stir gently until completely smooth, then remove from heat. In a separate bowl, whisk together the 0.75 cup unsweetened cocoa powder, 1.5 cups granulated sugar, 1 tbsp instant espresso powder, 0.5 tsp baking soda, and 0.5 tsp salt. The espresso powder might seem odd, but it deepens the chocolate flavor in a way that’s simply irresistible.
Next, add the melted chocolate to the dry ingredients and whisk until fully combined. Pour in the 0.5 cup vegetable oil and 1 tsp vanilla extract, mixing until smooth. Finally, add the 0.5 cup hot water—this helps create a rich, velvety batter. Let the mixture cool slightly before proceeding; it should be thick but pourable. If it’s too thick, add 1 tablespoon hot water to loosen it.
Mix in Eggs and Prepare the Batter
Crack the 2 whole large eggs into the chocolate mixture and whisk vigorously for 1-2 minutes until the batter is completely smooth and glossy. The eggs add moisture and structure, so make sure they’re fully incorporated. Here’s a pro tip: I like to beat the eggs separately first to ensure no lumps remain in the batter. If you notice any streaks of flour or cocoa, whisk a bit longer until everything is perfectly homogeneous.
Once the batter is smooth, pour it into a 6-inch round cake pan lined with parchment paper. Smooth the top with a spatula, making sure the batter reaches all the way to the edges. Tap the pan gently on the counter a few times to release any air bubbles that might have formed. This step is crucial for preventing cracks in your cake layers.
Bake to a Perfect Fudgy Center
Preheat your oven to 350°F and bake the cake for 30-35 minutes. The cake is done when a toothpick inserted in the center comes out with a few moist crumbs—but no wet batter. Here’s the thing—this cake should have a fudgy center, not be fully set like a traditional cake. If you pull it out too early, it won’t develop that rich, moist texture we’re after.
Let the cake cool in the pan for 10 minutes, then transfer it to a wire rack to cool completely. The cooling process is important; it allows the cake to set properly and makes it easier to slice clean layers later. While it cools, you can prepare your frosting or filling if you’re making a layered cake. The cake will firm up as it cools, but it should still have that signature fudgy texture when sliced.
Layer and Dust for Decadent Perfection
Once completely cooled, slice the cake into two equal layers using a serrated knife. Dust the top of the bottom layer with 0.25 cup powdered sugar—this is optional but adds a beautiful finish. If you’re making a filled cake, spread a layer of chocolate ganache or whipped cream between the layers. For a simpler version, just dust both layers with powdered sugar before serving.
Here’s where it gets fun—stack the layers and dust the top with more powdered sugar for that bakery-style finish. Serve immediately for the best texture, but you can also cover and refrigerate for up to 2 days if you prefer. The cake will keep its fudgy texture when stored properly, though it’s best enjoyed fresh. Each bite should deliver that perfect balance of rich chocolate, moist crumb, and just the right amount of sweetness.
Pro Tips For Making 6 Inch Chocolate Fudge Cake
- Sift the Cocoa: I learned this the hard way—lumpy cocoa powder ruins everything. Sift it twice with the flour before mixing, especially if your recipe calls for more than 3 tablespoons. No sifter? Press it through a fine-mesh strainer with a spoon. Trust me, your cake’s texture will be smoother and richer.
- Melt Chocolate Slow: Dark chocolate bars burn faster than you think. Chop them into small pieces and melt them in a heatproof bowl set over simmering water (double boiler), stirring every 30 seconds. If you microwave, start at 20-second bursts—overcooked chocolate turns grainy, and no one wants that in fudge cake.
- Don’t Overmix Batter: The second you add the espresso powder and buttermilk (or whatever liquid your recipe uses), stop mixing after 15 strokes. Overworking the batter introduces air, which makes the cake dense instead of moist. A few lumps are fine—just fold them out gently with a spatula when pouring into the pan.
- Test for Doneness Early: This cake’s small size means it bakes fast—check it at 25 minutes. Insert a toothpick; it should come out with moist crumbs, not wet batter. If it’s underdone, tent with foil and bake another 2–3 minutes. Overbaking turns the edges tough, and you’ll regret it when you slice into that perfect fudgy center.
Best sauces and condiments for this recipe
Chocolate Ganache
My go-to sauce for this cake is a silky chocolate ganache made with ½ cup heavy cream and ½ cup chopped dark chocolate. Heat the cream until steaming (not boiling), pour over the chocolate, then let sit for 5 minutes before whisking smooth.
Spread between cake layers or drizzle over the top. For extra decadence, fold in 1 tbsp whipped cream to lighten the texture. 🍫
Cream Cheese Frosting
For a tangy contrast, try a cream cheese frosting with 4 oz cream cheese, ¼ cup butter, 1 cup powdered sugar, and 1 tsp vanilla. Beat until fluffy, then spread between layers or pipe swirls on top.
This balances the richness of the fudge cake beautifully. I like to add ½ tsp espresso powder to enhance the chocolate flavor. 🥛
Whipped Cream
Light and airy whipped cream is perfect for a quick, elegant finish. Whip 1 cup heavy cream with 1 tbsp powdered sugar and ½ tsp vanilla until stiff peaks form.
Pipe rosettes around the edges of the cake or dollop between layers. For extra flair, dust with cocoa powder or crushed chocolate sprinkles. ✨
Salted Caramel Drizzle
Elevate your cake with a salted caramel drizzle. Simmer ½ cup sugar in a saucepan until amber, then whisk in ¼ cup heavy cream and 2 tbsp butter.
Finish with a pinch of flaky sea salt and drizzle over the top. The sweet-salty combo complements the chocolate perfectly. 🍯
Peanut Butter Filling
For a nutty twist, spread ¼ cup creamy peanut butter between layers. Warm it slightly to make it easier to spread, then top with extra chocolate shavings. This adds a Southern-style contrast that’s surprisingly delicious. I use Jif Natural for its smooth texture. 🥜
Fresh Berries
Brighten the plate with fresh raspberries or blackberries. Arrange them on top of the cake for a pop of color and acidity that cuts through the richness.
A simple syrup made with 2 tbsp sugar and 2 tbsp water (simmered and cooled) can be drizzled over the berries for extra shine. 🍓
Nutrition facts
Frequently asked questions
Can I use this recipe for a different pan size?
Yes, but you’ll need to adjust the baking time. For an 8-inch pan, bake for 35-40 minutes at 350°F, while a 4-inch pan requires 20-25 minutes. The key is to check for doneness with a toothpick—it should come out with moist crumbs, not wet batter. Divide the batter evenly between pans if making multiple sizes.
Why did my cake crack on top?
Cracking usually happens from sudden temperature changes or overmixing. Let the batter cool slightly before baking, and avoid opening the oven door during the first 20 minutes of baking. Also, make sure your eggs are at room temperature and whisk the batter just until smooth—overmixing develops gluten and causes cracks.
How do I make this cake gluten-free?
Replace the 1.5 cups all-purpose flour with a 1:1 gluten-free baking flour blend (like Bob’s Red Mill). You may need to add ½ tsp xanthan gum if your blend doesn’t contain it. For best results, let the batter rest for 10 minutes before baking to help the gluten-free flour hydrate properly.
Can I bake this cake ahead of time?
Bake it 1 day ahead and store it in an airtight container at room temperature. The flavors actually improve as it sits. If making more than 2 days ahead, freeze the layers wrapped tightly in plastic. Thaw at room temperature before assembling.
What’s the secret to getting that perfect fudgy center?
The fudgy texture comes from three things: not overbaking (pull it when the toothpick has moist crumbs), using high-quality cocoa powder (like Dutch-processed), and keeping the batter thick but pourable. The hot water in the batter also helps create that signature dense texture. Don’t skip the 10-minute cooling in pan—this helps set the center properly.

- 3lb Prime Rib Roast Recipe: Juicy Pink Center Guaranteed in 3 Hours - October 31, 2026
- 5 Spice Cake Recipe: Warmly Spiced Layers With Crunchy Top - October 31, 2026
- 1950’s Macaroni and Cheese Recipe: Nostalgic Creamy Cheese Sauce with Buttery Noodles - October 31, 2026