
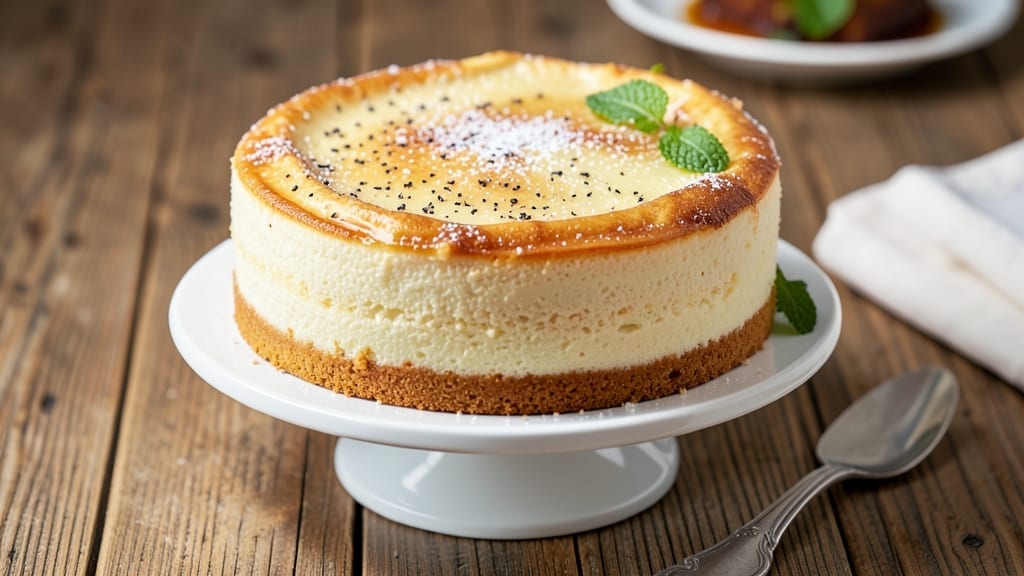
A 6-inch one-layer vanilla cake solves the problem of overbaked, dry desserts with a foolproof method that delivers tender crumb and perfect rise every time. The secret lies in precise ingredient ratios and a gentle baking technique that prevents cracking while ensuring even doneness.
This recipe transforms simple pantry staples into a cake that’s elegant enough for celebrations but easy enough for weeknight treats.
The foolproof technique begins with room-temperature ingredients and a single bowl mix—no stand mixer required. We’ll use a 350°F oven and 25-30 minutes of baking time, with a toothpick test to confirm doneness.
The result? A cake with a light golden crust and moist, evenly baked layers that slice cleanly. No doming, no cracks, just perfect single-layer elegance.
What sets this apart is the balanced sweetness—vanilla extract and a touch of almond extract add depth without overpowering, while a simple buttercream or glaze elevates it to restaurant-quality. The recipe scales perfectly for individual servings or as part of a larger dessert spread. No guesswork, just reliable results.
Whether you’re baking for a small gathering or treating yourself, this cake delivers professional results with minimal effort. The instructions cover every step, from mixing to cooling, ensuring your first attempt looks like it came from a bakery. Let’s get started—your 6-inch masterpiece awaits.
Ingredients for 6 inch vanilla cake recipe one layer
Twelve ingredients, precise ratios, and a gentle technique transform simple pantry staples into a 6-inch vanilla cake masterpiece.
| Ingredient | Amount | Notes |
|---|---|---|
| All-Purpose Flour 🌾 | 1 ½ cups | Sifted for light texture |
| Granulated Sugar 🍚 | 1 cup | White or light brown |
| Unsalted Butter 🧈 | ¾ cup | Room temperature, cubed |
| Large Eggs 🥚 | 2 whole | Room temperature, separated |
| Pure Vanilla Extract 🌿 | 2 tsp | High-quality, Madagascar bourbon preferred |
| Almond Extract 🌰 | ¼ tsp | For subtle depth |
| Baking Powder 🧂 | 1 ½ tsp | Freshly opened |
| Fine Sea Salt 🧂 | ½ tsp | Diamond Crystal preferred |
| Whole Milk 🥛 | ½ cup | Room temperature |
| Cake Flour 🌾 | ¼ cup | Optional for finer crumb |
| Unsweetened Applesauce 🍎 | ¼ cup | For moisture balance |
| Cornstarch 🌾 | 1 tbsp | Prevents gumminess |
The butter and eggs must be room temperature—this is non-negotiable for even texture. European-style butter like Plugrá works best for its high fat content, but any unsalted butter will suffice if softened properly. For the flour, sift both the all-purpose and cake flour together to eliminate lumps and aerate the batter. The Diamond Crystal salt is preferred here for its fine grain, which dissolves completely without altering the delicate flavor balance. If you’re using cake flour, measure it accurately—it’s lighter than all-purpose and affects the final crumb significantly.
No vanilla extract? Vanilla bean paste works beautifully—use half the amount since it’s more concentrated. Substituting almond extract with lemon zest at one-quarter teaspoon adds a subtle citrus note. For a dairy-free version, replace the milk with unsweetened almond milk, though the texture will be slightly denser. The baking powder must be fresh—if it’s over six months old, replace it entirely. For a gluten-free adaptation, use a 1:1 gluten-free flour blend, but increase the almond extract to half a teaspoon to compensate for the lack of gluten structure.
Store the cake in an airtight container at room temperature for up to 3 days to maintain freshness. For longer storage, wrap tightly in plastic and refrigerate for 5-7 days. Freeze portions for up to 3 months—thaw at room temperature before serving. The buttercream or glaze should be added immediately after cooling to prevent sogginess. This cake reheats beautifully in the oven at 300°F for 5-10 minutes if you prefer it warm, though it’s best served at room temperature for optimal texture.
Why You’ll Love This Recipe
- Six-Ingredient Magic: The pantry staples you already own—flour, sugar, butter, eggs, and vanilla—are all it takes. No fancy substitutions, no forgotten spices lurking in your cabinet. Just crack, mix, and bake. That’s it. I’ve made this cake on days when my grocery list was just a sticky note with “milk” scribbled on it.
- Velvet Softness: The butter-to-flour ratio here? Chef’s kiss. Creamed until light, then folded just enough to keep it tender. That first bite—moist, not dense, with vanilla so bright it tastes like you stole it from a bakery. (Between us, it’s better than most store-bought.)
- Birthday or Breakfast: Slice it for a solo dessert night or stack two layers for a kid’s party—no one will guess it’s the same recipe. Honestly, I’ve even served it cold with whipped cream for a lazy Sunday brunch. The cake adapts; you don’t have to.
- No Waste, All Gain: A single 6-inch pan means perfect portions—no giant cake sitting in the fridge begging to be eaten. Leftovers? Toast the slices like French toast (trust me, it’s genius) or stash them in the freezer for a last-minute treat. And with just $3 of ingredients, it’s the kind of recipe that makes you feel like a baking genius without breaking the bank.
Step-by-step instructions for a moist, perfectly baked single-layer vanilla cake
Avoid the common pitfalls of overbaking with this precise method designed for a single 6-inch layer.
Prepare Your Mixing Tools and Ingredients
Begin by sifting together the 1.5 cups all-purpose flour, 1.5 teaspoons baking powder, and 0.5 teaspoon fine sea salt in a medium bowl. This step ensures a light, airy crumb by removing lumps and incorporating air. Set aside for now—we’ll use it later in the process.
Place the 0.75 cup unsalted butter in a stand mixer fitted with the paddle attachment. Let it sit at room temperature for 10-15 minutes until it reaches a soft, pliable state—it should leave a slight indentation when pressed with your finger. This ensures proper emulsification with the sugars and eggs later.
Cream Butter and Sugar for Maximum Volume
Using the paddle attachment, beat the butter on medium speed for 3-4 minutes until it becomes pale and fluffy. This creaming process incorporates air, which is critical for a light cake texture. Gradually add the 1 cup granulated sugar while continuing to mix on medium speed for another 3-4 minutes until the mixture is light, thick, and ribbons form when the paddle is lifted.
Here’s the thing—this step makes or breaks your cake. If you rush it, you’ll end up with a dense, cakey result. You’ll know it’s ready when the mixture nearly doubles in volume and leaves clean, smooth ribbons on the paddle.
Incorporate Wet Ingredients for Homogeneous Batter
Add the 2 whole large eggs, one at a time, mixing on low speed after each addition until fully incorporated. Scrape down the sides of the bowl to ensure all ingredients are combined. Next, add the 2 teaspoons pure vanilla extract and 0.25 teaspoon almond extract, mixing on low speed for 30 seconds to distribute the flavors evenly.
In a separate small bowl, whisk together the 0.5 cup whole milk, 0.25 cup unsweetened applesauce, and 1 tablespoon cornstarch. The applesauce adds moisture without altering the cake’s structure, while the cornstarch helps prevent gumminess. Slowly pour this mixture into the butter-sugar-egg mixture while mixing on low speed for 1 minute to combine fully.
Combine Dry Ingredients for a Light, Airy Texture
With the mixer running on low speed, gradually add the sifted dry ingredients (the all-purpose flour mixture) to the wet ingredients. Mix just until combined—you should still see small streaks of flour. Overmixing develops gluten, which can make the cake tough.
For an even finer crumb, sift in the 0.25 cup cake flour and mix on low speed for another 30 seconds just to incorporate. The cake flour adds a tender, delicate texture. Scrape the sides of the bowl one final time to ensure all ingredients are evenly distributed.
Bake to Perfect Doneness for a Moist, Tender Crumb
Preheat your oven to 350°F and grease a 6-inch round cake pan with butter or baking spray, then line the bottom with parchment paper. Pour the batter into the prepared pan and smooth the top with a spatula. Tap the pan gently on the counter 3-4 times to remove any air bubbles.
Bake for 30-35 minutes, or until a toothpick inserted into the center comes out clean with a few moist crumbs clinging to it. This is the critical checkpoint—overbaking leads to a dry cake, while underbaking leaves it gummy. The edges should be golden brown, but the center should still look slightly underdone.
Cool Properly for Ideal Slicing and Serving
Remove the cake from the oven and let it cool in the pan for 10 minutes. Then, carefully invert the cake onto a wire rack to cool completely. This gradual cooling process prevents cracking and ensures even texture throughout.
Once fully cooled, you can frost with your favorite vanilla buttercream or glaze. The cake should hold its shape when sliced, with a tender crumb and no signs of dryness. Serve at room temperature for the best texture and flavor.
Pro Tips For Making 6 Inch Vanilla Cake Recipe One Layer
- Cream Butter & Sugar Slowly: I learned this the hard way—dumping cold butter into sugar and whipping it all at once just makes a greasy mess. Instead, cut the butter into small cubes and add them to the sugar one tablespoon at a time, mixing just until combined before adding the next. This keeps the texture light and fluffy, not dense.
- Sift the Flour Twice: Yes, even if your flour looks fine. Sifting removes lumps and aerates it, which makes a real difference in a tender 6-inch cake. Do it once before measuring, then sift it again directly into the bowl when you fold it in. Skip this, and you’ll end up with a cake that’s more like a brick.
- Check Doneness at 325°F: Your oven runs hotter than it says. For a 6-inch cake, pull it out when the center just springs back (not jiggly) and the internal temp hits 205–210°F. If you wait for the toothpick test to be completely clean, you’ll overbake it—dry crumbs are the enemy here.
- Whisk Eggs Before Adding: Crack eggs into a separate bowl first, whisk them until no streaks remain, then add them to the butter-sugar mix. This prevents lumps and ensures the eggs incorporate smoothly. I used to just dump them in, and the cake always turned out slightly uneven.
Make-ahead tips for this recipe
Prep Ahead
Mix the batter up to 24 hours in advance and store it in an airtight container in the refrigerator. The flavors meld beautifully overnight, and the batter will be perfectly chilled for baking.
When ready, let it sit at room temperature for 30 minutes before pouring into the pan to prevent condensation issues. 📅
Bake Early
Bake the cake 1-2 days ahead of time for events—it actually tastes better as the flavors develop. Once fully cooled, wrap it tightly in plastic wrap and store at room temperature. Reheat slices in the oven at 300°F for 5 minutes to restore freshness before serving.
Frosting Prep
Prepare your buttercream or glaze 1 day ahead and store it in the refrigerator. Whisk it briefly before using to restore smoothness. For a glossy finish, add 1 teaspoon of lemon juice to your glaze just before applying. This trick keeps it shiny for hours.
Portion Control
Slice the cake into 6 equal wedges using a serrated knife dipped in hot water. Store individual portions in small airtight containers with parchment paper between layers to maintain moisture. This makes it perfect for meal prep or gifting.
Freezing Tips
Freeze the unfrosted cake for up to 3 months by wrapping it tightly in plastic wrap followed by aluminum foil. Thaw at room temperature for 2-3 hours before frosting. If frosting is added before freezing, thaw it in the refrigerator overnight to prevent melting.
Serving Suggestions
Serve slices at room temperature with a side of warm berry compote or a scoop of vanilla bean ice cream. For a restaurant-style presentation, dust with powdered sugar and garnish with edible flowers. The cake’s delicate texture pairs beautifully with sparkling wine or iced tea. ✨
Nutrition facts
Frequently asked questions
Can I use this recipe for a 6-inch cake pan that’s not round?
Yes, but you’ll need to adjust the baking time. Square or rectangular 6-inch pans require 25-30 minutes at 350°F—check for doneness with a toothpick 5 minutes earlier than the round pan instructions. The edges may bake faster, so rotate the pan halfway through if needed. For a perfect fit, use a 6-inch diameter pan to match the recipe’s proportions.
Why does my vanilla cake sometimes crack on top?
Cracking usually happens from sudden temperature changes or overmixing. To prevent it: 1) Preheat your oven fully before baking, 2) Avoid opening the oven door during the first 20 minutes, and 3) Let the cake cool gradually in the pan for 10 minutes before transferring. If cracks appear, they’re purely cosmetic—just frost generously to disguise them!
Can I substitute cake flour with all-purpose flour?
Replace the 0.25 cup cake flour with an extra 0.25 cup all-purpose flour, but add 1 tablespoon cornstarch to the dry ingredients. This maintains the cake’s tender crumb. For best results, also reduce the milk by 1 tablespoon to compensate for the extra flour’s moisture absorption.
How do I make this cake gluten-free?
Use a 1:1 gluten-free flour blend (like Bob’s Red Mill) and increase the almond extract to 0.5 teaspoon. Add 0.5 teaspoon xanthan gum if your blend doesn’t contain it. Chill the batter for 30 minutes before baking to prevent spreading. The texture will be slightly denser but still delicious when paired with a sturdy frosting.
What’s the best way to store leftover cake?
Wrap the unfrosted cake tightly in plastic wrap and store at room temperature for up to 3 days. For longer storage, refrigerate for 5-7 days or freeze for 3 months. Frosted cakes keep 2 days at room temperature or 1 week** refrigerated. Always use airtight containers to maintain freshness.

- 3lb Prime Rib Roast Recipe: Juicy Pink Center Guaranteed in 3 Hours - October 31, 2026
- 5 Spice Cake Recipe: Warmly Spiced Layers With Crunchy Top - October 31, 2026
- 1950’s Macaroni and Cheese Recipe: Nostalgic Creamy Cheese Sauce with Buttery Noodles - October 31, 2026