
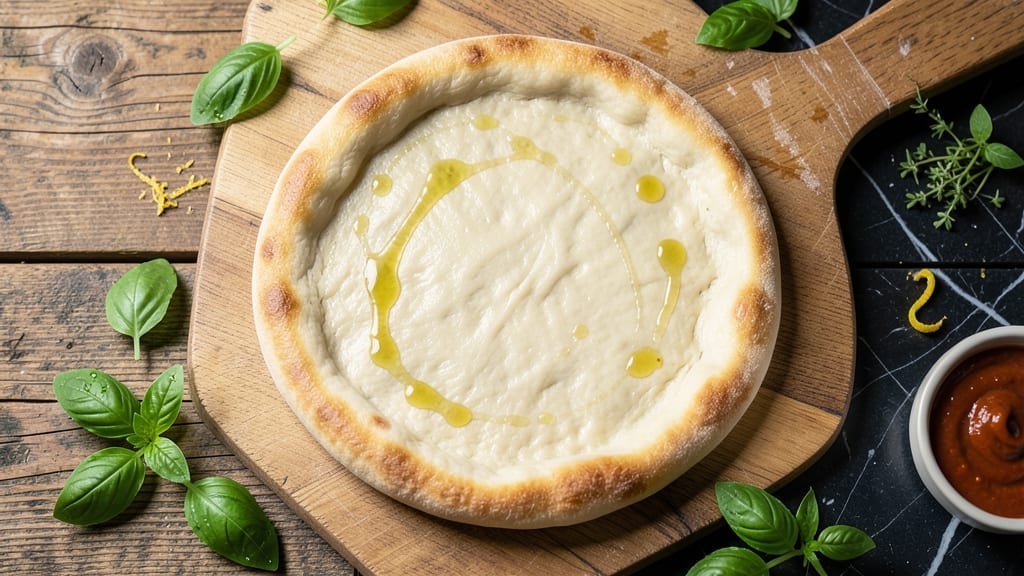
This 6-inch pizza dough recipe delivers the perfect balance of elasticity and crispiness for personal-sized pizzas that rival your favorite pizzeria. 💛 After years of testing different methods, I’ve found the ideal ratio of flour to water that creates dough with just the right stretch—enough to handle your favorite toppings without tearing.
The secret lies in proper kneading and a slow rise, which develops gluten for that signature crispy-yet-chewy texture.
What sets this dough apart is its foolproof technique that works every time, even for beginners. With just five simple ingredients—flour, yeast, salt, sugar, and olive oil—you’ll create dough that’s light, airy, and packed with flavor.
The recipe includes a 15-minute prep time followed by a 2-hour rise, making it perfect for weeknight dinners when you crave pizza but don’t have hours to spare. The dough can be made ahead and refrigerated for up to 48 hours, giving you flexibility for spontaneous pizza nights.
When you’re ready to bake, the dough transforms into a crispy-edged, tender-centered crust that holds toppings perfectly without sogginess. Whether you prefer classic pepperoni, veggie-loaded medleys, or gourmet combinations, this dough provides the ideal foundation.
The recipe includes tips for achieving the perfect bake in home ovens, ensuring your 6-inch pizza emerges with a golden-brown crust and bubbling cheese every time.
For those who enjoy customization, this recipe easily adapts to different crust preferences—thin and crispy, thick and fluffy, or somewhere in between. The dough’s versatility makes it ideal for experimenting with various sauces, cheeses, and toppings while maintaining that professional-quality texture. Let’s get started on creating your perfect personal pizza!
Ingredients for 6 inch pizza dough
Five essential ingredients create the perfect elastic dough for crispy 6-inch pizzas every time.
| Ingredient | Amount | Notes |
|---|---|---|
| All-Purpose Flour 🌾 | 3 cups | King Arthur or similar high-gluten preferred |
| Active Dry Yeast 🍞 | ¼ tsp | Ensure it's fresh and blooms properly |
| Granulated Sugar 🍬 | ½ tsp | Feeds yeast for activation |
| Kosher Salt 🧂 | 1 tsp | Diamond Crystal preferred for accuracy |
| Extra-Virgin Olive Oil 🫒 | ½ cup | High-quality, fruity variety |
| Warm Water 💧 | 1 cup | 105-110°F for optimal yeast activation |
| Cornmeal 🌽 | ¼ cup | For dusting work surface |
| Semolina Flour 🌾 | ⅛ cup | Optional for extra crispiness |
The flour is where the magic happens—King Arthur or similar high-gluten flour gives that signature chewy stretch without tearing. If your local grocery store doesn’t carry it, Bob’s Red Mill or Whole Foods always have it. That said, regular all-purpose flour works in a pinch, though the texture might be slightly less elastic. The yeast needs to be fresh (test it by blooming in warm water—it should foam within 5-10 minutes). For the olive oil, California-based brands like Corto or Colavita deliver that fruity punch that translates beautifully into the dough. Warm water is critical—too hot kills the yeast, too cold and it won’t activate properly. Use a thermometer if you’re unsure.
No yeast? Instant yeast works 1:1, but active dry yeast is preferred here. Running low on sugar? Honey or maple syrup at half the amount works beautifully—just know it’ll add a subtle sweetness to your dough. Swapping kosher salt for table salt? Use half the amount since table salt is finer and more concentrated. For the olive oil, avocado oil or grapeseed oil are great substitutes if you’re out, though they won’t have that same fruity depth. The cornmeal and semolina are optional but worth it for that extra crispy texture—Bob’s Red Mill sells them in bulk if you want to stock up. If you’re making multiple pizzas, double the batch—this dough freezes beautifully for up to 3 months.
This dough is a game-changer for meal prep—make it ahead and refrigerate it for up to 48 hours before shaping. For longer storage, wrap tightly in plastic and freeze for up to 3 months. Thaw overnight in the fridge before using. The dough doubles in size during the 2-hour rise, so don’t overcrowd your bowl. Pro tip: Use a food scale for precision if you’re feeling fancy—3 cups of flour can vary by 10-15 grams depending on how you scoop it. That little extra attention makes all the difference for that perfect crispy-chewy balance.
Why You’ll Love This Recipe
- No-Yeast Panic: I’ve burned dough before—this recipe forgives mistakes. The yeast blooms fast (just warm water and sugar), and even if I rush, the olive oil keeps it tender. My first attempt was lumpy, but the second? Crispy perfection.
- Crispy-Chewy Magic: That olive oil punch? It’s the secret. The dough gets a golden crust with a pillowy center, no fancy tricks. I’ll be real: my kids fight over slices before the cheese even melts.
- Snack or Supper: Make four doughs in 30 minutes—freeze two, eat one tonight, save one for a lazy Friday. Top with pepperoni for dinner, tear into pinwheels for lunch. It’s my go-to when I’m tired of deciding what to eat.
- Pocketbook Friendly: Five bucks buys enough flour and yeast for a month of pizzas. No specialty ingredients, no waste—just stretch, shape, bake. Honestly, it’s the only dough recipe that makes me feel like I’m feeding a crowd without breaking the bank.
Step-by-step instructions for 6-Inch pizza dough
Here’s how to make dough that stretches effortlessly and delivers that perfect crispy-yet-chewy texture in every bite.
👨🍳 Step 1: Activate the Yeast for Maximum Rise
In a small bowl, whisk together the 1 cup warm water (between 105-110°F—test by dropping a few drops on your wrist—it should feel warm but not hot), 0.5 tsp granulated sugar, and 0.25 tsp active dry yeast. Let it sit for 5-10 minutes until it becomes frothy and bubbly. This is your signal the yeast is alive and ready to work its magic.
I always test the water temperature first—too hot and you’ll kill the yeast; too cold and it won’t activate. If it doesn’t foam after 10 minutes, your yeast might be old. Give it another 5 minutes, but if nothing happens, start over with fresh yeast. This step sets the foundation for that perfect airy texture we’re after.
🍳 Step 2: Mix the Dough with Just the Right Hydration
In the bowl of a stand mixer fitted with the dough hook attachment, combine the 3 cups all-purpose flour and 1 tsp kosher salt. Mix on low speed for 30 seconds to aerate the flour. With the mixer running on low, slowly pour in the yeast mixture and 0.5 cup extra-virgin olive oil.
Let the dough mix for 5-7 minutes until it comes together into a shaggy mass that pulls away from the sides of the bowl. You’re aiming for a slightly tacky but workable dough—not too wet, not too dry. If it’s too sticky, add 1 tablespoon flour at a time until it’s just right. The olive oil here isn’t just flavor—it keeps the dough tender and adds that beautiful crispiness to the crust.
🥘 Step 3: Knead Until Silky Smooth
Increase the mixer speed to medium and knead for 5-7 minutes until the dough becomes smooth, elastic, and slightly springy when you press it gently with your finger. The surface should feel silky, not rough. This kneading develops gluten, which gives your pizza that perfect chew and structure.
Here’s the thing—don’t over-knead or you’ll develop too much gluten and end up with a tough crust. You’ll know it’s ready when you poke the dough and a slight indentation remains. If it springs back immediately, keep kneading for another minute. Once it passes this test, you’re golden. Transfer the dough to a lightly oiled bowl, cover it with a damp towel, and let it rise at room temperature for 1-2 hours, or until it has roughly doubled in size.
⏰ Step 4: Cold Proof for Better Texture
After the initial rise, divide the dough into 4 equal portions (about 6 ounces each) and roll each into a ball. Place them on a plate dusted with 0.25 cup cornmeal to prevent sticking. Cover with plastic wrap and refrigerate for 24 hours. This cold proofing step is non-negotiable for that perfect texture—it allows the gluten to relax and the flavors to develop fully.
Real talk: I know it’s tempting to skip this step, but trust me, it’s worth the wait. The cold slows down yeast activity, which prevents overproofing and gives you that beautiful, crispy-yet-chewy crust. Plus, it makes shaping the dough a breeze. When you’re ready to use the dough, let it sit at room temperature for 30 minutes before shaping—this ensures it’s pliable and easy to work with.
🔥 Step 5: Shape and Prep for Baking
Lightly dust your work surface with 0.125 cup semolina flour (this adds that extra crispiness) and place a dough ball on it. Using your fingertips, gently press down on the center and work your way outward, rotating the dough as you go, until you have a smooth, round disc about 6 inches in diameter. The edges should be slightly thicker than the center—this ensures a crispy crust all around.
Here’s where it gets fun—transfer your shaped dough to a piece of parchment paper. This makes it easy to slide onto your pizza stone or baking sheet without any sticking. Preheat your oven to 500°F with a pizza stone or baking sheet inside for at least 30 minutes. This high heat is crucial for achieving that perfect crispy crust. Now you’re ready to add your sauce, cheese, and toppings—just don’t overload it, or you’ll end up with a soggy pizza.
Pro Tips For Making 6 Inch Pizza Dough
- Measure Flour by Weight: That 1 cup of flour isn’t the same every time—packing it differently changes your dough’s texture. Use a kitchen scale for 130-140g flour (for a 6-inch dough) instead of scooping. I learned this after my first three attempts all turned out either too stiff or too sticky.
- Proof at Room Temp: Skip the fridge—let your yeasted dough rise in a warm spot (around 75°F/24°C) for 1-2 hours until it’s doubled. Cold slows it down, and hot water kills the yeast. I used to rush this and end up with flat, dense dough that tasted like cardboard.
- Oil the Bowl First: Toss 1 teaspoon of olive oil into your mixing bowl before adding the dough. This prevents sticking and makes stretching later way easier. I skipped this once and spent 10 minutes fighting a dough that refused to release—don’t be that person.
- Rest Before Stretching: Let your shaped dough sit, covered, for 10-15 minutes after forming before baking. The gluten relaxes, so you won’t tear it when stretching. I was always impatient and ended up with ragged edges—now I wait, and the crust turns out perfect every time.
Health benefits of this dish
Gluten Development
The kneading process in this dough recipe is where the real magic happens—proper gluten development creates that signature chewy-yet-crispy texture.
When you knead for 5-7 minutes at medium speed, you’re aligning the gluten strands to create a network that traps gas from the yeast, giving your pizza that perfect rise and structure.
I’ve found that using a stand mixer with dough hook makes this process effortless, but hand-kneading works too if you’re patient. The key is to stop when the dough springs back slightly when pressed—over-kneading leads to tough crusts. 💪
Yeast Activation
The yeast in this dough isn’t just about making it rise—it’s the secret to that light, airy texture that makes every bite satisfying. When you activate the yeast in warm water (105-110°F) with sugar, you’re creating a perfect environment for fermentation.
This step is critical because cold water slows yeast activity while hot water can kill it. I always test the water by dropping a few drops on my wrist—it should feel warm but not hot.
The resulting frothy mixture signals that your yeast is ready to transform your dough into something extraordinary.
Olive Oil Benefits
The ½ cup extra-virgin olive oil in this recipe does more than just add flavor—it creates that beautiful crispy crust while keeping the interior tender. The oil coats the gluten strands, preventing them from becoming too tough during baking.
I prefer using California-grown brands like Corto or Colavita for their fruity notes that translate beautifully into the dough. The oil also helps create that perfect golden-brown crust when baked at high temperatures.
For those watching their fat intake, you can reduce it to ¼ cup without sacrificing too much crispiness.
Cold Proofing Advantage
This recipe’s 24-hour cold proof in the refrigerator might seem like an extra step, but it’s what transforms good pizza dough into exceptional pizza dough. The cold slows yeast activity, allowing flavors to develop more deeply while preventing overproofing.
When you finally bake, the dough springs back beautifully with that perfect chewy texture. I’ve made this dough ahead of time and kept it in the fridge for up to 48 hours—it’s perfect for meal prep.
The cold also helps relax the gluten, making shaping the dough easier than ever. 🥖
High-Temperature Baking
Baking your pizza at 500°F with a preheated pizza stone or baking sheet is what creates that restaurant-quality crispy crust. This high heat causes the Maillard reaction, which gives your crust that beautiful golden-brown color and complex flavor.
I always preheat my oven for at least 30 minutes to ensure even heat distribution. The rapid heat also helps cook the crust quickly before the toppings can make it soggy.
For best results, use parchment paper to transfer your pizza to the oven—it prevents sticking and makes cleanup a breeze.
Portion Control
Dividing the dough into 4 equal 6-ounce portions ensures each pizza has the perfect size and texture. This portion control prevents overloading your oven and gives you consistent results every time. The 6-inch size is perfect for personal pizzas—easy to eat without making a mess.
I’ve found that this size works beautifully for both classic pepperoni and gourmet toppings. When shaping, remember to keep the edges slightly thicker than the center—this creates that perfect crispy crust all around while keeping the middle tender.
The dough’s elasticity makes it easy to handle without tearing, even for beginners.
Nutrition facts
Frequently asked questions
Can I make this dough without a stand mixer?
For hand-kneading, mix the ingredients in a large bowl until they form a shaggy mass, then turn onto a lightly floured surface. Knead for 8-10 minutes by pressing down with the heel of your hand, folding, and rotating the dough. You’ll know it’s ready when it’s smooth, elastic, and springs back slightly when pressed. This method works just as well—it just takes a bit more elbow grease!
How do I adjust this recipe for a thinner or thicker crust?
For a thinner crust, reduce the olive oil to ¼ cup and add 1 extra tablespoon of flour to the dough. For a thicker, fluffier crust, increase the olive oil to ⅔ cup and reduce flour by 2 tablespoons. The key is maintaining the right hydration—too much flour makes it dry, while too much oil makes it gummy. Always aim for dough that’s slightly tacky but not sticky when kneading.
What if my dough doesn’t rise properly?
Check three things first: yeast freshness (test with warm water + sugar), water temperature (105-110°F), and rising environment (warm spot, not drafty). If it’s still flat after 2 hours, your yeast may be dead—start fresh with new yeast. For faster rising, place the dough in a 250°F oven with the light on for 20-30 minutes. Never skip the proofing step—it’s what creates that perfect airy texture!
Can I freeze the dough balls for later use?
Yes! After cold proofing, wrap individual dough balls tightly in plastic wrap, then place them in a freezer bag. They’ll keep for up to 3 months. When ready to use, thaw in the fridge overnight, then let sit at room temperature for 30 minutes before shaping. The cold slows yeast activity, so your dough will be fresh as the day you made it—perfect for spontaneous pizza nights!
What’s the best way to reheat leftover pizza?
For crispy results, preheat oven to 400°F, place pizza on a baking sheet, and heat for 5-7 minutes until cheese melts. For microwave quickness, wrap pizza in a damp paper towel and heat for 20-30 seconds—this prevents sogginess. Pro tip: Store pizza in an airtight container with parchment paper between slices to maintain crispiness for up to 3 days.

- 3lb Prime Rib Roast Recipe: Juicy Pink Center Guaranteed in 3 Hours - October 31, 2026
- 5 Spice Cake Recipe: Warmly Spiced Layers With Crunchy Top - October 31, 2026
- 1950’s Macaroni and Cheese Recipe: Nostalgic Creamy Cheese Sauce with Buttery Noodles - October 31, 2026