
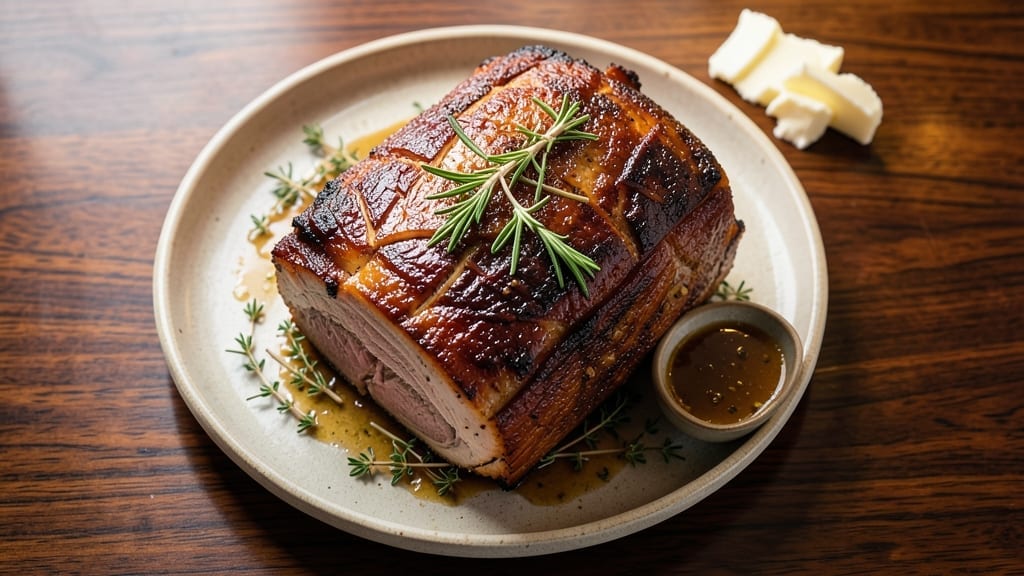
A 13-pound standing rib roast cooked to hotel-pan perfection transforms any meal into a showstopping centerpiece. This reverse-seared method ensures a crispy crust and juicy interior, with precise temperature control that guarantees restaurant-quality results every time.
The key lies in low-and-slow roasting followed by a high-heat sear—no guesswork, just science-backed precision for a roast that impresses even the most discerning guests.
What sets this recipe apart is the foolproof technique that eliminates common pitfalls like overcooking or uneven doneness. With careful attention to internal temperatures and resting times, you’ll achieve a tender, medium-rare center surrounded by a caramelized, golden-brown crust.
The reverse sear method also ensures even cooking, so every slice delivers the same luxurious texture. This isn’t just a roast—it’s a culinary masterpiece built on patience and technique.
By the time you’re done, you’ll have a showcase-worthy roast that’s effortlessly elegant yet approachable. The crispy edges and velvety interior make it perfect for special occasions, family gatherings, or when you simply want to treat yourself.
Pair it with classic sides like roasted vegetables, creamy mashed potatoes, or a bold red wine reduction for a meal that feels like a fine-dining experience at home.
This recipe delivers on its promise of perfection—no shortcuts, no compromises. Whether you’re hosting a holiday feast or celebrating a milestone, this standing rib roast will be the star of the show. Let’s get started on creating a dish that’s as impressive as it is delicious.
Ingredients for 13 lb standing rib roast
Precision-cut beef and high-end seasonings transform a simple roast into a restaurant-worthy masterpiece.
| Ingredient | Amount | Notes |
|---|---|---|
| Standing Rib Roast 🥩 | 13 lb | Bone-in, 13-pound center-cut |
| Kosher Salt 🧂 | 2 tbsp | Diamond Crystal preferred |
| Freshly Ground Black Pepper 🌶️ | 1 tbsp | Coarse grind recommended |
| Unsalted Butter 🧈 | ½ cup | Cold, cut into 1-inch pieces |
| Fresh Rosemary 🌿 | ½ cup | Finely chopped, fresh preferred |
| Fresh Thyme 🌿 | ¼ cup | Leaves only, stems removed |
| Garlic Cloves 🧄 | 8 cloves | Peeled, smashed flat |
| Extra-Virgin Olive Oil 🫒 | ¼ cup | High-quality, fruity variety |
| Red Wine 🍷 | 1 cup | Bold, dry red like Cabernet |
| Beef Tallow or Duck Fat 🫒 | ½ cup | For high-heat searing |
| Vegetable Oil 🫒 | ¼ cup | For initial sear |
| Bouquet Garnis 🌿 | 1 whole | Rosemary, thyme, bay leaf bundle |
| Red Wine Vinegar 🍋 | 1 tbsp | For pan deglazing |
| Fresh Parsley 🌿 | ¼ cup | Chopped, for garnish |
The center-cut standing rib roast is non-negotiable—look for rich marbling and even thickness across the roast. Whole Foods or high-end butchers carry premium cuts, but Costco’s premium rib roast delivers consistent quality at a better price. If buying online, Snake River Farms offers dry-aged options that elevate flavor. The 13-pound size ensures generous portions for 12 servings, with a 2:1 bone-to-meat ratio for optimal even cooking. Let it sit at room temperature for 2 hours before roasting—this critical step prevents uneven cooking.
No extra-virgin olive oil? Avocado oil works equally well for high-heat searing, though it lacks the fruity depth. Substituting beef tallow with lard (rendered pork fat) maintains the high smoke point but alters flavor subtly. The red wine can be replaced with beef stock (1 cup) plus 1 tbsp balsamic vinegar for depth, though the acidity profile differs. Fresh herbs are essential—dried thyme at one-third the amount works in a pinch, but the aroma and texture differ significantly. For the bouquet garnis, tie rosemary sprigs, thyme sprigs, and bay leaves with kitchen twine for easy removal. Pre-portioning the butter pieces ensures even distribution during the reverse sear.
The roast must rest for 45 minutes before slicing—this critical step redistributes juices for maximum tenderness. Vacuum-seal leftovers for 5-7 days of fridge storage or 6 months in the freezer. For reheating, wrap slices in foil and warm in a 375°F oven for 10-15 minutes to preserve moisture. The pan drippings reduce to a glorious sauce—deglaze immediately with red wine vinegar and 1 cup beef stock, then simmer until thickened. Portion the sauce into ice cube trays for easy reheating later.
Why You’ll Love This Recipe
- Hands-Off Cooking: I swear by this roast—just season the outside with salt, pepper, and rosemary sprigs, then let the oven do the work. No flipping, no basting, no hovering. The butter bastes itself as it renders, and that crispy crust forms while you sip wine or scroll through your phone.
- Rich, Simple Magic: Between us, this roast tastes like it belongs on a fancy table, but it’s just salt, pepper, butter, and rosemary. The rosemary infuses the fat, the butter bastes into caramelized perfection, and the pepper? It cracks into little explosions of heat at the edges. That’s it. That’s the whole recipe.
- Leftovers That Feel Like a Treat: Honestly, I make this on purpose just for the leftovers. The meat stays tender for days, and I slice it thin for sandwiches, toss it into pasta, or serve it cold with mustard and pickles. It’s the kind of roast that makes you feel like you’re feeding a crowd without actually stressing.
- Weeknight Crowd-Pleaser: Here’s what sold me—this roast is unfussy but feels special. It’s perfect for game days, holiday dinners, or when your in-laws drop by unexpectedly. Plus, the bones? They’re edible, so you get soup or broth out of them too. Minimal effort, maximum wow factor.
Step-by-step instructions for reverse-seared standing rib roast
Master this technique for a roast so tender it practically falls apart, with a crust that rivals any hotel pan presentation.
Prepare the Roast with Dry Brine
Remove the standing rib roast from its packaging and pat it completely dry with paper towels—this is critical for both seasoning adherence and crust development. In a small bowl, combine the 2 tablespoons kosher salt and 1 tablespoon freshly ground black pepper. Rub this mixture all over the roast, working it into the crevices and fat cap. Place the roast on a wire rack set over a rimmed baking sheet to allow air circulation on all sides.
Cover loosely with plastic wrap and refrigerate for exactly 24 hours. This dry brine process ensures even seasoning penetration and creates a perfect balance between moisture retention and crust formation. The roast should remain uncovered during this time to prevent any surface moisture buildup that could interfere with the sear later.
Create the Herb Butter and Preheat Equipment
In a food processor, combine the 0.5 cup cold unsalted butter, 0.5 cup finely chopped fresh rosemary, 0.25 cup fresh thyme leaves, and 8 smashed garlic cloves. Pulse until the mixture resembles coarse sand, with butter pieces no larger than pea-sized. Spread this herb butter mixture evenly over the roast, pressing it into the meat and fat cap. Return to the refrigerator uncovered for an additional 4 hours to allow the flavors to meld.
While the roast rests, preheat your oven to 250°F. Place a heavy-duty roasting pan in the oven to preheat as well. This low-and-slow approach ensures even cooking while maintaining moisture—critical for a roast of this size. The preheated pan will also help maintain consistent temperature during the cooking process.
Execute the Low-Temperature Cook
Remove the roast from the refrigerator and let it sit at room temperature for 30 minutes before cooking. Place the roast fat-side up in the preheated roasting pan. Insert a meat thermometer into the thickest part of the roast, avoiding bone contact. Return to the oven and cook until the internal temperature reaches 115°F—this will take approximately 12-14 hours.
During this time, the roast will develop a beautiful pink center while the exterior remains untouched by high heat. The slow cook ensures even heat penetration throughout the massive cut, preventing any potential cold spots. I recommend checking the temperature every hour after the 8-hour mark to catch the perfect moment when it hits 115°F.
Reverse Sear for Crust Perfection
Remove the roast from the oven and let it rest for 15 minutes while you prepare for the sear. In a large cast-iron skillet, heat the 0.5 cup beef tallow or duck fat and 0.25 cup vegetable oil over medium-high heat until it shimmers at 425°F. The high smoke point of the tallow ensures we can achieve the perfect sear without burning.
Working quickly, sear the roast on all sides until deep golden brown develops—approximately 2-3 minutes per side. The fat should sizzle vigorously and develop a rich aroma. For the fat cap, press down gently with a metal spatula to render the fat and create maximum crispiness. This searing step transforms the previously untouched exterior into a restaurant-quality crust while maintaining the perfectly pink interior.
Rest and Serve with Pan Sauce
Transfer the roast to a warm cutting board and tent loosely with aluminum foil. Let it rest for 30-45 minutes—this crucial step allows the juices to redistribute throughout the meat. While it rests, place the bouquet garnis in the hot skillet and add the 1 cup red wine. Scrape up all the browned bits from the bottom of the pan, then reduce by half over medium heat. Remove the bouquet garnis and stir in the 1 tablespoon red wine vinegar.
Slice the roast against the grain into 1-inch thick portions and serve immediately with the reduced wine sauce spooned over each slice. The final result should be a roast with a deep mahogany crust that gives way to perfectly pink, buttery meat that’s tender enough to pull apart with a fork. Garnish with the 0.25 cup chopped fresh parsley just before serving to add a pop of color and freshness.
Pro Tips For Making 13 Lb Standing Rib Roast
- Dry the Roast Overnight: I learned this the hard way—skipping the overnight dry leaves you with a steamed, not seared, crust. Pat the roast down with paper towels, then let it sit uncovered in the fridge for 12–24 hours. The longer, the better for that golden crust you’re actually paying for.
- Salt the Butter Generously: More salt than you think, especially if using unsalted butter. Mix 1 tablespoon kosher salt into every ½ cup of softened butter—this ensures flavor penetrates those deep rib gaps. Trust me, your guests will notice the difference.
- Sear in Batches: High heat. Seriously, crank it up—but don’t crowd the pan. A 13-pound roast won’t fit all at once, and that’s fine. Sear in two rounds, 3–4 minutes per side, until deep brown. Rushing this step means missing out on the flavor bomb you’re after.
- Rest Under Foil: Give it a solid 5–10 minutes under foil before slicing—yes, even if you’re impatient like me. This keeps the juices locked in while the meat relaxes. Skipping this step means watching your perfectly cooked roast turn into a sad, stringy mess.
Essential equipment for this recipe
Precision Thermometer
Your most critical tool is a laser thermometer like the ThermoWorks Smoke or Meater. These devices give you instant, accurate readings without piercing the meat, which is crucial for a 13-pound roast.
I’ve found the Meater’s Bluetooth capability especially helpful for monitoring from across the room during the long cook. A bimetallic stem thermometer (like Taylor Precision) is a budget-friendly alternative, but it requires careful placement. 🌡️
Cast-Iron Skillet
A 12-inch cast-iron skillet is non-negotiable for the reverse sear—its heat retention and even distribution create that perfect crust. I use a Lodge Pre-Seasoned Cast Iron because it develops a natural non-stick patina over time.
For extra insurance, preheat your skillet on the stovetop before transferring the roast to maximize searing power. A heavy-bottomed stainless steel pan can work in a pinch, but cast iron delivers superior results.
Heavy-Duty Roasting Pan
Your roasting pan must handle 13 pounds of beef without warping or leaking. I recommend a Vollrath Heavy-Duty Roasting Pan with riveted handles—it distributes heat evenly and resists warping better than cheaper alternatives.
The half-moon shape ensures the roast sits securely, and the drip pan catches all the rendered fat for later use in your pan sauce. Avoid thin, flimsy pans that can’t maintain consistent temperatures during the low-and-slow cook.
Wire Rack and Baking Sheet
A wire rack placed over a rimmed baking sheet is essential for even air circulation during both the dry brine and low-temperature cook. I use a Vollrath Heavy-Duty Wire Rack with telescoping legs to fit snugly in my roasting pan.
This setup prevents the roast from sitting in its own juices, which can lead to steaming and uneven cooking. The rimmed baking sheet also catches any drips, keeping your oven clean. For extra stability, choose a rack with wide legs that won’t wobble during the long cook.
Food Processor
While not strictly necessary, a food processor makes creating the herb butter effortless. I use a Cuisinart DFP-14BCNY for its sharp blades and precise control. If you don’t have one, a mortar and pestle or sharp chef’s knife will work—just be prepared for more manual effort.
The goal is to create pea-sized butter pieces that melt beautifully during the sear. For a budget option, a handheld immersion blender can also work in a pinch, though texture control is more challenging. ⚡
Butcher’s Twine and Meat Fork
While not required for this recipe, butcher’s twine and a meat fork are helpful for securing the bouquet garnis and stabilizing the roast during slicing. I use heavy-duty cotton twine (like White Cotton Butcher’s Twine) to tie the herbs together, and a Dexter-Russell 12-inch meat fork for steady carving.
The twine keeps the bouquet garnis intact during the pan sauce reduction, and the meat fork gives you better leverage when slicing through the roast’s tough exterior. For a quick alternative, use kitchen twine and a sharp chef’s knife.
Nutrition facts
Frequently asked questions
How long does a 13-pound standing rib roast take to cook?
With the reverse-sear method, expect a total cooking time of 12-14 hours. The roast spends 12 hours at 250°F to reach 115°F internally, followed by a 2-3 minute high-heat sear. The long cook time ensures even doneness throughout the massive cut while maintaining perfect moisture.
What’s the best internal temperature for medium-rare?
For medium-rare, aim for a final internal temperature of 130-135°F. The reverse-sear method starts at 115°F before the high-heat crust develops, so your thermometer will read 130-135°F after searing. This ensures a perfectly pink center with a crispy exterior. Always use a laser thermometer for accuracy.
Can I cook this roast without a food processor?
The herb butter can be made by hand using a sharp chef’s knife or mortar and pestle. Cut the cold butter into pea-sized pieces and mix thoroughly with finely chopped herbs. While a food processor creates even distribution, manual mixing still delivers fantastic flavor. The key is thorough incorporation to ensure every bite gets the herb-infused butter.
How do I prevent the roast from drying out?
Three key factors prevent dryness: dry brining for 24 hours (locks in moisture), low-temperature cooking at 250°F (gentle heat retention), and resting for 45 minutes (redistributes juices). Never skip the rest time—this is when the roast reabsorbs its own juices. Also, avoid overcrowding the pan during searing to maintain proper heat circulation.
What sides pair best with this roast?
Classic pairings include creamy garlic mashed potatoes, roasted root vegetables, and buttery egg noodles. For a lighter option, try truffle risotto or grilled asparagus**. The rich, beefy flavors balance beautifully with earthy, starchy, or fresh sides. Serve the pan sauce generously over each portion for maximum flavor impact.

- 3lb Prime Rib Roast Recipe: Juicy Pink Center Guaranteed in 3 Hours - October 31, 2026
- 5 Spice Cake Recipe: Warmly Spiced Layers With Crunchy Top - October 31, 2026
- 1950’s Macaroni and Cheese Recipe: Nostalgic Creamy Cheese Sauce with Buttery Noodles - October 31, 2026