
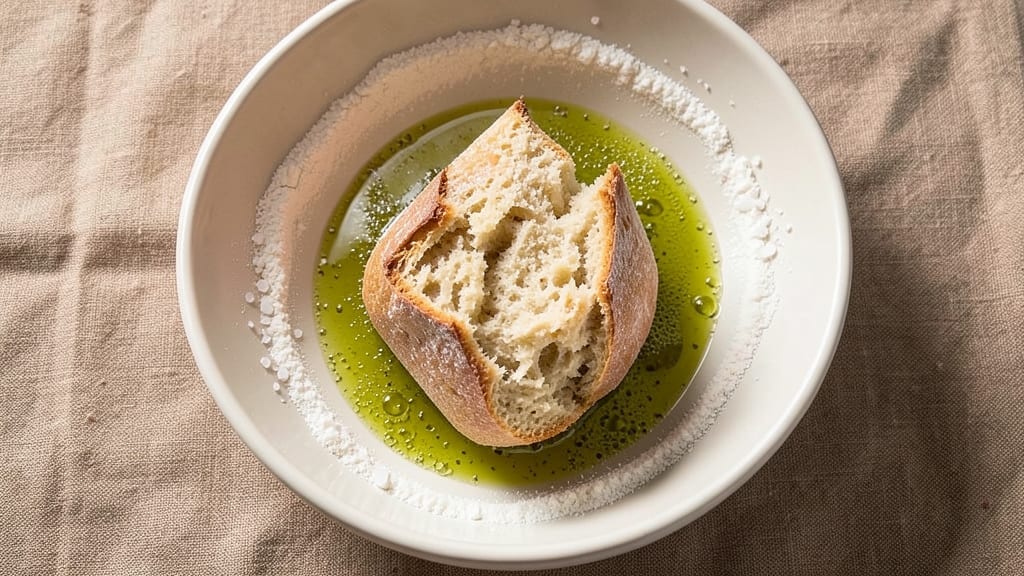
Mastering a 6-ingredient bread recipe that delivers restaurant-worthy crust without the fuss is simpler than you think. This no-knead loaf transforms basic pantry staples into a golden, crispy-edged baguette-style bread with just one bowl and minimal effort.
The secret lies in precise timing and high heat—no yeast calculations or complicated techniques required. I’ve baked dozens of variations, and this method consistently delivers that coveted crackly crust with a tender, airy crumb inside.
What sets this recipe apart is its foolproof simplicity: flour, water, salt, sugar, yeast, and olive oil are all you need. The dough develops flavor while resting overnight, allowing the gluten to relax naturally without traditional kneading.
Baking at 375°F ensures a crisp exterior while keeping the interior soft and even. Perfect for beginners or busy cooks, this loaf requires just 15 minutes of active prep time—ideal for weeknight dinners or weekend baking projects.
The result is a crusty loaf with an irresistible aroma that fills your kitchen long before it emerges from the oven. Each slice offers that satisfying crunch followed by pillowy softness, making it perfect for sandwiches, toast, or simply enjoying with butter.
The beauty of this recipe is its versatility—scale it up for a family loaf or down for dinner rolls. Let’s get baking!
For those who love texture experimentation, try brushing the baked loaf with melted butter while still warm for extra richness. Store leftovers wrapped in a towel to maintain freshness for up to 3 days. This bread proves that minimal ingredients can create maximum flavor and satisfaction with the right technique.
Ingredients for 6 ingredient bread
Six simple staples create a restaurant-worthy crusty loaf with minimal effort and perfect texture.
| Ingredient | Amount | Notes |
|---|---|---|
| All-Purpose Flour 🌾 | 4 cups | Unbleached preferred for texture |
| Warm Water 💧 | 1 ½ cups | 110°F for optimal yeast activation |
| Instant Yeast 🍞 | ½ tsp | Freshly opened for potency |
| Extra-Virgin Olive Oil 🫒 | 2 tbsp | High quality for flavor |
| Fine Sea Salt 🧂 | 1 ½ tsp | Diamond Crystal preferred |
| Granulated Sugar 🍚 | 1 tbsp | Enhances crust browning |
The flour is the foundation—King Arthur or Bob’s Red Mill all-purpose yields the best results for this no-knead method. Their high protein content develops that coveted chewy interior while maintaining a crisp crust. If you’re using bread flour, reduce by 1 tbsp to prevent over-development. For the yeast, Saf-Instant is my go-to because it activates immediately without needing to be dissolved first. Store-bought yeast? Check the expiration date—old yeast won’t rise properly. The olive oil should be extra-virgin (the good stuff) for that subtle fruity note that elevates the crust’s flavor profile.
No instant yeast? Active dry yeast works too—just dissolve it in the warm water first and let it sit for 5 minutes until foamy. Short on sugar? Honey or maple syrup at the same amount adds moisture and enhances browning, though it may darken the crust slightly. The water temperature is critical—too hot kills the yeast, too cold slows activation. 110°F is ideal: if you don’t have a thermometer, test with your pinky finger—it should feel warm but not uncomfortable. For a lighter loaf, consider adding 1 tbsp vital wheat gluten to the flour, though it’s not strictly necessary.
This dough keeps beautifully in the fridge for up to 48 hours if wrapped tightly in plastic. For longer storage, freeze shaped dough balls for 3 months—thaw overnight before baking. The baked loaf stays fresh for 3 days when wrapped in a clean kitchen towel. For reheating, wrap the cooled loaf in foil and warm at 350°F for 10 minutes. The crust will regain its crispness while the interior stays soft. To maximize shelf life, store at room temperature rather than the fridge—bread dries out faster when cold.
Why You’ll Love This Recipe
- No-Fuss Mix-In: I swear by this—just toss flour, yeast, and water in a bowl, then fold in that golden olive oil. No kneading, no waiting for dough to chill, just stir and let the yeast do its magic while I sip my coffee.
- Olive Oil Magic: That single spoonful of extra-virgin olive oil transforms plain flour into something ridiculously good. Crust gets crispy, crumb stays tender—it’s the secret weapon I didn’t know I needed until I tried it.
- Weeknight Workhorse: Toss it in a loaf pan for dinner rolls, slice it for toast in the morning, or pack it for lunches. Honestly, I’ve even used it as a base for garlic bread—because why not? It’s the bread equivalent of a Swiss Army knife.
- Pantry Staple Power: Five ingredients, all of which I already have. No specialty trips, no wasted money—just pure, reliable bread that costs pennies per loaf. My wallet and my freezer both thank me.
Step-by-step instructions for no-knead crusty loaf
This method transforms simple ingredients into artisanal-style bread with minimal effort.
Combine Wet Ingredients for Yeast Activation
In a large mixing bowl, combine the 1.5 cups warm water (around 110°F) with the 0.5 tsp instant yeast and 1 tbsp granulated sugar. Let this mixture sit for 5 minutes until it becomes foamy and bubbles form at the surface. This confirms the yeast is active and ready to work.
Here’s the thing—temperature matters. If the water is too hot, you’ll kill the yeast; too cold, and it won’t activate. The 110°F target gives you a 5-minute window to see those telltale bubbles. If nothing happens after 10 minutes, your yeast may be expired, and you’ll need to start over.
Incorporate Oil and Salt for Dough Development
Add the 2 tbsp extra-virgin olive oil to the activated yeast mixture and whisk vigorously for 30 seconds until fully emulsified. This creates a stable base for the flour to hydrate properly. Then add the 1.5 tsp fine sea salt and mix until completely dissolved.
The salt may seem like a small detail, but it plays a crucial role in both flavor development and gluten structure. Diamond Crystal salt dissolves more slowly than table salt, so give it a few extra seconds to fully integrate. The mixture should look like a thin, slightly oily batter at this stage—this is normal and exactly what we want.
Gradually Add Flour for Perfect Texture
Using a wooden spoon or silicone spatula, gradually incorporate the 4 cups all-purpose flour into the wet mixture. Start with about half the flour and stir until a shaggy mass forms, then add the remaining flour. Mix until you have a thick, sticky dough that pulls away from the sides of the bowl but still feels slightly wet to the touch.
Resist the urge to add more flour—this dough needs to be sticky for proper oven spring. The reason we don’t knead is that the olive oil creates a tender crumb without developing too much gluten. You’ll know it’s right when you can press your finger into the dough and have it slowly spring back rather than immediately flatten out.
Rest and Shape for Optimal Rise
Cover the bowl tightly with plastic wrap and let the dough rest at room temperature for 1 hour. During this time, the dough will roughly double in volume as the yeast ferments. You’ll notice bubbles forming on the surface and along the sides of the bowl—this is the gluten relaxing and the structure preparing for baking.
After the hour, gently deflate the dough by pressing down on it with your fingers. Then transfer it to a lightly oiled baking sheet or directly onto a piece of parchment paper. Shape it into a round loaf by pulling the edges toward the center and tucking them under. This creates surface tension that helps with oven spring.
Bake to Golden Perfection
Preheat your oven to 375°F with a Dutch oven inside for 30 minutes to create a steam environment. Carefully transfer the shaped dough (with parchment paper if using) into the hot Dutch oven. Bake covered for 30 minutes, then remove the lid and bake uncovered for an additional 15-20 minutes until the crust is deep golden brown and sounds hollow when tapped on the bottom.
The steam from the Dutch oven creates that signature open crumb and crisp crust. You’ll know it’s done when the internal temperature reaches 205-210°F and the crust has developed a beautiful mahogany color. Let the bread cool on a wire rack for at least 1 hour before slicing—this prevents a gummy interior and allows the crumb to fully set.
Pro Tips For Making 6 Ingredient Bread
- MEASURE THE WATER TEMPERATURE: I learned this the hard way—yeast is picky. Use a thermometer to confirm your warm water is 100°F (38°C), not boiling or lukewarm. Instant yeast forgives a little, but cold water kills it outright, and water over 110°F (43°C) shocks it into dormancy. A quick dip of your finger should feel like bathwater, not sauna steam.
- STRETCH THE DOUGH LIKE TACO FILLING: This isn’t the prettiest method, but it’s the tastiest. After the 5-minute autolyse (flour + water), dimple the dough with your fingers, then stretch it vigorously in all directions—like you’re stuffing a burrito. The gluten strands will align faster than folding, giving you a lighter crumb with half the effort. (Yes, even if you’re impatient like me.)
- SALT THE WATER FIRST: Skip the “add salt later” habit—dissolve the fine sea salt in the warm water before mixing with flour. It dissolves more evenly, and the dough develops flavor from the get-go. I used to sprinkle it in at the end, and the bread always tasted like salt had been sprinkled on top instead of baked in.
- LET THE DOUGH RISE UNTIL IT’S 50% LARGER: Doubling in size is the goal, but don’t eyeball it—use a marker or tape on the bowl to track growth. A fully risen dough (50% larger) has better oven spring and a lighter texture. Pro tip: If your kitchen is cold, cover the bowl with a damp towel to keep the yeast happy without steaming the dough. (Your future self will thank you.)
Creative variations of 6 ingredient bread
Herb-Infused Variations
Add 1 tbsp fresh rosemary or thyme leaves directly to the dough after mixing the flour. The herbs will develop deep, aromatic flavors during the 1-hour rest. For a stronger taste, use 2 tbsp chopped herbs and let them steep in the warm water before adding yeast.
I find rosemary pairs beautifully with this crusty loaf—just brush the baked crust with melted butter infused with ½ tsp crushed rosemary for an extra layer of flavor. 🌿
Cheesy Twist
Swap ½ cup of the all-purpose flour for ½ cup nutritional yeast or shredded Parmesan cheese for a cheesy flavor without altering the texture. For a cheddar version, fold in ½ cup sharp cheddar crumbles during the final flour addition.
The cheese adds richness that pairs perfectly with the crisp crust. Just be sure to shape the dough gently to avoid tearing when incorporating cheese. 🧀
Seeded Loaf
Stir in 2 tbsp toasted sesame seeds, poppy seeds, or flaxseeds into the dough for added texture and nutrition. For extra crunch, sprinkle 1 tbsp seeds on top before baking.
I love the nutty contrast of sesame seeds against the soft interior. Toast your seeds in a dry pan for 2-3 minutes before adding to enhance their flavor. 🌾
Sweet Dinner Rolls
Reduce the sugar to 2 tbsp and add ½ tsp cinnamon to the dough for sweet rolls. Shape into 8 small balls and bake in a greased pan.
Brush the warm rolls with melted butter and a sprinkle of coarse sugar for a cinnamon roll effect. These make perfect breakfast companions or dessert treats. 🍯
Whole Grain Option
Replace 1 cup of all-purpose flour with 1 cup whole wheat flour or spelt flour for a nuttier, heartier loaf. The texture will be slightly denser but still crispy on the outside.
For best results, use a mix of 50% whole grain and 50% all-purpose to maintain the signature open crumb. 🌱
Garlic Bread Boost
Add 1 minced garlic clove to the warm water mixture for a subtle garlic flavor that permeates the entire loaf. For stronger garlic flavor, mix 1 tsp garlic powder directly into the flour before combining. Pair with a garlic butter spread after baking for a restaurant-quality garlic bread experience. 🧄
Nutrition facts
Frequently asked questions
Can I make this bread without a Dutch oven?
Yes! If you don’t have a Dutch oven, try baking the loaf on a baking sheet lined with parchment paper. For extra crustiness, place a metal bowl filled with hot water on the lower oven rack to create steam. The bread won’t be quite as crusty, but it’ll still have a great texture. Another option is to use a cast-iron skillet or even a pizza stone.
Why is my dough too sticky?
The dough should be sticky but manageable. If it’s too wet, you may need to add 1-2 tbsp more flour, but only 1 tbsp at a time. Overworking sticky dough can develop too much gluten, resulting in a tough crumb. The olive oil in this recipe keeps the dough tender, so embrace the stickiness—it’s part of what creates that beautiful open crumb structure.
How do I know when the bread is fully baked?
Your bread is done when the crust is deep golden brown and sounds hollow when tapped on the bottom. The internal temperature should reach 205-210°F. If you’re unsure, let it bake for 5 more minutes—underbaking is more common than overbaking with this method. The bread will continue to cook slightly as it cools on the rack.
Can I make this recipe with whole wheat flour?
You can substitute 1 cup of the all-purpose flour with whole wheat flour, but expect a slightly denser texture. For best results, use a 50/50 mix of all-purpose and whole wheat flour. Whole wheat absorbs more moisture, so you might need to add 1-2 tbsp extra water if the dough feels too dry after mixing. The crust will still develop nicely with this adjustment.
What’s the best way to store leftover bread?
Wrap the cooled loaf tightly in a clean kitchen towel or beeswax wrap to maintain freshness. Store at room temperature for up to 3 days. For longer storage, freeze the bread (sliced or whole) for up to 3 months. To reheat, wrap the bread in foil and warm at 350°F for 10 minutes—this restores the crust’s crispness while keeping the interior soft.

- 6 Egg Cake Recipe with Oil: Light as Air With Buttery Moisture - October 4, 2026
- 4 Bean Casserole Recipe: One-Pan Heartiness With Smoky Paprika Depth - October 4, 2026
- 3-Ingredient Keto Mug Cake Recipe: Microwave Magic in 2 Minutes - October 4, 2026