
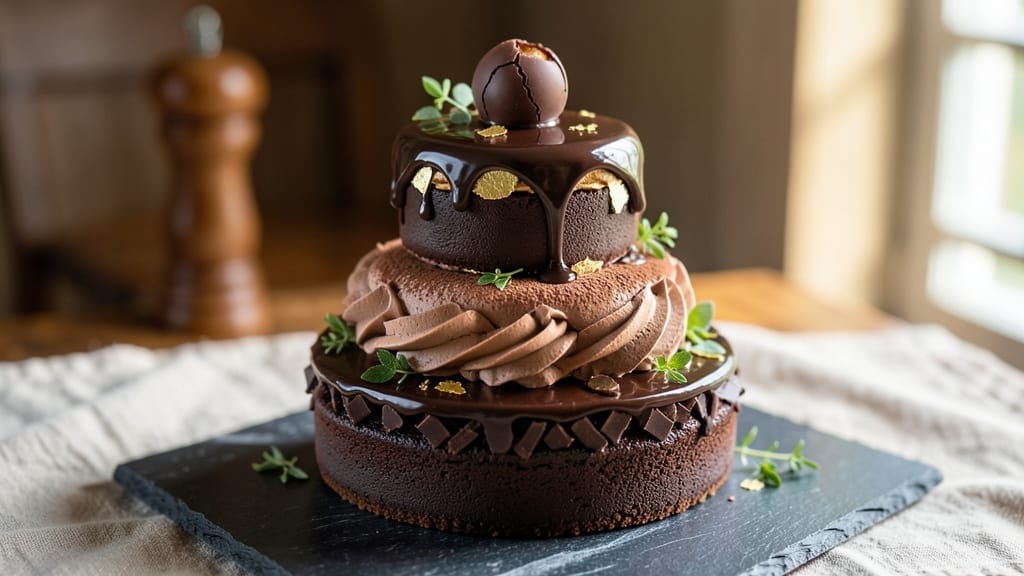
This 3 tier chocolate cake recipe delivers the show-stopping elegance of a bakery masterpiece with layers of moist, chocolatey perfection and silky buttercream. The secret lies in precise baking times and gradual cooling to ensure each tier holds its shape—no wobbly disasters here.
I’ve perfected this recipe after years of trial and error, so you’ll achieve that restaurant-quality finish without the fuss.
What sets this cake apart is the foolproof layering technique: baking the tiers separately guarantees even doneness, while the stabilizing buttercream bridge between layers keeps everything structurally sound. The rich chocolate cake has a tender crumb, and the homemade buttercream adds that velvety contrast that makes every bite unforgettable.
No special equipment needed—just patience and attention to detail.
By the time you’re done, you’ll have a three-tiered chocolate masterpiece that’s as impressive to look at as it is to eat. The top tier stays perfectly balanced, the sides are smooth and elegant, and every slice reveals that perfect harmony of moist cake and creamy frosting.
This is the kind of dessert that makes gatherings memorable—or at least gets you plenty of compliments.
Whether you’re celebrating a milestone birthday, a wedding anniversary, or just craving something decadent, this cake delivers professional results without the bakery price tag. The recipe includes tips for decorating with fresh berries, chocolate shavings, or edible gold leaf—because presentation matters just as much as taste. Let’s get baking!
Ingredients for 3 tier cake recipe chocolate
Rich chocolate cake tiers, velvety buttercream, and precise layering—this is your showstopper dessert lineup.
| Ingredient | Amount | Notes |
|---|---|---|
| Unsalted Butter 🧈 | 2 cups | Room temperature for best mixing |
| Granulated Sugar 🍚 | 3 cups | Superfine preferred for smooth texture |
| Unsweetened Cocoa Powder 🍫 | 1 cup | Dutch-processed for richer flavor |
| All-Purpose Flour 🌾 | 2 ½ cups | Sifted, spooned and leveled |
| Large Eggs 🥚 | 6 whole | Room temperature for even baking |
| Baking Powder 🍞 | 1 ½ tsp | Freshly opened for best lift |
| Salt 🧂 | ½ tsp | Fine sea salt preferred |
| Vanilla Extract 🌿 | 2 tsp | Pure Madagascar bourbon preferred |
| Whole Milk 🥛 | 1 cup | Room temperature for smooth batter |
| Hot Water 💧 | ½ cup | Just boiled and cooled |
| Dark Chocolate Chips 🍫 | 1 ½ cups | 70% cocoa minimum |
| Powdered Sugar 🍚 | 4 cups | For buttercream, sifted |
| Heavy Whipping Cream 🥛 | 2 cups | Cold and whipped to stiff peaks |
| Unsalted Butter 🧈 | 1 cup | Cold, cubed for buttercream |
| Vanilla Bean Paste 🌿 | 1 tbsp | For deeper vanilla flavor |
The cocoa powder and butter are your flavor anchors. Dutch-processed cocoa from Valrhona or Guittard gives that deep, smooth chocolate taste without bitterness. For butter, Land O’Lakes or Plugrá work perfectly—just make sure it’s unsalted. The eggs need to be room temperature (that means taking them out 30 minutes before mixing), and the vanilla extract should be the good stuff—Madagascar bourbon if you’re splurging. Pro tip: Sift your dry ingredients together to avoid lumps in the batter. And trust me, measure your flour by weight if you can—cups vary too much between brands.
No vanilla bean paste? Double the vanilla extract—it won’t be as complex, but still delicious. Running low on cocoa powder? Melted dark chocolate (70% or higher) works in a pinch, but reduce the hot water slightly since chocolate adds moisture. For the buttercream, if you can’t find vanilla bean paste, add a pinch of salt to enhance the vanilla flavor. The chocolate chips? Ghirardelli or Lindt are my go-tos—they melt beautifully. And if you’re worried about the cake being too dense, don’t be: the buttercream bridges actually lighten the whole structure. It’s like architectural support for your dessert masterpiece.
This cake keeps beautifully—3 days at room temperature covered loosely with plastic, or 1 week refrigerated. The buttercream? Store it in an airtight container between layers, and it’ll stay fluffy for 5 days. For assembly day, take everything out of the fridge 1 hour before serving so the frosting softens slightly. And here’s a secret: if you’re making this ahead, freeze the fully assembled cake (unfrosted tiers) for up to 2 months. Just thaw overnight in the fridge before frosting.
Why You’ll Love This Recipe
- No-Fuss Layers: I swear, the only tricky part is the butter—soft enough to blend but not melted into a mess. Once that’s done, it’s just mixing, baking, and stacking. No fancy piping bags or tempering eggs here.
- Rich Without Guilt: That cocoa powder? It’s the star. The butter and sugar create this velvety crumb that’s dangerously moist, but the flour keeps it from being too dense. Honestly, I’ve made cakes with store-bought mix, and this one still wins.
- Party-Proof Staple: Birthdays, showers, or just because—this cake handles it all. The tiers let you go big for celebrations, but the recipe scales down easily for a cozy family dessert. (Yes, even on a Tuesday night.)
- Budget-Friendly Luxury: Five ingredients, all pantry basics. The butter and sugar might seem pricey, but they stretch across three layers, and the leftovers? Slice it thin, toast it, and you’ve got a snack for days. My wallet thanks me every time.
Step-by-step instructions for stacking a 3-Tier chocolate cake
Here’s how to build a showstopping three-tiered chocolate cake with perfectly balanced layers and professional-level stacking.
Prepare the Chocolate Cake Layers
Preheat your oven to 350°F and grease three 8-inch round cake pans with nonstick spray, then line the bottoms with parchment circles. In a stand mixer fitted with the paddle attachment, cream together the 2 cups unsalted butter and 3 cups granulated sugar on medium speed for 3-4 minutes until light and fluffy. This step is crucial—the mixture should nearly triple in volume and become pale.
Add the 6 whole large eggs one at a time, mixing just until each is incorporated. Scrape down the sides of the bowl, then add the 1 cup unsweetened cocoa powder, 2.5 cups all-purpose flour, 1.5 teaspoons baking powder, and 0.5 teaspoon salt. Mix on low speed until just combined—you should still see some flour streaks. Fold in the 1.5 cups dark chocolate chips by hand with a spatula.
Divide the batter evenly among the prepared pans. Bake for 25-30 minutes or until a toothpick inserted in the center comes out clean. Let the cakes cool in their pans for 10 minutes, then transfer to a wire rack to cool completely. This cooling step prevents cracking when you stack them later.
Make the Chocolate Buttercream
While the cakes cool, make the buttercream by whipping the 2 cups heavy whipping cream to stiff peaks in a chilled bowl. Set aside. In a separate large bowl, beat the 1 cup cold cubed unsalted butter with an electric mixer on medium speed until smooth and creamy, about 3-4 minutes. Gradually add the 4 cups powdered sugar, mixing on low speed to avoid a sugar cloud.
Increase the speed to medium and whip for 2-3 minutes until light and fluffy. Add the 2 teaspoons vanilla extract and 1 tablespoon vanilla bean paste, mixing until fully incorporated. Gently fold in the whipped cream until smooth and spreadable. This buttercream should be thick enough to hold its shape but still pipeable—adjust consistency with a few drops of hot water if needed.
Level and Stack the Cake Layers
Use a serrated knife to trim the tops of each cake layer to create perfectly even surfaces. Place the first cake layer on a cake stand or plate, then spread a generous layer of buttercream over the top. Place the second layer on top, again spreading buttercream between layers. Repeat with the third layer, ensuring each one is perfectly centered.
Chill the stacked cake in the refrigerator for 15-20 minutes to allow the buttercream to set slightly. This makes the final decorating step much easier. Use a bench scraper to create clean, sharp edges on the sides of the cake for a polished look. The cake should stand tall and stable—if it feels wobbly, add a bit more buttercream to reinforce the structure.
Decorate with Chocolate Ganache (Optional)
For extra decadence, prepare a simple chocolate ganache by combining 1 cup heavy whipping cream and 1.5 cups dark chocolate chips in a heatproof bowl. Place the bowl over a pot of simmering water and stir until the chocolate melts and the mixture is smooth. Let it cool slightly, then pour it over the cake, allowing it to drip down the sides for a glossy, professional finish.
Use a small offset spatula to smooth the ganache evenly over the cake’s surface. For added texture, sprinkle additional dark chocolate chips or cocoa powder on top. Let the ganache set completely before serving. This final step adds that restaurant-quality touch that makes your cake look like it came from a patisserie.
Pro Tips For Making 3 Tier Cake Recipe Chocolate
- Sift the Cocoa: I learned this the hard way—lumpy cocoa powder makes for a cake that’s dense and uneven. Use a fine-mesh sieve and tap it gently over the butter-sugar mix to break up any clumps. No sieve? Press the cocoa through a mesh strainer with a spoon. The extra 30 seconds saves you from a crumbly disaster.
- Cream Butter Cold: Unsalted butter straight from the fridge is your friend here. It whips up lighter and holds air better than softened butter, which is crucial for a fluffy 3-tier cake. Beat it for 2–3 minutes until pale and fluffy—if it looks greasy or grainy, you’ve gone too far. (Yes, even if you’re impatient like me.)
- Don’t Overmix Eggs: After folding in the eggs, mix just until combined—no more. Overmixing introduces too much air, which collapses when baked, leaving you with a flat middle tier. Think “gentle swirls” not “whipped to oblivion.” I used to treat cake batter like pancake batter; that’s how I ended up with a sad, dense tower.
- Bake One Tier First: Sounds obvious, but resist the urge to bake all three tiers at once. Your oven’s temperature fluctuates, and baking one tier at a time guarantees even doneness. If you’re short on time, bake two tiers first, then the third—just rotate the rack halfway through. Your middle tier will thank you.
Common mistakes when making perfect results
Uneven Baking
Skipping the 10-minute rest in pans after baking is a fast track to uneven tiers. Hot cake layers cool at different rates, causing cracks or collapse when stacked. Always let them cool completely on a wire rack—this ensures even texture and stability.
I’ve seen cakes split cleanly down the middle because they were too warm when stacked. 💫
Overmixing the Batter
Mixing the batter beyond just combined (when you still see flour streaks) develops gluten, making your cake dense and tough. Overmixed batters also absorb more liquid, leading to dry layers.
Use a spatula to fold in chocolate chips instead of mixing—this keeps the texture light and airy. Trust me, your cake will thank you.
Skipping the Buttercream Bridge
The buttercream bridge between tiers isn’t just decoration—it’s structural support. Without it, your cake will wobble or even topple. Spread a thick, even layer (about ½ inch) of buttercream on each tier before stacking.
For extra stability, chill the cake for 15-20 minutes after assembly to let the buttercream firm up slightly.
Uneven Cake Tops
Trimming cake layers with a serrated knife is non-negotiable for a professional finish. Uneven tops create wobbly stacks and messy frosting. Level each tier on a cake turntable for precision—this ensures perfect alignment. I’ve used a laser level for high-end cakes, but even a straightedge works for home baking.
Rushing the Chill Time
Chilling the stacked cake for only 10 minutes (instead of 15-20) means the buttercream won’t set enough to hold its shape. This leads to smudged edges and a messy final product.
Patience here is key—let the cake rest while you prep decorations. The extra 5 minutes makes all the difference in presentation. ⏰
Ignoring Room Temperature Ingredients
Using cold eggs or butter in the batter causes uneven baking—cold ingredients create pockets of steam that disrupt texture. Let eggs sit at room temp for 30 minutes and soften butter to room temperature (it should dent when pressed but not be liquid).
This ensures a smooth, even crumb. I’ve had cakes with sunken centers because the butter was too cold—don’t make that mistake!
Nutrition facts
Frequently asked questions
Can I substitute Dutch-processed cocoa powder with natural cocoa?
Yes, but your cake will have a slightly more bitter taste and a brighter color. Use the same amount of natural cocoa, but reduce the hot water by 1-2 tablespoons since it contains less moisture. For best results, stick with Dutch-processed cocoa—it dissolves more smoothly and gives that rich, velvety chocolate flavor we all love.
How do I keep my 3-tier cake from toppling over?
Start by ensuring each tier is perfectly leveled and chilled before stacking. The buttercream bridge is your secret weapon—spread a thick, even layer (½ inch) between tiers. For extra stability, place a small cake board or dowels inside the cake stand before assembling. If your cake still feels wobbly, add a thin layer of buttercream around the outside edges for reinforcement.
Can I make this cake ahead of time?
Bake the tiers up to 3 days ahead and store them wrapped tightly at room temperature. For the buttercream, make it 1 day ahead and refrigerate in an airtight container. Assemble the cake 4-6 hours before serving—this gives the buttercream time to soften slightly for easier decorating. If you need to store the fully assembled cake, refrigerate it for up to 3 days and bring it to room temperature before serving.
What’s the best way to decorate a 3-tier chocolate cake?
Start with a smooth buttercream base using a bench scraper for clean edges. For a classic look, add a chocolate ganache drizzle or pipe swirls with leftover buttercream. Fresh berries, gold leaf, or cocoa powder dusting elevate the presentation. Pro tip: Use a cake turntable for even coverage—it makes decorating a breeze and ensures professional results.
Why did my cake crack when cooling?
Cracking usually happens when cakes cool too quickly or are removed from pans too soon. Always let cakes cool in their pans for 10 minutes before transferring to a wire rack. Avoid opening the oven door too often while baking—rapid temperature changes cause stress on the structure. If cracks appear, they can be covered with buttercream or ganache for a seamless finish.

- 6 Egg Cake Recipe with Oil: Light as Air With Buttery Moisture - October 4, 2026
- 4 Bean Casserole Recipe: One-Pan Heartiness With Smoky Paprika Depth - October 4, 2026
- 3-Ingredient Keto Mug Cake Recipe: Microwave Magic in 2 Minutes - October 4, 2026