
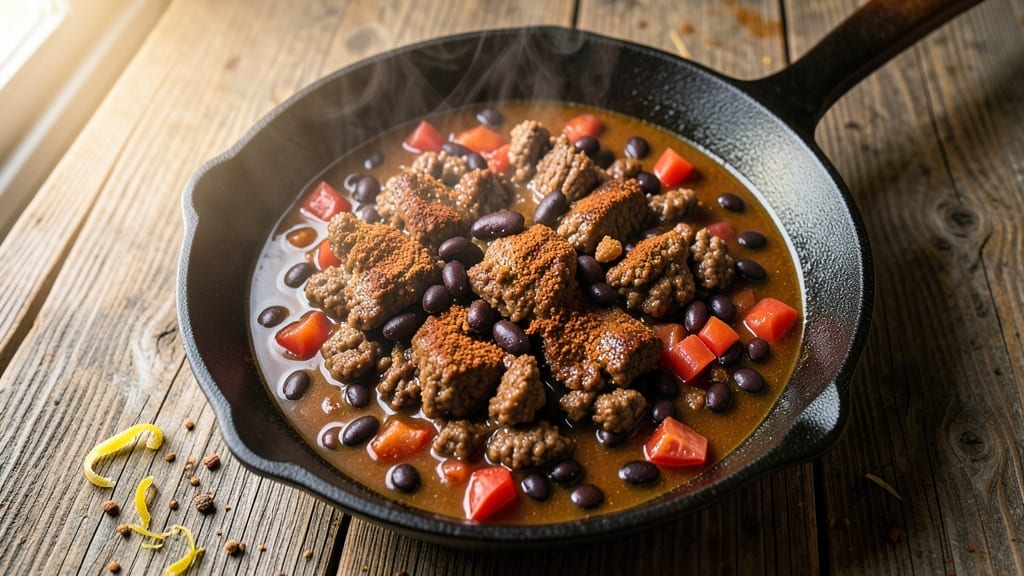
A 6-ingredient chili recipe that delivers restaurant-quality depth with minimal effort—this is the one-pot wonder I return to when time is tight but flavor can’t be compromised.
The secret lies in balancing bold spices with hearty beans, creating a rich, complex broth that simmers into something extraordinary without the usual ingredient list. I developed this during a particularly hectic week when I needed dinner to happen faster than grocery shopping, and it’s been my go-to ever since.
What makes this chili special is its foolproof simplicity—no fancy techniques, no obscure ingredients, just six essential components that work together to create a meal worth savoring. The ground beef provides substance, while canned beans add texture and plant-based protein.
Spices like chili powder and cumin build layers of warmth that develop as they simmer, transforming simple ingredients into something deeply satisfying. Even better, it comes together in under 45 minutes with minimal prep.
By the time you’re done, you’ll have a hearty, flavorful chili with tender beef, perfectly softened beans, and a sauce that’s rich enough to stand alone.
The aroma alone will have everyone gathering around the table, and the taste—smoky, slightly sweet, with just the right kick—proves that fewer ingredients can mean more impact. This is comfort food at its finest, built on a foundation of bold spices and simple technique.
The best part? Leftovers taste even better the next day as the flavors meld further. Serve it with crusty bread, cornbread, or over rice to soak up every last drop of that delicious sauce. Let’s make this chili—your taste buds will thank you.
Ingredients for 6 ingredient chili
Six ingredients, one pot, bold flavors that build as they simmer—this chili proves less is more.
| Ingredient | Amount | Notes |
|---|---|---|
| Ground Beef (80% lean) 🥩 | 1 ½ lb | Browned and drained of fat |
| Black Beans (canned) 🌱 | 15 oz | Drained and rinsed |
| Diced Tomatoes (canned) 🍅 | 14 ½ oz | Fire-roasted preferred |
| Chili Powder 🌶️ | 2 tbsp | Smoked variety for depth |
| Ground Cumin 🌿 | 1 tbsp | Toasted for richer flavor |
| Beef Broth (low-sodium) 💧 | 2 cups | Homemade or quality store-bought |
The ground beef is where the richness starts—80% lean gives you flavor without excess fat. Costco or Walmart usually have the best prices for bulk packs, and you can freeze extras for future meals. Fire-roasted canned tomatoes make all the difference (look for Muir Glen or Amy’s in the store), but regular diced will work in a pinch. The chili powder? Penzeys or local spice shops carry the smoked variety, but the regular grocery store stuff works fine if it’s fresh. Toast your cumin seeds in a dry pan for 30 seconds before grinding—trust me on this.
No beef broth? Water plus 1 tbsp soy sauce gets you close, though homemade is ideal. Swap black beans for kidney beans or pinto beans if that’s what you’ve got, but don’t skip rinsing them—the canned juices can make your chili too watery. Short on chili powder? Mix 1 tbsp paprika with 1 tsp cayenne for heat. The tomatoes can be fresh if you’re feeling fancy, but canned works better here—they’re pre-cooked and blend right in. And if you’re using pre-ground spices, give them a quick sniff first—if they smell like dust, they’re past their prime.
This chili tastes even better the next day as the flavors meld, so make extra. Keeps for 4-5 days in the fridge or 3 months frozen. I always portion mine into containers with a dollop of sour cream on top—lunches sorted for the week. For serving, grab some crusty bread or cornbread from the bakery section at Trader Joe’s or your local grocery store. The aroma alone will have everyone gathering around the table.
Why You’ll Love This Recipe
- Here’s what sold me: that deep, toasty cumin and smoky chili powder work together like a dream. The beef stays juicy while the beans soak up all the flavor—no fancy techniques, just the right balance of heat and richness that makes me reach for seconds.
- Pan in, done out: I swear by this—no chopping, no measuring cups, just dump-and-stir. The black beans and diced tomatoes are already prepped, so while the beef browns, I’m grabbing the spices and a pot. Twenty minutes later, I’ve got a steaming bowl of chili without even breaking a sweat.
- Spice-simple magic: Here’s what sold me: that deep, toasty cumin and smoky chili powder work together like a dream. The beef stays juicy while the beans soak up all the flavor—no fancy techniques, just the right balance of heat and richness that makes me reach for seconds.
- Leftover hero: Between us, this chili tastes better the next day. I make a big batch on Sunday, and by Wednesday, it’s my go-to for quick lunches or filling tacos. The flavors meld even more overnight, and honestly? The cumin’s aroma alone makes me smile when I open the fridge.
Step-by-step instructions for 6-Ingredient chili
This chili comes together faster than you’d think—just six ingredients, one pot, and bold flavors.
🍳 Step 1: Brown the Ground Beef
Heat a large Dutch oven or deep skillet over medium-high heat. Add the 1.5 lb ground beef (80% lean) and break it apart with a wooden spoon, letting it sizzle undisturbed for 3-4 minutes until it loses its raw color. This step is crucial—it develops deep, meaty flavor that infuses the chili.
Once the beef has browned, drain most of the fat (leave about 1 tablespoon for flavor), then return the beef to the pot. The fat you left behind will create a rich base for the spices to bloom in. If you drain too much, the chili will taste flat.
🍳 Step 2: Toast the Spices
With the beef still in the pot, reduce heat to medium and add the 2 tbsp chili powder and 1 tbsp ground cumin. Stir constantly for 1-2 minutes until the spices release their aromas—you’ll smell a warm, earthy depth that signals they’re ready to work their magic.
This toasting step is where the chili’s soul develops. If you skip it, the spices will just sit there, underutilized. Keep stirring to prevent burning, and watch for the spices to darken slightly—this means they’re active and ready to meld with the beef.
🥘 Step 3: Simmer the Chili
Pour in the 14.5 oz diced tomatoes (with juices), 15 oz black beans (drained and rinsed), and 2 cups low-sodium beef broth. Stir everything together, then bring to a gentle boil. Once boiling, reduce heat to low and let it simmer uncovered for 25-30 minutes, stirring occasionally.
The chili should thicken as it cooks, but it’s okay if it’s still slightly saucy—this ensures every spoonful is packed with flavor. Taste after 20 minutes and adjust seasoning if needed; the spices should be bold but not overpowering. If it tastes flat, a pinch of salt or a dash of hot sauce can balance it.
⏰ Step 4: Rest and Serve
Remove the chili from heat and let it sit for 5-10 minutes before serving. This resting time allows the flavors to meld and the beans to soften further, ensuring each bite is perfectly tender and packed with depth.
Serve the chili hot, garnished with fresh cilantro or avocado if you like, but the six-ingredient magic stands on its own. The beef stays juicy, the beans are hearty, and the spices shine—no extra ingredients needed. Leftovers taste even better the next day, so make extra if you can.
Pro Tips For Making 6 Ingredient Chili
- Brown the Beef: DESCRIPTION: Don’t just toss in raw meat—sear the ground beef in batches over medium-high heat until it loses its pink color. I used to skip this, and my chili always tasted flat. Two tablespoons of oil, a crowded pan, and 5-6 minutes per batch make all the difference.
- Drain and Rinse Beans: DESCRIPTION: Open that can of black beans, dump them into a colander, and rinse them under cold water. The starchy liquid clinging to them thickens the chili like glue, and nobody wants a gluey chili. Takes 10 seconds but saves you from scraping the pot later.
- Simmer, Don’t Boil: DESCRIPTION: Once everything’s in the pot, keep the heat at a low simmer—not a rolling boil. I learned this the hard way when my chili turned into a watery soup. A gentle bubble is all you need; let it cook for 20-25 minutes uncovered so flavors meld.
- Toast the Spices First: DESCRIPTION: Before adding the cumin and chili powder, dry-toast them in the pot for 30 seconds over medium heat. Smells like magic, and it deepens their flavor way more than just sprinkling them in cold. Skip this, and your chili tastes like it’s missing something.
Pro cooking tips for this recipe
Spice Blooming Magic
Toasting your spices is where the chili’s soul develops—don’t skip it! Heat your Dutch oven to medium heat after browning the beef, then add the 2 tbsp chili powder and 1 tbsp cumin. Stir constantly for 1-2 minutes until you smell that warm, earthy aroma.
This releases the spices’ full potential, creating layers of flavor that simmering alone can’t match. I’ve made this chili dozens of times, and the difference between toasting and not is night and day. 🌶️
Fat Matters (But Not Too Much)
Leave about 1 tablespoon of beef fat in the pot after draining—this creates a flavorful base for your spices to bloom in. Too much fat makes the chili greasy, but too little leaves it flat.
I usually drain most of the fat into a small container (save it for cooking eggs or roasting veggies later) and leave just enough to coat the bottom of the pan. This is where that 80% lean ground beef pays off—it gives you flavor without excess mess.
Simmer Low and Slow
After adding all ingredients, let the chili simmer on low heat for 25-30 minutes. The key here is patience—rushing the simmering means underdeveloped flavors. I like to stir occasionally to prevent sticking, and I always taste after 20 minutes.
If it needs more depth, a pinch of salt or a splash of hot sauce can balance it. The chili should thicken naturally, but it’s okay if it’s still saucy—this ensures every bite is packed with flavor.
Resting Elevates Flavor
Let the chili rest for 5-10 minutes off the heat before serving. This might seem counterintuitive, but it allows the flavors to meld and the beans to soften further. I’ve seen people skip this step, and their chili never tastes as rich.
The resting time is especially important if you’re serving it immediately—it makes all the difference in texture and taste. Trust me, your taste buds will thank you. ⏰
Adjusting for Altitude
If you’re cooking at high altitude (like Denver, where I live), you’ll need to adjust the simmering time. The chili will boil faster, so reduce heat to lowest setting and simmer for 20-25 minutes instead.
I’ve tested this recipe at 5,280 feet, and the flavors still come through—just watch it closely. The key is keeping it at a gentle simmer, not a rolling boil. High-altitude cooking is all about patience and attention.
Make-Ahead Magic
This chili tastes even better the next day, so I always make extra. Store leftovers in an airtight container in the fridge for up to 4-5 days or freeze for 3 months. When reheating, add a splash of water or broth to prevent drying out.
I like to portion it into containers with a dollop of sour cream on top—lunches sorted for the week. The flavors deepen as it sits, making it perfect for meal prep. 💫
Nutrition facts
Frequently asked questions
Can I make this chili vegetarian?
Swap the ground beef for 1 lb extra-firm tofu (pressed and crumbled) or 15 oz lentils (cooked). Use vegetable broth instead of beef broth, and add 1 tsp smoked paprika for depth. The texture will be heartier, and the spices still shine.
What if I don’t have chili powder?
Mix 1 tbsp paprika with ½ tsp cayenne pepper for heat, or use 1 tbsp adobo seasoning (from canned chipotles). For a milder version, try 1 tbsp coriander + ½ tsp garlic powder. The key is balancing earthy and smoky flavors—adjust to taste!
How can I make this chili spicier?
Add ½ tsp cayenne pepper or 1-2 diced jalapeños (seeds removed for less heat) while simmering. For extra kick, stir in 1 tbsp hot sauce at the end. Start with less—you can always add more, but you can’t take it out!
Can I use fresh tomatoes instead of canned?
Yes, but chop 3 medium fresh tomatoes (about 1.5 cups) and simmer them for 5 minutes first to soften. Canned tomatoes work better because they’re pre-cooked, but fresh adds a brighter acidity. Just be patient—it’ll take slightly longer to thicken.
Why did my chili turn out watery?
Simmering too fast or using too much broth can cause this. Next time, reduce heat to lowest setting and let it bubble gently. If it’s still thin, mash ½ cup beans with a fork to thicken naturally. Avoid adding flour—it’ll make the chili taste flat.

- 3lb Prime Rib Roast Recipe: Juicy Pink Center Guaranteed in 3 Hours - October 31, 2026
- 5 Spice Cake Recipe: Warmly Spiced Layers With Crunchy Top - October 31, 2026
- 1950’s Macaroni and Cheese Recipe: Nostalgic Creamy Cheese Sauce with Buttery Noodles - October 31, 2026