
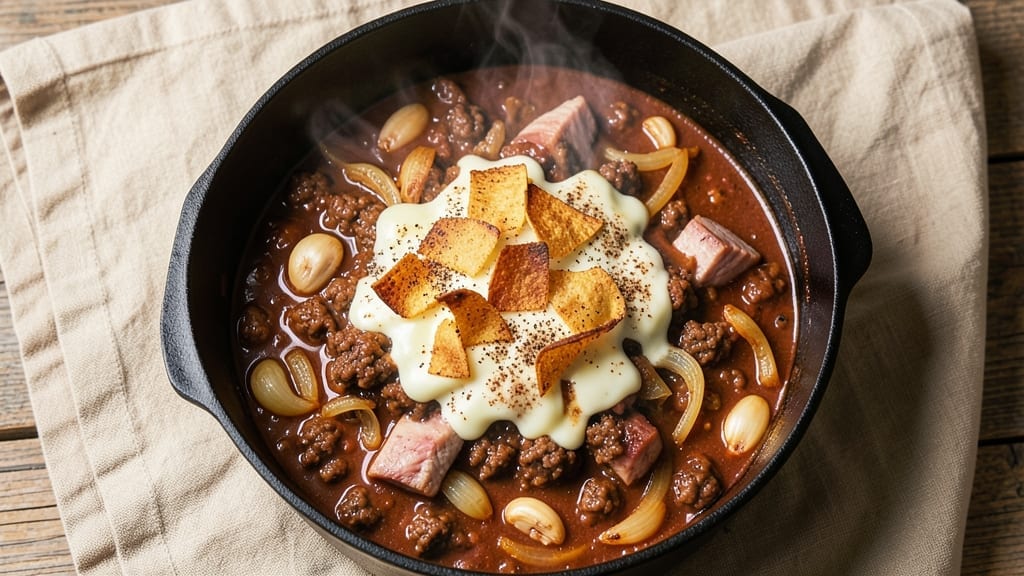
This 6-qt chili recipe delivers the kind of hearty, smoky depth that transforms a simple pot into the centerpiece of any gathering. I’ve perfected it over years of tailgating and family dinners, where the slow-simmered flavors build into something truly special.
The secret lies in proper meat browning and layered spices that develop during those essential 3+ hours of simmering.
What sets this recipe apart is the balance between rich, meaty flavors and just enough heat to linger without overpowering. Ground beef and pork shoulder create a deep, savory base, while chili powder, cumin, and a touch of cinnamon build complex warmth.
The onions and garlic cook down slowly, infusing every bite with aromatic sweetness that cuts through the richness.
By the time you’re ready to serve, you’ll have a pot of chili that’s thick, flavorful, and packed with tender meat—perfect for feeding a crowd or meal prepping for the week.
The aroma alone will have everyone gathering around your table, and the first spoonful delivers on that promise of smoky, hearty satisfaction.
This recipe scales beautifully for game days, potlucks, or weeknight dinners. The leftovers reheat just as well, making it a true workhorse for any kitchen. Let’s get started on creating your crowd-pleasing pot of chili.
Ingredients for 6 qt chili
Pantry staples plus a few key ingredients make this legendary 6-quart chili.
| Ingredient | Amount | Notes |
|---|---|---|
| Ground Beef (80/20) 🥩 | 3 lb | Lean-to-fat ratio for juiciness |
| Pork Shoulder 🐖 | 2 lb | Cut into 1-inch cubes |
| Yellow Onion 🧅 | 2 whole | Medium size, chopped |
| Garlic Cloves 🧄 | 6 cloves | Minced for aromatic depth |
| Chili Powder 🌶️ | 3 tbsp | Medium heat preferred |
| Ground Cumin 🌿 | 1 ½ tbsp | Toasted for richer flavor |
| Smoked Paprika 🌶️ | 1 ½ tbsp | Adds smoky depth |
| Cinnamon 🌿 | ½ tsp | Warmth without heat |
| Dried Oregano 🍃 | 1 tsp | Mexican oregano preferred |
| Salt 🧂 | 1 ½ tsp | Kosher or sea salt |
| Black Pepper 🌶️ | ½ tsp | Freshly ground preferred |
| Cayenne Pepper 🔥 | ½ tsp | Adjust for heat preference |
| Tomato Paste 🍅 | ½ cup | Squeeze tube or can |
| Diced Tomatoes (28 oz can) 🍅 | 1 can | Fire-roasted preferred |
| Kidney Beans (15 oz can) 🌱 | 2 cans | Drained and rinsed |
| Black Beans (15 oz can) 🌱 | 2 cans | Drained and rinsed |
| Beef Broth 💧 | 4 cups | Low-sodium preferred |
| Dark Brown Sugar 🍚 | 1 tbsp | Balances acidity |
The meat is non-negotiable—ground beef and pork shoulder create that deep, rich base. Grab the 80/20 ground beef (fat keeps it juicy) and ask the butcher to cube the pork shoulder for you. If you’re prepping ahead, Costco or Sam’s Club have pre-cubed pork shoulder in bulk. For the spices, Penzeys Spices or the bulk bins at Whole Foods are worth the trip—they stay vibrant longer. Look for smoked paprika with visible flecks of smoke for that authentic tailgate flavor.
No chili powder? Mix 2 tbsp paprika + 1 tsp cumin + 1/2 tsp cayenne in a pinch. Fire-roasted diced tomatoes add depth, but regular crushed tomatoes work too—just add an extra pinch of salt. The beans can be swapped for pinto beans or chickpeas if that’s what you’ve got. For extra richness, stir in 1/4 cup tomato paste at the end. The brown sugar might seem odd, but it rounds out the acidity from the tomatoes—trust me on this. If you’re watching sugar, reduce to 1 tsp and add a splash of balsamic vinegar instead.
This chili tastes even better the next day—3-4 days in the fridge, 6 months frozen. Portion into quart-sized containers for easy serving. Freeze extras in ziplock bags with a spoonful of broth to keep it moist. The pork shoulder stays tender for days, but if you’re serving it fresh, let it sit at room temp for 15 minutes before digging in. Leftovers reheat beautifully—just add a splash of broth if it gets too thick.
Why You’ll Love This Recipe
- Ditch the Chopping: I swear by this recipe because you only need to dice one onion and crush a few garlic cloves—no fancy prep, no small cuts. The pork shoulder breaks down beautifully, so even if you forget to shred it perfectly, it’ll still taste like you spent hours.
- Deep, Smoky Richness: That 80/20 ground beef and pork shoulder? Oh, it’s juicy—the fat renders into the pot, and the chili powder doesn’t just sit on top. It’s got this slow-built depth that makes it taste like it simmered all day, even if you’re done in 45 minutes.
- Game-Day Crowd Feeder: This makes exactly six quarts, which means you can feed a football party, a family reunion, or just your household for a week. Serve it with cornbread or over rice—it’s the kind of dish that disappears fast, no matter the occasion.
- Budget-Friendly Leftovers: Honestly, this chili is so good that you’ll want to make it twice—but the first time, you’ll have enough for lunches all week. Ground beef and pork shoulder stretch far, and the flavors only get better the next day. (Yes, even on a Tuesday night.)
Step-by-step instructions for 6 qt chili recipe
Let’s build this rich, smoky chili from scratch—layer by flavorful layer.
Brown the Meats for Maximum Flavor
In a large Dutch oven or heavy pot, heat over medium-high heat until hot. Add the 3 lb ground beef (80/20) and cook, breaking it apart with a wooden spoon, until it loses its raw color (5-6 minutes). This step is crucial—it develops deep, meaty flavors through the Maillard reaction.
Remove the beef and set aside. In the same pot, add the 2 lb pork shoulder cut into 1-inch cubes. Brown on all sides for 4-5 minutes until golden brown. The pork should release easily from the pan—if it sticks, reduce heat slightly. Remove and set aside with the beef. You’re building layers of flavor that will infuse the entire chili.
Sauté Aromatics and Spices
In the same pot (no need to wipe it clean—those browned bits are pure flavor), add the 2 whole yellow onions chopped and cook for 5-6 minutes until softened and golden. Add the 6 cloves minced garlic and cook for 30 seconds until fragrant—don’t let it burn, or it’ll turn bitter.
Now add all the spices: 3 tbsp chili powder, 1.5 tbsp ground cumin, 1.5 tbsp smoked paprika, 0.5 tsp cinnamon, 1 tsp dried oregano, 1.5 tsp salt, 0.5 tsp black pepper, and 0.5 tsp cayenne pepper. Stir constantly for 30 seconds to toast the spices—this releases their essential oils and deepens their flavor. You’ll smell that rich, smoky aroma filling your kitchen.
Build the Chili Base
Stir in the 0.5 cup tomato paste and cook for 1 minute until it darkens slightly. This creates a rich, concentrated base for your chili. Pour in the 1 can (28 oz) diced tomatoes (with juices), 4 cups beef broth, and 1 tbsp dark brown sugar. Bring to a gentle boil, then reduce heat to medium-low.
Return both meats to the pot and stir to combine. Add the 2 cans (15 oz each) drained kidney beans and 2 cans (15 oz each) drained black beans. The chili should bubble gently—if it’s boiling too vigorously, reduce heat. Let it simmer uncovered for 1 hour, stirring occasionally. This initial simmer allows all the flavors to meld together beautifully.
Simmer to Perfection
After the initial hour, taste the chili and adjust seasoning if needed. You want a balance of smoky, spicy, and sweet flavors. Cover the pot and continue simmering on low heat for another 2-3 hours, stirring occasionally. The chili will thicken naturally as it cooks, and the flavors will deepen and become more complex.
Here’s the key: the longer it simmers, the better it tastes. I know it’s tempting to rush, but patience pays off with a chili that’s rich, flavorful, and perfectly balanced. The beans will absorb all that delicious meaty broth, and the pork will become tender and melt-in-your-mouth. You’ll know it’s ready when the flavors are harmonious and the texture is just right—not too thick, not too thin.
Pro Tips For Making 6 Qt Chili
- CRANK THE HEAT FIRST: Brown the pork shoulder and ground beef in two batches over medium-high heat until the edges crisp. I learned this the hard way—low heat means gray, greasy meat that won’t develop that deep, caramelized flavor you need in a 6-quart chili.
- CHOP ONIONS AND GARLIC SMALL: No bigger than a dime—small dice for onions, minced garlic. Big chunks mean uneven cooking, and you’ll end up with raw bits in your chili. (Yes, even if you’re impatient like me.)
- SALT THE MEAT BEFORE BROWNING: Generously season the pork shoulder and ground beef with salt before cooking. This guarantees flavor penetration, not just surface seasoning. Skip this, and your chili will taste like it’s missing something.
- USE THE FAT FOR FLAVOR: After browning the meat, scrape up all the browned bits from the pot—including the fat—and stir them into the onions and garlic. That’s where the depth of flavor hides. (Your future self will thank you.)
Common mistakes when making this dish
Skipping Meat Browning
This is the biggest flavor killer in chili—skipping the browning step means missing out on the deep, meaty foundation that makes chili sing. The Maillard reaction creates those rich, caramelized flavors that take hours to develop.
I’ve made this mistake too—once I rushed through browning and ended up with chili that tasted more like stew. Always take the 10-15 minutes to properly brown both the ground beef and pork shoulder. 🔥
Using Lean Meat
Ground beef labeled 90/10 or leaner will make your chili dry and tough. The fat in 80/20 ground beef renders out during cooking, keeping the meat juicy and the chili rich.
I learned this the hard way at a tailgate—using lean meat left me with chili that needed extra broth to salvage it. If you’re health-conscious, mix in ½ lb ground pork for extra fat content.
Overloading the Pot
A 6-quart chili needs room to breathe—don’t overfill your pot. I’ve seen people cram in too much meat and beans, leading to a watery, under-seasoned mess. Your pot should be about ⅔ full when you start cooking.
If it looks too crowded, reduce the beans by 1 can or use 1 cup less broth. The chili will thicken naturally as it simmers.
Ignoring the Simmer Time
Rushing the simmer is a common mistake—chili tastes best after 3+ hours of slow cooking. I’ve had people serve chili after just 1 hour, and it’s noticeably less flavorful. The spices need time to meld, the pork needs to become tender, and the flavors need to develop.
Set a timer and let it cook low and slow. If you’re short on time, use a slow cooker on low for 8 hours—it works beautifully.
Not Tasting as You Go
Many cooks add all the spices at once and never adjust. I recommend tasting your chili at the 1-hour mark and again at 2 hours. You might need more salt, a pinch of cayenne, or even a splash of broth to balance the flavors.
Keep a small bowl of salt and cayenne pepper nearby—you’ll thank yourself later. The spices mellow as they cook, so what tastes perfect initially might need a boost later.
Using Pre-Cooked Beans
Canned beans are convenient, but they lack the texture and flavor of dried beans. If you’re using dried beans, soak them overnight and add them 1 hour before serving—they’ll absorb all the delicious chili broth.
I’ve had people complain their chili was watery because they added too many canned beans. For best results, stick to 2 cans total (kidney and black beans) or use 1 cup dried beans per pound of meat.
Nutrition facts
Frequently asked questions
Can I make this chili in a slow cooker instead of stovetop?
For a slow cooker version, brown the meats as directed, then transfer everything to your slow cooker. Cook on low for 8 hours or high for 4-5 hours. The slow cooker method actually enhances the flavors even more by allowing them to develop over time. Just stir once or twice during cooking and taste before serving to adjust seasoning.
How do I adjust the heat level for picky eaters?
Start by reducing the cayenne pepper to ¼ tsp or omit it completely. For extra mildness, add 1 tsp sugar or ½ tsp cinnamon at the end to balance any remaining heat. You can also serve toppings like sour cream, shredded cheese, or avocado on the side to cool things down.
What’s the best way to reheat leftover chili?
Reheat gently on the stovetop over medium-low heat, stirring occasionally, until warmed through (5-7 minutes). If it’s too thick, add ¼ cup broth or water at a time. For microwave reheating, cover with a damp paper towel and heat in 1-minute intervals, stirring between each. Never reheat to boiling—this breaks down the textures.
Can I substitute turkey or chicken for the beef and pork?
Yes, but with adjustments. Use 3 lbs ground turkey (93% lean or less) and 2 lbs ground chicken thigh for similar fat content. Brown the turkey thoroughly and add 1 extra tbsp tomato paste to compensate for its milder flavor. The texture will be slightly lighter but still delicious. For extra richness, stir in 2 tbsp chicken broth at the end.
How do I make this chili vegetarian?
Replace the meats with 3 cups cooked quinoa or lentils and 1 package (16 oz) extra-firm tofu, pressed and crumbled. Use 3 tbsp vegetarian chili powder (check for meat-free labels) and add 1 tbsp soy sauce or mushroom powder for umami depth. Simmer for 1 extra hour to let flavors meld. The beans will provide enough protein, but consider adding 1 cup corn or diced bell peppers for texture.

- 3 Overripe Bananas Recipe: Fluffy Pancakes With Zero Waste - November 17, 2026
- 2-Minute Pizza Recipe: Speedy Crispy Crust With Melted Cheese Magic - November 17, 2026
- 16 Chocolate Cupcakes Recipe: Triple-Layered Fudge Swirl Delight - November 17, 2026