
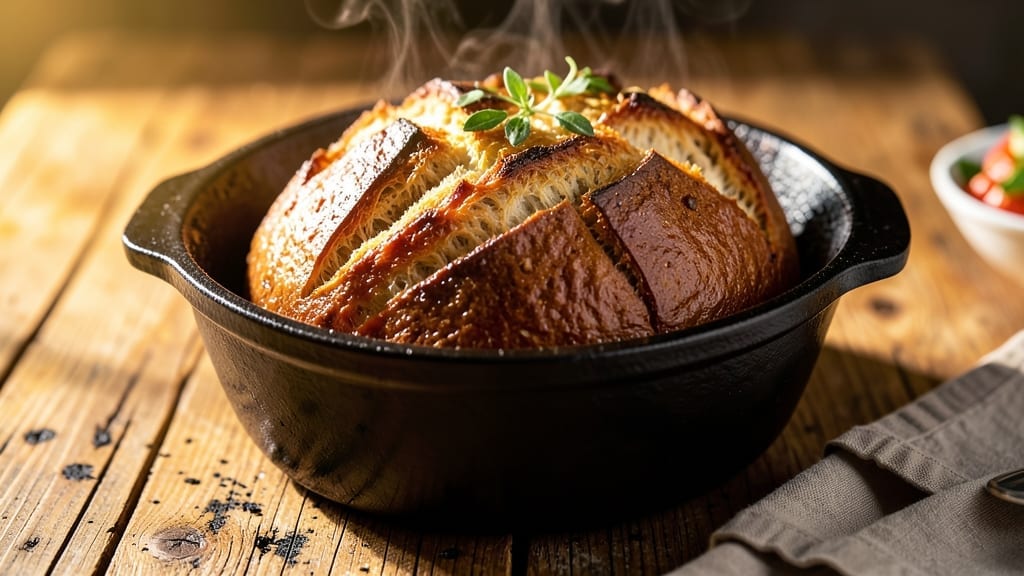
A 6-qt Dutch oven bread recipe delivers the perfect balance of crispy crust and airy crumb with minimal effort—no kneading required. 💛 The secret lies in the Dutch oven’s ability to trap steam, creating that iconic bakery-style texture right in your home kitchen.
This method has transformed my weekend baking routine, producing loaves that rival artisanal bread with just a few simple ingredients and patience.
The beauty of this recipe is its simplicity: combine flour, yeast, water, and salt, let it rest overnight, then shape and bake. The Dutch oven’s heavy walls distribute heat evenly, ensuring a golden-brown crust while keeping the interior tender.
I’ve baked dozens of loaves using this technique, and each one turns out better than the last—proof that great bread doesn’t require complicated methods.
By the time you pull that loaf from the oven, you’ll have a crusty, crackling exterior with a soft, open crumb inside—exactly what you’d expect from a high-end bakery. The aroma alone will have everyone gathering around the table.
This recipe is perfect for feeding a crowd, meal prepping, or treating yourself to homemade bread that tastes like it came from a specialty shop.
Whether you’re a beginner or an experienced baker, this method delivers restaurant-quality results with minimal fuss. The key is patience—letting the dough rest and the oven preheat properly—but the payoff is worth every minute. Here’s how to make it happen.
Ingredients for 6 qt dutch oven bread
Simple ingredients transform into artisanal bread with Dutch oven magic—just flour, yeast, and patience.
| Ingredient | Amount | Notes |
|---|---|---|
| All-Purpose Flour 🌾 | 4 ½ cups | Unbleached preferred for lighter crumb |
| Active Dry Yeast 🍞 | ¼ oz | Or 2.5g for precision |
| Granulated Sugar 🍚 | ½ tbsp | Feeds yeast for activation |
| Kosher Salt 🧂 | 1 ½ tsp | Diamond Crystal preferred |
| Warm Water 💧 | 2 ½ cups | 110°F (43°C) ideal |
| Olive Oil 🫒 | ½ tbsp | Extra-virgin for flavor |
| Cornmeal 🌽 | ½ cup | For dusting Dutch oven |
| Ice Water ❄️ | ¼ cup | For shaping dough |
Flour is the foundation—King Arthur or Gold Medal brands bake best here. The yeast matters too: check expiration dates—old yeast won’t activate properly. Warm water should feel like bathwater (110°F), not hot. Store-bought yeast packets work fine, but if you bake often, grab a small jar from Penzeys or bulk bins at Whole Foods for better shelf life. The olive oil adds subtle richness, but don’t skip it—it helps create that signature crust. For salt, Diamond Crystal dissolves better than table salt, giving you more control over flavor.
No all-purpose flour? Bread flour works too—just expect a slightly chewier texture. Running short on yeast? Instant yeast is a 1:1 swap, but active dry needs to be dissolved first. The sugar can be swapped for honey or maple syrup (reduce water by 1 tbsp), but it’s not essential—just helps the yeast wake up. Cornmeal substitute? Semolina or rice flour works in a pinch. The ice water is crucial for shaping—it tightens the gluten without overworking the dough. If you forget, just chill the dough 15 minutes before shaping.
Dough keeps 2 days in the fridge or 3 months frozen—wrap tightly in plastic. For the Dutch oven, preheat with lid on for 30 minutes to create that perfect steam environment. Cool completely on a wire rack before slicing—this prevents gummy bread. Leftovers? Toast them—second day is even better. Store in a bread bag or wrapped in a towel to maintain freshness. The crust stays crisp for 3 days if kept dry.
Why You’ll Love This Recipe
- Dutch Oven Magic: I swear by this method—just mix the flour, yeast, sugar, and salt with warm water, let it rise, and bake in my trusty Dutch oven. The steam creates that perfect crust, every single time.
- Pantry Staple Power: Honestly, these five ingredients are always in my cupboards. No fancy substitutions, no last-minute grocery runs—just dump, knead, and bake. It’s my go-to when I’m too tired to fuss.
- Weeknight Wonder: Between us, this bread is ridiculously good toasted with butter or slathered with jam. I make a double batch on Sundays so I always have slices ready for quick breakfasts or sandwiches all week.
- Budget-Friendly Feast: A single batch stretches across meals—think toast, French toast, or even breadcrumbs for fried chicken. I’ve fed my whole family for days on just one loaf, and the cost? Less than $3. Efficiency at its finest.
Step-by-step instructions for perfect Dutch oven bread
Master this no-knead technique for bread with a crispy crust and airy interior every time.
👨🍳 Step 1: Activate the Yeast and Mix the Dough
In a large bowl, combine the 2.5 cups warm water, 0.5 tbsp granulated sugar, and 0.25 oz active dry yeast. Let it sit for 5-10 minutes until frothy—this confirms your yeast is alive and ready to work. If it doesn’t bubble, start over with fresh yeast.
Add the 4.5 cups all-purpose flour and 1.5 tsp kosher salt to the bowl. Stir with a wooden spoon until a shaggy dough forms, then add the 0.5 tbsp olive oil. Mix until just combined—you’ll see some dry flour remaining, and that’s perfect. Cover the bowl with a damp towel and let it rest at room temperature for 12-18 hours.
⏰ Step 2: Shape and Prepare the Dough
After resting, the dough will be sticky but pliable. Lightly flour a clean surface and turn out the dough. Gently fold it over itself 4-5 times to develop surface tension—this creates that signature open crumb structure. Shape into a loose round by pulling the edges toward the center.
Place the dough seam-side up in a bowl, cover with the damp towel, and refrigerate for 1-2 hours. This cold proof helps create a better oven spring. Meanwhile, preheat your oven to 450°F and place a 6-quart Dutch oven with lid inside to heat for 30 minutes.
🔥 Step 3: Score and Bake for Maximum Crisp
Remove the hot Dutch oven from the oven and carefully transfer the dough onto a floured surface. Using a razor blade or sharp knife, score the top with a ½-inch deep cross—this controls expansion and adds visual appeal. Dust the top generously with 0.5 cup cornmeal.
Carefully lift the dough into the hot Dutch oven using a peel or parchment paper. Bake uncovered for 20 minutes, then place the lid on and bake for another 20-25 minutes until the internal temperature reaches 205-210°F. The crust should be deep golden brown with dark spots.
🍞 Step 4: Cool and Serve for Best Texture
Remove the bread from the Dutch oven and let it cool on a wire rack for at least 1 hour before slicing. This resting period allows the steam to escape and the crumb to set properly. If you cut too soon, the bread will be gummy inside.
The bread will keep well at room temperature for 2-3 days wrapped in a clean kitchen towel. For extra crispiness, reheat slices in a 350°F oven for 5-10 minutes. The combination of the crisp exterior and tender crumb makes this bread perfect for sandwiches or enjoyed on its own.
Pro Tips For Making 6 Qt Dutch Oven Bread
- USE A THERMOMETER FOR WATER: The yeast will die if your water’s too hot—aim for 105–110°F. I learned this the hard way when my first batch of dough smelled like burnt sugar. Use a kitchen thermometer or test the water with your wrist: it should feel warm, not steamy.
- WEIGH YOUR FLOUR: Scooping flour from the bag packs too much air, which makes your dough dry and dense. Use a scale for the 6-quart Dutch oven recipe—350–375 grams of all-purpose flour will give you the right texture. (Yes, even if you’re impatient like me.)
- STEAM THE OVEN FIRST: Before baking, place a metal bowl of boiling water on the lower rack for 10 minutes. This creates steam that helps the bread rise dramatically in the first 20 minutes—no more flat, sad loaves. (Your future self will thank you.)
- LET THE DOUGH REST AFTER SHAPING: After forming the boule, cover it and let it sit at room temp for 30–60 minutes before baking. This relaxes the gluten, so the bread expands properly in the Dutch oven. I used to skip this, and my crusts were tough—now they’re shatteringly crisp.
Storing and reheating your 6 qt dutch oven bread
Room-Temp Storage
Your freshly baked Dutch oven bread stays fresh for 2-3 days at room temperature when stored properly. I wrap mine in a clean muslin linen towel (not plastic) to preserve moisture while allowing airflow—this prevents sogginess.
Place the wrapped loaf in a paper bag or on a wire rack in a cool, dark pantry spot. The crust stays crisp for the first 24 hours, but after that, I recommend toasting slices for maximum crunch. 💛
Fridge Preservation
If you need to extend freshness beyond 3 days, refrigerate the bread in an airtight container or resealable bag. I slice the loaf first—this way, you can grab individual portions without thawing the whole thing.
The bread will last up to 5 days in the fridge, though the crust loses some crispness. To revive, wrap slices in foil and reheat in a 350°F oven for 5 minutes.
Freezer-Friendly
For long-term storage, freeze your bread in 1-inch thick slices on a parchment-lined tray for 1 hour before transferring to a freezer bag. This prevents freezer burn and makes slicing easier later. Thaw at room temperature for 30 minutes before toasting—no microwave needed.
I’ve successfully stored bread this way for 3 months without quality loss. The texture remains slightly softer than fresh, but it’s perfect for toast or French toast. ❄️
Reheating Secrets
For that bakery-fresh texture, I swear by the oven method. Preheat to 350°F, place slices on a baking sheet, and warm for 5-7 minutes until golden. For quick fixes, use the toaster on medium heat—add a pat of butter for extra richness.
Avoid the microwave at all costs; it turns bread gummy. If reheating a whole loaf, wrap it in foil and bake at 325°F for 15 minutes to warm through evenly.
Reviving Stale Bread
Even “stale” Dutch oven bread can be rescued! Spritz with water using a spray bottle, then bake at 375°F for 5-10 minutes until crisp again. This works wonders for sandwiches or croutons.
For a fun twist, transform stale slices into breadcrumbs** by pulsing in a food processor—perfect for meatballs or coatings. I keep a small container of these in my freezer for quick breading needs. 🔥
Nutrition facts
Frequently asked questions
Can I use a different size Dutch oven?
A 6-quart Dutch oven is ideal for this recipe, but you can adapt it to a 5-quart by reducing the dough by about 15% (use 3.8 cups flour instead of 4.5 cups). For a 7-quart, increase flour by 0.5 cups and water by 0.25 cups to maintain the same proportions. The key is to keep the dough thickness consistent—about 2 inches high in the pot.
Why is my bread dense instead of airy?
Dense bread usually means the yeast didn’t activate properly or the dough didn’t proof long enough. First, check your yeast—it should bubble within 5-10 minutes in warm water. If not, use fresh yeast. Also, ensure your dough rests the full 12-18 hours at room temp (or 1-2 hours in the fridge after shaping). Overworking the dough or skipping the cold proof can also weigh it down.
How do I know when the bread is fully baked?
Your bread is done when the internal temperature reaches 205-210°F and the crust has deep golden-brown spots. Tap the bottom—it should sound hollow. If unsure, bake 5 more minutes covered. Overbaking can dry out the crumb, so pull it out when it’s just slightly underdone. The bread will continue cooking as it cools.
Can I make this recipe without a Dutch oven?
Yes! Use a heavy oven-safe pot with a lid (like a cast-iron skillet) or a baking stone. For best results, place a metal bowl of boiling water on the lower rack to create steam during the first 20 minutes of baking. The texture won’t be identical, but you’ll still get a good crust. Preheat your substitute pot for 30 minutes at 450°F before adding the dough.
What’s the best way to slice this bread?
Always let the bread cool completely on a wire rack before slicing—this prevents a gummy interior. Use a sharp serrated knife and cut against the grain for cleaner slices. For sandwiches, slice ½-inch thick. To prevent crumbs, dip the knife in hot water between cuts. Store slices in an airtight container or wrap tightly in foil to maintain freshness.

- 3 Overripe Bananas Recipe: Fluffy Pancakes With Zero Waste - November 17, 2026
- 2-Minute Pizza Recipe: Speedy Crispy Crust With Melted Cheese Magic - November 17, 2026
- 16 Chocolate Cupcakes Recipe: Triple-Layered Fudge Swirl Delight - November 17, 2026