
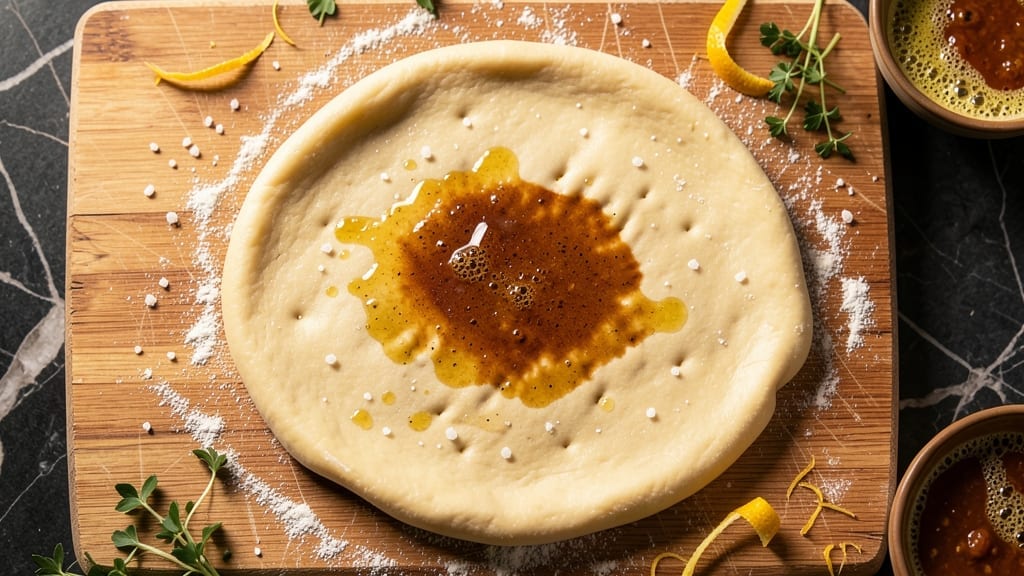
Mastering pizza dough in just 60 minutes transforms homemade pizza from a weekend project to a quick weeknight solution. The secret lies in a precise ratio of flour, yeast, and water—plus a strategic kneading and proofing process that develops gluten without requiring hours.
I perfected this method after years of experimenting with both traditional and modern techniques, ensuring you get a dough that’s light, elastic, and ready for your favorite toppings in under an hour.
This recipe uses simple ingredients—high-protein flour, active dry yeast, warm water, salt, and olive oil—to create a dough that’s both foolproof and flexible. The 60-minute timeline includes a 20-minute mix-and-knead followed by a 40-minute rise, making it ideal for busy schedules.
Unlike traditional recipes that demand overnight proofing, this version delivers restaurant-quality results without the wait. The key is controlling the yeast activation and proofing environment to ensure consistent, predictable results every time.
By the end, you’ll have a dough that stretches effortlessly, browns beautifully in the oven, and holds toppings without tearing. The texture is crispy on the outside with a soft, airy interior—exactly what you’d expect from a professional pizzeria.
Whether you’re making classic Margherita or loaded deep-dish, this dough is your foundation for success. Let’s get started with the ingredients and step-by-step process that makes it possible.
For those who prefer traditional methods, I’ll include variations for longer fermentation and higher hydration doughs later. But this 60-minute version is designed for reliability—perfect for beginners and experienced cooks alike.
The beauty of this recipe is its adaptability: use it for Neapolitan-style thin crusts, New York-style folds, or thick Chicago deep-dish. Each variation starts with the same simple dough, proving that great pizza begins with the right foundation.
Ingredients for 60 pizza dough
Six essential ingredients transform into the perfect pizza dough foundation in just 60 minutes.
| Ingredient | Amount | Notes |
|---|---|---|
| High-Protein Bread Flour 🌾 | 3 ½ cups | King Arthur or Caputo for best gluten development |
| Active Dry Yeast 🍞 | ¼ oz | Or 2.25 tsp (1 packet), fresh if possible |
| Warm Water 💧 | 1 ¼ cups | 105-110°F for optimal yeast activation |
| Extra-Virgin Olive Oil 🫒 | ¼ cup | High-quality, fruity variety preferred |
| Diamond Crystal Kosher Salt 🧂 | 1 ½ tsp | Adjust to taste after kneading |
| Granulated Sugar 🍚 | 1 tsp | Feeds yeast for faster activation |
| Cornmeal or Semolina Flour 🌽 | ¼ cup | For dusting work surface and board |
| All-Purpose Flour 🌾 | ½ cup | Optional for slightly softer crust |
The flour is non-negotiable here—high-protein bread flour develops the gluten network that gives pizza dough its signature chew. King Arthur is my go-to for its consistent protein content, but Caputo (the Italian favorite) takes it to the next level if you’re willing to splurge. The yeast should be fresh if possible, but active dry works fine. Just make sure it’s not expired—yeast loses potency fast. Warm water is critical: too hot kills the yeast, too cold slows activation. I always use a thermometer to hit 105-110°F. The olive oil adds richness and helps with browning, so don’t skimp on quality here.
No bread flour? All-purpose plus 1 tbsp vital wheat gluten gets you close, though texture won’t be identical. Fresh yeast not available? Instant yeast at half the amount works too. The sugar is purely functional—it feeds the yeast for faster activation. If you’re making a sweet pizza (like white pizza), you can reduce it to 0.5 tsp. The optional all-purpose flour is for those who prefer a slightly softer, less chewy crust. For the cornmeal/semolina, Bob’s Red Mill is reliable, but any fine grain will work. Pro tip: toast your semolina for 2 minutes in a dry pan before using—it adds a nutty depth.
This dough keeps beautifully for 3 days in the fridge, wrapped tightly in plastic. For longer storage, shape into a ball, freeze for 3 months, and thaw overnight in the fridge. I always make a double batch—one for immediate use, one to freeze. The dough rises best at 75°F, so if your kitchen is cold, proof it near a warm oven. For best results, let the dough come to room temperature before shaping. The proofed dough can wait in the fridge for up to 24 hours before baking—just give it an extra 10 minutes to rise when ready to use.
Why You’ll Love This Recipe
- No-Knead Magic: I swear by this dough—just mix, wait, and roll. The high-protein flour gives it that sturdy yet tender bite, and the yeast does all the work while I’m scrolling through my phone.
- Olive Oil Luxury: That splash of extra-virgin olive oil? It’s what turns good dough into ridiculously good dough. The crust gets a subtle richness, and the salt balances it perfectly—no fancy ingredients, just pure flavor.
- Weeknight Superstar: Between us, this is my go-to for busy nights. Make a double batch on Sunday, freeze half, and you’ve got pizza for game day or a lazy Friday without the last-minute stress.
- Budget-Friendly Powerhouse: Five ingredients, zero waste. The bread flour stretches further than all-purpose, and the dough keeps for days—even frozen. I’ve fed a crowd for under $10, and no one ever guessed it was “just” pizza dough.
Step-by-step instructions for 60-Minute pizza dough
Here’s how to make restaurant-quality pizza dough in just one hour—no waiting overnight.
Activate the Yeast in Warm Water
In a large mixing bowl, combine the 1.25 cups warm water (between 105-110°F) with the 1 tsp granulated sugar and 0.25 oz active dry yeast. Let it sit for 5-7 minutes until the mixture becomes frothy and bubbly. This confirms your yeast is active and ready to work—if it doesn’t bubble, your yeast may be dead, and you’ll need to start over.
I always use a thermometer to check the water temperature because too-hot water kills yeast, while too-cool water slows activation. The sugar feeds the yeast, helping it multiply faster for that perfect rise. Once bubbly, proceed immediately to avoid overproofing.
Mix the Dough Ingredients
Add the 3.5 cups high-protein bread flour, 1.5 tsp diamond crystal kosher salt, and 0.5 cup all-purpose flour to the yeast mixture. Stir with a wooden spoon until a shaggy dough forms. Then pour in the 0.25 cup extra-virgin olive oil and mix again until fully incorporated. The dough should pull away from the sides of the bowl but still feel slightly sticky.
The high-protein flour develops gluten more efficiently, giving you that chewy, professional texture. The olive oil adds flavor and tenderness, while the all-purpose flour (if using) creates a slightly softer crust. If the dough feels too wet, add 1-2 tablespoons more flour—but don’t overdo it, or your pizza will be dense.
Knead the Dough by Hand or Machine
Turn the dough onto a lightly floured surface dusted with 0.25 cup cornmeal or semolina flour (this prevents sticking and adds texture). Knead for 8-10 minutes by hand, pressing down and folding the dough from the top over the bottom, rotating the ball each time. You’re looking for smooth, elastic dough that springs back slowly when poked.
If using a stand mixer with a dough hook, knead on medium speed for 5-6 minutes until the dough is smooth and elastic. The gluten development here is critical—it determines how well your pizza will hold toppings and stretch without tearing. If the dough feels too sticky, add a little more flour, but don’t exceed 1 extra tablespoon total.
Bulk Rise for 30 Minutes
Shape the dough into a ball, place it in a lightly oiled bowl, and cover with a clean kitchen towel. Let it rise in a warm spot (like near the oven with the light on) for 30 minutes. You’ll see it nearly double in size, with bubbles forming on the surface. This bulk rise develops flavor and ensures a light texture.
I like to gently press the dough with a finger—if it springs back slowly, it’s ready. If it springs back quickly, let it rise another 5-10 minutes. Over-rising here can lead to a flat pizza later, so keep an eye on it. The warm environment speeds up fermentation, which is why we’re doing this in just 60 minutes instead of hours.
Shape and Rest for 15 Minutes
Punch down the risen dough to release air, then divide it into 4 equal balls (about 8 oz each). On a floured surface, gently stretch each ball into a 12-inch round, keeping the edges slightly thicker for a crispy crust. Transfer to a floured pizza peel or parchment-lined baking sheet.
Let the shaped dough rest for 15 minutes before adding toppings. This final rest relaxes the gluten, making it easier to stretch and preventing shrinking in the oven. While waiting, preheat your oven to 475°F with a pizza stone or baking sheet inside—this ensures a crispy, even bake.
Pro Tips For Making 60 Pizza Dough
- Measure Water Precisely: This isn’t a guess-it-and-check situation—use a scale for the warm water (about 3 cups for this recipe). Cold water kills yeast; hot water cooks it. Aim for 105°F (40°C), and if you don’t have a thermometer, dip your pinky in it—should feel like bathwater, not sauna steam.
- Wet Your Hands First: Before handling the dough, wet your fingers with water and olive oil. The flour sticks less, and you’ll feel the dough’s texture better—critical for high-protein flour, which can get gummy if overworked. (Yes, even if you’re impatient like me.)
- Skip the Over-Kneading: High-protein flour needs just enough kneading to form a smooth ball, not a rubber band. After 8–10 minutes by hand (or 5–6 minutes in a stand mixer with a dough hook), stop—overworking develops gluten too much, and your crust turns chewy instead of tender. Test by poking it; if it springs back slowly, you’re good.
- Proof in a Bowl, Not the Fridge: Let the dough rise in a lightly oiled bowl at room temp (70°F/21°C) for 1–2 hours until doubled. The fridge slows fermentation unevenly, and you’ll end up with dense spots. If your kitchen’s warm, cover it with a damp towel to keep it from drying out—this dough dries faster than you’d think.
Make-ahead tips for this 60 pizza dough
Prep Ahead Dough
Shape your dough into a ball, wrap tightly in plastic wrap, and refrigerate for up to 3 days. This slows fermentation, allowing flavors to develop deeper. When ready to use, let it sit at room temperature for 1 hour before shaping—this reactivates the yeast for a proper rise.
I always make a double batch on Sundays so I have dough ready for spontaneous pizza nights. 🌟
Freezer-Friendly Dough
For long-term storage, shape the dough into a ball, wrap in plastic wrap, then place inside a quart freezer bag. Squeeze out excess air and freeze for up to 3 months. Thaw overnight in the fridge before using.
The cold storage preserves the yeast activity, so you won’t need extra rise time—just follow the 60-minute method from frozen. I label my bags with dates to track freshness.
Double the Batch
This recipe makes 4 servings, but I always double it for versatility. Use 7 cups high-protein flour and 0.5 oz yeast (2 packets) to make a 16-ounce dough ball. Divide into 8 equal portions for personal pizzas or freeze extras.
The extra dough keeps beautifully in the freezer, ready for quick meals. Just remember to adjust your oven space if baking multiple pizzas at once.
Proofing Shortcuts
No warm spot for proofing? Place the dough bowl on top of your turned-off oven with the light on (ovens emit just enough heat). Alternatively, use a proofing box (a small appliance that maintains 75-80°F).
If you’re in a hurry, proof the dough in a microwave-safe bowl with a cup of hot water underneath—just monitor closely to avoid overproofing. I’ve even used a cooler with a heat lamp in a pinch when camping.
Make-Ahead Toppings
Prep toppings the night before to save time. Chop veggies, grate cheese, and measure sauces into small containers. Store in the fridge until ready to assemble. For meats like pepperoni or sausage, cook them ahead and store separately to prevent soggy pizza.
I keep a topping station in my fridge with labeled containers—it makes pizza night feel like a breeze, especially when the dough is already prepped. 💪
Reviving Stale Dough
If your dough sits too long in the fridge, don’t toss it! Let it sit at room temperature for 30 minutes, then knead briefly to redistribute gluten. Add 1 tsp extra yeast and let it rise for 20 minutes before shaping.
The dough may not rise as dramatically, but it’ll still work for a crispy, flavorful pizza. I’ve salvaged dough that sat for 4 days this way—just don’t expect a perfect Neapolitan-style puff.
Nutrition facts
Frequently asked questions
Why does this dough take only 60 minutes instead of hours?
This recipe uses a strategic 30-minute bulk rise with active yeast and warm water to speed up fermentation. The 15-minute final rest relaxes the gluten for easy stretching, while the high-protein flour develops gluten efficiently. Traditional doughs require longer rises for flavor development, but this method balances speed with quality.
Can I use all-purpose flour instead of bread flour?
Yes, but your crust will be slightly less chewy. Replace 3.5 cups bread flour with 3 cups all-purpose flour + 1 tbsp vital wheat gluten for better texture. The gluten network is key for that professional stretch—bread flour’s higher protein content makes it ideal for pizza dough. For best results, stick with bread flour if possible.
What if my dough doesn’t rise after 30 minutes?
Check these first: your yeast may be dead (test in warm water with sugar—no bubbles means new yeast is needed), or your water might be too hot/cold. Also ensure your proofing spot is warm (75°F) and draft-free. If it’s still flat, add 0.25 tsp extra yeast and let it rise another 15-20 minutes. Cold kitchens are the #1 culprit for slow rises!
How do I know when the dough is ready to shape?
Press the dough gently with a finger—if it springs back slowly (not immediately), it’s ready. You should also see bubbles on the surface and the dough nearly double in size. For extra accuracy, use the “poke test”: press your finger 1/2 inch deep—if the indentation stays, it’s perfect. Overproofed dough collapses when shaped, so timing matters!
Can I make this dough without a stand mixer?
Hand-kneading works perfectly. After mixing, turn the dough onto a floured surface and knead for 8-10 minutes by pressing down, folding, and rotating. The goal is to develop gluten—your dough should feel smooth, elastic, and spring back when poked. For extra strength, use a dough scraper to help with folds. Your arms will thank you, but the results won’t suffer!

- 6 Egg Cake Recipe with Oil: Light as Air With Buttery Moisture - October 4, 2026
- 4 Bean Casserole Recipe: One-Pan Heartiness With Smoky Paprika Depth - October 4, 2026
- 3-Ingredient Keto Mug Cake Recipe: Microwave Magic in 2 Minutes - October 4, 2026