
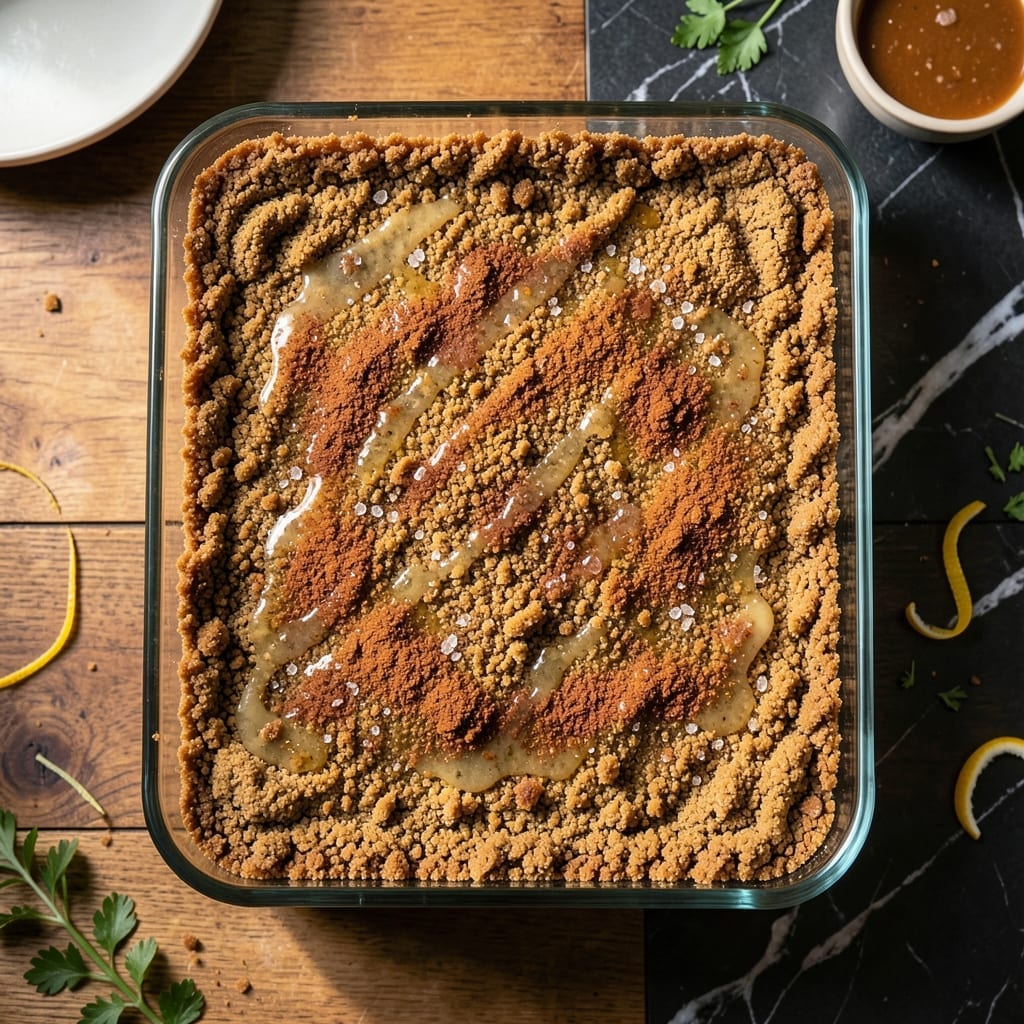
This buttery graham cracker crust transforms any dessert into something extraordinary. I’ve perfected this base to deliver consistent results every time—crisp, golden, and perfectly structured to hold fillings without crumbling.
The secret lies in the right ratio of crumbs to butter and proper pressing technique. With just 5 simple ingredients and 10 minutes of prep, you’ll create a foundation that works for pies, cheesecakes, or bars.
Baking it briefly sets the crust so it stays firm yet tender, never soggy. The sweet, toasty flavor complements everything from tangy lemon to rich chocolate without overpowering the filling.
Whether you’re making a classic cheesecake or a layered dessert, this crust provides the ideal start. No special equipment required—just a bowl, a pan, and your hands.
Ingredients for 9 X 13 Graham Cracker Crust
Five simple ingredients create this buttery, crisp base for all your favorite desserts.
| Ingredient | Amount | Notes |
|---|---|---|
| Graham Cracker Crumbs 🍪 | 3 cups | Finely crushed from whole crackers |
| Granulated Sugar 🍚 | ¼ cup | Adjust to taste preference |
| Unsalted Butter 🧈 | ¾ cup | Melted for binding |
| Ground Cinnamon 🌿 | ½ tsp | Optional for warmth |
| Salt 🧂 | ¼ tsp | Fine grain for even distribution |
The graham crackers are the foundation here. Honey Maid or Annie’s brands crush evenly without turning to dust. I always buy the whole crackers and pulse them myself in a food processor (the pre-crushed stuff is often too fine). For the butter, unsalted gives you control over the salt level—Kerrygold or Plugrá melt beautifully into the crumbs.
No graham crackers? Digestive biscuits or gingersnaps work in a pinch (adjust sugar to taste). Out of butter? Coconut oil at a 1:1 ratio makes a great dairy-free swap. The cinnamon is optional but adds that classic warmth—skip it if you’re pairing with a delicate filling like lemon. For extra crunch, toast the crumbs in the oven for 5 minutes before mixing.
This crust keeps 3-4 days at room temperature if well-sealed, but it’s best fresh. Pre-bake and cool completely before adding fillings. Freeze the unbaked crust mixture for up to 3 months—just press and bake straight from frozen, adding a minute or two.
Why You’ll Love This Recipe
- 5-Minute Mix: I dump the graham cracker crumbs, melted butter, and a pinch of cinnamon in a bowl and press—no rolling, no chilling, just done.
- Buttery Cinnamon Crunch: That warm, toasty scent when it bakes is pure comfort, and the sweet crumb with a hint of spice is dangerously addictive.
- Feeds a Party: One batch fills my big pan, so it’s my go-to for potlucks, birthdays, or just because Tuesday needs cheesecake.
- Budget Stretch: A sleeve of graham crackers, a stick of butter, and pantry staples make a crust that costs pennies but tastes like a million bucks.
Step-by-Step Instructions for Graham Cracker Crust
Here’s the method. Straightforward, tested, works every time.
Step 1: Combine Dry Ingredients for Maximum Flavor
In a large mixing bowl, combine the 3 cups Graham Cracker Crumbs with the 0.25 cup Granulated Sugar. I always use finely crushed whole crackers for the best texture—the coarse crumbs create that perfect, crumbly base.
Add the 0.5 tsp Ground Cinnamon and 0.25 tsp Salt, then whisk everything together until evenly distributed. This ensures every bite has that warm, spiced flavor. The salt enhances all the other ingredients, so don’t skip it.
Here’s the thing—the sugar amount is flexible. If you prefer a less sweet crust, you can reduce it slightly, but I’ve found this ratio balances perfectly with most pie fillings.
Step 2: Incorporate Melted Butter for the Perfect Bind
Melt the 0.75 cup Unsalted Butter in the microwave or a small saucepan until completely liquid. Let it cool for 1-2 minutes—you want it warm but not hot, otherwise it might make the crust greasy.
Pour the melted butter over the dry ingredients in the bowl. Use a spatula to gently fold everything together until the mixture resembles wet sand. You want all the crumbs to be evenly coated with butter—this is what binds them together in the pan.
Real talk: if it looks too dry, add another tablespoon of melted butter. If it’s too wet, add a few more crumbs. The mixture should hold together when pressed between your fingers.
Step 3: Press the Crust into the Pan with Firm, Even Pressure
Transfer the mixture to a 9 x 13-inch baking dish. Dump it all in and spread it out roughly with your spatula. Then, use the bottom of a measuring cup or glass to press the crumbs down firmly and evenly across the bottom of the pan.
I like to start in the center and work my way out to the edges, pressing hard as I go. This creates a compact, solid base that won’t crumble when you slice into it later. Pay special attention to the corners—they tend to be the weakest spots.
Don’t skip this (I learned the hard way): if the crust isn’t pressed firmly, it’ll fall apart when you try to serve it. The goal is a uniform layer that’s tightly packed.
Step 4: Chill for Structure and Bake for Crispness
Place the pan in the refrigerator and chill for at least 30 minutes. This step is non-negotiable—it allows the butter to solidify, which helps the crust hold its shape during baking.
Preheat your oven to 375°F. Once the crust is chilled, bake it for 8-10 minutes until the edges are just starting to turn light golden brown. You’re not looking for deep browning here—just enough to set the crust and give it a slight crispness.
If you’re using this for a no-bake pie or cheesecake, you can skip the baking step and just chill it for 1 hour to firm up. For baked desserts, proceed with your recipe as directed.
Pro Tips For Making 9 X 13 Graham Cracker Crust
- Press Firmly: Use the bottom of a glass to really pack down the crumb mixture—about 30 seconds of firm pressing guarantees it won’t crumble when sliced. I learned this the hard way after my first few pies looked great until the first cut.
- Melt Butter Slowly: Brown the butter just until foamy, not dark, then cool it 5 minutes before mixing with crumbs. After burning three batches, I finally figured out that hot butter makes the crust greasy instead of crisp.
- Skip Store Crumbs: Pulse whole graham crackers yourself—store-bought crumbs are too fine and turn the base to dust. Sounds weird, but it works: the uneven chunks bind better and give that perfect texture.
- Chill 20 Minutes: Pop the pan in the fridge for a full 20 minutes before baking or filling. My grandmother swore by this, and she was right: it sets the butter so the crust holds its shape under fillings.
Essential Equipment for 9 x 13 graham cracker crust
Mixing Bowls
I always use a large stainless steel mixing bowl for combining the dry ingredients. The 5-quart size gives plenty of room to mix without spilling. Cuisinox makes durable, lightweight bowls that won’t react with acidic ingredients.
Measuring Tools
A set of nesting measuring cups and measuring spoons is essential for precision. I prefer OXO Good Grips with magnetic backs—they stay organized and the handles are comfortable. The ¼ cup and ½ tsp get heavy use in this recipe.
Crushing Equipment
For perfect crumbs, a food processor is my go-to. The Cuisinart 14-cup pulverizes whole crackers into even crumbs in 10-15 seconds. No processor? A rolling pin and zip-top bag work too, but require more elbow grease.
Pressing Tool
The bottom of a 1-cup dry measuring cup is ideal for pressing the crust evenly. The flat base and weight make it easy to compact the crumbs. I’ve also used a glass tumbler in a pinch—just ensure it has a flat bottom.
Baking Dish
A 9 x 13-inch metal baking pan conducts heat evenly for consistent baking. I recommend USA Pan with a nonstick coating—the corners are sharp for clean slices. For easy removal, line with parchment paper before pressing in the crust. 💛
Cooling Rack
After baking, transfer the pan to a wire cooling rack to prevent the bottom from steaming. The OXO wire rack has wide spacing for air circulation. Let the crust cool completely before adding any filling to maintain its crisp texture.
Nutrition Facts
Frequently Asked Questions
Can I use a different pan size?
For an 8×8 pan, halve the ingredients. For a 10-inch pie dish, reduce by 25%. Adjust baking time by 1-2 minutes based on thickness.
Why chill the crust before baking?
Chilling for 30 minutes prevents the butter from melting too fast, which helps the crust hold its shape. Skipping this can cause crumbling or uneven texture.
Can I make it gluten-free?
Yes! Swap graham crackers for gluten-free graham-style crumbs or crushed almond flour cookies. Ensure all ingredients are certified gluten-free.
How long can I store the unbaked crust?
Press and wrap tightly in plastic; refrigerate for up to 2 days or freeze for 3 months. Bake straight from frozen, adding 1-2 minutes.

- 6 Egg Cake Recipe with Oil: Light as Air With Buttery Moisture - October 4, 2026
- 4 Bean Casserole Recipe: One-Pan Heartiness With Smoky Paprika Depth - October 4, 2026
- 3-Ingredient Keto Mug Cake Recipe: Microwave Magic in 2 Minutes - October 4, 2026