
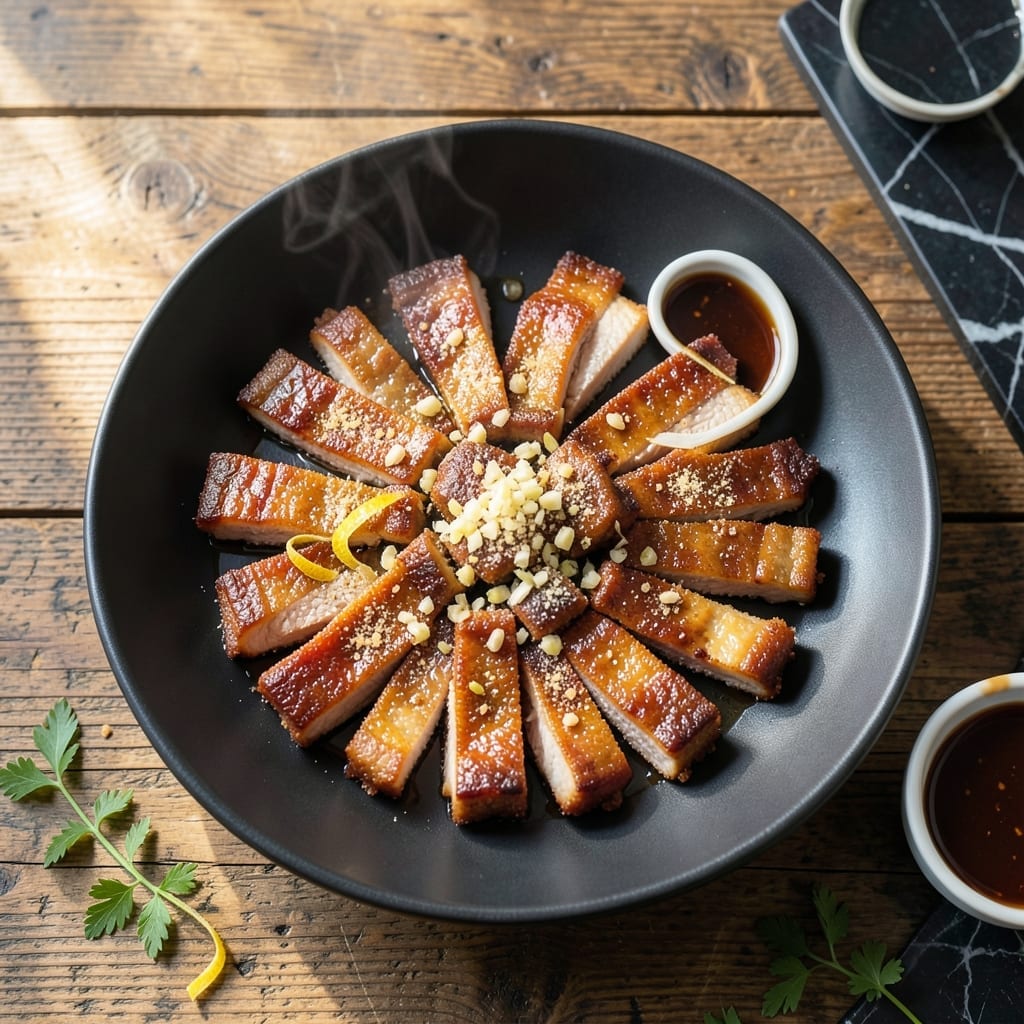
I’m about to share my secret for achieving crispy deep fried pork belly that shatters between your teeth while the fat melts like butter. No fancy equipment needed—just a pot, oil, and a little patience.
The magic happens in the double-fry method, which ensures every bite has that perfect contrast of crunchy skin and tender meat. I learned this technique from my grandmother, who swore by using cold pork straight from the fridge.
What you’ll end up with is golden, bubbling pork belly with layers of texture that are impossible to resist. The first bite always gets me—crispy outside, unctuous inside, with a satisfying snap.
Serve it hot with your favorite dipping sauce. Here’s how to make it happen.
Ingredients for Deep Fried Pork Belly
Pantry staples meet a few special ingredients for that perfect crispy contrast.
| Ingredient | Amount | Notes |
|---|---|---|
| Pork Belly 🥓 | 2 lb | Skin-on, cut into 1-inch strips |
| Neutral Oil 🫒 | 8 cups | For deep frying, like vegetable or canola |
| Kosher Salt 🧂 | 2 tbsp | For seasoning pork |
| Black Pepper 🌶️ | 1 tsp | Freshly ground preferred |
| Garlic Powder 🧄 | 1 tsp | For extra flavor depth |
| Onion Powder 🧅 | 1 tsp | Balances the richness |
| Paprika 🌶️ | 1 tsp | Sweet or smoked variety |
| Baking Powder 🧂 | ½ tsp | For extra crispiness |
| Cornstarch 🌾 | ½ cup | For dredging before frying |
| Soy Sauce 🫒 | 2 tbsp | For marinating pork |
| Rice Vinegar 💧 | 1 tbsp | Adds tang to marinade |
| Brown Sugar 🍚 | 1 tbsp | For caramelization |
| Fresh Ginger 🌿 | 1 tbsp | Grated, for marinade |
The pork belly is everything here. Look for skin-on pieces at your butcher or Asian market—Costco often has great options too. Ask them to cut it into 1-inch strips for you (saves time). The fat should be creamy white with a bit of pink meat. Cold pork straight from the fridge fries up crispier, so don’t let it sit out too long before cooking.
No pork belly? Pork shoulder cut into strips works in a pinch, though the texture won’t be as luxurious. Swap soy sauce for coconut aminos if needed. Fresh ginger not on hand? Ground ginger at half the amount gets you close. The cornstarch is key for that shatter—don’t skip it. If you’re out, all-purpose flour works but won’t be as crisp.
Fry in batches so the oil stays hot—crowding makes soggy pork. Leftovers (if there are any) keep in the fridge for 3 days. Reheat in the oven at 400°F to revive the crunch. The oil can be reused once if strained and stored properly.
Why You’ll Love This Recipe
- Five Ingredient Magic: I love that it only takes pork belly, oil, salt, pepper, and garlic powder—no fancy shopping required.
- Crispy Perfection: That first bite with the salty, garlicky crust and tender fat inside? Ridiculously good.
- Crowd Pleaser: Honestly, it disappears faster than I can fry it, whether it’s game day or a lazy Sunday.
- Budget Stretch: One slab of pork belly feeds my family for two meals, and the leftovers reheat beautifully.
Step-by-Step Instructions for Deep Fried Pork Belly
Here’s the method I use to achieve irresistibly crispy pork belly with tender, juicy layers.
Step 1: Marinate the Pork Belly
Cut the 2 lb Pork Belly into 1-inch strips and place them in a bowl. In a separate small bowl, combine the 2 tbsp Soy Sauce, 1 tbsp Rice Vinegar, 1 tbsp Brown Sugar, and 1 tbsp Fresh Ginger.
Pour this marinade over the pork belly strips, ensuring each piece is well coated. Cover and let it marinate in the refrigerator for at least 1 hour, or overnight for deeper flavor. This step infuses the meat with umami and a hint of sweetness, balancing the richness of the pork.
Step 2: Season and Prep for Frying
Remove the pork belly from the marinade and pat it dry with paper towels. This helps the coating adhere better. In a large bowl, mix the 2 tbsp Kosher Salt, 1 tsp Black Pepper, 1 tsp Garlic Powder, 1 tsp Onion Powder, 1 tsp Paprika, and 0.5 tsp Baking Powder.
Sprinkle this seasoning mix evenly over the pork belly strips, pressing it in gently so it sticks. The baking powder is my secret for extra crispiness—it creates tiny bubbles in the coating that puff up during frying.
Step 3: Dredge in Cornstarch
Place the 0.5 cup Cornstarch in a shallow dish. Coat each seasoned pork belly strip thoroughly in the cornstarch, pressing lightly to ensure an even layer. The cornstarch will form a light, crispy crust that locks in the juices.
Let the dredged strips rest on a wire rack for 10 minutes before frying. This short rest helps the coating set, so it doesn’t fall off when it hits the hot oil.
Step 4: Deep Fry to Golden Perfection
In a large, heavy-bottomed pot, heat the 8 cups Neutral Oil to 350°F. Use a deep-fry thermometer to monitor the temperature—consistency is key. Carefully lower the pork belly strips into the oil, working in batches to avoid overcrowding.
Fry for 6-8 minutes, turning occasionally, until the strips are golden brown and crispy on all sides. The pork is done when the internal temperature reaches 145°F and the coating is deep golden. Drain on a wire rack or paper towels to remove excess oil.
Serve immediately while hot and crispy. The contrast between the crunchy exterior and the melt-in-your-mouth pork belly is what makes this dish unforgettable.
Pro Tips For Making Deep Fried Pork Belly
- Double Fry for Crisp: Fry the pork belly once at 325°F until cooked through, then crank the heat to 375°F for a second fry to get that shatteringly crisp skin. I learned this the hard way—single frying always left me with soggy spots.
- Dry the Skin First: Pat the pork belly completely dry with paper towels before seasoning, and let it air-dry in the fridge uncovered for 30 minutes. Sounds weird, but it works: the drier the surface, the better the crust.
- Skip the Overcrowding: Resist the urge to fry all the pieces at once—overcrowding drops the oil temp and steams the pork instead of frying it. I used to rush this part and wondered why my belly never got golden.
- Season Twice: Hit the pork with salt, pepper, and garlic powder before frying, then dust it again with a pinch more right after it comes out of the oil. My grandmother swore by this, and she was right: the second seasoning sticks to the crispy bits.
Dietary Considerations for This Dish
Gluten-Free Adaptation
This recipe is naturally gluten-free if you use tamari instead of regular soy sauce. Check that your spices are certified gluten-free, as some blends can contain wheat. The cornstarch coating is safe, but always verify the brand for cross-contamination warnings. 💡
Keto-Friendly Version
Skip the cornstarch entirely and use almond flour or crushed pork rinds for dredging. The baking powder remains, but omit the brown sugar in the marinade. A 2-ounce serving of the adapted recipe has about 3g net carbs without the starchy coating.
Lower-Sodium Option
Reduce the kosher salt to 1 tbsp and use low-sodium soy sauce or coconut aminos. The garlic and onion powders add flavor without much sodium, and a squeeze of lime juice after frying brightens the dish without extra salt.
Allergen Considerations
This dish contains pork, which may be an allergen for some. The frying oil can also be a concern—use avocado oil for a higher smoke point if needed. Always disclose ingredients if serving to guests with allergies.
For nut allergies, confirm your cornstarch and spices are processed in a nut-free facility.
Vegetarian Alternative
While not the same, mushroom stems or eggplant slices can mimic the texture when breaded and fried. Marinate in soy sauce and ginger, then dredge in cornstarch for a similar crunch. The flavors won’t match pork belly, but the technique works well. 🌱
Nutrition Facts
Frequently Asked Questions
Do I need a deep fryer for this?
No, a heavy pot and thermometer work perfectly. Just ensure you have 2-3 inches of oil and maintain 350°F.
Why do you use baking powder in the coating?
It creates tiny air pockets for extra crunch. The alkaline nature also helps the meat brown beautifully during frying.
How do I keep it crispy after frying?
Drain on a wire rack, not paper towels. Reheat in a 400°F oven for 5-10 minutes if needed.
Can I use skinless pork belly?
Not recommended—the skin provides the best crunch. If using skinless, score the fat cap deeply before marinating.

- 6 Egg Cake Recipe with Oil: Light as Air With Buttery Moisture - October 4, 2026
- 4 Bean Casserole Recipe: One-Pan Heartiness With Smoky Paprika Depth - October 4, 2026
- 3-Ingredient Keto Mug Cake Recipe: Microwave Magic in 2 Minutes - October 4, 2026