
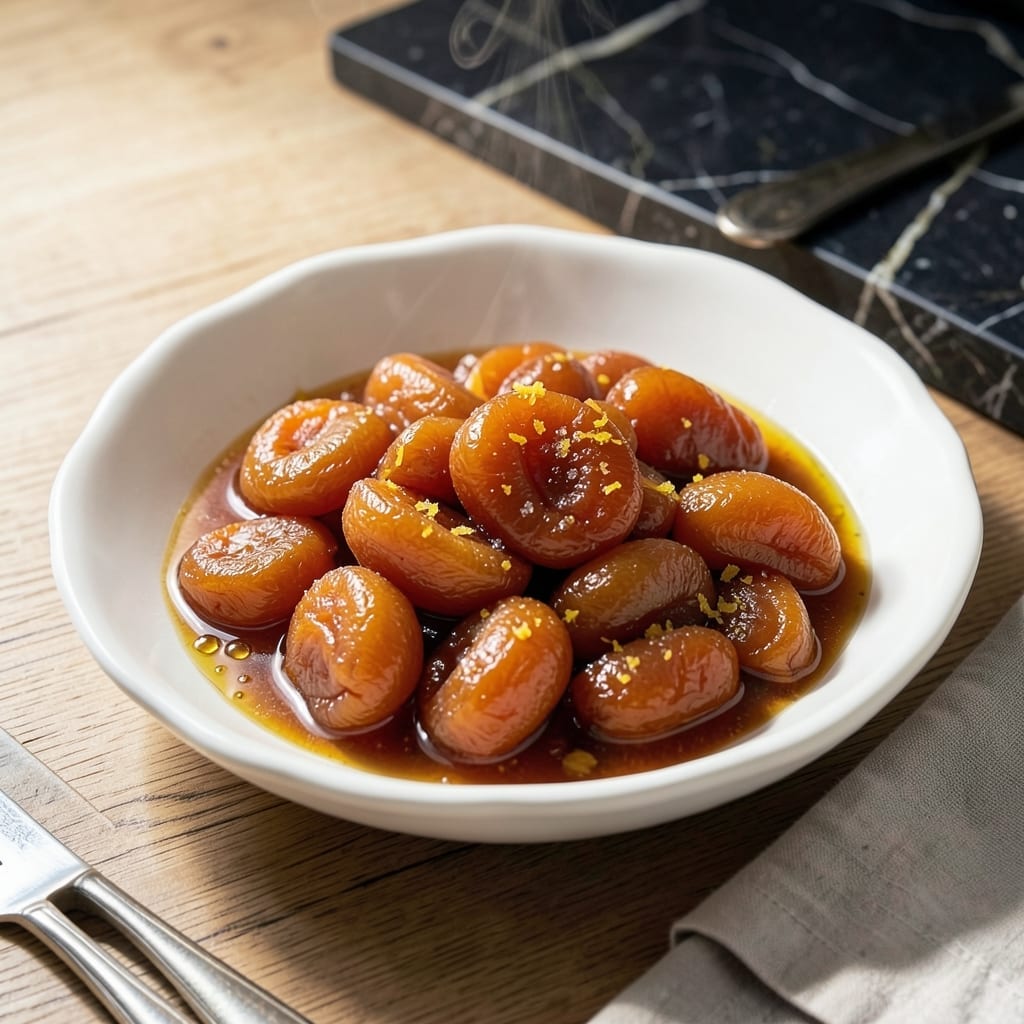
This apricot filling delivers a thick, glossy consistency perfect for pastries and desserts. I developed this method to ensure a smooth texture that holds its shape without being runny.
The key is cooking down fresh or dried apricots with sugar until naturally pectin-rich. A small amount of lemon juice brightens the flavor while helping the mixture set properly.
What results is a versatile spread with vibrant color and balanced sweetness. It pipes beautifully and maintains a satin finish that makes any baked good look professional.
Make a batch ahead—it keeps well for weeks when stored properly in the refrigerator.
Ingredients for Apricot Filling
Seven simple ingredients create this luscious, professional-quality apricot spread for baked goods and desserts.
| Ingredient | Amount | Notes |
|---|---|---|
| Dried Apricots 🍑 | 8 oz | Unsulfured, pitted, chopped |
| Granulated Sugar 🍚 | ¾ cup | Adjust to taste preference |
| Water 💧 | 1 cup | For initial cooking liquid |
| Lemon Juice 🍋 | 2 tbsp | Freshly squeezed preferred |
| Lemon Zest 🍋 | 1 tsp | Finely grated for brightness |
| Vanilla Extract 🌿 | 1 tsp | Pure extract for depth |
| Ground Cinnamon 🌿 | ¼ tsp | Optional for warmth |
For the best results, use unsulfured dried apricots—they retain a brighter color and cleaner flavor. Trader Joe’s and Whole Foods carry excellent quality, or buy in bulk at natural food stores. The sugar amount can be adjusted based on apricot sweetness; taste as you cook. Fresh lemon juice and zest are non-negotiable for that vibrant, balanced finish that defines a professional filling.
No dried apricots? Fresh apricots (about 1.5 lb) work but require pitting and chopping. Out of lemon? Lime juice at equal amount substitutes acceptably. For a smoother texture, blend the cooked mixture with an immersion blender. The cinnamon is optional but adds a subtle depth that pairs beautifully with the fruit’s natural sweetness.
This keeps beautifully in an airtight container. Refrigerate for up to 3 weeks, or freeze for 6 months. The flavor actually improves after a day as it thickens further. Always bring to room temperature before using for easiest spreading or piping.
Why You’ll Love This Recipe
- Five Minute Simmer: I just dump everything in a pot and let it bubble away—no fancy techniques, just dried apricots, sugar, and a squeeze of lemon.
- Bright and Zesty: The lemon zest cuts through the sweetness, making it taste fresh, not cloying.
- Endless Uses: I slap this on toast, swirl it into yogurt, or bake it into pastries. Honestly, it’s my secret weapon for dessert emergencies.
- Budget Stretcher: A bag of dried apricots and pantry staples make a jarful. Between us, it costs pennies compared to store-bought.
Step-by-Step Instructions for Apricot Filling
This method ensures a smooth, glossy filling with perfect consistency for pastries and desserts.
Step 1: Rehydrate the Dried Apricots
Combine the 8 oz dried apricots and 1 cup water in a medium saucepan. Bring to a boil over medium-high heat, then reduce to a simmer. Cook for 10-12 minutes until the apricots are softened and have absorbed most of the liquid.
You’ll notice the fruit plumping significantly and becoming tender enough to pierce easily with a fork. This rehydration step is crucial for achieving the right texture in your final filling. If any water remains, don’t drain it—those liquid infusions carry valuable flavor.
Step 2: Purée the Apricot Mixture
Transfer the rehydrated apricots and any remaining liquid to a blender or food processor. Add the 0.75 cup granulated sugar, 2 tbsp lemon juice, 1 tsp lemon zest, 1 tsp vanilla extract, and 0.25 tsp ground cinnamon.
Purée until completely smooth, stopping to scrape down the sides as needed. The mixture should be uniform with no visible chunks. The acidity from the lemon balances the sweetness while the zest adds a bright, citrusy note that enhances the apricot flavor.
Step 3: Reduce to Desired Consistency
Return the purée to the saucepan and cook over medium heat for 8-10 minutes, stirring frequently. The filling should thicken noticeably and reduce by about one-third in volume. You’re aiming for a spreadable consistency that holds its shape when cooled.
Watch for the mixture to darken slightly and develop a glossy sheen. As it thickens, it will leave a visible trail when you drag a spoon through it. This reduction step concentrates the flavors and ensures your filling won’t make pastries soggy.
Step 4: Cool and Store the Filling
Transfer the hot filling to a clean, heatproof container. Let it cool to room temperature, which typically takes 1-2 hours. As it cools, it will thicken further to the perfect pastry-filling consistency.
Once cooled, cover and refrigerate. The filling will keep for up to 2 weeks in the refrigerator or can be frozen for longer storage. For best results, make this a day ahead to allow the flavors to fully meld and the texture to set completely.
Pro Tips For Making Apricot Filling
- Soak the Apricots: Cover dried apricots with hot water for at least 20 minutes before cooking—I learned this the hard way after ending up with chewy bits in my filling.
- Simmer Low and Slow: Keep the heat at a gentle simmer and stir often, about 15-20 minutes, to prevent the sugar from caramelizing too fast and turning bitter.
- Zest Before Juicing: Always zest the lemon before juicing it—you’ll get more zest without the struggle, and it adds a brighter flavor to the filling.
- Skip the Over-Sweetening: Taste before adding extra sugar; dried apricots are already sweet, and the flavor deepens as it cooks—my first batch was cloying because I didn’t check.
Regional Styles of apricot filling
French Tradition
In Provence, apricot filling often includes lavender honey for a floral note. Use 1 tbsp in place of sugar. The region’s famous Calisson d’Aix candy pairs beautifully with this variation. I love the subtle perfume it adds. 💜
Middle Eastern Style
Add ½ tsp cardamom and ¼ tsp rose water for a Persian-inspired twist. This version works wonderfully in baklava or as a filling for ma’amoul cookies during festive occasions.
German Approach
Stir in 2 tbsp apricot brandy (like Barack Palinka) after cooking. This technique, common in Black Forest pastries, adds depth. The alcohol cooks off, leaving rich fruit essence.
American Classic
For a retro diner vibe, mix in ¼ cup crushed pineapple and 1 tbsp orange zest. This bright, slightly tangy version was popular in 1950s pie fillings. It’s nostalgic comfort in every bite.
North African Spice
Incorporate ½ tsp ground coriander and pinch of saffron for a Moroccan influence. Perfect with briouats or as a glaze for bastilla. The warm spices complement apricot’s natural sweetness.
British Favorite
Add 1 tbsp ginger wine (like Stone’s) for a British twist. This version is traditional in Eccles cakes and Bakewell tarts. The ginger adds a lovely warmth to the filling. 💛
Nutrition Facts
Frequently Asked Questions
Can I use fresh apricots instead of dried?
Yes, use about 1.5 lb fresh apricots, pitted and chopped. Cook them down first to remove excess moisture. They’ll yield a slightly lighter, fresher flavor than dried.
How do I fix a runny filling?
Return it to the saucepan and cook over medium heat for 3-5 minutes longer, stirring constantly. For immediate thickening, mix in 1 tsp cornstarch slurry and cook for 1 minute.
Can I make this without sugar?
Use ½ cup honey or maple syrup as a substitute. Note that this may slightly alter the texture and shelf life. Reduce other liquids by 2 tbsp to compensate.
How long does homemade filling last?
Store in an airtight container in the fridge for up to 3 weeks. For longer storage, freeze for up to 6 months. Thaw in the fridge overnight before using.

- 6 Egg Cake Recipe with Oil: Light as Air With Buttery Moisture - October 4, 2026
- 4 Bean Casserole Recipe: One-Pan Heartiness With Smoky Paprika Depth - October 4, 2026
- 3-Ingredient Keto Mug Cake Recipe: Microwave Magic in 2 Minutes - October 4, 2026