
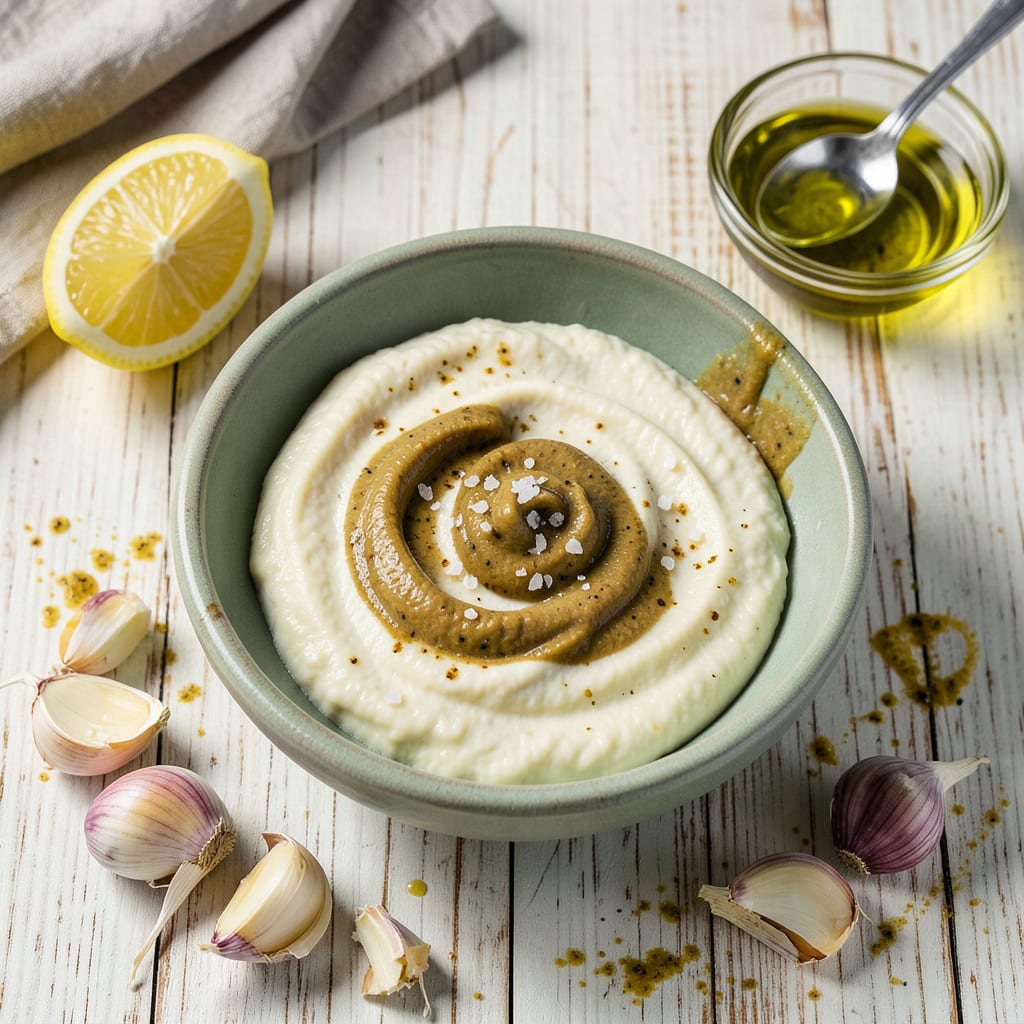
True aioli represents the essence of Mediterranean cooking—a bold, creamy emulsion where garlic and oil transform into something far greater than their parts. This isn’t just flavored mayonnaise; it’s a centuries-old technique that demands patience and precision. The traditional method begins with a mortar and pestle, where garlic is crushed into a paste before slowly incorporating oil drop by drop to create that signature thick, velvety texture.
The result is a sauce with intense garlic flavor balanced by the richness of olive oil, brightened with just enough acid. Whether you’re dipping crusty bread, pairing with grilled seafood, or dressing roasted vegetables, authentic aioli elevates every bite. The key lies in the emulsion process—rush it, and you risk a broken sauce; do it right, and you’ll achieve restaurant-quality results every time.
Ingredients for Authentic Aioli
Seven simple ingredients, one showstopping sauce. This is aioli as it’s meant to be.
| Ingredient | Amount | Notes |
|---|---|---|
| Garlic Cloves 🧄 | 6 cloves | Fresh, peeled, for bold flavor |
| Extra-Virgin Olive Oil 🫒 | 1 cup | High-quality, for rich emulsion |
| Large Egg Yolk 🥚 | 1 whole | Room temperature, for stability |
| Dijon Mustard 🟡 | 1 tsp | Smooth, for emulsifying power |
| Lemon Juice 🍋 | 1 tbsp | Freshly squeezed, for brightness |
| Sea Salt 🧂 | ½ tsp | Fine grain, to taste |
| White Wine Vinegar 🍷 | ½ tsp | Balances garlic’s intensity |
The garlic is everything here. Fresh cloves crushed in a mortar give that authentic texture—no shortcuts. I grab mine from local farmers markets when possible (the flavor’s night and day). The olive oil? Spanish or Italian extra-virgin with a peppery finish works best. Skip the ‘light’ stuff—it won’t emulsify right. And that egg yolk? Room temp is non-negotiable (cold ones break the sauce).
No mortar? A food processor or blender works, but pulse carefully—overmixing turns it bitter. Out of Dijon? Stone-ground mustard at half the amount is fine. Lemon juice too sharp? Swap for rice vinegar. The salt matters too—Diamond Crystal kosher dissolves cleanly. If you’re nervous about raw egg, pasteurized yolks (like Safest Choice) are a safe bet.
Aioli separates? No panic. Start over with a fresh yolk in a clean bowl, then whisk in the broken sauce slowly. Keeps 3 days in the fridge (olive oil solidifies—just stir before using). For longer storage, freeze in ice cube trays (thaw overnight).
Why You’ll Love This Recipe
- No Blender Needed: I’ve made this with just a whisk and a bowl—no fancy equipment, no cleanup nightmare. The egg yolk and olive oil emulsify right before your eyes with a little elbow grease, and honestly? It’s weirdly satisfying to watch it thicken up like magic.
- Garlic That Doesn’t Overpower: Here’s what sold me—the raw garlic mellows into something rich and sweet when it meets the lemon and mustard, not that harsh bite you’d expect. It’s bold but balanced, the kind of flavor that makes you dip everything into it (yes, even that last sad french fry).
- Dresses Up Anything: Slather it on crusty bread for garlic toast, dollop it over grilled fish, or—my personal move—stir a spoonful into mashed potatoes when no one’s looking. Between us, I’ve used this aioli to rescue dry chicken more times than I’ll admit.
- Keeps Like a Dream: Three days in the fridge, and it’s still spot-on. I’ll make a double batch Sunday night, and by Wednesday, it’s saving me from sad desk lunches—toss it with roasted veggies or smear it on a sandwich, and suddenly you’re eating like you planned ahead. (Spoiler: You didn’t.)
Step-by-Step Instructions for Authentic Aioli
Making real aioli is all about patience and technique—let’s build that perfect creamy emulsion together.
Step 1: Prepare the Garlic Base
Start by smashing the 6 cloves garlic cloves with the flat side of your knife. This breaks down the fibers and releases more flavor than mincing. Remove any green germs from the center if you want a milder garlic taste, but I usually leave them in for that authentic bold kick.
Place the smashed garlic in a mortar and pestle with the 0.5 tsp sea salt. Grind into a smooth paste, scraping down the sides occasionally. This process takes about 3-5 minutes of steady grinding. You’ll know it’s ready when the paste looks uniform and slightly sticky. If you don’t have a mortar and pestle, use a small food processor, but pulse carefully to avoid overheating the garlic.
Step 2: Create the Emulsion Foundation
In a medium bowl, whisk together the 1 whole large egg yolk, 1 tsp Dijon mustard, 1 tbsp lemon juice, and 0.5 tsp white wine vinegar until completely combined. The mixture should look pale yellow and slightly thickened. This is your emulsion base that will hold everything together.
Add the garlic paste to this mixture and whisk vigorously for about 30 seconds until fully incorporated. You’ll notice the color deepen slightly and the texture become more cohesive. This is where the magic starts—all those bold flavors coming together before we even add the oil.
Step 3: Slowly Incorporate the Olive Oil
Here’s the most critical part: very slowly drizzle in the 1 cup extra-virgin olive oil, starting with just a few drops at a time while whisking constantly. I like to use my non-dominant hand for drizzling while whisking with my dominant hand. After the first ¼ cup is incorporated and the mixture starts to thicken, you can increase to a thin, steady stream.
Keep whisking until all the oil is incorporated and the aioli reaches a mayonnaise-like consistency. This should take about 5-7 minutes of continuous whisking. You’ll see the color lighten and the texture become creamy and voluminous. If it gets too thick, you can thin it with a splash of warm water. The key is patience—rushing this step can cause the emulsion to break.
Step 4: Adjust and Finish
Taste your aioli and adjust the seasoning if needed. I often find it needs just a pinch more sea salt to balance the richness. If you want it tangier, add another ½ tsp lemon juice. The texture should be smooth and creamy, with enough body to hold its shape when spooned.
Transfer the aioli to a clean jar or bowl and let it sit at room temperature for 10-15 minutes before serving. This resting time allows the flavors to meld together. The finished aioli should be thick enough to cling to a spoon but still pourable. Serve it immediately for the best texture, or store in the refrigerator for up to 3 days—though it’s always best fresh.
Best Sauces and Condiments for This authentic aioli
Classic Catalan Aioli
The original Catalan version skips the egg entirely—just garlic, oil, and salt, emulsified with sheer elbow grease. I make this when I want pure garlic punch. The trick is using aged garlic cloves (they’re sweeter) and Spanish Arbequina olive oil for its fruity notes. Serve with grilled calçots (spring onions) for the full Catalan experience. 🧄
Provençal Aioli Garni
In Provence, aioli becomes a meal itself—served with cod, potatoes, and green beans. Their version often includes 1 tsp saffron threads steeped in warm water, giving it a golden hue. I love adding herbes de Provence (about ½ tsp) for an aromatic twist. The saffron makes it feel special enough for company.
Modern Vegan Aioli
For plant-based versions, I swear by aquafaba (chickpea brine) as the emulsifier. Use 3 tbsp aquafaba per 1 cup oil, plus ½ tsp xanthan gum for stability. The flavor’s nearly identical to traditional aioli, and it holds up beautifully for 5 days refrigerated. Perfect for vegan seafood platters.
Smoky Roasted Garlic
Roasting the garlic first transforms the flavor completely. Toss 8 whole cloves with 1 tsp olive oil, wrap in foil, and roast at 400°F for 25 minutes. The caramelized cloves make the aioli sweeter and deeper. I add ¼ tsp smoked paprika to enhance the smokiness. This version pairs amazingly with grilled meats.
Citrus-Herb Brightness
For summer dishes, I brighten aioli with 1 tbsp orange zest and 1 tbsp chopped tarragon. The citrus cuts through the richness while the tarragon adds an anise-like complexity. This works wonders with steamed artichokes or poached salmon. The zest should be added at the very end to preserve its freshness. ✨
Spicy Sriracha Kick
When I want heat, I blend in 1 tbsp sriracha and ½ tsp gochugaru (Korean chili flakes) after the emulsion is set. The combination gives both immediate spice and slow-building warmth. This version is my go-to for fried oysters or crispy tofu. Start with less sriracha—you can always add more to taste.
Nutrition Facts

- 6 Egg Cake Recipe with Oil: Light as Air With Buttery Moisture - October 4, 2026
- 4 Bean Casserole Recipe: One-Pan Heartiness With Smoky Paprika Depth - October 4, 2026
- 3-Ingredient Keto Mug Cake Recipe: Microwave Magic in 2 Minutes - October 4, 2026