
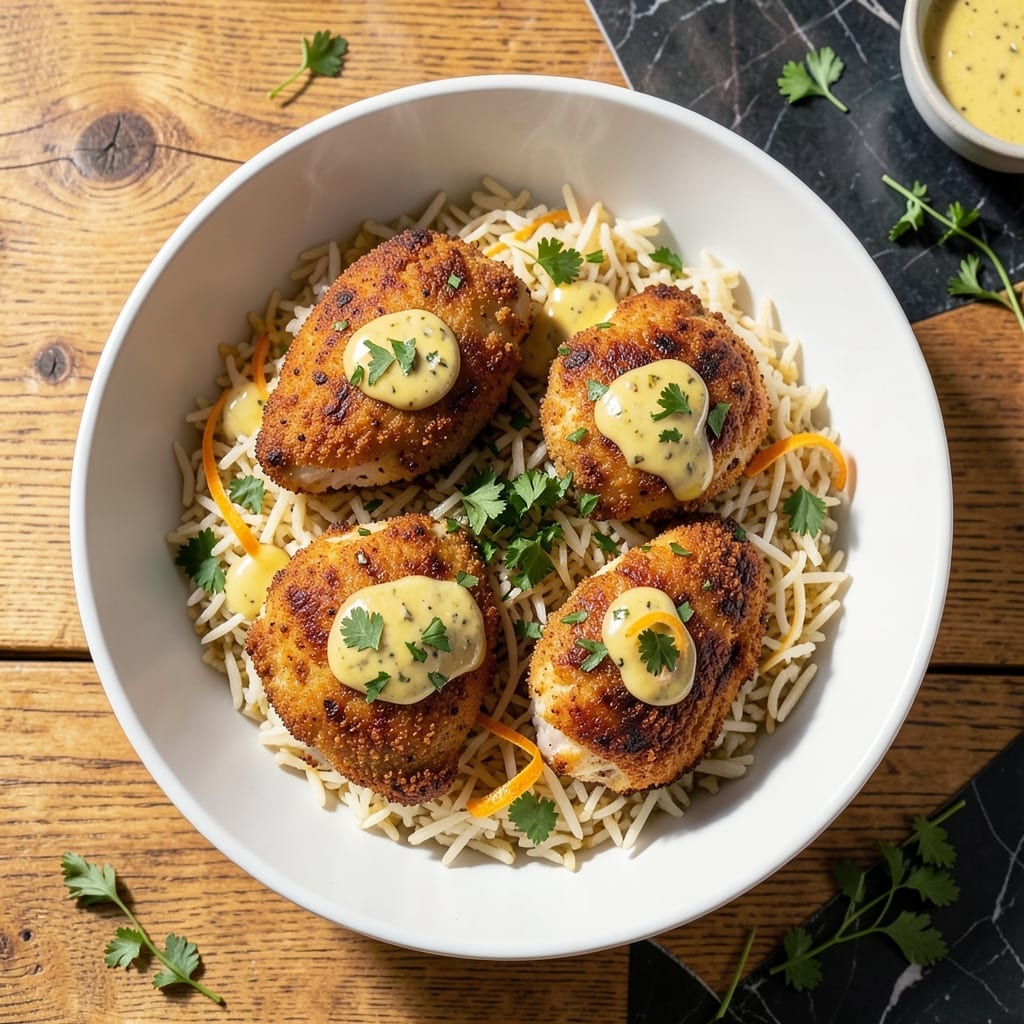
There’s something special about cutting into a perfectly baked chicken kiev and discovering that buttery, garlicky center oozing out. This recipe delivers restaurant-quality results without the fuss.
I’ve refined the breading technique to ensure a golden, crispy coating that stays intact while baking. The secret is chilling the butter filling so it holds its shape until the very last moment.
You’ll get juicy chicken with a surprise burst of herbed butter in every bite. The aroma alone will have everyone gathered around the table before it’s even out of the oven.
Serve with mashed potatoes or roasted vegetables to soak up every drop of that rich, savory sauce. This is comfort food at its finest.
Ingredients for Baked Chicken Kiev
Pantry staples plus a few fresh additions create this elegant, restaurant-quality dish.
| Ingredient | Amount | Notes |
|---|---|---|
| Chicken Breast 🍗 | 4 whole | Boneless, skinless, pounded to 1/4-inch thickness |
| Unsalted Butter 🧈 | ½ cup | Chilled and cut into 4 equal portions |
| Garlic Cloves 🧄 | 4 cloves | Minced finely for filling |
| Fresh Parsley 🌿 | 2 tbsp | Finely chopped for butter mixture |
| All-Purpose Flour 🌾 | ½ cup | For dredging chicken |
| Large Eggs 🥚 | 2 whole | Beaten for egg wash |
| Panko Breadcrumbs 🍞 | 1 ½ cups | For crispy coating |
| Parmesan Cheese 🧀 | ½ cup | Freshly grated for breading |
| Dijon Mustard 🟡 | 1 tbsp | For egg wash mixture |
| Salt 🧂 | 1 tsp | Divided for seasoning |
| Black Pepper 🌶️ | ½ tsp | Freshly ground preferred |
| Garlic Powder 🧄 | ½ tsp | For breading seasoning |
| Paprika 🌶️ | ½ tsp | Sweet or smoked for color |
| Olive Oil 🫒 | 2 tbsp | For baking sheet preparation |
The butter is the star here. Use a high-quality European-style butter like Plugrá or Kerrygold—it has less water, so it holds its shape better when chilled. Chicken breasts should be uniform in thickness (pound them if needed) so they cook evenly. Most supermarkets carry pre-pounded cutlets, but doing it yourself ensures even thickness. The Parmesan should be freshly grated from a block for the best melt and flavor.
No Panko? Regular breadcrumbs work in a pinch, but the texture won’t be as crisp. Out of fresh parsley? Dried parsley at half the amount works, though fresh brings better color. If you’re avoiding dairy, vegan butter can substitute for the filling, but the flavor won’t be quite as rich. The Dijon mustard adds depth—yellow mustard in a 1:1 swap if that’s what you’ve got.
The assembled chicken can be refrigerated for up to 24 hours before baking. Leftovers keep in the fridge for 3-4 days and reheat best in the oven at 350°F to maintain crispiness. The butter filling will re-solidify when chilled, so warm it gently.
Why You’ll Love This Recipe
- I’ll be real: it’s even better the next day. The flavors deepen, and the chicken stays juicy—perfect for lunch the following afternoon.
- One Pan Wonder: I love that I can bake these in a single dish with minimal cleanup—just flour the chicken, stuff with buttery garlic-herb goodness, and pop it in the oven.
- Weeknight Hero: Honestly, it’s my go-to for busy evenings—fancy enough for guests but unfussy enough for a Tuesday.
- Leftovers? Yes Please: I’ll be real: it’s even better the next day. The flavors deepen, and the chicken stays juicy—perfect for lunch the following afternoon.
Step-by-Step Instructions for Baked Chicken Kiev
This method ensures a crispy exterior with a molten garlic butter center that stays perfectly contained.
Step 1: Prepare the Garlic Butter Filling
Combine the 0.5 cup unsalted butter (chilled and cut into 4 equal portions) with 4 cloves minced garlic cloves and 2 tbsp finely chopped fresh parsley in a small bowl. Mix until fully incorporated and evenly distributed throughout the butter.
Divide the mixture into 4 equal portions and shape each into a 1-inch thick log. Place on a plate and refrigerate for 30 minutes until firm. This chilling step is crucial—it keeps the butter from leaking out during cooking and ensures each bite delivers that signature garlic butter surprise.
Step 2: Bread the Chicken with a Three-Step Process
Set up a breading station with three shallow dishes. Place the 0.5 cup all-purpose flour in the first dish, seasoned with ½ tsp salt and ½ tsp black pepper. In the second dish, whisk together the 2 whole large eggs and 1 tbsp Dijon mustard. In the third dish, combine the 1.5 cups panko breadcrumbs, 0.5 cup freshly grated parmesan cheese, ½ tsp garlic powder, and ½ tsp paprika.
Working with one piece at a time, dredge each chicken breast in the seasoned flour, shaking off excess. Dip into the egg mixture, letting any excess drip off. Finally, press into the panko mixture, ensuring full coverage. The mustard in the egg wash helps the breading adhere better, while the parmesan adds depth of flavor to the crispy coating.
Step 3: Assemble and Secure the Filling
Lay a breaded chicken breast flat on your work surface. Place one chilled garlic butter log in the center of the breast. Fold the edges of the chicken over the butter, enclosing it completely. Secure with toothpicks if needed to keep the filling contained.
Repeat with the remaining chicken breasts and butter portions. This step requires care—make sure the butter is fully enclosed to prevent leaks during baking. The toothpicks will be removed after cooking, so place them where they’re easy to see and remove later.
Step 4: Bake to Golden Perfection
Preheat your oven to 375°F. Line a baking sheet with parchment paper and drizzle with 2 tbsp olive oil, spreading it evenly. Place the assembled chicken Kievs on the baking sheet, seam-side down.
Bake for 25-30 minutes or until the coating is golden brown and the internal temperature reaches 165°F. Flip halfway through baking to ensure even browning on both sides. The high heat of the oven creates a crispy exterior while keeping the chicken juicy and the butter filling molten.
Remove from the oven and let rest for 5 minutes before serving. This brief rest allows the filling to set slightly, reducing the risk of it spilling out when you cut into the chicken. Remove any toothpicks before serving.
Pro Tips For Making Baked Chicken Kiev
- Chill the Butter: Freeze the butter-herb mixture for 20-30 minutes before stuffing—it holds its shape better and won’t leak out during baking. I learned this the hard way after my first three attempts turned into buttery puddles.
- Pound Even Thickness: Use a meat mallet to pound chicken breasts to 1/2-inch thickness before rolling. This guarantees even cooking and prevents dry, overdone edges while the center finishes.
- Seal the Edges: Press the flour-dusted chicken edges firmly together and crimp with your fingers to lock in the filling. Skip this and you’ll be scraping garlic butter off the pan instead of eating it.
- Rest Before Baking: Let the stuffed chicken rest in the fridge for 15 minutes after breading. It helps the coating adhere better and keeps the filling intact—my grandmother swore by this, and she was right.
Common Mistakes When Making This Recipe
Butter Leakage
Don’t skip chilling the garlic butter for 30 minutes before assembling. Warm butter will seep out during baking, leaving you with a sad, dry chicken breast and a pool of melted butter on your baking sheet. I learned this the hard way. 💡
Uneven Thickness
Pound your chicken breasts to an even ¼-inch thickness before breading. Thicker parts cook slower, causing the butter to leak while thinner areas overcook. Use a meat mallet or rolling pin for uniform results.
Skipping the Toothpicks
Always secure the folded edges with toothpicks. Without them, the butter can escape during baking. Just
Overcrowding the Pan
Give each piece at least 2 inches of space on the baking sheet. Crowding traps steam, making the coating soggy instead of crispy. I use a half-sheet pan for 4 servings to ensure proper airflow.
Incorrect Oven Temp
Bake at 375°F—any lower and the breading won’t crisp properly. Too hot, and the outside burns before the chicken cooks through. Flip halfway for even browning on both sides.
Skipping the Rest
Let the chicken rest for 5 minutes after baking. This allows the juices and butter to settle slightly, so you get that perfect ooze without losing half the filling on the cutting board. Patience pays off here.
Nutrition Facts
Frequently Asked Questions
Can I use chicken thighs instead of breasts?
Yes, but pound boneless thighs to ¼-inch thickness for even cooking. The darker meat stays juicier but may slightly alter the classic presentation.
Why did my butter leak out during baking?
This usually happens if the butter wasn’t chilled for 30 minutes or the edges weren’t sealed tightly. Always use toothpicks to secure the fold.
How do I know when it’s fully cooked?
Use a meat thermometer to check the internal temperature reaches 165°F. The breading should be golden brown and crisp.
Can I make this ahead of time?
Assemble and refrigerate up to 24 hours before baking. Add 5 minutes to cooking time if baking straight from the fridge.

- 6 Egg Cake Recipe with Oil: Light as Air With Buttery Moisture - October 4, 2026
- 4 Bean Casserole Recipe: One-Pan Heartiness With Smoky Paprika Depth - October 4, 2026
- 3-Ingredient Keto Mug Cake Recipe: Microwave Magic in 2 Minutes - October 4, 2026