
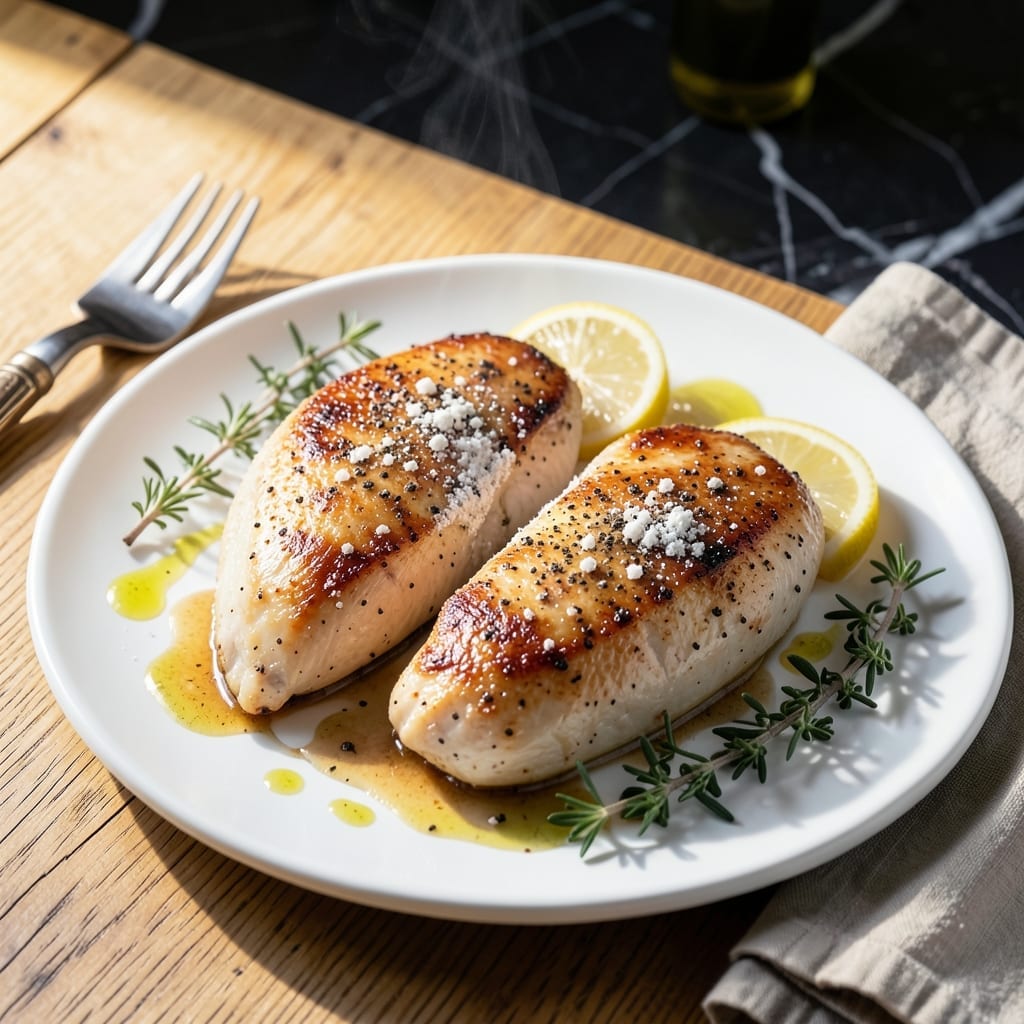
Achieving tender, evenly cooked chicken breast is simpler than you think with this thin-cut method.
I developed this technique after years of struggling with dry, overcooked poultry. Pounding the breast to an even thickness ensures every bite cooks at the same rate, eliminating the dreaded dry center.
The result is juicy, tender chicken that cooks in 10 minutes on the stovetop. Season simply with salt and pepper, or dress it up with your favorite herbs and spices.
Serve with roasted vegetables or a fresh salad for a complete meal. This method works for any chicken breast recipe requiring even cooking.
Ingredients for Chicken Breast Recipe Pounded
Pounded chicken breast plus simple pantry staples create this juicy, even-cooked dish.
| Ingredient | Amount | Notes |
|---|---|---|
| Boneless, Skinless Chicken Breast 🍗 | 1 ½ lb | Pounded to 1/2-inch thickness |
| Kosher Salt 🧂 | 1 ½ tsp | Diamond Crystal preferred |
| Freshly Ground Black Pepper 🌶️ | ¾ tsp | Coarse grind recommended |
| All-Purpose Flour 🌾 | ¼ cup | For light dredging |
| Olive Oil 🫒 | 3 tbsp | Divided for cooking |
| Unsalted Butter 🧈 | 2 tbsp | For basting chicken |
| Garlic Cloves 🧄 | 3 cloves | Minced for basting |
| Fresh Thyme Sprigs 🌿 | 4 sprigs | Optional for aromatics |
| Fresh Rosemary Sprigs 🌿 | 2 sprigs | Optional for aromatics |
| Lemon 🍋 | 1 whole | Zested and juiced |
| Chicken Stock 🍲 | ½ cup | Low-sodium preferred |
| Dijon Mustard 🟡 | 1 tbsp | For pan sauce |
The chicken breast quality is paramount. Air-chilled, free-range breasts from Whole Foods or Costco yield the most tender results due to superior texture and moisture retention. Avoid pre-brined or enhanced products, as they can affect the seasoning balance. Pounding to an exact 1/2-inch thickness ensures uniform cooking—use a meat mallet or rolling pin between plastic wrap for clean execution.
No kosher salt? Sea salt at a 1:1 ratio works, but avoid table salt (it’s too dense). Pre-ground pepper lacks the aromatic punch of freshly cracked, so invest in a pepper mill. The butter can be replaced with ghee for a higher smoke point, or avocado oil for a dairy-free option. Fresh herbs are ideal, but dried at one-third the amount will suffice if that’s what’s on hand.
Cooked chicken keeps in the refrigerator for 3-4 days when stored in an airtight container. For longer storage, freeze for up to 3 months. The pan sauce can be made ahead and reheated gently—don’t boil, or it may separate. Always bring chilled chicken to room temperature before reheating to maintain moisture.
Why You’ll Love This Recipe
- 20-Minute Meal: I can pound the chicken and have it sizzling in olive oil before the pasta water even boils.
- Crispy, Juicy Bite: The flour crust gets golden in the pan while the pounded breast stays tender—honestly, it’s the only way I cook chicken now.
- Weeknight Hero: Between us, it’s my go-to for quick dinners, lunches, or even sliced thin for sandwiches the next day.
- Pantry Staples Only: All-purpose flour, salt, pepper, oil—no extra grocery runs, and it still tastes like I put in serious effort.
Step-by-Step Instructions for Chicken Breast Pounded
Achieve consistent doneness and melt-in-your-mouth texture with this reliable method.
Step 1: Pound and Season the Chicken Breast
Place the 1.5 lb boneless, skinless chicken breast between two sheets of plastic wrap. Using a meat mallet or rolling pin, pound to an even ½-inch thickness. This uniform thickness ensures the chicken cooks through at the same rate, eliminating dry edges and undercooked centers.
Pat the pounded chicken dry with paper towels, then season both sides evenly with the 1.5 tsp kosher salt and 0.75 tsp freshly ground black pepper. The salt should adhere well to the surface, creating a flavorful crust as it cooks.
Step 2: Dredge and Sear for Golden Crust
Lightly dredge the seasoned chicken in the 0.25 cup all-purpose flour, shaking off any excess. The flour creates a delicate coating that browns beautifully and helps thicken the pan sauce later.
Heat 2 tbsp olive oil in a large skillet over medium-high heat until shimmering. Add the chicken and sear for 4-5 minutes per side until golden brown and cooked through. The chicken should release easily from the pan when properly seared—don’t force it.
Step 3: Aromatic Basting for Extra Flavor
Reduce heat to medium and add the remaining 1 tbsp olive oil, 2 tbsp unsalted butter, 3 cloves minced garlic cloves, 4 sprigs fresh thyme sprigs, and 2 sprigs fresh rosemary sprigs to the pan. Tilt the skillet slightly and spoon the melted butter and herbs over the chicken repeatedly for 1-2 minutes.
This basting technique infuses the chicken with aromatic flavors while adding a glossy sheen. The herbs should sizzle in the butter without burning—if they brown too quickly, reduce the heat slightly.
Step 4: Create the Pan Sauce
Transfer the chicken to a plate and tent with foil to keep warm. In the same skillet, add the zest and juice of 1 whole lemon, 0.5 cup chicken stock, and 1 tbsp Dijon mustard. Stir with a wooden spoon to deglaze, scraping up all the browned bits from the bottom.
Simmer for 2-3 minutes until the sauce thickens slightly and coats the back of a spoon. The sauce should be glossy and emulsified, with a balance of tangy lemon and rich mustard flavors. Taste and adjust seasoning if needed.
Step 5: Serve with Sauce
Return the chicken to the skillet and spoon the pan sauce over it. Let it warm through for 1-2 minutes before serving. The sauce should pool slightly around the chicken when plated.
Slice the chicken against the grain and drizzle with additional sauce. Each piece should be tender and juicy, with a golden crust and a bright, flavorful sauce that complements the meat perfectly.
Pro Tips For Making Chicken Breast Recipe Pounded
- Pound Evenly: Use a meat mallet or rolling pin to pound the chicken to an even 1/2-inch thickness—this guarantees it cooks through without drying out the thinner edges.
- Salt the Flour: Mix 1 teaspoon of kosher salt into the all-purpose flour before dredging; it seasons the chicken more deeply than just salting the surface.
- Skip Cold Chicken: Let the pounded chicken sit at room temperature for 10 minutes before cooking—I learned this the hard way after too many dry, tough breasts.
- Heat the Oil First: Get the olive oil shimmering but not smoking before adding the chicken; it’s the only way to get that golden crust without steaming the meat.
Creative Variations of These Flavors
Herb-Crusted Parmesan
Mix ½ cup grated Parmesan with ¼ cup panko and 1 tbsp fresh parsley. Press this onto the pounded chicken before searing. The cheese creates a crispy, golden crust while the parsley adds a fresh brightness. 🌿
Spicy Cajun Kick
Replace the salt and pepper with 2 tbsp Cajun seasoning (I use Tony Chachere’s). Add ½ tsp cayenne for extra heat. The bold spices pair perfectly with the chicken’s natural sweetness, and the thin cut lets the flavors penetrate deeply.
Mediterranean Lemon-Oregano
Add 1 tbsp dried oregano to the flour dredge and use 2 lemons for zest and juice in the pan sauce. The citrus and herbs create a vibrant, aromatic profile that transports you to the Greek islands.
Bacon-Wrapped Delight
Wrap each pounded breast with 2 slices thin-cut bacon before searing. The bacon renders its fat into the chicken while adding smoky depth. Secure with toothpicks and cook until the bacon is crisp and the chicken reaches 165°F. 🔥
Asian-Inspired Teriyaki
Swap the pan sauce for ⅓ cup teriyaki sauce (I prefer Kikkoman), 1 tbsp grated ginger, and 1 minced garlic clove. Simmer until glossy and thick, then drizzle over the chicken for a sweet-savory finish.
Pesto-Prosciutto Stuffed
Spread 2 tbsp basil pesto on the pounded chicken, top with 1 slice prosciutto, then roll tightly. Secure with toothpicks and cook seam-side down first. The pesto adds herby richness while the prosciutto lends salty depth.
Nutrition Facts
Frequently Asked Questions
Why is pounding chicken breast important?
Pounding ensures even thickness, so the meat cooks uniformly. Without it, thicker parts may stay raw while thin edges dry out. ½-inch thickness is ideal for 10-minute stovetop cooking.
Can I use a rolling pin instead of a mallet?
Yes! Place chicken between plastic wrap and use a rolling pin for even results. Apply steady pressure to avoid tearing the meat. This method works just as well for achieving ½-inch thickness.
What if my chicken is too thick to pound?
Slice thicker breasts horizontally into 2 even cutlets first. Then pound each piece to ½-inch. This prevents over-stretching the meat and ensures consistent cooking.
How do I prevent the coating from falling off?
Pat the chicken completely dry before dredging in flour. Press the coating gently into the surface and let it rest for 2 minutes before cooking. This helps it adhere better.

- 6 Egg Cake Recipe with Oil: Light as Air With Buttery Moisture - October 4, 2026
- 4 Bean Casserole Recipe: One-Pan Heartiness With Smoky Paprika Depth - October 4, 2026
- 3-Ingredient Keto Mug Cake Recipe: Microwave Magic in 2 Minutes - October 4, 2026