
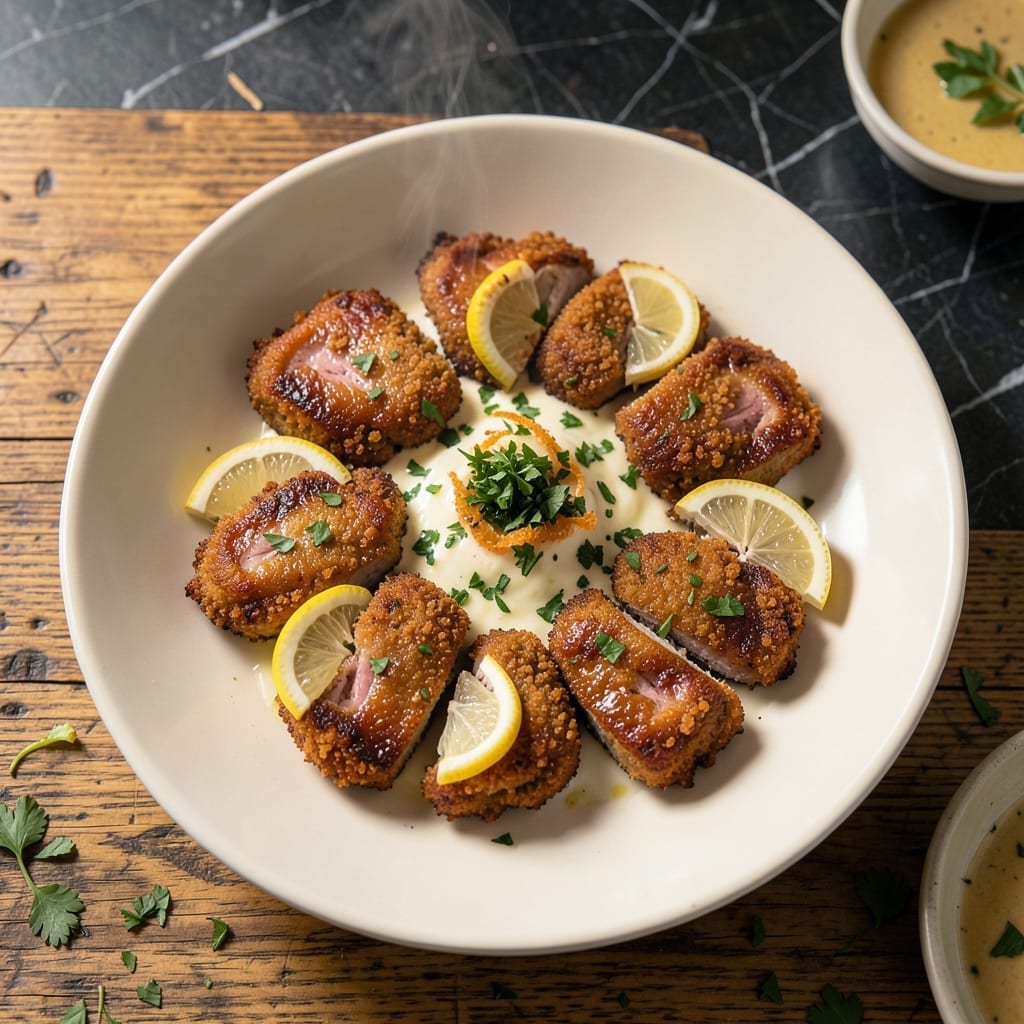
I’ve perfected a method for baking chicken livers that delivers crispy edges while keeping the centers tender and rich. The key is a high-heat oven and a simple coating that transforms these nutrient-packed bites into a crowd-pleasing dish.
This technique ensures even cooking without the mess of frying. A quick soak in milk removes any bitterness, while a light breading creates that irresistible crispy texture. It’s a foolproof way to elevate a budget-friendly protein.
The result is golden-brown livers with a satisfying crunch, packed with iron and deep, savory flavor. Serve them hot with lemon wedges or a tangy dipping sauce for the perfect balance.
Ready in under 30 minutes, this dish works as an appetizer or a hearty main with roasted vegetables.
Ingredients for Baked Chicken Livers
Transform budget-friendly chicken livers into crispy, golden bites with these essential ingredients.
| Ingredient | Amount | Notes |
|---|---|---|
| Chicken Livers 🍗 | 1 ½ lb | Trimmed and rinsed thoroughly |
| Whole Milk 🥛 | 1 cup | For soaking livers to remove bitterness |
| All-Purpose Flour 🌾 | 1 cup | For dredging chicken livers |
| Large Eggs 🥚 | 2 whole | Beaten for egg wash coating |
| Panko Breadcrumbs 🍞 | 1 ½ cups | For extra crispy texture |
| Olive Oil 🫒 | ½ cup | Divided for baking and greasing |
| Garlic Powder 🧄 | 1 tsp | For savory seasoning in coating |
| Onion Powder 🧅 | 1 tsp | For depth of flavor in breading |
| Paprika 🌶️ | 1 tsp | Sweet or smoked for color |
| Salt 🧂 | 1 ½ tsp | Kosher or sea salt preferred |
| Black Pepper 🌶️ | ¾ tsp | Freshly ground for best flavor |
| Cayenne Pepper 🔥 | ¼ tsp | Optional for heat adjustment |
| Fresh Parsley 🌿 | ¼ cup | Chopped for garnish |
| Lemon Wedges 🍋 | 4 pieces | For serving and brightness |
Optimal quality requires fresh chicken livers with vibrant color and no off odors. Source from Whole Foods or a trusted butcher for best results. The milk soak is non-negotiable—whole milk works best (reduced-fat lacks the fat needed to mellow bitterness). For the breading, Panko delivers superior crunch compared to standard breadcrumbs. Professional kitchens use a three-step dredging process for maximum adhesion.
For dietary flexibility, almond milk can substitute the whole milk soak (though with slightly less effectiveness). Gluten-free? Swap all-purpose flour for rice flour or cornstarch. The paprika can be smoked for deeper flavor, or omitted entirely if you prefer a milder profile. Egg-free versions work with a flax egg (1 tbsp ground flaxseed + 3 tbsp water per egg), though the coating may be less crisp.
Prepared chicken livers are best served immediately but can be kept warm in a 200°F oven for up to 30 minutes. Store leftovers in an airtight container in the refrigerator for 3-4 days. Reheat in a toaster oven to revive crispness—microwaving makes them soggy.
Why You’ll Love This Recipe
- One Bowl Wonder: I just dump flour, eggs, and panko in one bowl—no fancy prep, just dip and bake.
- Crispy Outside, Creamy Inside: That panko crust gives a satisfying crunch while the milk-soaked livers stay tender and rich.
- Weeknight Hero: Honestly, it’s my go-to for busy evenings when I need something fast and filling.
- Budget Stretch: A pound of livers costs less than steak but feels just as special on the plate.
Step-by-Step Instructions for Baked Chicken Livers
This method ensures perfectly crispy results while preserving the rich, iron-rich flavor of the livers.
Step 1: Soak and Prepare the Chicken Livers
Place the 1.5 lb Chicken Livers in a bowl and cover completely with the 1 cup Whole Milk. Let them soak for 1 hour at room temperature. This crucial step removes any bitterness and mellows the strong liver flavor, resulting in a more delicate final taste.
After soaking, drain and rinse the livers thoroughly under cold water. Pat them completely dry with paper towels—any moisture will prevent the breading from adhering properly and compromise the crispiness you’re aiming for.
Step 2: Set Up the Breading Station
In a shallow dish, combine the 1 cup All-Purpose Flour with 1 tsp Garlic Powder, 1 tsp Onion Powder, 1 tsp Paprika, 1.5 tsp Salt, 0.75 tsp Black Pepper, and 0.25 tsp Cayenne Pepper. Whisk until evenly distributed. This seasoned flour will create the first flavorful layer of your breading.
In a second shallow dish, beat the 2 whole Large Eggs until smooth. In a third dish, place the 1.5 cups Panko Breadcrumbs. The three-part breading system ensures maximum crispiness and even coating.
Step 3: Bread the Chicken Livers
Dredge each liver piece in the seasoned flour, shaking off any excess. Then dip it into the beaten eggs, allowing any excess to drip off. Finally, roll the liver in the Panko breadcrumbs, pressing gently to ensure the crumbs adhere completely. Place the breaded livers on a plate and let them rest for 10 minutes.
This resting period helps the breading set, preventing it from falling off during baking. The Panko breadcrumbs will give you that extra-crispy texture that sets this dish apart from traditional fried versions.
Step 4: Bake to Golden Perfection
Preheat your oven to 400°F. Pour 0.5 cup Olive Oil onto a rimmed baking sheet and place it in the oven to heat for 5 minutes. The hot oil will create a crispy exterior similar to frying, but with less mess and fewer calories.
Carefully place the breaded livers on the hot baking sheet, leaving space between each piece for even browning. Bake for 15-20 minutes, flipping halfway through, until they’re golden brown on both sides and crispy to the touch. The internal temperature should reach 165°F.
Transfer the baked livers to a paper towel-lined plate to drain any excess oil. Garnish with the 0.25 cup Fresh Parsley and serve immediately with the 4 pieces Lemon Wedges for a bright, fresh contrast to the rich livers.
Pro Tips For Making Baked Chicken Livers
- Soak the Livers: Cover the livers in whole milk for at least 30 minutes before breading—this removes the bitter taste and keeps them tender. I learned this the hard way after serving a batch that was too strong for my guests.
- Heat the Oil: Get your baking sheet and oil screaming hot in the oven (425°F) before adding the breaded livers. After burning two batches, I finally figured out that a preheated surface is the only way to get that golden crust without soggy breading.
- Skip the Overcrowding: Leave space between each piece on the baking sheet—crowding steams the livers instead of crisping them. Sounds weird, but it works: a single layer guarantees even cooking and a perfect crunch.
- Use Fresh Panko: Stale breadcrumbs make for a sad, limp coating. My grandmother swore by this, and she was right: fresh panko absorbs less oil and stays crisper longer, especially in the oven.
Creative Variations of This Recipe
Spicy Cajun Twist
Add 1 tbsp Cajun seasoning to your flour mixture for a bold, smoky kick. I love using Tony Chachere’s brand for authentic Louisiana flavor. Serve with a creamy remoulade sauce to balance the heat. The spices complement the livers’ richness beautifully. 🌶️
Herb-Crusted Elegance
Mix 2 tbsp chopped fresh rosemary and 2 tbsp thyme into your Panko breadcrumbs. This variation elevates the dish for special occasions. The herbs release aromatic oils during baking, creating an irresistible fragrance.
Parmesan Crunch
Stir ½ cup grated Parmesan cheese into the Panko for extra depth. The cheese browns beautifully, adding a nutty flavor that pairs perfectly with the livers. I recommend using Parmigiano-Reggiano for the best results.
Bacon-Wrapped Bites
Wrap each breaded liver with ½ slice of bacon before baking. The bacon adds smokiness and extra crispiness. Secure with toothpicks and bake as usual. This variation turns the dish into a hearty appetizer. 🔥
Asian-Inspired Fusion
Swap the seasonings for 1 tbsp soy sauce in the egg wash and 1 tsp ginger powder in the flour. Use panko with 1 tbsp sesame seeds for crunch. Serve with a sweet chili dipping sauce for an East-West fusion.
Gluten-Free Crisp
Replace all-purpose flour with 1 cup cornstarch and use gluten-free panko. The cornstarch creates an ultra-crispy coating that works beautifully. This version maintains all the texture without the gluten.
Nutrition Facts
Frequently Asked Questions
Why soak livers in milk first?
Soaking in whole milk for 1 hour removes bitterness and mellows the strong flavor. The milk’s fat helps neutralize any metallic or gamey notes, resulting in a more delicate taste.
Can I skip the Panko breadcrumbs?
Panko gives the best crunch, but regular breadcrumbs work in a pinch. For gluten-free, use crushed cornflakes or almond flour. The texture won’t be identical, but you’ll still get a crispy coating.
How do I know when they’re done?
Bake until golden brown and internal temperature reaches 165°F. They should feel firm to the touch and the coating should be crispy. Overcooking makes them tough, so check at 15 minutes.
Can I make these ahead?
Bread the livers and refrigerate up to 4 hours before baking. Add 5 minutes to cooking time if baking straight from the fridge. For best results, serve immediately after baking.

- 6 Egg Cake Recipe with Oil: Light as Air With Buttery Moisture - October 4, 2026
- 4 Bean Casserole Recipe: One-Pan Heartiness With Smoky Paprika Depth - October 4, 2026
- 3-Ingredient Keto Mug Cake Recipe: Microwave Magic in 2 Minutes - October 4, 2026