
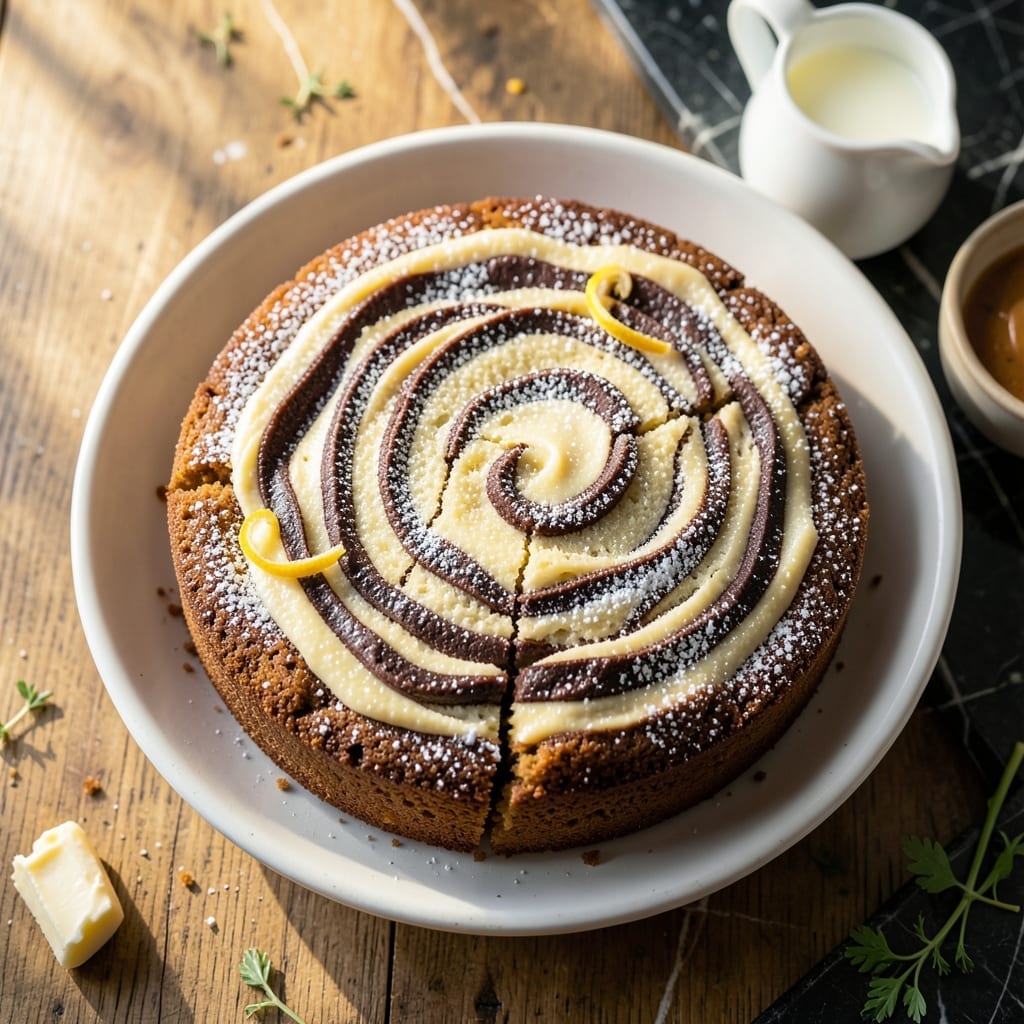
There’s an art to creating a marble cake that’s both visually stunning and perfectly balanced in flavor. This recipe delivers a tender crumb with distinct swirls of vanilla and chocolate in every slice, proven through years of testing and refinement.
The technique involves layering vanilla and chocolate batters in the pan, then using a knife to create elegant swirls. A simple yet precise method ensures even distribution without overmixing, so each bite offers the best of both flavors.
Baked at the right temperature, the cake emerges with a golden crust and moist interior, while the marble pattern remains sharp and defined. It’s a showstopper dessert that’s deceptively easy to master.
Serve it at gatherings or enjoy it as a special treat—this cake never fails to impress. Here’s how to achieve that signature swirled elegance at home.
Ingredients for Barefoot Contessa Marble Cake
Classic ingredients create a tender, swirled vanilla and chocolate masterpiece worthy of any gathering.
| Ingredient | Amount | Notes |
|---|---|---|
| All-Purpose Flour 🌾 | 3 cups | Sifted for even texture |
| Granulated Sugar 🍚 | 2 cups | Fine grain preferred |
| Unsalted Butter 🧈 | 1 cup | Room temperature, softened |
| Large Eggs 🥚 | 4 whole | Room temperature, separated |
| Whole Milk 🥛 | 1 cup | Full-fat for richness |
| Pure Vanilla Extract 🌿 | 2 tsp | High-quality for best flavor |
| Baking Powder 🧂 | 1 tbsp | Fresh for optimal rise |
| Baking Soda 🧂 | ½ tsp | Balances acidity |
| Salt 🧂 | ½ tsp | Fine sea salt preferred |
| Unsweetened Cocoa Powder 🍫 | ¼ cup | Dutch-process for smoothness |
| Boiling Water 💧 | ¼ cup | For cocoa powder mixture |
| Sour Cream 🥣 | ½ cup | Full-fat for moisture |
The butter and eggs must be at room temperature for proper emulsification—Land O’Lakes unsalted is a reliable choice. Use King Arthur all-purpose flour for consistent results, and always sift it first. The cocoa powder should be Dutch-process (like Hershey’s Special Dark) for a smoother chocolate flavor. Sour cream adds moisture; Breakstone’s full-fat works well (don’t skimp on the fat content here).
No Dutch-process cocoa? Natural cocoa powder at the same amount works, though the flavor will be slightly more acidic. Substitute buttermilk for the milk (use 1 cup buttermilk and omit the sour cream) if needed. The vanilla extract can be swapped for vanilla bean paste at 1 tbsp for a more pronounced flavor. For a richer cake, replace 2 tbsp of milk with melted dark chocolate.
Store the cake in an airtight container at room temperature for up to 3 days, or refrigerate for up to 1 week. It also freezes beautifully for 3 months—just wrap slices tightly in plastic and foil. Bring to room temperature before serving for the best texture.
Why You’ll Love This Recipe
- One Bowl Wonder: I love that I can mix everything in a single bowl—flour, sugar, butter, eggs, and milk—no fancy equipment needed.
- Vanilla-Chocolate Swirl: The rich butter and sugar base with ribbons of chocolate and vanilla is pure nostalgia in every bite.
- Crowd Pleaser: Honestly, it’s my go-to for birthdays, potlucks, or just because Tuesdays need cake.
- Stays Fresh: Bakes up tall and keeps well for days, so I can make it ahead and still serve moist slices.
Step-by-Step Instructions for Marble Cake
Master the technique for perfect swirls and even crumb with these refined steps.
Step 1: Cream Butter and Sugar to Ribbon Stage
In a stand mixer fitted with the paddle attachment, beat the 1 cup Unsalted Butter and 2 cups Granulated Sugar on medium-high speed for 4-5 minutes. The mixture should transform from grainy to pale and voluminous, with visible ribbons forming on the bowl’s sides when the paddle lifts.
This extended creaming incorporates air, which lightens the cake’s texture. Scrape the bowl’s sides and bottom with a silicone spatula halfway through to ensure even mixing. The butter must be truly room temperature—65-68°F—to emulsify properly with the sugar.
Step 2: Incorporate Eggs and Alternate Dry Ingredients
Add the 4 whole Large Eggs one at a time, mixing for 30 seconds after each addition until fully emulsified. Then, combine the 3 cups All-Purpose Flour, 1 tbsp Baking Powder, 0.5 tsp Baking Soda, and 0.5 tsp Salt in a separate bowl.
With the mixer on low speed, add the dry ingredients in three additions, alternating with the 1 cup Whole Milk and 0.5 cup Sour Cream in two additions, beginning and ending with the flour mixture. Mix just until the batter comes together—overmixing develops gluten and creates a dense crumb.
Step 3: Prepare Chocolate Swirl Mixture
In a heatproof bowl, whisk the 0.25 cup Unsweetened Cocoa Powder with the 0.25 cup Boiling Water until smooth. This creates a thick, glossy paste that will swirl beautifully through the vanilla batter.
Allow the cocoa mixture to cool for 5 minutes before using. Then, transfer 2 cups of the vanilla batter to a separate bowl and fold in the cooled cocoa mixture until uniformly combined. This ensures a deep chocolate flavor and distinct swirls in the finished cake.
Step 4: Layer and Swirl the Batters
Pour half of the vanilla batter into a greased and floured 10-inch bundt pan. Spoon half of the chocolate batter over the vanilla, then use a butter knife to gently swirl the two together in a figure-eight motion. Repeat with the remaining batters.
Avoid overmixing the swirls—two or three passes with the knife create the classic marbled effect. Tap the pan firmly on the counter 2-3 times to remove air bubbles and ensure even baking.
Step 5: Bake and Test for Doneness
Bake in a preheated 350°F oven for 50-60 minutes, or until a wooden skewer inserted into the center comes out clean. Rotate the pan 180 degrees halfway through baking to ensure even browning.
Cool the cake in the pan for 20 minutes, then invert onto a wire rack to cool completely. The cake should pull away slightly from the pan’s edges and spring back when lightly pressed. Allow it to cool fully before slicing to preserve the swirl pattern.
Pro Tips For Making Barefoot Contessa Marble Cake
- Room Temp Butter: Take your unsalted butter out at least 1 hour before baking—creaming it properly with sugar is what gives this cake its light, airy crumb.
- Alternate Wet and Dry: Add the flour and milk in 3 parts, starting and ending with flour, mixing just until combined to avoid a dense cake.
- Swirl Gently: When adding the cocoa mixture for the marble effect, use a knife to swirl once or twice—overmixing turns it muddy instead of marbled.
- Test with Toothpick: Start checking for doneness at 45 minutes—this cake bakes faster than you think, and overbaking dries it out.
Pro Cooking Tips for barefoot contessa marble cake
Butter Temperature Matters
Your 1 cup butter must be exactly 65-68°F for proper creaming. Too cold and it won’t incorporate air; too warm and your cake will collapse. I use a Thermoworks instant-read thermometer to check. Take it out 1-2 hours before baking. 🌡️
Ribbon Stage Perfection
Beat the butter and sugar for the full 4-5 minutes until pale and fluffy. You’ll see ribbons form on the bowl when you lift the paddle. This step creates air pockets for a light, tender crumb. Don’t rush it!
Swirling Technique
Use a butter knife to make figure-eight motions through the batters. Only make 2-3 passes total—overmixing will muddy your swirls. I found that rotating the pan 90 degrees between layers helps create even distribution.
Pan Preparation
For a 10-inch bundt pan, use baking spray with flour (like Baker’s Joy) or grease thoroughly with butter and dust with flour. Tap out excess flour to prevent white spots on your finished cake. This ensures clean release of those beautiful swirls.
Doneness Testing
A wooden skewer should come out clean when inserted into the center. If it has wet batter, bake for 5 more minutes and retest. The cake should pull slightly from the pan edges and spring back when lightly pressed. 💡
Cooling Strategy
Cool in the pan for exactly 20 minutes, then invert onto a wire rack. Cooling too long in the pan can make the cake soggy, while removing too soon may cause it to break apart. Patience here preserves your swirl pattern.
Nutrition Facts
Frequently Asked Questions
Why does the butter need to be room temperature?
Butter at 65-68°F emulsifies properly with sugar, creating air pockets for a light, tender crumb. Too cold and it won’t cream properly; too warm and the cake may collapse.
Can I use a different pan size?
A 9×13-inch pan works, but adjust baking time to 40-45 minutes. For loaf pans, fill only halfway and bake for 50-55 minutes. Always check doneness with a skewer.
How do I prevent muddy swirls?
Use a butter knife for just 2-3 figure-eight passes through the batters. Overmixing blends the colors, so keep it light for defined swirls.
What if my cake sinks in the middle?
This happens if the batter is under-mixed or the oven door is opened too soon. Ensure proper creaming and avoid opening the oven during the first 40 minutes.

- 6 Egg Cake Recipe with Oil: Light as Air With Buttery Moisture - October 4, 2026
- 4 Bean Casserole Recipe: One-Pan Heartiness With Smoky Paprika Depth - October 4, 2026
- 3-Ingredient Keto Mug Cake Recipe: Microwave Magic in 2 Minutes - October 4, 2026