
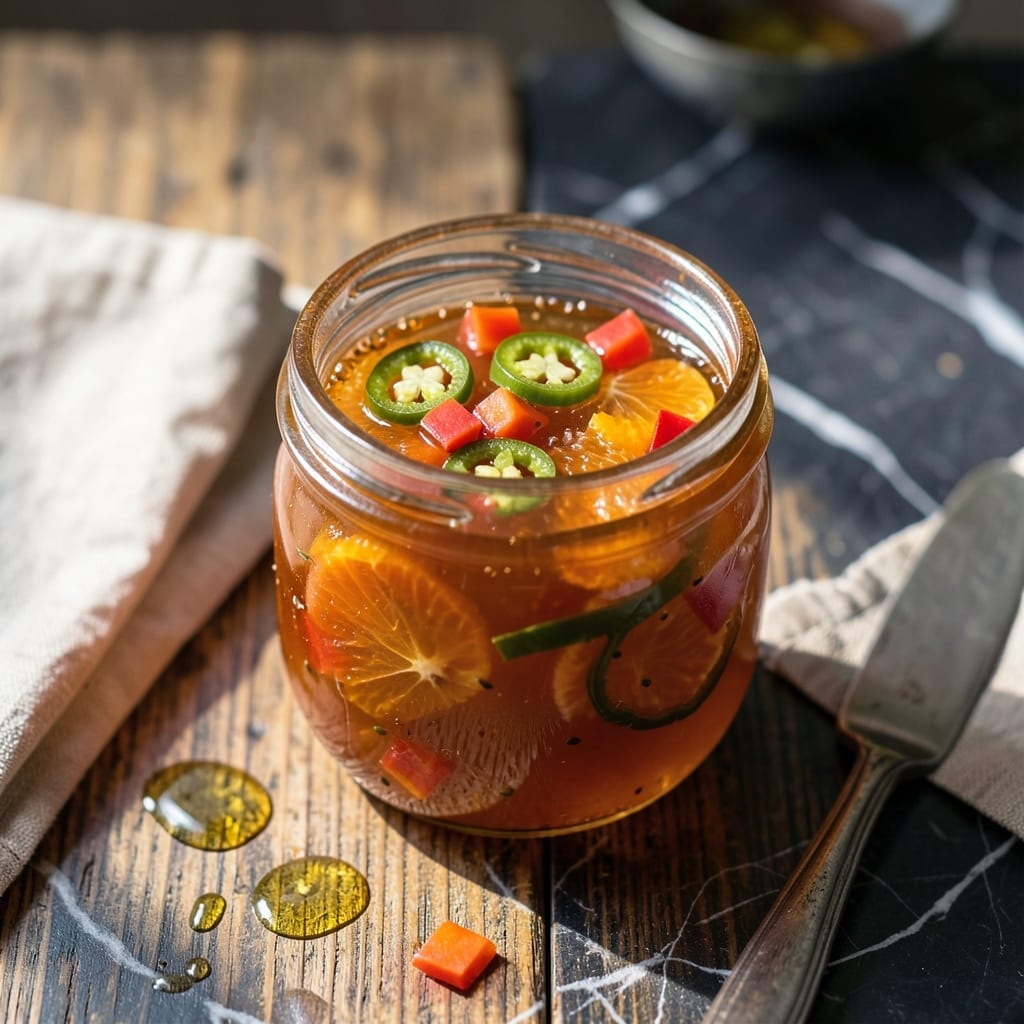
This satsuma pepper jelly captures the perfect balance of citrus sweetness and gentle heat in a glossy, spreadable glaze. The combination of juicy satsumas and fresh peppers creates a condiment that’s versatile and full of bright flavor.
I developed this recipe to highlight the natural sweetness of satsumas while letting the peppers add just enough warmth. The process is straightforward, using simple ingredients like sugar, vinegar, and pectin to achieve that ideal jelly consistency.
What you’ll end up with is a vibrant, smooth jelly that works beautifully on toast, as a glaze for meats, or paired with cheese. Its balanced flavor makes it a standout addition to any pantry.
Store it properly, and this jelly will keep its fresh taste for months, ready to elevate your meals whenever you need it.
Ingredients for Satsuma Pepper Jelly
Seven ingredients transform satsumas and peppers into that glossy, balanced jelly you crave.
| Ingredient | Amount | Notes |
|---|---|---|
| Satsuma Mandarins 🍊 | 2 cups | Peeled, segmented, seeded |
| Jalapeño Peppers 🌶️ | ½ cup | Seeded, finely chopped |
| Granulated Sugar 🍚 | 4 cups | For sweetness and preservation |
| Apple Cider Vinegar 🍏 | ¾ cup | For acidity and balance |
| Liquid Pectin 🧪 | 6 oz | One standard pouch |
| Red Bell Pepper 🌶️ | ½ whole | Seeded, finely chopped |
| Lemon Juice 🍋 | 2 tbsp | Freshly squeezed |
The satsumas are the soul here—fresh, juicy ones with no bitter pith. I grab mine from local farmers markets in late fall when they’re at peak sweetness. The jalapeños add gentle heat (leave seeds in for extra kick, or swap in serrano peppers if you want more fire). For the vinegar, Bragg’s apple cider vinegar is my go-to. It’s got that perfect tang without overpowering the citrus.
No jalapeños? Green bell peppers give you the texture without heat. Short on satsumas? Clementines or tangerines work in a pinch—just avoid navel oranges (too bitter). If you’re out of pectin, you can use powdered pectin but adjust the sugar ratio. And yes, you can cut the sugar by a quarter if you prefer a less sweet jelly (it’ll just be softer).
This keeps for 12-18 months unopened, and 6 months once opened (store in the fridge). The flavor actually deepens over time. Pro tip: save those pretty jars—they make great gifts (worth the effort).
Why You’ll Love This Recipe
- Minimal Chopping: I just slice the jalapeños and zest the satsumas—no fancy knife skills needed.
- Sweet Heat Balance: The sugar mellows the jalapeño bite while the citrus keeps it bright and fresh.
- Gift in a Jar: I bring this to potlucks and it disappears faster than the wine.
- Pantry Staple: One batch gives me jars to last through holiday appetizers and cheese boards.
Step-by-Step Instructions for Satsuma Pepper Jelly
This method delivers the perfect balance of sweet citrus and spicy kick.
Step 1: Prepare the Fruit and Peppers
Peel, segment, and seed the 2 cups Satsuma Mandarins carefully. You want just the juicy segments without any pith or membranes. The oils in the peel can make the jelly bitter, so thorough prep here is key.
Seed and finely chop the 0.5 cup Jalapeño Peppers and 0.5 whole Red Bell Pepper. I wear gloves for this step—trust me. The red bell pepper adds sweetness and body without extra heat, balancing the jalapeños perfectly.
Step 2: Create the Pepper and Citrus Mixture
In a large pot, combine the prepared satsuma mandarins, chopped jalapeños, and chopped red bell pepper. Add the 0.75 cup Apple Cider Vinegar and 2 tbsp Lemon Juice. The acidity from both liquids is crucial for both flavor and preservation.
Bring this mixture to a full rolling boil over high heat, stirring frequently. You’ll notice the fruit softening after about 5 minutes. Keep boiling until the peppers are completely tender—this usually takes 8-10 minutes total.
Step 3: Add Sugar and Dissolve Completely
Stir in all 4 cups Granulated Sugar at once. This seems like a lot, but it’s necessary for proper gel formation and that classic jelly sweetness. Use a long-handled spoon—the mixture will be extremely hot and sticky.
Return to a full rolling boil, stirring constantly. You need to maintain this boil for exactly 1 minute to ensure the sugar fully dissolves. Watch for the mixture to become slightly translucent around the edges—that’s your visual cue.
Step 4: Incorporate Pectin and Process
Remove from heat and immediately stir in the 6 oz Liquid Pectin. This needs to be added all at once for even distribution. Stir vigorously for 30 seconds—you’ll see the mixture start to thicken slightly as the pectin activates.
Let the mixture rest for 5 minutes, then skim off any foam that rises to the surface. This foam is normal but not desirable in your final jelly. A metal spoon works best for skimming.
Step 5: Jar and Set the Jelly
Ladle the hot jelly into sterilized jars, leaving ¼-inch headspace. The jelly will still be quite liquid at this point—that’s normal. As it cools, it will set to that perfect spreadable consistency you’re after.
Let the jars cool at room temperature for 12-24 hours before sealing. You’ll know it’s properly set when the jelly holds its shape when tilted and has a glossy, slightly jiggly appearance. Store in the refrigerator for up to 3 weeks, or process in a water bath for longer storage.
Pro Tips For Making Satsuma Pepper Jelly
- Boil Vigorous: Once you add the pectin, bring the mixture to a rolling boil that can’t be stirred down for a full minute—I learned this the hard way after my first batch never set properly.
- Seed the Peppers: Remove all jalapeño seeds and white membranes unless you want your jelly to pack serious heat; I was skeptical until I tried it both ways.
- Measure Sugar Exactly: Resist the urge to eyeball the sugar—using even 1/4 cup less than the recipe calls for can prevent the jelly from gelling, and yes, I’ve ruined batches this way.
- Use Ripe Satsumas: Pick fully ripe, soft satsumas for maximum juice and natural sweetness; underripe ones make the jelly taste tart and dull, no matter how much sugar you add.
Essential Equipment for This Dish
Large Heavy Pot
I always use my 8-quart stainless steel pot for jelly making—it needs to be large enough to prevent boil-overs when the mixture bubbles up. A heavy bottom prevents hot spots that can scorch your jelly. All-Clad makes excellent options if you’re investing in one. 🔥
Candy Thermometer
A candy thermometer is non-negotiable for precise temperature control. You need to hit 220°F for proper gel formation. I clip mine to the pot’s side and monitor closely. Taylor Precision makes reliable, affordable models.
Long-Handled Spoon
Stirring boiling jelly requires a long, heat-resistant spoon. I prefer silicone or wooden spoons with at least a 12-inch handle. The mixture gets extremely hot and sticky—keep your hands safe with proper length.
Ladle and Funnel
For transferring hot jelly to jars, a stainless steel ladle with a pour spout is ideal. Pair it with a canning funnel that fits standard jar mouths. This combo prevents spills and makes filling jars much cleaner.
Jar Lifter
Sterilizing jars in boiling water means you’ll need to handle them carefully. A jar lifter grips hot jars securely without burning your hands. I use mine for both the sterilization and final sealing steps.
Sterilization Setup
You’ll need a water bath canner or large stockpot with a rack to sterilize jars. Fill it with enough water to cover jars by 1-2 inches. Bring to a boil before adding jars to ensure proper sterilization.
Nutrition Facts
Frequently Asked Questions
Can I use a different citrus fruit instead?
Yes! Try clementines or tangerines for similar sweetness. Avoid navel oranges—they can add unwanted bitterness to the jelly.
How long does it take to set?
Jars typically set in 12-24 hours at room temperature. Once cool, the jelly will hold its shape when tilted and have a glossy finish.
Can I adjust the sweetness?
You can reduce sugar by up to 25%, but the jelly may be softer. Never skip it entirely—sugar is essential for gel formation.
Why is my jelly too runny?
This usually means the pectin didn’t activate properly. Ensure you boiled the mixture for the full 1 minute after adding sugar and pectin.

- 6 Egg Cake Recipe with Oil: Light as Air With Buttery Moisture - October 4, 2026
- 4 Bean Casserole Recipe: One-Pan Heartiness With Smoky Paprika Depth - October 4, 2026
- 3-Ingredient Keto Mug Cake Recipe: Microwave Magic in 2 Minutes - October 4, 2026