
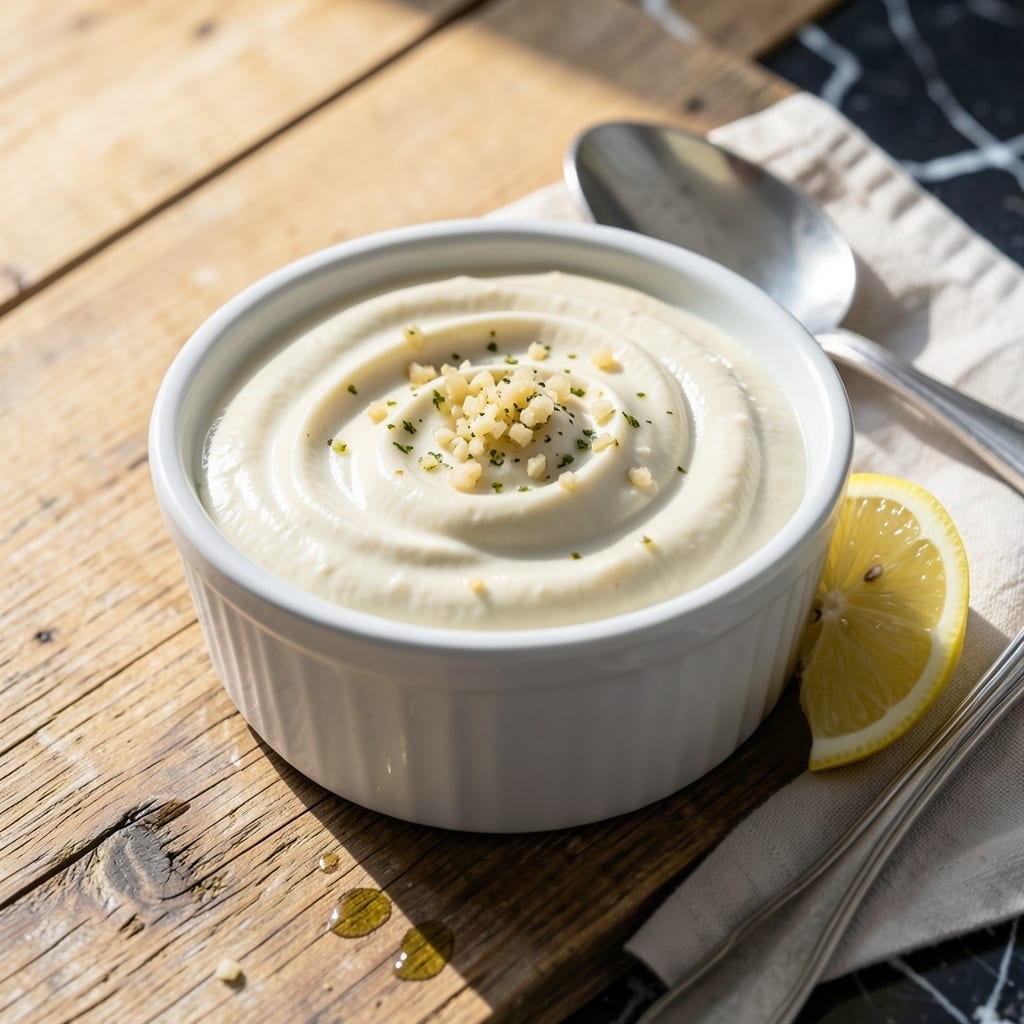
This classic sauce delivers a rich, creamy texture with a bold garlic flavor that elevates any dish it touches. The key lies in the slow emulsion process, where oil meets egg yolk to create that signature silky consistency.
I’ve refined this method to ensure it never breaks, even for beginners. A pinch of salt and a squeeze of lemon brighten the garlic’s punch, balancing the richness without overpowering it.
What you get is a versatile condiment that clings perfectly to sandwiches, drizzles beautifully over roasted vegetables, or serves as a dip for crispy fries. Its smooth, velvety finish is the mark of a well-made aioli.
Store it in the fridge for up to 5 days, and watch how it transforms simple meals into something extraordinary.
Ingredients for Basic Aioli
Seven ingredients transform into a silky, garlic-packed emulsion that elevates everything it touches.
| Ingredient | Amount | Notes |
|---|---|---|
| Garlic Cloves 🧄 | 4 cloves | Freshly minced for bold flavor |
| Large Egg Yolks 🥚 | 2 whole | Room temperature for best emulsion |
| Dijon Mustard 🟡 | 1 tsp | Acts as emulsifying agent |
| Lemon Juice 🍋 | 1 tbsp | Freshly squeezed preferred |
| Neutral Oil 🫒 | 1 cup | Light olive or avocado oil |
| Kosher Salt 🧂 | ¼ tsp | Adjust to taste preference |
| White Pepper 🌶️ | 0.125 tsp | Optional for subtle heat |
The garlic is non-negotiable—fresh cloves only (pre-minced lacks the punch). Diamond Crystal kosher salt is ideal for its clean flavor and easy control. For the oil, avocado oil has the highest smoke point and neutral taste, but light olive oil works too. Room temperature egg yolks are critical—cold yolks resist emulsifying. Most supermarkets carry everything you need; no specialty stores required.
No fresh garlic? Garlic powder at one-eighth the amount (½ tsp per clove) in a pinch, but fresh is night-and-day better. Out of Dijon? Whole-grain mustard adds texture—strain if you prefer smooth. The lemon juice can be swapped for white wine vinegar (use 1 tsp instead of 1 tbsp). If avoiding raw eggs, pasteurized yolks work identically.
Aioli keeps for 5 days refrigerated in an airtight container. The surface may separate slightly—just whisk before using. For longer storage, freeze in ice cube trays for up to 3 months. Thaw in the fridge overnight (don’t microwave).
Why You’ll Love This Recipe
- 5-Minute Whisk: I can make this while the pasta boils—just a bowl, a whisk, and those egg yolks.
- Garlic Kick: Honestly, the raw garlic with Dijon hits different than any store-bought spread.
- Sandwich Savior: Slather it on burgers, fries, even grilled veggies. Between us, it’s my secret for making leftovers disappear.
- Pantry Starter: Neutral oil and lemon juice mean I already have everything on hand, no extra grocery trip needed.
Step-by-Step Instructions for Basic Aioli
Master the emulsion technique and you’ll create a rich, creamy sauce with bold garlic flavor every time.
Step 1: Prepare the Garlic and Egg Base
Finely mince the 4 cloves Garlic Cloves until they form a near-paste consistency. This releases the maximum flavor and ensures even distribution throughout the aioli. I recommend using a microplane for the smoothest texture.
In a medium bowl, combine the minced garlic with the 2 whole Large Egg Yolks, 1 tsp Dijon Mustard, and 1 tbsp Lemon Juice. Whisk vigorously for 30 seconds until the mixture becomes pale and slightly thickened. The mustard acts as your emulsifier, while the acid from the lemon juice brightens the flavor.
Step 2: Begin the Emulsion with Slow Oil Incorporation
With your whisk in one hand and the 1 cup Neutral Oil in the other, begin adding the oil in a very thin, steady stream while whisking constantly. Start with just a few drops at a time – this is critical for establishing a stable emulsion.
As the mixture begins to thicken and lighten in color, you can increase the oil to a thin stream. Maintain constant whisking motion, keeping the oil in contact with the existing emulsion. After incorporating about ¼ cup of the oil, the base should resemble a thick, pale mayonnaise.
Step 3: Complete the Emulsion with Remaining Oil
Continue whisking while slowly pouring in the remaining ¾ cup Neutral Oil. The mixture will become increasingly thick and glossy. If at any point the aioli appears to separate or the oil pools on the surface, stop adding oil and whisk vigorously for 10-15 seconds to re-emulsify.
This process should take 3-5 minutes total. The finished aioli should be thick enough to hold its shape briefly when the whisk is lifted, with a satiny sheen and creamy texture. Avoid adding the oil too quickly, as this is the most common cause of broken emulsions.
Step 4: Season and Adjust to Taste
Once all the oil is incorporated, whisk in the 0.25 tsp Kosher Salt and 0.125 tsp White Pepper. Taste and adjust seasoning as needed – remember that the flavor will intensify slightly as the aioli rests.
For best results, let the aioli rest at room temperature for 10-15 minutes before serving. This allows the flavors to meld and the texture to stabilize. The finished product should have a vibrant white color with a subtle garlic aroma and rich, creamy mouthfeel.
Pro Tips For Making Basic Aioli
- Slowly Drizzle Oil: Add the neutral oil drop by drop at first, then in a thin stream once the emulsion starts—rushing this is how aioli breaks.
- Mince Garlic Fine: Press or mince the garlic to a paste; big chunks make the aioli bitter and disrupt the smooth texture.
- Use Room-Temp Yolks: Cold egg yolks resist emulsifying. I learned this the hard way—let them sit out 10 minutes before starting.
- Add Lemon Last: Stir in the lemon juice after the aioli thickens; adding it too early can prevent the emulsion from forming.
Creative Variations of This basic aioli
Roasted Garlic Aioli
Swap raw garlic for 6 roasted cloves—the caramelization mellows the bite while adding deep, sweet complexity. Roast at 400°F for 20 minutes with a drizzle of oil until soft and golden. The result is a nutty, spreadable aioli perfect for grilled meats. 🔥
Lemon-Herb Infusion
Add 2 tbsp chopped fresh herbs (dill, tarragon, or basil) and 1 tbsp lemon zest to the finished aioli. This bright variation pairs beautifully with seafood or as a veggie dip. I love it with grilled shrimp skewers.
Spicy Chipotle Twist
Blend in 1 tbsp adobo sauce from canned chipotles and ½ tsp smoked paprika. The smoky heat transforms this into a bold condiment for burgers or tacos. Start with less adobo if you prefer mild spice.
Truffle Luxe Version
Stir in 1 tsp white truffle oil and a pinch of flaky sea salt at the end. This decadent aioli elevates fries, steak, or even a humble baked potato. Use high-quality oil for the best flavor.
Avocado Lime
Mash ½ ripe avocado into the finished aioli with an extra 1 tbsp lime juice. The creamy, tangy result is fantastic with fish tacos or as a sandwich spread. Serve immediately to prevent browning.
Honey-Sriracha Glaze
Whisk in 1 tbsp honey and 1 tsp sriracha for a sweet-spicy aioli that’s amazing on chicken tenders or roasted sweet potatoes. Adjust ratios to taste—more honey for sweetness, more sriracha for heat. 💡
Nutrition Facts
Frequently Asked Questions
Why does my aioli break or separate?
This happens when oil is added too quickly. Always drizzle slowly while whisking constantly. If it breaks, stop adding oil and whisk vigorously for 10-15 seconds to re-emulsify before continuing.
Can I use a blender or food processor?
Yes! Use the pulse function to control oil incorporation. Add oil in a thin stream through the feed tube while pulsing. This method is faster but requires careful attention to avoid over-processing.
How long can I store homemade aioli?
It keeps for 5 days in an airtight container in the fridge. For longer storage, freeze in ice cube trays for up to 3 months. Thaw in the fridge overnight.
What oil works best for aioli?
Avocado oil or light olive oil are ideal for their neutral taste and high smoke point. Avoid extra virgin olive oil as its strong flavor can overpower the garlic.

- 6 Egg Cake Recipe with Oil: Light as Air With Buttery Moisture - October 4, 2026
- 4 Bean Casserole Recipe: One-Pan Heartiness With Smoky Paprika Depth - October 4, 2026
- 3-Ingredient Keto Mug Cake Recipe: Microwave Magic in 2 Minutes - October 4, 2026