
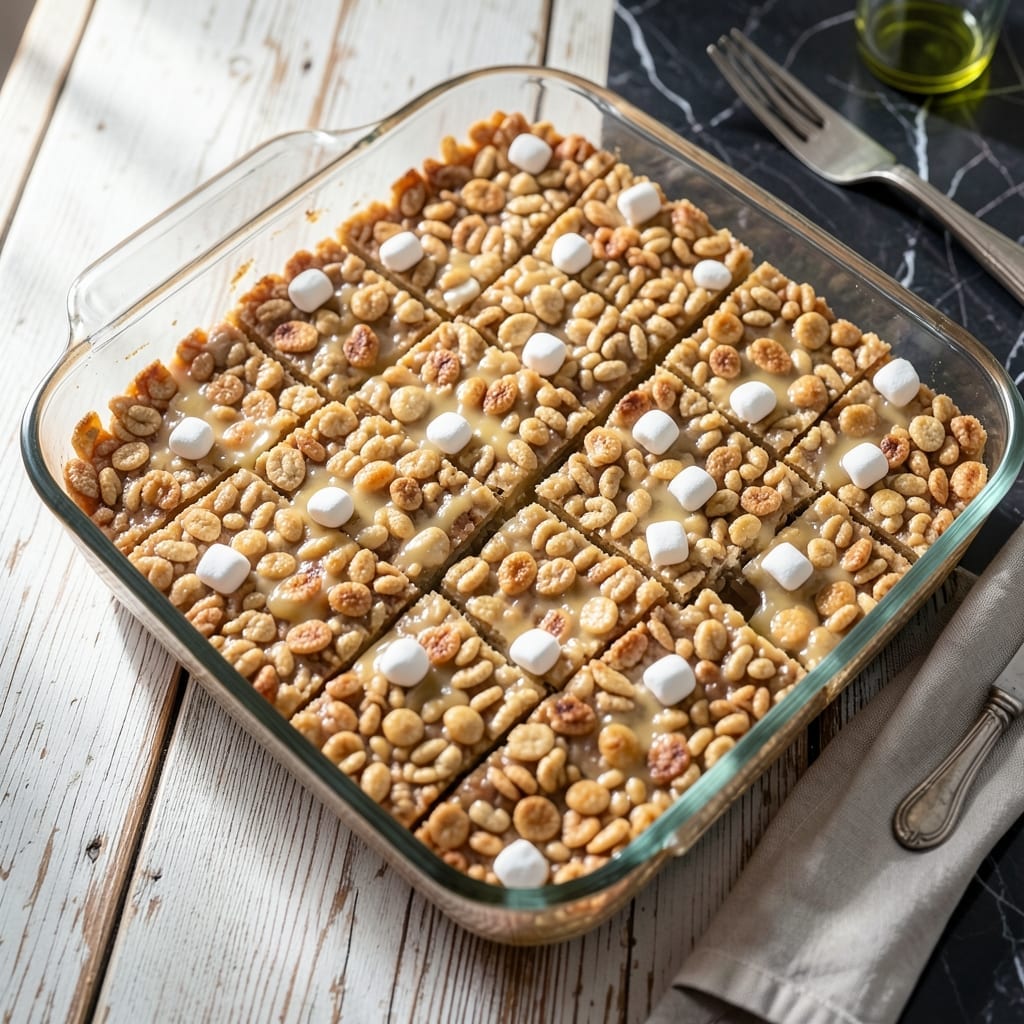
There’s a reason homemade rice krispie treats remain a classic—they’re perfectly balanced between crispy and chewy. This method delivers that nostalgic texture with minimal effort and maximum flavor.
The key is melting the butter and marshmallows together until completely smooth before mixing with the cereal. This ensures every piece of rice krispies gets evenly coated, creating that signature gooey consistency.
What you’ll get is a batch of homemade treats that are soft yet slightly crisp at the edges, with a rich buttery-marshmallow flavor in every bite. They set quickly, so you can enjoy them within the hour.
Ideal for parties, lunchboxes, or a quick sweet fix. Here’s how to make them right.
Ingredients for Homemade Rice Krispie Treats
Six simple ingredients deliver that nostalgic crispy-chewy magic you remember from childhood.
| Ingredient | Amount | Notes |
|---|---|---|
| Rice Krispies Cereal 🥣 | 6 cups | Standard or generic brand works |
| Mini Marshmallows 🍬 | 10 oz | Or 40 regular marshmallows |
| Unsalted Butter 🧈 | ½ cup | 1 stick, cut into pieces |
| Vanilla Extract 🌿 | 1 tsp | Pure extract preferred |
| Salt 🧂 | ¼ tsp | Fine grain for even distribution |
| Vegetable Oil 🫒 | ½ tsp | For greasing the pan |
The marshmallows are doing the heavy lifting here. Kraft Jet-Puffed is the classic choice, but any brand works as long as they melt smoothly. I always grab the mini marshmallows—less chopping, faster melting. The butter needs to be unsalted so you control the salt level. Land O’Lakes or store brand is fine, just avoid margarine (it has too much water). The cereal? Any crispy rice cereal does the trick.
No mini marshmallows? Regular marshmallows cut into quarters work just as well. Want a richer flavor? Swap half the marshmallows for chocolate chips. Vanilla extract is optional but worth it—pure vanilla (not imitation) adds depth. If you’re out of vegetable oil, butter or nonstick spray for the pan works in a pinch.
These keep 2-3 days at room temperature in an airtight container. For longer storage, freeze for up to 6 weeks—just let them thaw before serving. They’re best the same day, though (that’s when they’re perfectly gooey).
Why You’ll Love This Recipe
- One Bowl Wonder: I melt the butter, toss in the marshmallows, and stir in the cereal—all in the same pot. One less dish to wash.
- Vanilla Clouds: The vanilla extract transforms the melted marshmallows into this warm, sweet aroma that makes the whole kitchen smell like a bakery.
- Party Ready: I bring these to potlucks, pack them in lunchboxes, or set out a batch for movie night. They disappear every time.
- Pennywise Perfection: A box of cereal and a bag of marshmallows feed a crowd for under five bucks. Honestly, it’s my cheapest crowd-pleaser.
Step-by-Step Instructions for Homemade Rice Krispie Treats
Here’s how to make the perfect batch of gooey treats with that signature crispy-chewy texture.
Step 1: Prep Your Pan and Melt the Butter
Lightly grease a 9×13-inch baking dish with the 0.5 tsp Vegetable Oil, making sure to coat the bottom and sides evenly. I use a paper towel to spread it thinly—this prevents sticking without making the treats greasy.
In a large pot, melt the 0.5 cup Unsalted Butter over low heat. Watch for the butter to fully liquefy and start to foam slightly. Don’t let it brown; you just want it completely melted. This is your base for melting the marshmallows evenly.
Step 2: Toast the Marshmallows to Gooey Perfection
Add all 10 oz Mini Marshmallows to the melted butter. Stir constantly with a wooden spoon or silicone spatula over low heat. The marshmallows will start to soften and collapse after 2-3 minutes.
Keep stirring until the mixture is completely smooth with no visible marshmallow lumps. This is the key to that perfect gooey texture. Remove the pot from heat and immediately stir in the 1 tsp Vanilla Extract and 0.25 tsp Salt—the residual heat will distribute them evenly.
Step 3: Fold in the Cereal for Even Coating
Add all 6 cups Rice Krispies Cereal to the melted marshmallow mixture. Using your spatula, fold gently but thoroughly until every piece of cereal is evenly coated. You’ll notice the mixture lighten in color as the cereal absorbs the marshmallow.
Be careful not to overmix or press too hard—you want to keep the Rice Krispies intact for that signature snap in every bite. The mixture should look glossy and hold together when pressed.
Step 4: Press and Shape the Treats
Transfer the mixture to your prepared baking dish. Using your spatula or the back of a greased spoon, press it down firmly and evenly into all corners. I like to lightly dampen my hands with water and press the top one final time for a smooth finish.
Don’t compact it too tightly—just enough so it holds its shape when cut. The mixture will still be warm and slightly sticky, so work quickly. Let it sit at room temperature for 30 minutes to set completely.
Step 5: Cut and Serve
Once fully cooled and set, use a sharp knife to cut into 16 equal squares. For clean cuts, I run the knife under hot water and wipe it between each slice. The treats should hold their shape but still have that perfect chewy pull when you bite in.
Serve immediately or store in an airtight container at room temperature for up to 3 days. These taste best the day they’re made when the cereal is still at its crispiest.
Pro Tips For Making Homemade Rice Krispie Treats
- Melt Butter Low: Keep the heat on medium-low when melting butter for marshmallows—I learned this the hard way after scorching two batches. The sugar in marshmallows burns fast over high heat.
- Use Fresh Marshmallows: Skip the stale ones; fresh mini marshmallows melt smoother and bind better. I was skeptical until I tried it with a brand-new bag and noticed the difference.
- Press While Warm: Don’t wait for the mixture to cool before pressing it into the pan. Warm marshmallows are sticky enough to hold the cereal together without turning rock-hard.
- Butter Your Hands: Lightly coat your hands with butter before pressing the mixture—it prevents sticking and makes shaping a breeze. Sounds weird, but it works.
Essential Equipment for This Dish
Essential Cookware
You’ll need a large pot (at least 4-quart capacity) with a heavy bottom to melt the butter and marshmallows evenly. I use my Le Creuset Dutch oven—it distributes heat beautifully and prevents hot spots that can scorch the mixture. 🔥
Mixing Tools
A wooden spoon or silicone spatula is essential for stirring. Wooden spoons won’t melt, and silicone won’t scratch your pot. I prefer a spatula for folding in the cereal—it gets into all the corners of the pot.
Baking Dish
A 9×13-inch baking dish is the perfect size for this recipe. I recommend a glass or ceramic dish—they retain heat better than metal, helping the treats set evenly. Lightly greasing it is crucial, even if it’s nonstick.
For easy removal, line your dish with parchment paper, leaving an overhang on the sides. This lets you lift the entire batch out for clean cutting.
Cutting Tools
A sharp chef’s knife (at least 8 inches) makes clean cuts. For perfect squares, I use a ruler to mark 2-inch intervals before slicing. Running the knife under hot water between cuts prevents sticking.
Optional Upgrades
An ice cream scoop helps portion the mixture evenly into the pan. For extra crispiness, I sometimes use a potato masher to gently press the cereal into the marshmallow mixture before transferring to the dish.
Nutrition Facts
Frequently Asked Questions
Can I use regular marshmallows instead of mini?
Yes! Use 40 regular marshmallows (about 10 oz), cut into quarters for faster melting. They’ll work the same as minis, just take a bit longer to dissolve completely.
Why are my treats hard instead of chewy?
Overheating the marshmallow mixture is the most common cause. Keep the heat on low and remove from heat as soon as it’s smooth. Pressing too firmly when shaping can also make them dense.
How do I make them extra crispy?
Add an extra 1 cup of cereal to the mixture, or press the treats very lightly into the pan. For maximum crunch, spread them thin in the dish and let them set uncovered.
Can I melt the marshmallows in the microwave?
Yes, use a microwave-safe bowl and heat in 30-second bursts, stirring between each. Stop when just 80% melted—the residual heat will finish the job. Avoid overheating!

- 6 Egg Cake Recipe with Oil: Light as Air With Buttery Moisture - October 4, 2026
- 4 Bean Casserole Recipe: One-Pan Heartiness With Smoky Paprika Depth - October 4, 2026
- 3-Ingredient Keto Mug Cake Recipe: Microwave Magic in 2 Minutes - October 4, 2026