
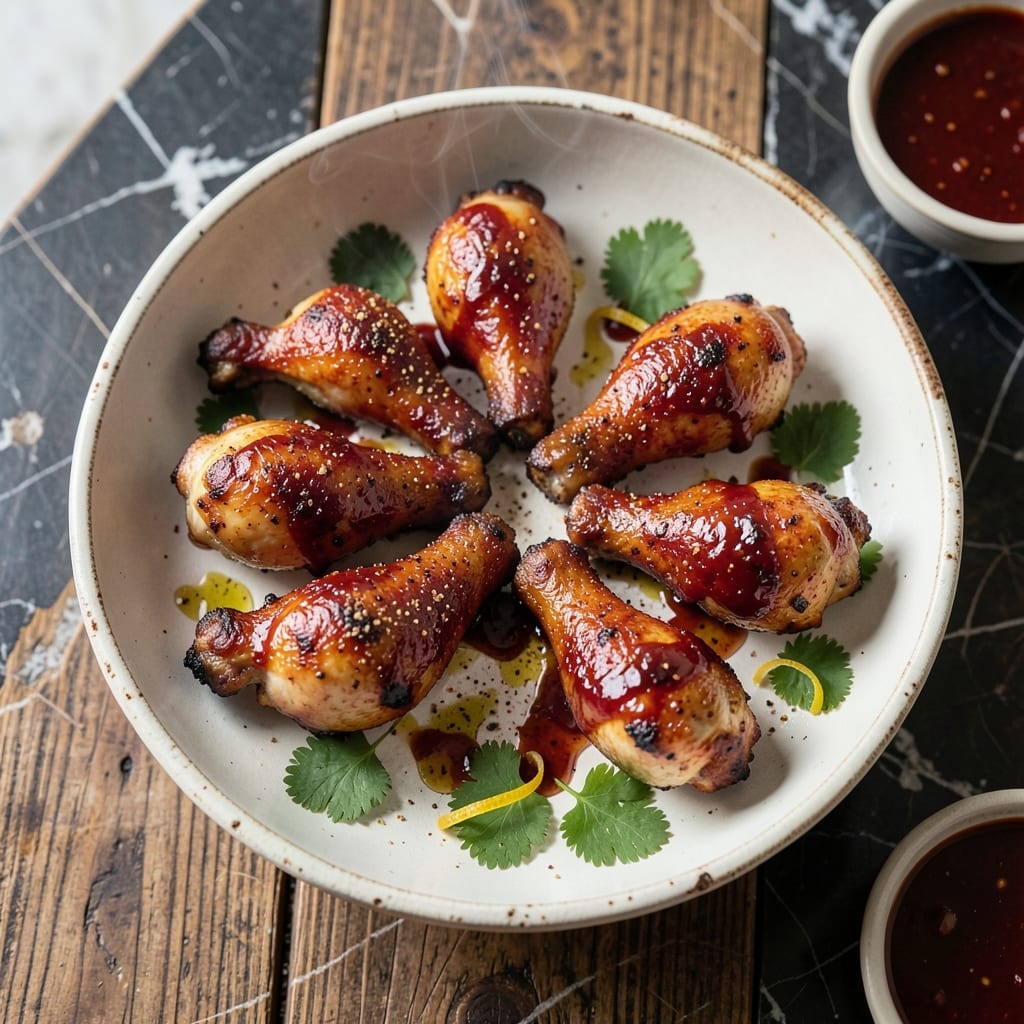
Achieving perfectly oven-baked BBQ chicken legs requires the right balance of heat and timing. This method delivers sticky, smoky results without a grill.
I developed this technique after years of testing, focusing on high initial heat to render fat, followed by a lower temperature to caramelize the sauce. The oven does all the work while you prepare sides.
The chicken emerges with fall-off-the-bone tenderness and a glossy, finger-licking glaze. Each bite offers smoky depth with just the right amount of sweetness.
This approach guarantees consistent results every time, with minimal effort and maximum flavor. The secret is in the two-stage cooking process.
Ingredients for Bbq Chicken Legs Recipe Oven
These carefully selected ingredients transform chicken legs into sticky, smoky perfection in the oven.
| Ingredient | Amount | Notes |
|---|---|---|
| Chicken Legs 🍗 | 8 pieces | Skin-on, bone-in preferred |
| BBQ Sauce 🍯 | 1 ½ cups | High-quality, thick variety |
| Olive Oil 🫒 | 2 tbsp | Extra-virgin for richness |
| Garlic Powder 🧄 | 1 tsp | Freshly ground if possible |
| Onion Powder 🧅 | 1 tsp | Fine grind preferred |
| Smoked Paprika 🌶️ | 1 tsp | Adds depth of smokiness |
| Salt 🧂 | 1 tsp | Kosher or sea salt |
| Black Pepper 🌶️ | ½ tsp | Freshly ground preferred |
| Brown Sugar 🍚 | 2 tbsp | Light or dark variety |
| Apple Cider Vinegar 🍏 | 1 tbsp | Balances sweetness |
| Worcestershire Sauce 🍶 | 1 tbsp | Adds umami depth |
| Dijon Mustard 🟡 | 1 tsp | Spicy or smooth |
Optimal quality requires skin-on, bone-in chicken legs for maximum flavor and moisture. Kosher salt and freshly ground black pepper ensure precise seasoning. For the BBQ sauce, Stubb’s or Sweet Baby Ray’s provide consistent results, though homemade offers superior customization. Smoked paprika from Penzeys delivers authentic smokiness (the good stuff, not the pre-mixed kind).
Substitutions are straightforward. No smoked paprika? Regular paprika plus a dash of liquid smoke works. Missing Worcestershire? Soy sauce with a pinch of sugar approximates the umami. For a sweeter glaze, increase brown sugar to 3 tablespoons. The apple cider vinegar can be replaced with white vinegar in a pinch, though the flavor profile shifts slightly.
Store raw chicken in its original packaging on the coldest shelf for up to 2 days. Prepared sauce keeps in the fridge for 1 week or can be frozen for 3 months. Leftovers reheat beautifully—microwave briefly or warm in a low oven to maintain tenderness.
Why You’ll Love This Recipe
- One Pan Magic: I toss everything on a sheet tray, pop it in the oven, and let the heat do the work—no flipping required.
- Smoky Sweet Perfection: The garlic and onion powders in the dry rub make the BBQ sauce cling to the chicken like it was born there.
- Feeds the Crew: I’ve served these for Sunday dinner, game day, and even packed leftovers for lunch the next day.
- Budget Hero: A pack of legs costs pennies per serving, and one bottle of BBQ sauce stretches across multiple meals.
Step-by-Step Instructions for Oven-Baked BBQ Chicken Legs
Achieve restaurant-quality results with this precise method for tender, fall-off-the-bone meat with caramelized glaze.
Step 1: Season and Prepare the Chicken Legs
Pat the 8 pieces chicken legs completely dry with paper towels. This critical step ensures maximum crispiness for the skin. In a small bowl, combine the 1 tsp garlic powder, 1 tsp onion powder, 1 tsp smoked paprika, 1 tsp salt, and 0.5 tsp black pepper.
Rub this seasoning blend evenly over all sides of each chicken leg, pressing gently to adhere. The smoked paprika adds that authentic barbecue depth. Arrange the seasoned chicken on a wire rack set over a rimmed baking sheet to allow air circulation on all sides.
Step 2: Create the BBQ Sauce Mixture
In a medium bowl, whisk together the 1.5 cups bbq sauce, 2 tbsp olive oil, 2 tbsp brown sugar, 1 tbsp apple cider vinegar, 1 tbsp worcestershire sauce, and 1 tsp dijon mustard. The olive oil helps thin the sauce slightly for better coating.
The vinegar and mustard balance the sweetness while the Worcestershire adds umami complexity. Taste and adjust the balance if needed, though the combination should be tangy, sweet, and slightly smoky. This mixture will be both a baste and a glaze.
Step 3: Initial Roasting for Crispy Skin
Preheat your oven to 400°F. Roast the chicken legs on the wire rack for 30 minutes. This high-heat start renders fat from the skin and begins the crisping process without burning the eventual glaze.
You’ll see the skin start to tighten and turn light golden. The internal temperature should reach about 160°F at this stage. Rotate the pan halfway through for even browning, especially if your oven has hot spots.
Step 4: Apply Sauce and Finish Roasting
Reduce oven temperature to 375°F. Generously brush the chicken legs with half of the sauce mixture, coating all sides. Return to the oven and roast for 15 minutes.
Remove the pan and flip each leg, then brush with the remaining sauce. Roast for an additional 10-15 minutes until the chicken reaches 195°F internally and the sauce has caramelized into a sticky glaze. The edges should be deeply browned but not burnt.
Step 5: Rest and Serve
Transfer the chicken to a serving platter and let rest for 5-10 minutes. This allows the juices to redistribute throughout the meat, ensuring each bite is moist and flavorful.
The sauce should have thickened into a glossy coating that clings to the chicken. Serve immediately while hot, with any accumulated pan juices spooned over the top. The meat should pull away from the bone easily with a gentle tug.
Pro Tips For Making Bbq Chicken Legs Recipe Oven
- Preheat High: Crank the oven to 425°F first—I learned this the hard way after ending up with soggy skin on my first few attempts. The high heat guarantees crispy edges while keeping the meat juicy. —
- Pat Dry First: Blot the chicken legs with paper towels before seasoning. Sounds tedious, but it actually changes the outcome by helping the skin crisp up instead of steaming. —
- Sauce Last: Skip slathering on the BBQ sauce until the final 10 minutes of baking. Adding it too early burns the sugars and leaves you with bitter, charred spots instead of sticky-sweet glaze. —
- Double Coat: Brush on a thin layer of BBQ sauce, bake 5 minutes, then add another coat. This builds layers of flavor and gives that glossy finish everyone raves about.
Common Mistakes When Making This Dish
Skipping the Drying Step
Never skip patting the chicken legs dry with paper towels. Wet skin steams instead of crisping, leaving you with rubbery results rather than that coveted sticky texture. I learned this the hard way with my first few batches. 💡
Overcrowding the Pan
Always use a wire rack over a baking sheet for even air circulation. Crowding the legs together causes uneven cooking and soggy skin. Leave at least 1 inch between each piece for proper browning and crispiness.
Applying Sauce Too Early
Resist the urge to add BBQ sauce at the start. The high sugar content burns quickly at 400°F. Wait until after the initial roast to brush on the sauce, ensuring it caramelizes beautifully without turning bitter.
Underestimating Rest Time
Let the chicken rest for 5-10 minutes after cooking. Cutting too soon causes all those flavorful juices to spill onto the cutting board instead of staying in the meat. This simple step makes a huge difference in tenderness.
Ignoring Internal Temperature
Don’t rely on cooking time alone. Use a meat thermometer to confirm the internal temperature reaches 195°F for fall-off-the-bone results. Dark meat like chicken legs needs this higher temp to fully render and become tender.
Anything below 185°F risks tough, stringy meat. 🌡️
Using Thin BBQ Sauce
Thin sauces slide right off the chicken during cooking. Opt for a thick, high-quality sauce like Stubb’s or Sweet Baby Ray’s that clings to the meat. If your sauce is too runny, reduce it on the stovetop first.
Nutrition Facts
Frequently Asked Questions
What temperature should the oven be for crispy skin?
Start at 400°F for the first 30 minutes to render fat and crisp the skin. Then reduce to 375°F when adding the sauce to prevent burning.
How do I know when the chicken is done?
Use a meat thermometer – the internal temp should reach 195°F for fall-off-the-bone tenderness. Anything below 185°F may be tough.
Can I use boneless chicken thighs instead?
Yes, but reduce cooking time by 5-10 minutes since they cook faster. Bone-in legs are ideal for this method though, as they stay juicier.
Why rest the chicken before serving?
Resting for 5-10 minutes lets juices redistribute. Skipping this step means dry meat as all the moisture will spill out when cut.

- 6 Egg Cake Recipe with Oil: Light as Air With Buttery Moisture - October 4, 2026
- 4 Bean Casserole Recipe: One-Pan Heartiness With Smoky Paprika Depth - October 4, 2026
- 3-Ingredient Keto Mug Cake Recipe: Microwave Magic in 2 Minutes - October 4, 2026