
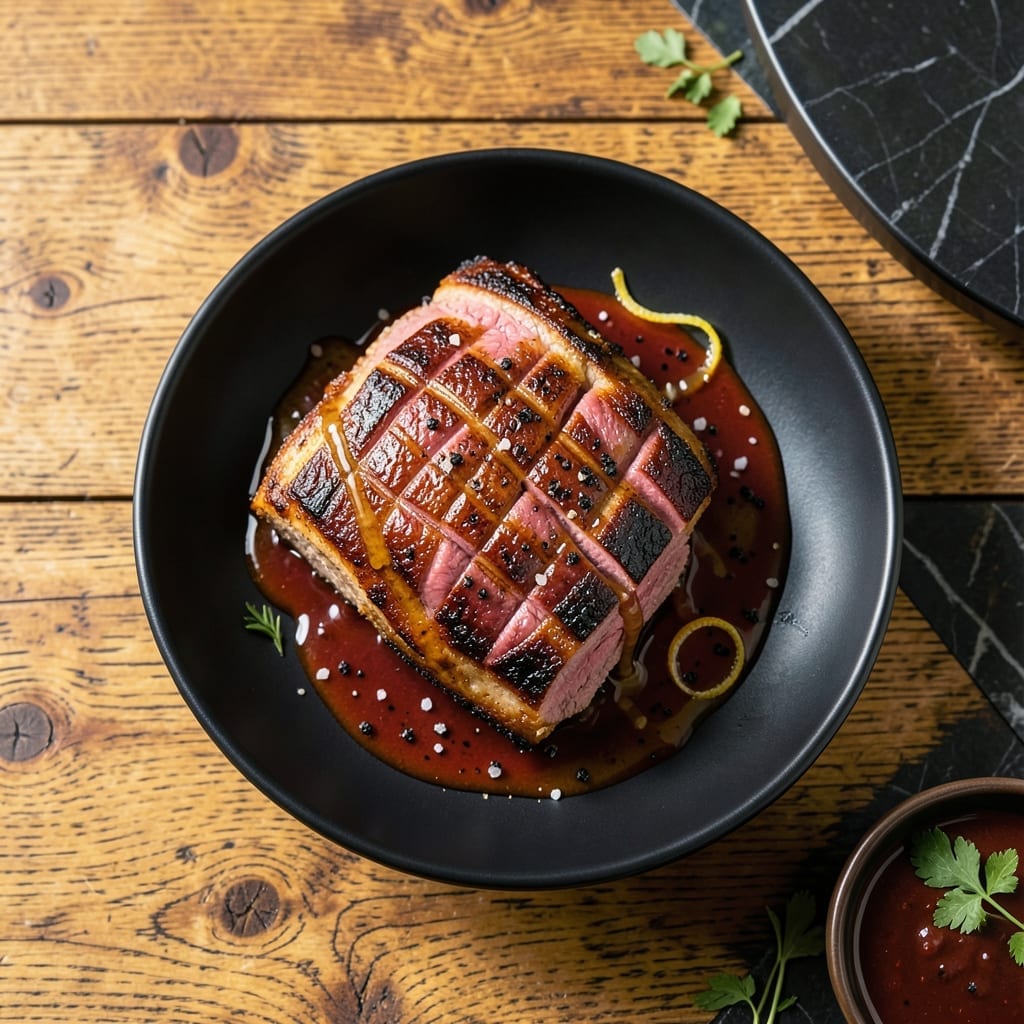
Achieving crispy skin and perfectly cooked meat makes duck breast a showstopper. This method delivers that ideal balance every time.
I start by scoring the fat, which renders out beautifully while creating a golden, shatteringly crispy exterior. The smoky BBQ glaze adds depth without overpowering the duck’s natural richness.
The meat stays tender and juicy inside, contrasting perfectly with the caramelized skin. A resting period ensures the juices redistribute, so every slice is succulent.
Serve with your favorite sides for a restaurant-quality meal at home. The technique is simple but precise, guaranteeing impressive results.
Ingredients for Bbq Duck Breast
Duck breast plus a smoky-sweet glaze. That is all you need for restaurant-quality at home.
| Ingredient | Amount | Notes |
|---|---|---|
| Duck Breast 🦆 | 2 lb | Skin-on, about 2 breasts |
| Kosher Salt 🧂 | 1 tsp | Diamond Crystal preferred |
| Black Pepper 🌶️ | ½ tsp | Freshly ground |
| BBQ Sauce 🍯 | ½ cup | Smoky variety recommended |
| Honey 🍯 | 2 tbsp | For balancing glaze |
| Apple Cider Vinegar 🍏 | 1 tbsp | Adds tang to glaze |
| Worcestershire Sauce 🫒 | 1 tbsp | Or coconut aminos |
| Garlic Cloves 🧄 | 2 cloves | Minced for glaze |
| Dijon Mustard 🟡 | 1 tsp | For depth in glaze |
| Olive Oil 🫒 | 1 tbsp | For searing skin |
| Fresh Thyme Sprigs 🌿 | 2 pieces | Optional for aroma |
| Orange Zest 🍊 | 1 tsp | Brightens the glaze |
The duck is everything here. Magret duck breast (from D’Artagnan or your butcher) has the best fat cap for crispy skin. Look for even thickness—around 1.5 inches—so it cooks uniformly. If buying frozen, thaw it in the fridge overnight (never at room temp). The skin should be dry before scoring—pat it with paper towels. This renders the fat better and gives you that shatteringly crisp finish.
No smoky BBQ sauce? Mix regular BBQ sauce with half a teaspoon of smoked paprika. Honey can be swapped with maple syrup or agave if you prefer. The Worcestershire adds umami depth—coconut aminos work for a gluten-free version. If you’re out of fresh garlic, garlic powder at one-quarter the amount (so ½ tsp) will do in a pinch. The orange zest is optional but adds a bright note that cuts through the richness.
Duck breast keeps in the fridge for 2-3 days before cooking, or freeze it for up to 6 months. Once cooked, let it rest before slicing—this keeps it juicy. Leftovers (if any) reheat well in a skillet with a splash of water to loosen the glaze. Best eaten within 3-4 days.
Why You’ll Love This Recipe
- Minimal Effort: I just season, sear, and brush with BBQ sauce—no marinating, no fuss.
- Sweet & Smoky: The honey in the BBQ sauce caramelizes into this sticky, finger-licking glaze on the crispy skin.
- Dinner or Lunch: Honestly, it’s just as good cold in a wrap the next day as it is fresh off the pan.
- Feeds Two, Easily: One duck breast splits perfectly for date night, with leftovers for my lunch tomorrow.
Step-by-Step Instructions for BBQ Duck Breast
This method guarantees crispy skin and a sticky glaze that clings to every bite.
Step 1: Score and Season the Duck Breast
Pat the 2 lb Duck Breast dry with paper towels. Using a sharp knife, score the skin in a crosshatch pattern, being careful not to cut into the meat. This helps render the fat and creates extra crispy surface area.
Rub the duck all over with the 1 tsp Kosher Salt and 0.5 tsp Black Pepper. I press the seasoning into the meat and skin to ensure it adheres. Let it sit at room temperature for 30 minutes while you prepare the glaze.
Step 2: Make the Smoky BBQ Glaze
In a small bowl, whisk together the 0.5 cup BBQ Sauce, 2 tbsp Honey, 1 tbsp Apple Cider Vinegar, 1 tbsp Worcestershire Sauce, minced 2 cloves Garlic Cloves, 1 tsp Dijon Mustard, and 1 tsp Orange Zest. The vinegar and mustard balance the sweetness while the orange zest adds brightness.
Taste and adjust the glaze if needed, but resist the urge to add salt—the duck is already seasoned. The glaze should be thick enough to coat the back of a spoon. Set it aside until ready to use.
Step 3: Sear the Duck Skin to Crispy Perfection
Heat the 1 tbsp Olive Oil in a large skillet over medium heat. Place the duck breasts skin-side down in the pan. The fat will start to render immediately. Cook undisturbed for 8-10 minutes until the skin is deep golden brown and crispy.
Flip the duck and cook for 3-4 minutes on the other side. If using, add the 2 pieces Fresh Thyme Sprigs to the pan during the last minute to infuse the fat with aroma. The duck should reach an internal temperature of 130°F for medium-rare.
Step 4: Glaze and Finish
Reduce the heat to low and brush the duck breasts liberally with the prepared glaze. Flip and brush the other side, then flip back to skin-side down. Spoon any remaining glaze over the top.
Cook for another 2-3 minutes, basting occasionally, until the glaze has thickened and the duck reaches 135°F internally. The skin should be deep mahogany and the glaze should have a glossy, sticky appearance.
Step 5: Rest and Slice
Transfer the duck to a cutting board, skin-side up. Let it rest for 5-10 minutes to allow the juices to redistribute. This resting period ensures the meat stays moist when you slice it.
Slice the duck breasts against the grain into ½-inch thick pieces. Serve immediately while the skin is still crispy, with any remaining glaze spooned over the top. The contrast of tender meat, crispy skin, and sweet-tangy glaze is what makes this dish exceptional.
Pro Tips For Making Bbq Duck Breast
- Score the Skin: Use a sharp knife to cut a crosshatch pattern into the duck fat—about 1/4 inch apart. I learned this the hard way after my first few attempts came out rubbery instead of crispy.
- Start Cold, Finish Hot: Place the duck skin-side down in a cold pan, then turn heat to medium. This renders fat slowly without burning, and the skin gets perfectly golden.
- Don’t Over Sauce: Brush on the BBQ sauce and honey mix only in the last 2-3 minutes of cooking. Adding it too early causes the sugar to burn and turn bitter.
- Rest Before Slicing: Let the duck rest for 5-10 minutes after cooking—yes, even if you’re hungry. It keeps all the juices inside instead of on your cutting board.
Wine and Beer Pairings for This Dish
Wine Pairings
A bold Pinot Noir from Oregon’s Willamette Valley complements the smoky-sweet glaze beautifully. Its bright acidity cuts through the duck’s richness while its red fruit notes harmonize with the BBQ flavors. I love how it enhances the dish without overpowering it. 🍷
Burgundy Alternative
For a classic French pairing, try a Bourgogne Rouge. The earthy undertones and subtle tannins balance the duck’s fat content. A 2019 Louis Jadot is my go-to for its approachable price and consistent quality.
White Wine Option
If you prefer white, a full-bodied Chardonnay from California works surprisingly well. The buttery texture stands up to the duck, while the oak notes echo the smokiness. I recommend Kendall-Jackson Vintner’s Reserve for this pairing.
Craft Beer Pairings
A malty Amber Ale like Fat Tire complements the caramelized skin and glaze. Its toasty, biscuity notes mirror the BBQ flavors. For a darker option, a Porter with chocolate undertones adds depth. 🍺
Belgian Ale Choice
A Belgian Dubbel like Chimay Red offers a unique contrast. The dark fruit and caramel notes in the beer enhance the duck’s sweetness. Serve slightly chilled to let the flavors shine.
Non-Alcoholic Pairing
For a non-alcoholic option, a sparkling black cherry soda like Cheribundi provides a fizzy, fruity counterpoint. The effervescence cleanses your palate between bites of this rich dish.
Nutrition Facts
Frequently Asked Questions
Should I remove the skin before cooking?
No, keep the skin on! It renders down to create a crispy texture and adds rich flavor. Scoring it first helps the fat drain and ensures even crisping.
What if my glaze burns during cooking?
Lower the heat and add a splash of water or broth to thin it out. Next time, apply the glaze only in the last 2-3 minutes of cooking to prevent burning.
Can I use a gas grill instead of a skillet?
Yes, preheat the grill to medium heat and cook skin-side down for 8-10 minutes. Move to indirect heat for glazing to avoid flare-ups.
How do I know when it’s done?
Use a meat thermometer: 135°F for medium-rare. The skin should be deep brown, and the meat slightly springy to the touch.

- 6 Egg Cake Recipe with Oil: Light as Air With Buttery Moisture - October 4, 2026
- 4 Bean Casserole Recipe: One-Pan Heartiness With Smoky Paprika Depth - October 4, 2026
- 3-Ingredient Keto Mug Cake Recipe: Microwave Magic in 2 Minutes - October 4, 2026