
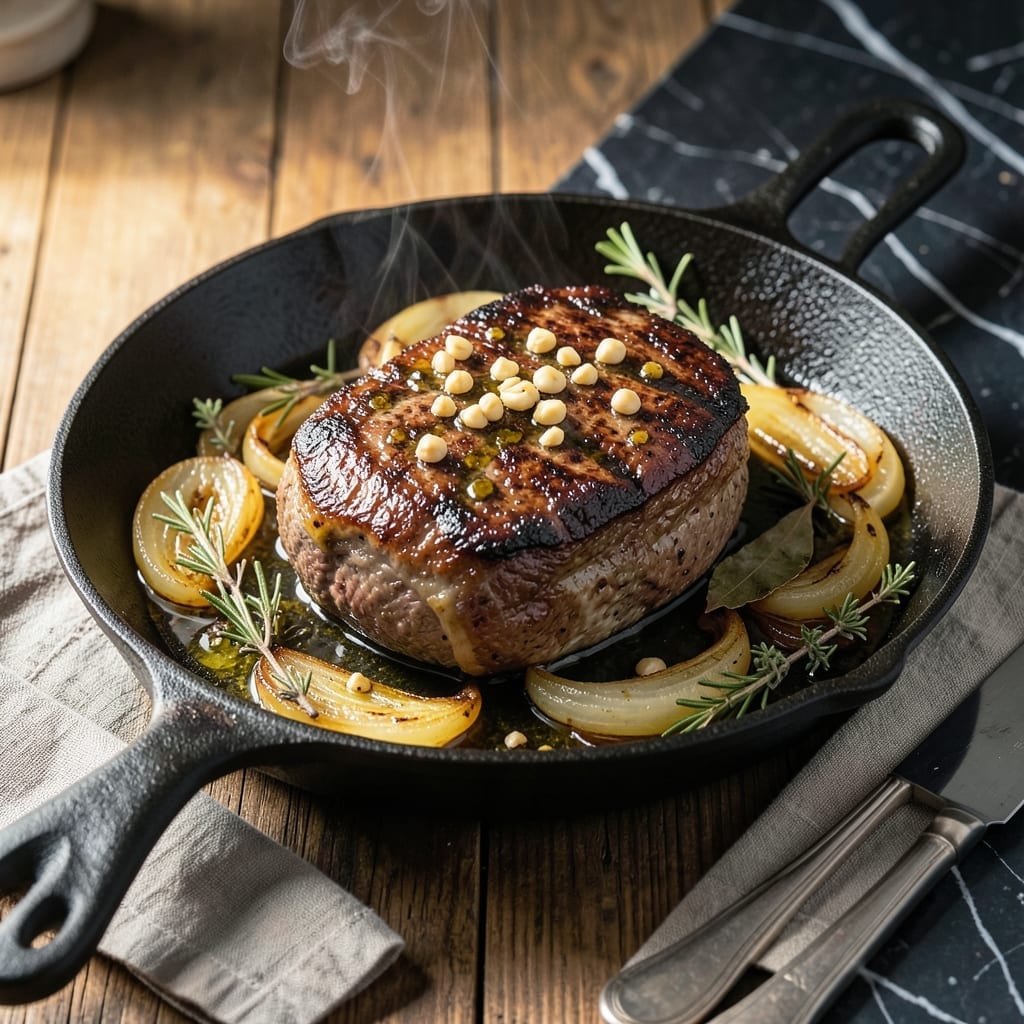
This slow-cooked beef bottom round transforms a tough cut into fork-tender perfection with minimal effort. The key lies in patience and the right cooking method.
I’ve tested multiple approaches, and slow cooking at low heat breaks down the connective tissue while keeping the meat juicy. A simple marinade with garlic, herbs, and acid enhances the natural beef flavor without overpowering it.
The result is perfectly tender beef that pulls apart easily, ideal for sandwiches, tacos, or hearty dinners. The meat absorbs every bit of seasoning, delivering rich, savory depth in every bite.
Serve with roasted vegetables or mashed potatoes to soak up the flavorful juices. This method guarantees consistent results every time.
Ingredients for Beef Bottom Round
Pantry staples and fresh aromatics create deeply savory, fork-tender beef with minimal hands-on time.
| Ingredient | Amount | Notes |
|---|---|---|
| Beef Bottom Round Roast 🥩 | 2 ½ lb | Trimmed of excess fat |
| Olive Oil 🫒 | 2 tbsp | Extra-virgin preferred |
| Garlic Cloves 🧄 | 6 cloves | Minced for marinade |
| Dried Rosemary 🌿 | 1 tbsp | Crushed between fingers |
| Dried Thyme 🍃 | 1 tbsp | Rubbed to release oils |
| Bay Leaves 🌿 | 2 whole | Removed before serving |
| Red Wine Vinegar 🍷 | ¼ cup | For acidity in marinade |
| Low-Sodium Beef Broth 🥣 | 2 cups | Divided for cooking |
| Kosher Salt 🧂 | 2 tsp | Diamond Crystal preferred |
| Freshly Ground Black Pepper 🌶️ | 1 tsp | Coarse grind ideal |
| Yellow Onion 🧅 | 1 whole | Large, thinly sliced |
| Carrots 🥕 | 3 whole | Peeled, cut into chunks |
| Celery Stalks 🥬 | 2 whole | Cut into 2-inch pieces |
| Tomato Paste 🍅 | 2 tbsp | For depth of flavor |
The beef bottom round is non-negotiable here—look for well-marbled cuts at Whole Foods or a trusted butcher. Avoid pre-cut stew meat (often from less ideal cuts). The meat should be bright red with visible fat streaks. If buying in bulk, Costco offers excellent quality at a better price point. Always trim excess fat before cooking to prevent greasiness in the final dish.
No red wine vinegar? Apple cider vinegar works in a pinch. Dried herbs not on hand? Fresh at triple the amount, but dried is preferred for slow cooking. For the broth, Better Than Bouillon paste dissolved in water gives superior depth. The tomato paste can be swapped with 1/4 cup crushed tomatoes reduced by half. Carrots and celery can be omitted, but they add essential aroma to the cooking liquid.
This tastes even better the next day. Refrigerate in an airtight container for up to 5 days, or freeze for 3 months. The cooking liquid freezes beautifully—use it as a base for gravy or future stews. Always store the beef submerged in its juices to maintain moisture.
Why You’ll Love This Recipe
- Set It and Forget It: I rub the roast with olive oil, garlic, rosemary, and thyme, pop it in the oven, and walk away—no babysitting required.
- Herb-Crusted Perfection: The garlic and dried herbs form this insane crust that makes every bite of the bottom round taste like a Sunday dinner.
- Feeds My Crew Twice: One roast gives us a hearty dinner and enough leftovers for sandwiches or tacos the next day.
- Budget-Friendly Centerpiece: Bottom round is lean, flavorful, and way cheaper than other cuts, so I can serve a crowd without breaking the bank.
Step-by-Step Instructions for Beef Bottom Round
This method transforms a lean cut into meltingly tender perfection through slow cooking.
Step 1: Sear and Season the Roast
Pat the 2.5 lb Beef Bottom Round Roast completely dry with paper towels. This ensures a proper sear and prevents steaming. Season all sides aggressively with the 2 tsp Kosher Salt and 1 tsp Freshly Ground Black Pepper.
Heat the 2 tbsp Olive Oil in a heavy pot over medium-high heat until shimmering. Sear the roast on all sides until deeply browned, about 4-5 minutes per side. This develops a flavorful crust that enhances the final dish.
Step 2: Build the Aromatic Base
Reduce heat to medium and add the 1 whole Yellow Onion (thinly sliced), 3 whole Carrots (cut into chunks), and 2 whole Celery Stalks (cut into 2-inch pieces) to the pot. Cook for 5 minutes, stirring occasionally, until the vegetables begin to soften and develop color.
Add the 6 cloves Garlic Cloves (minced), 1 tbsp Dried Rosemary (crushed), 1 tbsp Dried Thyme (rubbed), and 2 tbsp Tomato Paste. Stir for 1-2 minutes until the tomato paste darkens slightly and coats the vegetables. This builds a rich flavor foundation for the braising liquid.
Step 3: Deglaze and Braise
Pour in the 0.25 cup Red Wine Vinegar and scrape up all browned bits from the bottom of the pot. This step captures all the concentrated flavors from searing. Add the 2 cups Low-Sodium Beef Broth and 2 whole Bay Leaves.
Return the seared roast to the pot, ensuring it’s mostly submerged in the liquid. Bring to a simmer, then reduce heat to low. Cover and cook for 2.5-3 hours, turning the roast occasionally, until the meat is fork-tender and pulls apart easily.
Step 4: Rest and Serve
Remove the roast from the pot and transfer to a cutting board. Discard the 2 whole Bay Leaves. Tent the roast loosely with foil and let it rest for 15 minutes. This allows the juices to redistribute throughout the meat.
Skimming excess fat from the braising liquid creates a rich, flavorful sauce to serve alongside the roast. Slice against the grain and serve with the vegetables and strained braising liquid. The meat should be incredibly tender with a deep, savory flavor throughout.
Pro Tips For Making Beef Bottom Round
- Sear It Hard: I learned this the hard way—get your pan screaming hot before adding the beef so it develops a deep crust, not a sad gray steamed exterior.
- Slice Against Grain: After resting, slice the bottom round across the grain into 1/4-inch pieces to guarantee tender bites instead of chewy strips.
- Skip Dry Herbs: Sounds weird, but it works: crush the dried rosemary and thyme between your palms before rubbing to release their oils and actually flavor the meat.
- Rest 15 Minutes: Give it a solid 15 minutes under foil before carving—yes, even if you’re hungry—so the juices redistribute instead of pooling on your cutting board.
Essential Equipment for Perfect Results
Dutch Oven Essentials
This dish demands a heavy-bottomed Dutch oven—I swear by my 5.5-quart Le Creuset for even heat distribution. The thick walls prevent hot spots that could toughen the meat. A 7-quart works too if you’re doubling the recipe. 🔥
Knife and Board
A sharp 8-inch chef’s knife makes quick work of trimming the roast and slicing vegetables. Pair it with a large cutting board (12×18 inches) to give yourself room. I use Wüsthof Classic for precision and durability.
Thermometer Matters
An instant-read thermometer is non-negotiable for checking doneness without cutting into the meat. I recommend the ThermoWorks ThermoPop—it gives accurate readings in 3-4 seconds and is Budget-friendly at under $30.
Tongs for Turning
Use 12-inch locking tongs to turn the roast during searing and braising. The long handles keep your hands safe from steam and splatters. I prefer OXO Good Grips for their comfortable, non-slip handles.
Wooden Spoon
A wooden spoon is perfect for stirring the aromatic base and scraping the fond from the pot. It won’t scratch your Dutch oven like metal utensils might. Look for one with a long handle to reach the bottom of deep pots.
Resting Setup
After cooking, transfer the roast to a wire rack set over a rimmed baking sheet. This setup keeps the meat elevated so air circulates underneath, ensuring a proper rest without steaming. 💡
Nutrition Facts
Frequently Asked Questions
How do I know when it’s done?
Use a fork to test tenderness—it should pull apart easily with no resistance. For precise results, an instant-read thermometer should register 195-205°F internally. This ensures the connective tissue has fully broken down.
Can I cook it faster in the oven?
Not recommended. This cut needs 2.5-3 hours of slow cooking to become tender. High heat will toughen the meat. If short on time, try a pressure cooker instead for similar results in 60-90 minutes.
Why is my roast dry?
Overcooking or insufficient liquid can cause dryness. Always keep it mostly submerged in liquid and check at 2 hours. Also, let it rest 15 minutes before slicing to retain juices.
What can I substitute for red wine vinegar?
Apple cider vinegar works well, or use 1/4 cup lemon juice with a splash of water. The acidity is key for tenderizing and balancing flavors in the braise.

- 6 Egg Cake Recipe with Oil: Light as Air With Buttery Moisture - October 4, 2026
- 4 Bean Casserole Recipe: One-Pan Heartiness With Smoky Paprika Depth - October 4, 2026
- 3-Ingredient Keto Mug Cake Recipe: Microwave Magic in 2 Minutes - October 4, 2026