
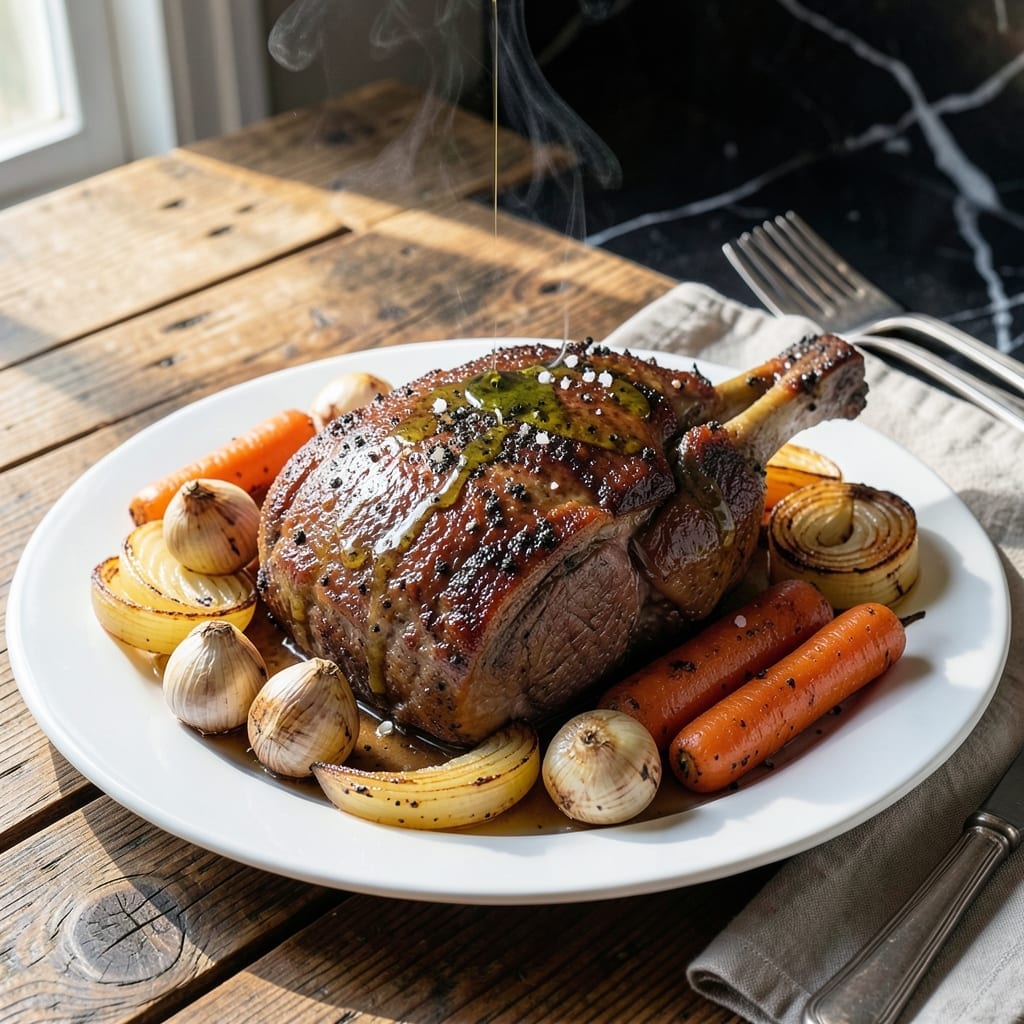
This beef knuckle roast transforms a tough cut into melting tenderness through slow cooking. I’ve tested multiple methods, and this approach consistently delivers the best results.
The secret lies in low, steady heat. Cooking at 325°F for several hours breaks down the connective tissue, turning it into gelatin that keeps the meat juicy. A simple seasoning blend enhances the natural beef flavor.
What you get is fall-apart tender meat with a rich, savory depth. The roast absorbs the cooking juices, making every bite flavorful and satisfying. It’s a dish that rewards patience.
Serve with mashed potatoes or roasted vegetables to soak up the delicious pan juices. This method ensures tender results every time.
Ingredients for Beef Knuckle Roast
Transform that tough cut with these quality ingredients and watch it melt in your mouth.
| Ingredient | Amount | Notes |
|---|---|---|
| Beef Knuckle Roast 🥩 | 3 lb | Well-marbled, bone-in preferred |
| Kosher Salt 🧂 | 1 ½ tbsp | Diamond Crystal preferred |
| Black Pepper 🌶️ | 1 tbsp | Freshly ground, coarse |
| Garlic Cloves 🧄 | 6 cloves | Peeled, smashed |
| Yellow Onion 🧅 | 1 whole | Large, quartered |
| Carrots 🥕 | 3 whole | Peeled, cut into chunks |
| Celery Stalks 🌿 | 3 whole | Cut into large pieces |
| Beef Stock 💧 | 2 cups | Low-sodium preferred |
| Red Wine 🍷 | 1 cup | Dry variety like Cabernet |
| Tomato Paste 🍅 | 2 tbsp | For depth of flavor |
| Fresh Thyme Sprigs 🍃 | 4 whole | Or 1 tsp dried |
| Fresh Rosemary Sprigs 🌿 | 2 whole | Or 1 tsp dried |
| Bay Leaves 🍃 | 2 whole | Dried, for aroma |
| Olive Oil 🫒 | 2 tbsp | For searing roast |
The beef knuckle is the star here—look for one with good marbling (those white fat streaks mean flavor and tenderness). Costco or Whole Foods usually have well-sourced options, but your local butcher will know exactly what you need. Bone-in adds depth to the broth (and your dog will love the leftover bone). The stock should be low-sodium so you control the seasoning yourself.
No red wine? Extra beef stock plus a splash of balsamic vinegar works in a pinch. Dried herbs are fine at one-third the amount—just rub them between your fingers to release the oils. If you’re missing tomato paste, a tablespoon of ketchup (yes, really) adds similar sweetness. The veggies can be swapped—parsnips or turnips hold up just as well as carrots and celery.
This reheats like a dream—shred the meat and soak it in the juices for 3-4 days in the fridge. Freezes beautifully for 6 months (portion before freezing). The leftovers make killer sandwiches or tacos (trust me, the flavors just get richer).
Why You’ll Love This Recipe
- Set It and Forget It: I toss the knuckle roast with salt, pepper, and garlic, then let the oven do all the work while I catch up on laundry.
- Melt-in-Your-Mouth Good: The slow-roasted beef with caramelized onion and garlic is so tender it practically falls apart at the touch of a fork.
- Sunday Supper Star: This feeds my whole family with enough left for sandwiches the next day—no extra cooking required.
- Budget-Friendly Feast: A single knuckle roast stretches into multiple meals without breaking the bank.
Step-by-Step Instructions for Beef Knuckle Roast
Here’s the method that guarantees fall-apart tenderness with rich, developed flavors.
Step 1: Season and Sear the Beef Knuckle Roast
Pat the 3 lb beef knuckle roast completely dry with paper towels. This ensures a proper sear. Season all sides aggressively with the 1.5 tbsp kosher salt and 1 tbsp black pepper, pressing the seasoning into the meat so it adheres well.
Heat the 2 tbsp olive oil in a large Dutch oven over medium-high heat until shimmering. Sear the roast on all sides for 4-5 minutes per side until deeply browned. You’re building a flavorful crust that will enhance the final dish. Don’t rush this step—proper browning is key to depth of flavor.
Step 2: Build the Aromatic Base
Remove the seared roast and set aside. In the same pot, add the 1 whole yellow onion, 3 whole carrots, and 3 whole celery stalks. Cook for 5 minutes, stirring occasionally, until the vegetables begin to soften and brown slightly.
Add the 6 cloves garlic cloves and 2 tbsp tomato paste, cooking for 1-2 minutes until the tomato paste darkens slightly. This step develops the rich, savory base that defines this dish. Stir constantly to prevent burning—the tomato paste can stick quickly.
Step 3: Deglaze and Add Liquids
Pour in the 1 cup red wine, scraping the bottom of the pot to release all the browned bits. This deglazing step captures all the concentrated flavors from searing and adds complexity to the sauce. Simmer for 3-4 minutes until the liquid reduces by half.
Add the 2 cups beef stock, 4 whole fresh thyme sprigs, 2 whole fresh rosemary sprigs, and 2 whole bay leaves. Stir to combine, then return the beef knuckle roast to the pot, along with any accumulated juices. The liquid should come about halfway up the roast.
Step 4: Braise to Tender Perfection
Cover the pot and transfer it to a preheated 325°F oven. Braise for 2.5 to 3 hours, turning the roast halfway through, until the meat is fork-tender. You’ll know it’s ready when a fork slides in and out with no resistance.
This slow cooking process breaks down the connective tissue in the beef knuckle, transforming it into that melting tenderness promised in the title. Check occasionally to ensure the liquid level hasn’t dropped too low—add a splash of water if needed.
Step 5: Rest and Serve
Carefully remove the roast from the pot and transfer it to a cutting board. Tent loosely with foil and let it rest for 15-20 minutes. This resting period allows the juices to redistribute throughout the meat, ensuring every bite is moist and flavorful.
Skimming excess fat from the braising liquid and reducing it slightly makes a quick, rich sauce to serve alongside the roast. Slice against the grain for maximum tenderness, and serve with the braised vegetables and sauce for a complete, satisfying meal.
Pro Tips For Making Beef Knuckle Roast
- Low and Slow: I learned this the hard way—beef knuckle is lean, so cook it at 275°F for 3-4 hours until it hits 195°F internal. Any hotter and it’ll turn into shoe leather.
- Score the Fat: Sounds weird, but it works: make shallow cuts in the fat cap in a crosshatch pattern before seasoning so the salt and garlic actually penetrate.
- Don’t Skip the Sear: After burning three roasts, I finally figured out that a quick sear in a screaming-hot pan before roasting makes a real difference in flavor.
- Use a Meat Thermometer: My grandmother swore by this, and she was right: guessing doneness with this cut is a gamble—200°F internal means fall-apart tender, 180°F means chewy.
Dietary Considerations for These Flavors
Gluten-Free Friendly
This dish is naturally gluten-free as written, using only whole ingredients without any wheat, barley, or rye. The seasoning blend and braising liquid contain no gluten-containing additives. Always double-check your beef stock label to ensure it hasn’t been thickened with flour.
Low-Carb Option
With only 15g net carbs per serving (mostly from vegetables), this fits well into low-carb diets. For keto, simply reduce the carrots to 1 large and skip the onion, replacing with 2 extra celery stalks for aroma. The rich beef and fat content keep it satisfying.
Dairy-Free Naturally
No dairy appears in this recipe, making it safe for lactose-intolerant diners. The braising liquid relies on beef stock and wine rather than milk or cream. Just ensure your tomato paste doesn’t contain casein, as some brands add it as a thickener.
Allergen Awareness
The primary allergen to watch is sulfites in the red wine. For sulfite-sensitive individuals, use extra beef stock with 1 tbsp balsamic vinegar instead. Also verify your beef stock is free from common allergens like soy or nuts.
This dish contains no eggs, tree nuts, peanuts, fish, or shellfish. 💪
Sodium Control
To reduce sodium, use low-sodium beef stock and cut the kosher salt to 1 tsp initially. You can always adjust seasoning at the end. The long cooking time concentrates flavors, so you’ll likely need less salt than you think.
Nutrition Facts
Frequently Asked Questions
What’s the best cooking method for this cut?
Slow braising in the oven at 325°F for 2.5-3 hours works best. This low-and-slow method breaks down the tough connective tissue, resulting in fork-tender meat that falls apart easily.
Can I cook this in a slow cooker instead?
Yes! Use the low setting for 6-8 hours or high for 4-5 hours. Brown the roast first for maximum flavor, then transfer everything to the slow cooker with the same liquid ratio.
How do I know when it’s done?
The roast is ready when a fork slides in and out with no resistance. For extra certainty, use a meat thermometer—it should read 195-205°F internally.
What if my roast turns out dry?
This usually means it was cooked too hot or not long enough. Always use low heat and ensure there’s enough braising liquid. If it happens, try slicing thin and serving with extra sauce.

- 6 Egg Cake Recipe with Oil: Light as Air With Buttery Moisture - October 4, 2026
- 4 Bean Casserole Recipe: One-Pan Heartiness With Smoky Paprika Depth - October 4, 2026
- 3-Ingredient Keto Mug Cake Recipe: Microwave Magic in 2 Minutes - October 4, 2026