
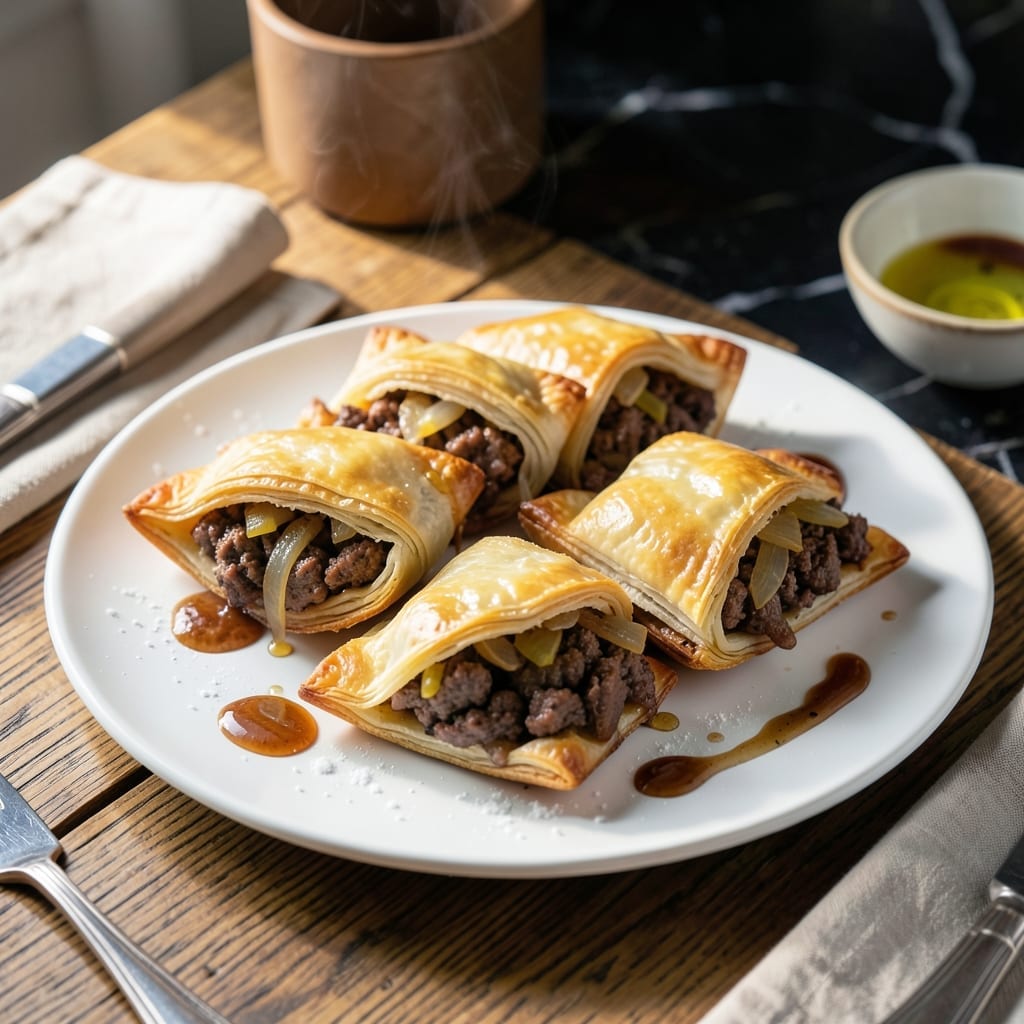
There’s something deeply satisfying about a perfectly baked beef pocket—golden pastry encasing a rich, savory filling that’s both hearty and portable.
This recipe transforms simple ground beef and pantry staples into a flaky, handheld meal that’s ideal for lunchboxes or quick dinners. The key is seasoning the beef well and sealing the edges tightly to prevent leaks.
You’ll end up with individual pockets that are crisp on the outside and juicy inside, with every bite delivering that perfect balance of meat and pastry.
Serve warm or at room temperature, with or without dipping sauces. Here’s how to make them.
Ingredients for Beef Pocket
Golden pastry and rich beef filling combine for this satisfying handheld meal built from pantry staples.
| Ingredient | Amount | Notes |
|---|---|---|
| Ground Beef 🥩 | 1 lb | 80/20 lean-to-fat ratio preferred |
| All-Purpose Flour 🌾 | 2 cups | For pastry dough plus dusting |
| Unsalted Butter 🧈 | ½ cup | Chilled and cubed for flakiness |
| Ice Water 💧 | ¼ cup | Plus 1 tbsp as needed |
| Salt 🧂 | 1 tsp | Divided between dough and filling |
| Yellow Onion 🧅 | 1 whole | Finely diced for filling |
| Garlic Cloves 🧄 | 3 cloves | Minced for filling |
| Worcestershire Sauce 🫒 | 1 tbsp | Adds umami depth to beef |
| Dijon Mustard 🟡 | 1 tsp | For tangy filling flavor |
| Black Pepper 🌶️ | ½ tsp | Freshly ground preferred |
| Dried Thyme 🌿 | ½ tsp | Crushed between fingers |
| Egg 🥚 | 1 whole | For egg wash sealing |
| Parmesan Cheese 🧀 | ¼ cup | Freshly grated for filling |
The beef is the foundation here. Ground chuck with 80/20 fat ratio delivers the best flavor and moisture—leaner blends can dry out during baking. Most supermarkets carry it pre-packaged, but butcher counters often have fresher options. For the pastry, European-style butter (higher fat content) creates superior flakiness, though standard unsalted works perfectly well.
No Worcestershire? Soy sauce plus a few drops of lemon juice mimics the depth. Fresh thyme can replace dried at triple the amount. For a time-saver, pre-made pie crust (like Pillsbury) works—just roll it thinner. The onion can be white or red, but yellow offers the best balance of sweetness and sharpness for this application.
Assembled pockets freeze beautifully—2 months if wrapped tightly in plastic then foil. Bake from frozen, adding 5-10 minutes to cooking time. The filling mixture keeps 3 days refrigerated, making assembly faster for multiple batches.
Why You’ll Love This Recipe
- No-Fuss Dough: The butter and flour come together so smoothly, and I don’t even need a mixer—just my hands and a bowl.
- Rich Beef Filling: That first bite of savory ground beef wrapped in flaky pastry? Here’s what sold me—it’s like a handheld pot pie.
- Freezer Friendly: I make a double batch, freeze half, and pull one out whenever I need a quick lunch. (Yes, even on a Tuesday night)
- Budget Stretcher: Ground beef and basic pantry staples keep this dish easy on the wallet, and it still feels like a treat.
Step-by-Step Instructions for Beef Pockets
Precision and patience ensure these handheld delights turn out flaky and flavorful every time.
Step 1: Prepare the Filling with Aromatic Depth
Heat a skillet over medium heat and add the 1 lb Ground Beef. Break it apart with a wooden spoon and cook until browned and no pink remains, about 6-8 minutes.
Add the finely diced Yellow Onion and cook for 3-4 minutes until translucent. Stir in the minced Garlic Cloves, 1 tbsp Worcestershire Sauce, 1 tsp Dijon Mustard, 0.5 tsp Black Pepper, and 0.5 tsp Dried Thyme. Cook for another 2 minutes until fragrant. Remove from heat and stir in the 0.25 cup Parmesan Cheese. Set aside to cool completely.
Step 2: Create the Pastry Dough
In a food processor, pulse the 2 cups All-Purpose Flour with ½ tsp Salt to combine. Add the 0.5 cup Unsalted Butter, chilled and cubed, and pulse until the mixture resembles coarse crumbs with pea-sized butter pieces visible.
With the processor running, gradually add the 0.25 cup Ice Water through the feed tube, adding up to 1 tbsp more if needed, until the dough just begins to come together. Turn the dough out onto a lightly floured surface and gently knead until it forms a smooth ball. Wrap in plastic and refrigerate for 30 minutes.
Step 3: Assemble the Beef Pockets
On a lightly floured surface, roll out the chilled dough to ⅛-inch thickness. Using a 4-inch round cutter, cut out circles of dough. Re-roll scraps as needed to yield 8 circles for 4 pockets.
Place 2 tbsp of the cooled filling onto half of each dough circle, leaving a ½-inch border. Lightly beat the Egg with 1 tsp water and brush the edges of the dough. Fold the dough over the filling to create a half-moon shape. Press the edges firmly with a fork to seal, then brush the tops with the remaining egg wash.
Step 4: Bake to Golden Perfection
Preheat the oven to 375°F. Line a baking sheet with parchment paper. Arrange the beef pockets on the sheet, leaving 1 inch between each.
Bake for 25-30 minutes, or until the pastry is golden brown and the filling is heated through. Rotate the baking sheet halfway through for even browning. Remove from the oven and let cool on the sheet for 5 minutes before serving.
Pro Tips For Making Beef Pocket
- Chill the Dough: Let the flour and butter dough rest in the fridge for at least 30 minutes—this keeps the butter firm so your beef pockets don’t turn into a greasy mess when baked.
- Drain the Beef: After browning the ground beef, drain off the excess fat completely, or you’ll end up with soggy pastry bottoms that fall apart.
- Seal It Tight: Press the edges of the dough together firmly with a fork, and add a tiny bit of ice water if it’s not sticking—nothing ruins a beef pocket like filling leaking out mid-bake.
- Brush with Butter: Right after baking, brush the tops with melted unsalted butter for a richer flavor and that golden finish everyone notices.
Make-Ahead Tips for Leftovers
Prep Ahead Strategy
You can make the filling up to 3 days in advance and store it in an airtight container in the fridge. This saves time on assembly day and lets the flavors meld beautifully. I always prep my filling the night before for easier morning assembly. 💡
Dough Prep
The pastry dough can be made 2 days ahead and kept wrapped tightly in the refrigerator. For best results, let it sit at room temperature for 15 minutes before rolling to prevent cracking.
Assemble and Freeze
Fully assembled, unbaked pockets freeze wonderfully for up to 2 months. Place them on a baking sheet to freeze solid first, then transfer to a freezer bag. This prevents them from sticking together. Label with the date for easy tracking.
Baking from Frozen
No need to thaw! Bake frozen pockets at 375°F for 35-40 minutes, adding 10 minutes to the original baking time. The results are just as delicious as fresh. 🔥
Room Temperature Tips
Assembled pockets can rest in the fridge for up to 24 hours before baking. Cover them loosely with plastic wrap to prevent drying. This is perfect for making lunch the night before.
Reheating Leftovers
Warm leftover pockets in a 350°F oven for 10-12 minutes until crisp. Microwaving works in a pinch but makes the pastry soggy. I always prefer the oven method for best texture.
Nutrition Facts
Frequently Asked Questions
What can I substitute for Worcestershire sauce?
Use 1 tbsp soy sauce plus ½ tsp lemon juice as a perfect substitute. The combo mimics the umami depth and tang of Worcestershire.
Can I use store-bought pie crust?
Roll pre-made crust to ⅛-inch thickness and cut 4-inch circles. It saves time while still delivering flaky results.
Why did my pockets leak during baking?
Leaks happen when edges aren’t sealed tightly. Press with a fork, use egg wash as glue, and avoid overfilling.
How do I keep the pastry crispy?
Bake on parchment paper and avoid stacking while cooling. For leftovers, reheat in a 350°F oven for 10-12 minutes.

- 6 Egg Cake Recipe with Oil: Light as Air With Buttery Moisture - October 4, 2026
- 4 Bean Casserole Recipe: One-Pan Heartiness With Smoky Paprika Depth - October 4, 2026
- 3-Ingredient Keto Mug Cake Recipe: Microwave Magic in 2 Minutes - October 4, 2026