
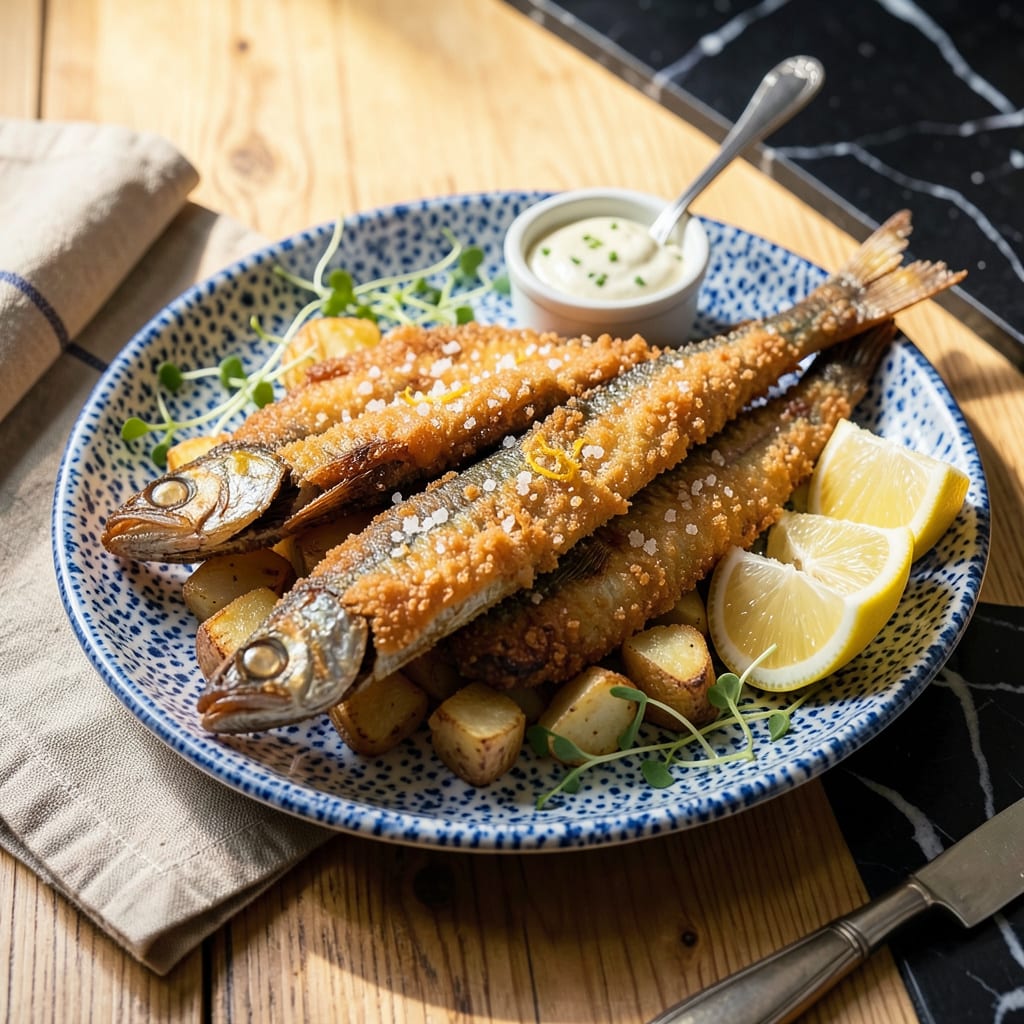
Fresh smelt, when prepared properly, transforms into the ultimate crispy, golden bites that disappear faster than you can fry them. This recipe delivers the perfect balance of crunch and tender fish, using a simple beer batter that guarantees restaurant-quality results at home. The secret lies in maintaining the right oil temperature—375°F—to achieve that signature shatteringly crisp exterior while keeping the fish moist inside.
What sets this method apart is its efficiency: from prep to plate in just 15 minutes. The beer batter creates a light, airy coating that doesn’t overwhelm the delicate smelt flavor, while a quick dusting of seasoned flour ensures maximum crispiness. Serve immediately with lemon wedges and tartar sauce for the complete experience—this is how to make smelt that rivals any lakeside fish fry.
Ingredients for Best Smelt
Here’s everything you need to create those irresistible, golden-crisp smelt bites that’ll vanish in minutes!
| Ingredient | Amount | Notes |
|---|---|---|
| Fresh Smelt 🐟 | 2 lb | Whole, cleaned, patted dry |
| All-Purpose Flour 🌾 | 1 ½ cups | Divided for dredging and batter |
| Cornstarch 🌽 | ½ cup | For extra crispiness |
| Baking Powder 🧂 | 1 tsp | Makes batter light and airy |
| Light Beer 🍺 | 1 cup | Cold, any lager or pilsner |
| Kosher Salt 🧂 | 1 ½ tsp | Plus extra for seasoning |
| Garlic Powder 🧄 | 1 tsp | Or substitute fresh minced |
| Paprika 🌶️ | 1 tsp | Sweet or smoked variety |
| Vegetable Oil 🫒 | 4 cups | For deep frying (peanut oil works too) |
| Lemon Wedges 🍋 | 1 whole | For serving (about 8 wedges) |
| Tartar Sauce 🥄 | ½ cup | Store-bought or homemade |
| Fresh Parsley 🌿 | ¼ cup | Chopped, for garnish |
The smelt is the star—freshness is non-negotiable. Look for whole, cleaned smelt with bright eyes and firm flesh (no fishy smell!). Most seafood markets carry them seasonally, but Asian grocery stores often have them year-round. The beer matters too—any light lager or pilsner works, but avoid dark beers (they’ll make the batter bitter). I always keep cornstarch on hand—it’s the secret to that restaurant-style crunch. The oil? Vegetable or peanut for high smoke point—no olive oil here (it burns at frying temps).
No beer? Sparkling water plus 1 tsp vinegar mimics the effect. Out of cornstarch? Arrowroot powder works 1:1. The paprika is flexible—smoked adds depth, sweet keeps it classic. For gluten-free, swap the flour for rice flour or a 1:1 GF blend. Tartar sauce can be store-bought (I like Hellmann’s), but homemade with mayo, pickles, and capers is next-level. And if you’re skipping the lemon, lime works too—just don’t skip the acid!
Fry immediately after battering—this is NOT a make-ahead dish. But you can prep the dry mix and beer separately up to 2 hours ahead. Leftover cooked smelt? Unlikely, but if you’ve got some, they’ll keep 2 days in the fridge (reheat in the oven to crisp them up). The oil? Strain through a coffee filter and reuse once if it’s still clear. Pro tip: Double the batch—these disappear fast!
Why You’ll Love This Recipe
- I’ll be real: fresh smelt are often cheaper than other fish, and a pound stretches further than you’d think. Leftovers? Cold, with a squeeze of lemon the next day, they’re just as good—maybe better—than fresh out of the fryer.
- One-Bowl Magic: Honestly, I love recipes where cleanup doesn’t haunt me later. Toss the flour, cornstarch, baking powder, and beer in one bowl—no fancy steps, no extra dishes. The batter comes together faster than I can preheat the oil.
- That Crispy Beer Bite: Here’s what sold me—the cornstarch and light beer combo. It fries up so the outside shatters like a perfect potato chip, but the smelt stays tender inside. First bite, and I’m already reaching for seconds.
- Fish Fry Hero: Between us, this is my secret weapon for feeding a group without stress. Smelt are small, so they cook in minutes—ideal for game day spreads or lazy summer dinners where everyone grabs bites straight from the pan.
Step-by-Step Instructions for Crispy Beer-Battered Smelt
You’re about to make the crispiest, most flavorful smelt you’ve ever tasted—let’s get that perfect golden crunch!
Step 1: Prepare the Smelt and Make the Batter
Start by patting the 2 lb fresh smelt completely dry with paper towels. This is crucial—any moisture will prevent the batter from adhering properly and create splatter when frying. I like to lay them out on a clean kitchen towel to absorb any lingering dampness.
In a large bowl, whisk together 1.5 cups all-purpose flour, 0.5 cup cornstarch, 1 tsp baking powder, 1.5 tsp kosher salt, 1 tsp garlic powder, and 1 tsp paprika until fully combined. The cornstarch is your secret weapon for that extra-crispy coating. Make a well in the center and pour in the 1 cup light beer—it should be ice cold for maximum crispiness.
Whisk the batter just until smooth with no lumps. You want it to coat the back of a spoon but still be thin enough to drip off. Don’t overmix or you’ll lose those beautiful air bubbles that make the batter light and crispy. Let it rest for 5 minutes while you heat the oil.
Step 2: Heat the Oil to Perfect Frying Temperature
Pour the 4 cups vegetable oil into a heavy-bottomed pot or Dutch oven—you want at least 2 inches of depth for proper frying. Heat over medium-high heat until it reaches 375°F on a deep-fry thermometer. This is the sweet spot: hot enough for immediate crisping but not so hot it burns the batter before the fish cooks through.
While the oil heats, set up your frying station: place a wire rack over a baking sheet near the stove, and have paper towels ready. I also keep a slotted spoon and tongs handy—you’ll need both for turning and removing the smelt. The oil is ready when a drop of batter sizzles immediately and floats to the surface.
Step 3: Fry the Smelt to Golden Perfection
Working in batches of 8-10 smelt to avoid crowding, dip each fish into the batter, letting excess drip off for 3 seconds. Gently lower them into the hot oil using tongs. The batter should puff up immediately—this is how you know your oil is at the right temperature.
Fry for 2-3 minutes, turning occasionally with the slotted spoon, until the batter is deep golden brown and crispy. The smelt are done when they float to the surface and the bubbling slows down. Transfer them to the wire rack to drain—this keeps them crispier than paper towels would.
Between batches, check that your oil maintains 350-375°F. If it drops below 350°F, let it reheat before adding more smelt. Cold oil equals greasy fish, and we want that perfect crunch! I usually need about 3 batches total for all the smelt.
Step 4: Season and Serve Immediately
While the smelt are still hot, sprinkle them lightly with additional kosher salt. This final seasoning enhances all the flavors and makes that crispy batter pop. Arrange them on a platter and garnish with the 0.25 cup fresh parsley—the bright green contrast makes the dish look as good as it tastes.
Serve immediately with the 0.5 cup tartar sauce for dipping and lemon wedges for squeezing. The acid from the lemon cuts through the richness perfectly. These are best eaten right away while the batter is at its crispiest, so call everyone to the table as soon as they’re ready!
Watch how the golden batter shatters when you bite into it, revealing the tender smelt inside. The beer in the batter gives it a subtle malty flavor that pairs beautifully with the briny fish. This is what makes this recipe the absolute best way to enjoy smelt!
Essential Equipment for This Recipe
Deep Fry Thermometer
The secret to perfect smelt every time is precise temperature control, and a deep-fry thermometer is non-negotiable. I use the CDN ProAccurate model because it gives instant readings and has a handy clip to attach to your pot. The difference between 375°F and 350°F might seem small, but it’s what separates crispy perfection from soggy disappointment. 🌡️
Heavy-Duty Dutch Oven
For frying, you need a pot that holds heat steady and has high sides to prevent splatter. My go-to is a 5-quart enameled cast iron Dutch oven—the Lodge brand is affordable and built to last. The heavy base prevents temperature fluctuations when you add cold battered fish, and the tall sides contain any oil splatters. Avoid thin stainless steel pots that can’t maintain consistent heat.
Wire Cooling Rack
Draining fried foods on paper towels makes them soggy. Instead, use a wire cooling rack set over a baking sheet. I love the OXO Good Grips version because it’s sturdy and easy to clean. The air circulation keeps your smelt crispy on all sides while excess oil drips away. This small investment makes a huge difference in texture.
Long Tongs and Spider
You’ll need both tools for safe frying. I use 12-inch stainless steel tongs for lowering fish into oil and a wire mesh spider for removing them. The spider’s flat shape lets you lift multiple smelt at once without breaking the delicate batter. Look for ones with heat-resistant handles—I burned myself once using cheap plastic tongs and learned my lesson!
Batter Mixing Bowls
A wide, shallow bowl makes dredging smelt easier. I use stainless steel mixing bowls with sloped sides—the Winco 3-quart size is perfect. The metal stays cool while you work, and the shape helps you coat each fish evenly. Avoid glass bowls that can get slippery when wet. For the beer batter, a second bowl with a pour spout prevents messy transfers.
Oil Disposal System
Never pour used oil down the drain! I use a FryAway solidifying powder that turns oil into a disposable solid. Just pour the cooled oil into a container, add the powder, and toss it in the trash when hardened. It’s eco-friendly and prevents plumbing disasters. For storing oil between uses, a dark glass bottle with a tight seal keeps it fresh longer. 💡
Nutrition Facts

- 6 Egg Cake Recipe with Oil: Light as Air With Buttery Moisture - October 4, 2026
- 4 Bean Casserole Recipe: One-Pan Heartiness With Smoky Paprika Depth - October 4, 2026
- 3-Ingredient Keto Mug Cake Recipe: Microwave Magic in 2 Minutes - October 4, 2026