
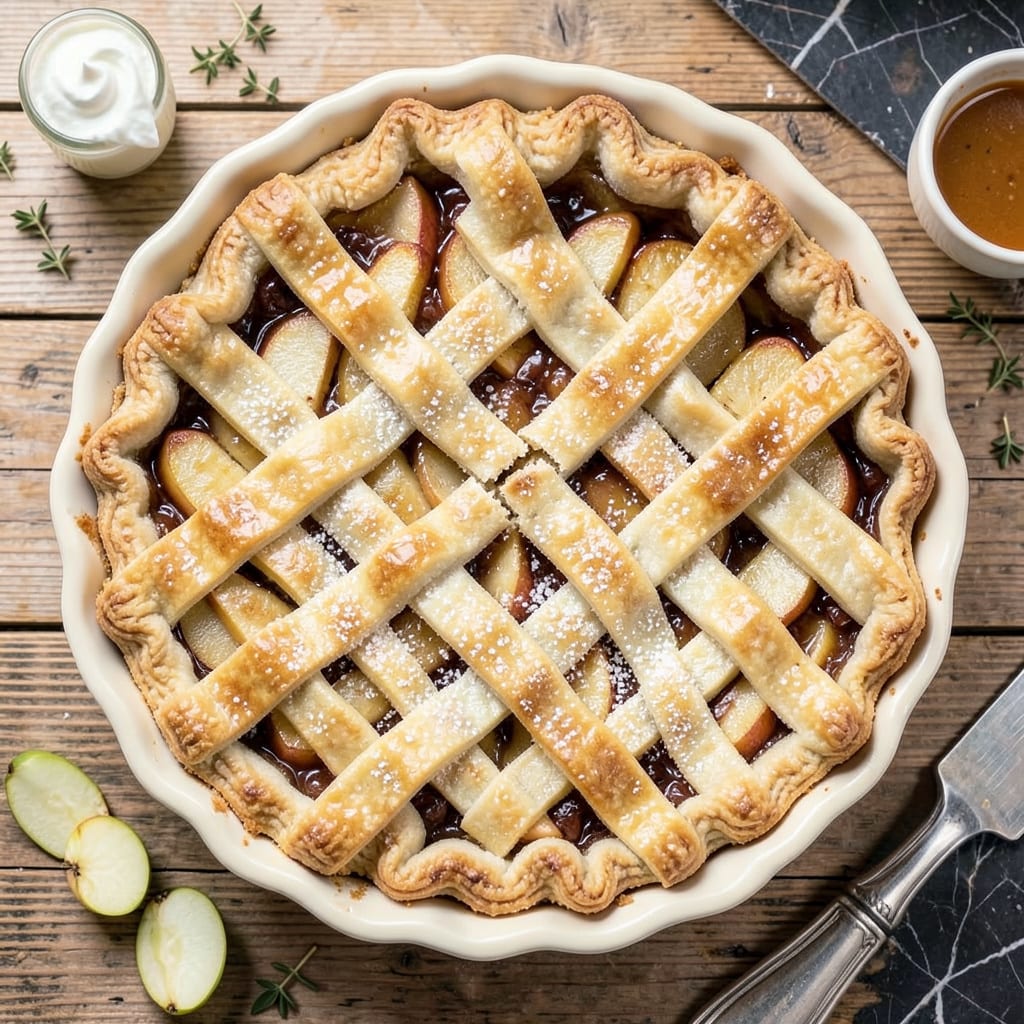
There’s nothing quite like the aroma of a freshly baked apple pie filling the kitchen—it’s the essence of home baking. This recipe delivers the perfect balance of flaky, golden crust and cinnamon-spiced apple filling that’s tender yet holds its shape. I’ve refined the technique over years to ensure the crust stays crisp while the apples become perfectly caramelized.
The secret lies in the details: cold butter for the crust, a mix of tart and sweet apples, and just the right amount of cornstarch to thicken the filling without making it gluey. Whether you’re baking for a holiday gathering or simply craving comfort food, this pie delivers the classic taste you remember with professional results every time.
Ingredients for Better Homes and Gardens Apple Pie
Classic ingredients combine to create that nostalgic apple pie experience with professional-level results every time.
| Ingredient | Amount | Notes |
|---|---|---|
| All-Purpose Flour 🌾 | 2 ½ cups | Plus extra for dusting |
| Granulated Sugar 🍚 | ¾ cup | Divided for crust and filling |
| Unsalted Butter 🧈 | 1 cup | Cold, cubed for crust |
| Ice Water 💧 | ¼ cup | Plus 1-2 tbsp as needed |
| Table Salt 🧂 | 1 tsp | Divided for crust and filling |
| Granny Smith Apples 🍏 | 3 whole | Peeled, cored, sliced |
| Honeycrisp Apples 🍎 | 3 whole | Peeled, cored, sliced |
| Light Brown Sugar 🍯 | ½ cup | Packed for filling |
| Ground Cinnamon 🌿 | 1 ½ tsp | Freshly ground preferred |
| Cornstarch 🌽 | 2 tbsp | For thickening filling |
| Lemon Juice 🍋 | 1 tbsp | Freshly squeezed |
| Vanilla Extract 💧 | 1 tsp | Pure extract recommended |
| Large Egg 🥚 | 1 whole | For egg wash |
| Coarse Sugar 🍚 | 1 tbsp | For crust topping |
[recipeingredientscaler]
The crust demands precision. King Arthur Flour produces consistently excellent results for flakiness, while European-style butter (like Plugrá) with its higher fat content creates superior layers. For apples, seek firm, unbruised specimens—Granny Smith provides tartness while Honeycrisp offers sweetness and holds shape. The cornstarch is critical; Argo brand is widely available and reliable for thickening without altering flavor profile.
Apple variety substitutions require balancing sweetness and texture. Braeburn or Jonagold work well in place of Honeycrisp, while Granny Smith alone may require additional sugar. For crust alternatives, vegetable shortening (like Crisco) produces excellent flakiness, though butter yields superior flavor. The egg wash can be replaced with milk or cream for a slightly less shiny but equally effective finish.
Prepare the crust dough up to 2 days ahead—wrap tightly in plastic and refrigerate. Sliced apples can be stored in lemon water for 6 hours to prevent browning. The assembled pie freezes beautifully before baking for up to 3 months; bake directly from frozen, adding 15-20 minutes to baking time. Baked pie keeps at room temperature for 2 days or refrigerated for 5 days.
Why You’ll Love This Recipe
- No-Fuss Crust: The ice water trick with just flour, butter, and salt makes this crust foolproof. I’ve messed up pie dough before, but this one comes together smooth every time—no weird cracks or tough spots.
- Buttery, Flaky Magic: That unsalted butter layered between the flour creates these insane crispy pockets. Honestly, the first bite of warm crust with the sugary apples? I’d make this just for that texture alone.
- Holiday or Tuesday: I’ve served this at Thanksgiving and on random weeknights when we needed something sweet. The sugar caramelizes enough to feel special, but the prep’s simple enough for any day.
- Leftovers? Doubt It: Between us, this pie disappears fast—but if you’re lucky enough to have a slice left, it reheats beautifully in the oven. Five minutes at 350°F, and it’s like fresh-baked all over again.
Step-by-Step Instructions for Apple Pie
This method delivers a perfectly flaky crust and balanced apple filling every time.
Step 1: Prepare the Pie Crust
In a large bowl, combine the 2.5 cups all-purpose flour and ½ teaspoon table salt. Add the 1 cup unsalted butter that’s been cubed and chilled. Using a pastry cutter or your fingers, work the butter into the flour until the mixture resembles coarse crumbs with pea-sized butter pieces visible.
Gradually sprinkle in the ¼ cup ice water, 1 tablespoon at a time, while gently stirring with a fork. The dough should just come together when pressed – don’t overwork it. Divide the dough into two equal portions, flatten into discs, wrap in plastic, and refrigerate for at least 1 hour. This resting period allows the gluten to relax, ensuring a tender, flaky crust.
Step 2: Prepare the Apple Filling
Peel, core, and slice the 3 Granny Smith apples and 3 Honeycrisp apples into ¼-inch thick slices. In a large bowl, toss the apple slices with the 1 tablespoon lemon juice to prevent browning. Add the ½ cup light brown sugar, 1.5 teaspoons ground cinnamon, 2 tablespoons cornstarch, and remaining ½ teaspoon table salt.
Drizzle with the 1 teaspoon vanilla extract and stir gently but thoroughly to coat all apple slices. The cornstarch will help thicken the juices as the pie bakes, while the cinnamon and vanilla create that classic apple pie aroma. Let the mixture sit for 15 minutes while you roll out the crust.
Step 3: Assemble the Pie
On a lightly floured surface, roll out one dough disc to a 12-inch circle about ⅛-inch thick. Transfer to a 9-inch pie dish, pressing gently into the bottom and sides. Trim the edges, leaving a ½-inch overhang. Roll out the second dough disc to the same size for the top crust.
Pour the apple filling into the crust, mounding slightly in the center. Cover with the top crust, trim the edges, and crimp to seal. Cut 4-5 slits in the top crust to allow steam to escape. For a golden finish, beat the large egg with 1 tablespoon water and brush over the entire top crust, then sprinkle with the 1 tablespoon coarse sugar.
Step 4: Bake to Golden Perfection
Place the pie on a baking sheet lined with parchment paper to catch any drips. Bake in a preheated 375°F oven for 50-60 minutes, until the crust is deep golden brown and the filling is bubbling through the slits. If the edges brown too quickly, cover them with foil or a pie shield.
The pie is done when the juices are thick and bubbling – you should see them oozing through the slits. Let the pie cool on a wire rack for at least 2 hours before slicing. This cooling time allows the filling to set properly, preventing a runny pie when served.
Pro Cooking Tips for This Recipe
Butter Temperature Control
For that signature flaky crust, your butter must stay cold but pliable. I cube mine and freeze for 15 minutes before mixing. If your kitchen is warm, work quickly or chill the bowl between steps. The ideal texture is pea-sized butter pieces coated in flour—this creates those beautiful steam pockets during baking. 🌡️
Apple Prep Technique
Uniform ¼-inch slices ensure even cooking. I use an apple corer/peeler for speed, but a sharp chef’s knife works too. Toss slices immediately with lemon juice to prevent browning. The mix of Granny Smith and Honeycrisp gives perfect sweet-tart balance—don’t skip this combo!
Crimping Like a Pro
Use your thumb and index finger to press the dough edges while pushing outward with your opposite hand. For a classic look, try the rope edge: fold overhang under, then pinch between thumb and side of index finger. A well-crimped edge prevents filling leaks and looks stunning. Practice on scrap dough first!
Venting Strategy
Cut 4-5 decorative slits in the top crust to allow steam to escape. I use a small paring knife to create leaf shapes or simple lines. Position vents toward the center where filling bubbles most. This prevents soggy crust and ensures the filling thickens properly during baking.
Egg Wash Secrets
Whisk the egg with 1 tbsp water (not milk) for maximum shine. Apply with a pastry brush in smooth, even strokes. The water thins the wash just enough for even coverage without pooling. Sprinkle coarse sugar immediately after brushing for that bakery-style sparkle.
Baking Rack Position
Place your pie on the lower-middle rack of the oven. This ensures the bottom crust crisps while the top browns evenly. I rotate the pie 180 degrees halfway through baking. The parchment-lined sheet pan catches drips and makes transfer easier. Let it cool 2 full hours—patience prevents a runny filling! 💛
Nutrition Facts

- 6 Egg Cake Recipe with Oil: Light as Air With Buttery Moisture - October 4, 2026
- 4 Bean Casserole Recipe: One-Pan Heartiness With Smoky Paprika Depth - October 4, 2026
- 3-Ingredient Keto Mug Cake Recipe: Microwave Magic in 2 Minutes - October 4, 2026