
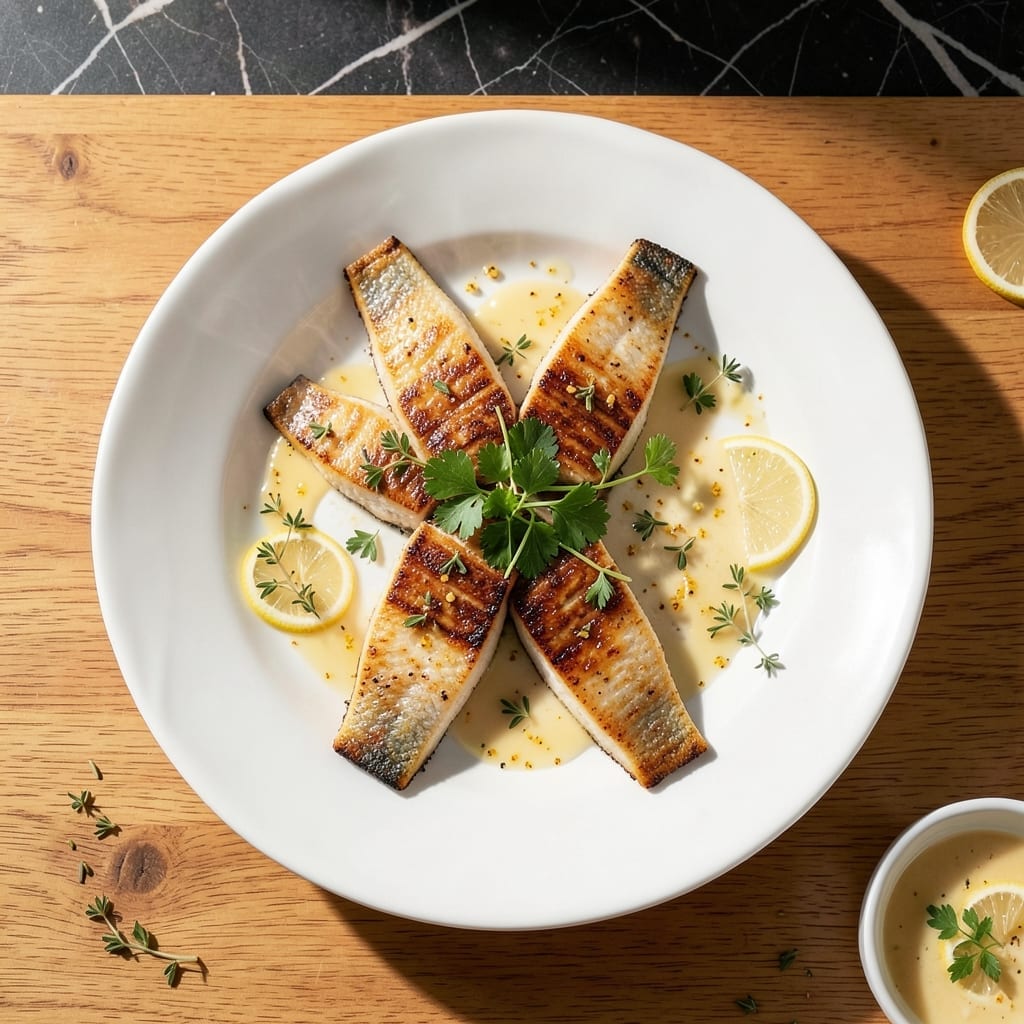
This pan-seared yellowtail snapper delivers restaurant-quality results with a technique that’s surprisingly simple to master. The key is high heat and patience—let the skin crisp to golden perfection before flipping.
The lemon-herb butter transforms the dish, adding bright acidity and rich depth that complements the delicate fish. A foolproof method ensures the fillets stay moist and tender, never dry or overcooked.
With just a few ingredients and 15 minutes of active cooking, you’ll have a dish that looks and tastes like it came from a high-end seafood restaurant. The butter melts into every bite, creating a luscious finish.
Serve immediately with fresh herbs and a squeeze of lemon for the best presentation. This is the kind of meal that impresses without effort.
Ingredients for Best Yellowtail Snapper
Fresh snapper, bright herbs, and butter make this dish shine with minimal effort.
| Ingredient | Amount | Notes |
|---|---|---|
| Yellowtail Snapper Fillets 🐟 | 4 whole | Skin-on, about 6 oz each |
| Unsalted Butter 🧈 | ½ cup | For compound butter base |
| Lemon Zest 🍋 | 1 tbsp | Freshly grated from 1 lemon |
| Fresh Lemon Juice 🍋 | 2 tbsp | From 1 large lemon |
| Fresh Parsley 🌿 | ¼ cup | Finely chopped, flat-leaf |
| Fresh Thyme Leaves 🌿 | 1 tbsp | Stems removed, chopped |
| Garlic Cloves 🧄 | 2 cloves | Minced or pressed |
| Kosher Salt 🧂 | 1 tsp | Diamond Crystal preferred |
| Freshly Ground Black Pepper 🌶️ | ½ tsp | Coarse grind ideal |
| Olive Oil 🫒 | 2 tbsp | High smoke point for searing |
| All-Purpose Flour 🌾 | ¼ cup | For light dusting |
The snapper is the star—look for wild-caught fillets at Whole Foods or a trusted fishmonger. Skin should be shiny and odorless (if it smells fishy, skip it). I always ask for center-cut pieces so they cook evenly. For the herbs, flat-leaf parsley has better flavor than curly, and fresh thyme beats dried every time (worth the extra minute to pick the leaves).
No yellowtail? Red snapper or branzino work beautifully here. If you’re out of fresh herbs, dried at one-third the amount is fine—just bloom them in the butter. The lemon can be bottled in a pinch, but fresh makes a difference. For a richer butter, swap half the amount for ghee (clarified butter has a higher smoke point).
Cook the snapper the same day you buy it if possible—fish is best within 24-48 hours. The compound butter keeps in the fridge for 3 days or freeze it for up to 1 month. Leftovers? Not likely, but they’ll hold for 1 day refrigerated (reheat gently).
Why You’ll Love This Recipe
- One Pan Wonder: I just melt butter with lemon zest, toss in the fillets, and dinner’s half done before the oven’s even hot.
- Bright and Fresh: That hit of lemon juice and parsley makes every bite taste like a seaside escape.
- Weeknight Hero: Honestly, it’s fancy enough for guests but quick enough for a Tuesday when I’m starving at 7 PM.
- Zero Waste: Leftovers? Rare. But when they happen, they’re just as good flaked into a salad the next day.
Step-by-Step Instructions for Pan-Seared Yellowtail Snapper
Master these professional techniques to achieve restaurant-quality snapper with crisp skin and moist flesh.
Step 1: Prepare the Lemon-Herb Compound Butter
In a small bowl, combine the 0.5 cup Unsalted Butter with 1 tbsp Lemon Zest, 2 tbsp Fresh Lemon Juice, 0.25 cup Fresh Parsley, 1 tbsp Fresh Thyme Leaves, and 2 cloves Garlic Cloves (minced). Use a fork to blend thoroughly until all ingredients are evenly distributed.
The butter should become pale yellow with visible flecks of herbs and zest. This compound butter will melt over the hot snapper, creating a bright, aromatic finish. I always prepare this first so the flavors can meld while I work on the fish.
Step 2: Season and Dredge the Fillets
Pat the 4 whole Yellowtail Snapper Fillets completely dry with paper towels—this is critical for achieving crispy skin. Season both sides evenly with 1 tsp Kosher Salt and 0.5 tsp Freshly Ground Black Pepper, pressing gently so the seasoning adheres.
Lightly dredge the skin-side of each fillet in 0.25 cup All-Purpose Flour, shaking off any excess. The flour creates a delicate crust that enhances the skin’s natural crispness during searing. Don’t flour the flesh side—this would make the final dish gummy.
Step 3: Sear the Fillets Skin-Side Down
Heat 2 tbsp Olive Oil in a large skillet over medium-high heat until it shimmers but doesn’t smoke. Carefully place the fillets in the pan, skin-side down, pressing gently with a fish spatula for 10 seconds to ensure full contact with the pan.
Cook undisturbed for 4-5 minutes until the skin is deep golden brown and crisp. You’ll see the edges of the fillets become opaque and the skin pull away slightly from the pan when it’s ready to flip. Don’t move them prematurely—this prevents sticking and ensures even browning.
Step 4: Finish Cooking and Add Compound Butter
Flip the fillets and cook for an additional 2-3 minutes until the flesh is opaque and flakes easily when tested with a fork. The internal temperature should reach 145°F at the thickest part.
Reduce heat to low and add the compound butter to the pan. Tilt the skillet slightly and use a spoon to baste the fillets with the melting butter for 30-45 seconds. This final step infuses the fish with the lemon-herb flavors and adds a glossy finish.
Step 5: Rest and Serve Immediately
Transfer the fillets to a warm plate, skin-side up. Let them rest for 2 minutes—this brief pause allows the juices to redistribute, ensuring moist, tender flesh. The skin should remain crisp during this time.
Spoon any remaining butter sauce from the pan over the fillets before serving. The ideal presentation shows the golden, crispy skin contrasting with the opaque, flaky flesh, all glistening with the lemon-herb butter. Serve immediately for the best texture.
Pro Tips For Making Best Yellowtail Snapper
- Pat Dry First: I learned this the hard way—water on the fillets steams them instead of searing. Use paper towels and press firmly to remove every bit of moisture before they hit the pan.
- Hot Pan, Cold Butter: Crank the heat to medium-high before adding the fillets, then drop in a tablespoon of cold butter right after. This prevents the butter from burning while still getting that golden crust.
- Zest Before Juicing: Always grate the lemon zest first, then juice it. Sounds obvious, but I’ve ruined more than one microplane trying to do it the other way around.
- Rest Under Foil: Pull the snapper off when it’s just opaque in the center, tent it loosely with foil, and let it sit for 5 minutes. It finishes cooking and stays tender—no dry fish here.
Make-Ahead Tips for This Dish
Compound Butter Prep
Make your lemon-herb butter up to 3 days ahead and store it in an airtight container in the fridge. The flavors actually improve as they meld together. I like to shape it into a log in parchment paper for easy slicing later. 💪
Fish Preparation
Pat your snapper fillets dry and season them up to 1 hour before cooking, but don’t dredge in flour until right before searing. The flour can make the skin soggy if left too long. Keep the seasoned fillets covered in the fridge until ready to cook.
Partial Cooking
You can sear the skin side 4-5 minutes ahead of serving, then finish cooking just before eating. Leave the partially cooked fillets skin-side up on a wire rack—they’ll stay warm and the skin will remain crisp.
Room Temperature
Let refrigerated fillets sit at room temperature for 15-20 minutes before cooking. This ensures even cooking throughout. I take my fish out of the fridge while I’m prepping the compound butter.
Plating Ahead
Warm your serving plates in a 200°F oven for 5 minutes. Transfer cooked fillets to the warm plates and tent loosely with foil. They’ll stay hot for up to 10 minutes while you finish side dishes. 🔥
Butter Reheating
If your compound butter hardens, let it sit at room temperature for 10 minutes or microwave in 5-second bursts until soft. Never melt it completely before using—you want it to melt gradually in the pan.
Nutrition Facts
Frequently Asked Questions
How do I know when the snapper is done?
It’s cooked when the flesh turns opaque and flakes easily with a fork. The internal temperature should reach 145°F at the thickest part.
Can I use skinless fillets?
Yes, but the skin helps create a crispy texture. If using skinless, reduce searing time to 2-3 minutes per side to prevent drying.
What if the skin sticks to the pan?
Ensure the pan is very hot before adding fillets and don’t move them for 4-5 minutes. A well-seasoned cast iron or nonstick pan works best.
What sides pair well with this dish?
Try roasted asparagus, quinoa pilaf, or a simple arugula salad. The lemon-herb butter complements light, fresh sides perfectly.

- 6 Egg Cake Recipe with Oil: Light as Air With Buttery Moisture - October 4, 2026
- 4 Bean Casserole Recipe: One-Pan Heartiness With Smoky Paprika Depth - October 4, 2026
- 3-Ingredient Keto Mug Cake Recipe: Microwave Magic in 2 Minutes - October 4, 2026