
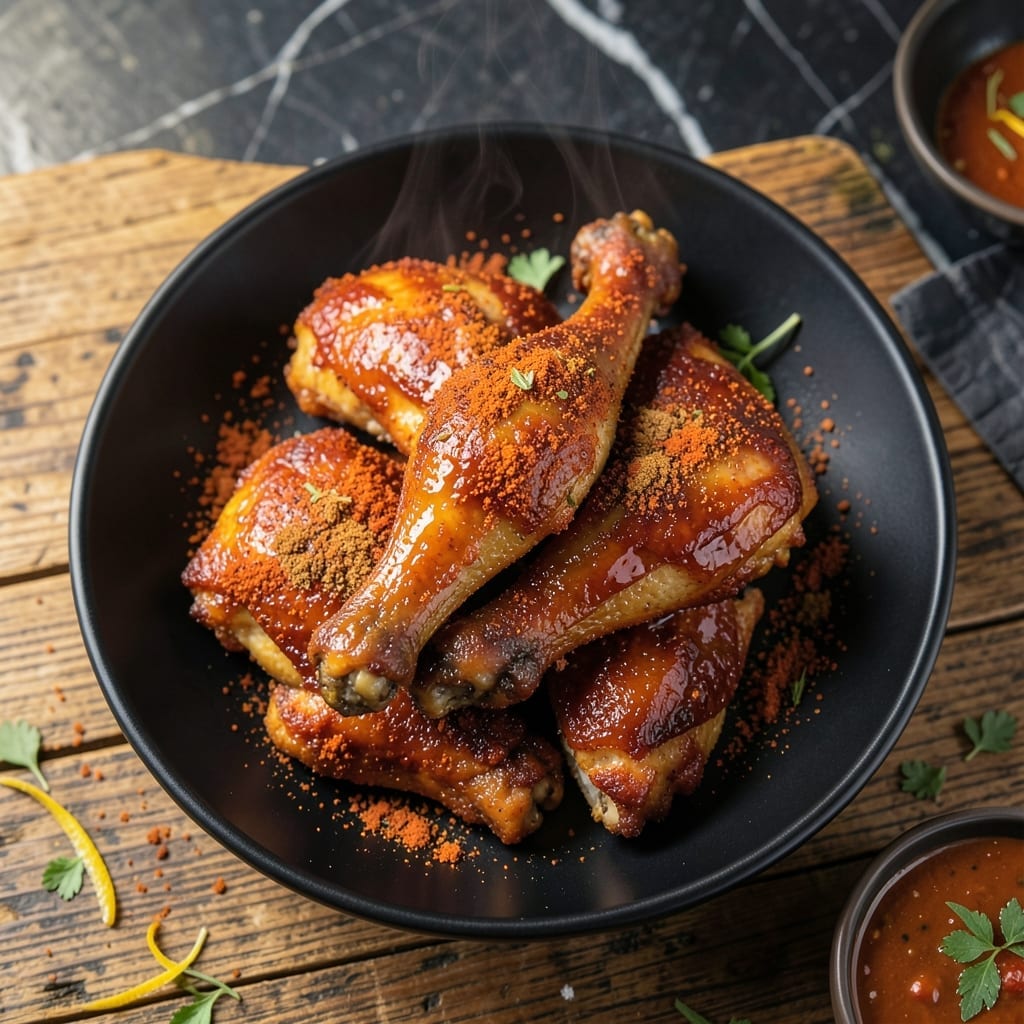
Nashville hot chicken has a cult following for good reason—crispy, juicy, and packed with fiery flavor. This version stays true to the classic method while making it achievable in any home kitchen.
The secret lies in the double-fry technique, which creates an ultra-crispy crust that holds up to the spicy oil coating. I’ve tested this process repeatedly to ensure the heat level is bold but balanced, with a perfect blend of cayenne and brown sugar.
What you’ll get is golden, shatteringly crispy chicken with a glossy, fiery glaze that clings to every bite. The heat builds gradually, making it addictive rather than overwhelming.
Serve it on white bread with pickles to cut through the spice. Here’s how to make it right.
Ingredients for Prince’s Hot Chicken
Here are the ingredients to create that signature fiery, crispy Nashville-style dish at home.
| Ingredient | Amount | Notes |
|---|---|---|
| Chicken Thighs 🍗 | 2 lb | Boneless, skin-on preferred |
| Buttermilk 🥛 | 2 cups | Full-fat for best results |
| All-Purpose Flour 🌾 | 2 cups | For dredging chicken |
| Cayenne Pepper 🌶️ | 3 tbsp | Adjust for heat preference |
| Brown Sugar 🍯 | ½ cup | Light or dark works |
| Paprika 🌶️ | 1 tbsp | Smoked or sweet variety |
| Garlic Powder 🧄 | 1 tbsp | Not garlic salt |
| Onion Powder 🧅 | 1 tbsp | Fresh ground preferred |
| Salt 🧂 | 1 tbsp | Kosher or sea salt |
| Black Pepper 🌶️ | 1 tsp | Freshly ground preferred |
| Vegetable Oil 🫒 | 4 cups | For deep frying |
| Unsalted Butter 🧈 | ½ cup | For spicy oil glaze |
| White Bread 🍞 | 4 slices | For serving |
| Dill Pickles 🥒 | 1 cup | Sliced, for serving |
The chicken thighs are key—skin-on, boneless gives you that shatteringly crisp crust. Look for plump pieces with good marbling at your butcher or Whole Foods. The buttermilk should be full-fat (trust me on the full-fat version) for maximum tenderness. For the flour, all-purpose is standard, but White Lily brand if you’re going for authenticity. That Southern staple makes a difference in the coating’s texture.
No buttermilk? Whole milk with 1 tbsp vinegar per cup works in a pinch. Want less heat? Cut cayenne to 1 tbsp and add more brown sugar. The paprika can be swapped for smoked paprika if you like depth. Vegetable oil is ideal for frying, but peanut oil works too (higher smoke point). Skip the butter in the glaze if dairy’s an issue—just use more oil.
Fry in batches so the oil stays hot—crowding drops the temp. Leftovers keep 2-3 days in the fridge, but reheat in the oven to stay crispy. The spicy oil can be stored in a jar for 1 week—great on fries, sandwiches, or eggs (don’t skip this part).
Why You’ll Love This Recipe
- One Bowl Magic: I just toss everything in a single bowl—flour, cayenne, brown sugar—and the chicken soaks up all that buttermilk goodness without the fuss.
- Sweet & Spicy Kick: That cayenne heat hits first, then the brown sugar smooths it out. Honestly, the balance is what makes it irresistible.
- Crowd Pleaser: Between us, this is my go-to for game nights. Thighs stay juicy, and the spice level is easy to tweak for picky eaters.
- Budget Hero: A bag of thighs and pantry staples feed four for under ten bucks. I’ll be real: it’s cheaper than takeout and twice as tasty.
Step-by-Step Instructions for Nashville Hot Chicken
Here’s the tested method for achieving crispy, fiery, and perfectly balanced heat in every bite.
Step 1: Marinate the Chicken Thighs
Place the 2 lb Chicken Thighs in a large bowl and pour over all 2 cups Buttermilk. Ensure each piece is fully submerged for even marination. I always let this sit at room temperature for 30 minutes to kickstart the tenderizing process.
Then, refrigerate for at least 4 hours, or ideally overnight. This extended soak guarantees the buttermilk penetrates deeply, resulting in juicy meat that stays moist even after frying. The acidity also helps the coating adhere better during the next steps.
Step 2: Prepare and Dredge the Chicken
In a large shallow dish, combine all 2 cups All-Purpose Flour with the 1 tbsp Salt, 1 tsp Black Pepper, 1 tbsp Paprika, 1 tbsp Garlic Powder, and 1 tbsp Onion Powder. This spiced flour base creates the crispy foundation for your hot chicken.
Remove the chicken from the buttermilk, letting excess drip off, then dredge each piece thoroughly in the flour mixture. Press firmly to ensure the coating clings completely. Place the dredged pieces on a wire rack set over a baking sheet. This setup allows air circulation, preventing the coating from getting soggy before frying.
Step 3: Fry the Chicken to Golden Perfection
Heat all 4 cups Vegetable Oil in a heavy pot or deep skillet to 350°F. Use a deep-fry thermometer for accuracy—maintaining this temperature is crucial. The oil should be deep enough to fully submerge the chicken without overcrowding the pot.
Fry the chicken in batches for 12-15 minutes, turning occasionally, until the coating is deep golden brown and the internal temperature reaches 165°F. The crust should be shatteringly crisp, and the meat inside should be fully cooked but still juicy. Drain on a clean wire rack to preserve crispiness.
Step 4: Create the Spicy Oil Glaze
In a small saucepan, melt all 0.5 cup Unsalted Butter over medium heat. Stir in the 3 tbsp Cayenne Pepper and 0.5 cup Brown Sugar until fully combined. Cook for 2-3 minutes until the mixture is smooth and the sugar has dissolved.
This glaze should be glossy and aromatic, with a deep red color from the cayenne. The brown sugar balances the heat with a touch of sweetness, creating that signature Nashville-style flavor profile. Be careful—the oil will be extremely hot and spicy.
Step 5: Coat and Serve Immediately
While the chicken is still hot from frying, brush or spoon the spicy oil glaze generously over each piece, coating all surfaces completely. The heat from the chicken helps the glaze adhere and intensifies the spice level.
Serve immediately on 4 slices White Bread with 1 cup Dill Pickles on the side. The bread soaks up some of the spicy oil, and the cool, tangy pickles provide the perfect contrast to the fiery chicken. Expect this dish to deliver serious heat with every bite.
Pro Tips For Making Prince’S Hot Chicken
- Brine Overnight: Soak the chicken thighs in buttermilk for at least 12 hours—I learned this the hard way after my first batch turned out dry and under-seasoned.
- Double Fry: Fry the chicken once at 325°F until golden, then again at 375°F for 2-3 minutes to guarantee that crispy crust Prince’s is known for.
- Balance the Heat: Mix cayenne with a little brown sugar in the flour coating—sounds weird, but it works to mellow the burn while keeping the signature kick.
- Rest Before Serving: Let the fried chicken rest 5-10 minutes on a wire rack—this keeps the crust crispy instead of soggy from trapped steam.
Serving Suggestions for Leftovers
Classic Nashville Style
Serve this dish on white bread with dill pickles on the side—the traditional way. The bread soaks up the spicy oil while the pickles cut through the heat. I like to use Wonder Bread for that authentic Nashville experience. 🔥
Plated Presentation
Arrange the hot chicken on a platter with pickles and bread on the side for a family-style meal. Garnish with extra cayenne or paprika for a pop of color that hints at the heat to come. This makes for a striking centerpiece at any gathering.
Sandwich Style
Place a piece of chicken between two slices of bread with pickles and a drizzle of leftover spicy oil for a handheld sandwich. Add a slice of American cheese if you want to mellow the heat slightly. This is my go-to for quick lunches.
Sides to Balance
Cool, creamy sides like coleslaw or mac and cheese pair perfectly. The creaminess contrasts the heat beautifully. I love serving it with a simple cucumber salad dressed in vinegar and sugar.
Drink Pairings
Cold, sweet tea is the classic beverage pairing—it’s a Nashville staple. For beer lovers, a crisp IPA or a malty amber ale complements the spice. I always keep a pitcher of sweet tea in the fridge when making this. 💛
Leftovers Tip
Reheat leftovers in a 400°F oven for 10-12 minutes to restore crispiness. Microwaving turns the coating soggy, so avoid it if possible. Serve with fresh bread and pickles to revive the experience.
Nutrition Facts
Frequently Asked Questions
Can I use chicken breasts instead of thighs?
Thighs stay juicier, but breasts work if pounded to even 1/2-inch thickness. Reduce frying time to 10-12 minutes to prevent dryness. The dark meat’s fat content helps balance the heat better.
How do I adjust the heat level?
Reduce cayenne to 1 tbsp for mild heat, or increase to 5 tbsp for extra spicy. Brown sugar tempers the burn, so keep it at 1/2 cup for balance. Always taste the glaze before coating.
Why does my coating fall off during frying?
Common causes: not patting chicken dry before dredging or skipping the 30-minute rest after coating. Let dredged pieces sit on a rack so the flour adheres properly before frying.
Can I bake instead of fry?
Yes, but texture differs. Bake at 400°F for 25-30 minutes on a rack for crispiness. Brush with extra oil halfway. It won’t be as shatteringly crisp as fried, but still flavorful.

- 6 Egg Cake Recipe with Oil: Light as Air With Buttery Moisture - October 4, 2026
- 4 Bean Casserole Recipe: One-Pan Heartiness With Smoky Paprika Depth - October 4, 2026
- 3-Ingredient Keto Mug Cake Recipe: Microwave Magic in 2 Minutes - October 4, 2026