
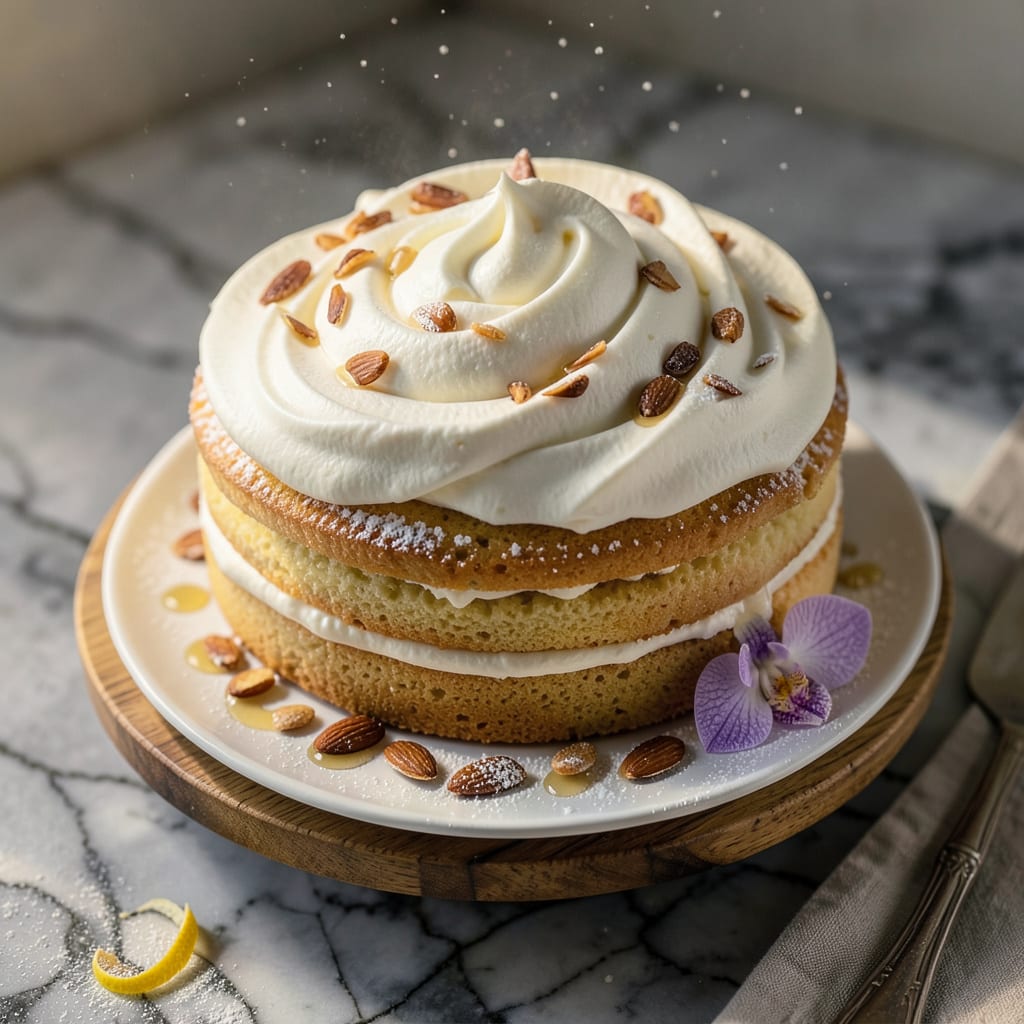
Achieving professional-quality frosting at home is simpler than you think with this BetterCreme recipe. This formulation delivers the ideal balance of lightness and stability, perfect for both spreading and intricate piping work. The secret lies in the precise ratio of BetterCreme base to powdered sugar, creating a frosting that holds its shape without becoming overly sweet.
What sets this recipe apart is its versatility and reliability. Whether you’re decorating a layer cake or piping cupcakes, this frosting maintains a smooth, creamy texture that won’t crust or weep. The neutral base allows for endless flavor variations while ensuring consistent results every time you make it.
Ingredients for Bettercreme Frosting
Eight simple ingredients transform into that dreamy, pipeable frosting you’ve been chasing.
| Ingredient | Amount | Notes |
|---|---|---|
| BetterCreme Shortening Base 🧈 | 1 cup | Room temperature for smooth blending |
| Powdered Sugar 🍚 | 4 cups | Sifted for lump-free texture |
| Vanilla Extract 💧 | 1 tbsp | Pure extract for best flavor |
| Whole Milk 🥛 | 2 tbsp | Or unsweetened almond milk |
| Salt 🧂 | ¼ tsp | Fine grain for even distribution |
| Almond Extract 🌰 | ¼ tsp | Optional for depth of flavor |
| Heavy Whipping Cream 🥛 | 2 tbsp | Cold for optimal whipping |
| Corn Syrup 🍯 | 1 tbsp | Light variety for sheen |
The BetterCreme base is non-negotiable here—it’s what gives this frosting its professional stability without the greasy aftertaste of traditional shortening. Look for it in the baking aisle at Michaels or Joann Fabrics, or grab it online if your local stores don’t stock it. Powdered sugar quality matters too—Domino or C&H are reliable brands that dissolve smoothly. Skip the off-brands; they can leave a gritty texture. And yes, you have to sift it (worth the extra minute, I promise).
Out of vanilla extract? Vanilla bean paste works even better—use half the amount. No almond extract? Skip it or try a splash of coconut extract for a different twist. The milk is mostly for consistency, so any neutral liquid (even water) works in a pinch, but whole milk gives the creamiest result. If you’re avoiding dairy, unsweetened almond or oat milk blends right in. The corn syrup might seem odd, but it’s the secret to that glossy finish—agave or honey can sub in if needed (though honey’s not vegan).
This frosting holds up beautifully at room temp for 2 days if covered tightly—press plastic wrap right against the surface to prevent crusting. For longer storage, refrigerate in an airtight container for up to 1 week, but let it come to room temp and rewhip before using. Freezing isn’t ideal (it can separate), but if you must, freeze for up to 3 months in a sealed container. Thaw overnight in the fridge, then rewhip with a splash of milk.
Why You’ll Love This Recipe
- No Mixer Needed: I’ve made this with just a wooden spoon and a bowl—no fancy equipment, no waiting for butter to soften. The BetterCreme base blends smooth with powdered sugar in minutes, even when my stand mixer is buried in the back of the cabinet.
- That Bakery-Style Texture: Here’s what sold me—the frosting holds its shape like a dream but still melts in your mouth. The shortening base gives it that light, fluffy stability my buttercream never quite nails, especially on layer cakes or cupcakes in summer heat.
- Birthdays to Tuesday Nights: Honestly, I’ve used this for everything: my kid’s last-minute school cupcakes, a rushed weeknight sheet cake, even piping decorations that actually stayed put. One batch covers a 9×13” cake or 24 cupcakes—no scaling math required.
- Stays Fresh for Days: Leftovers? No stress. This frosting keeps perfectly in the fridge for up to a week (just rewhip with a splash of milk), and it’s way cheaper than store-bought tubs. I’ll be real: I’ve frozen it for emergencies, and it still pipes like it’s fresh.
Step-by-Step Instructions for BetterCreme Frosting
Here’s how to whip up that impossibly light, perfectly pipeable frosting you’ve been dreaming about.
Step 1: Cream the BetterCreme Base to Silky Smoothness
Start with the 1 cup BetterCreme Shortening Base at room temperature. In a stand mixer fitted with the paddle attachment, beat it on medium speed for 2-3 minutes until completely smooth and creamy. You’re looking for a texture that resembles whipped butter but with a slightly lighter consistency.
Scrape down the sides of the bowl with a silicone spatula to ensure even mixing. This step is crucial—properly creamed shortening incorporates air that gives your frosting that signature lightness. Don’t rush it; you should see the color lighten slightly and the volume increase by about 20%.
Step 2: Gradually Incorporate the Powdered Sugar
With the mixer running on low speed, begin adding the 4 cups Powdered Sugar one cup at a time. I sift mine directly into the bowl to prevent any lumps. After each addition, pause to scrape the bowl and mix for 15-20 seconds before adding more.
Once all the sugar is incorporated, increase the speed to medium-high and beat for 1-2 minutes until the mixture becomes fluffy. You’ll know it’s ready when it holds soft peaks and has a smooth, velvety appearance. This is where the magic starts happening—the frosting will transform from dense to airy right before your eyes.
Step 3: Add Liquids and Flavorings for Perfect Balance
Reduce the mixer speed to low and add the 1 tbsp Vanilla Extract, 2 tbsp Whole Milk, 0.25 tsp Salt, and 0.25 tsp Almond Extract. Mix for 30 seconds until just combined. Then, with the mixer still running, slowly drizzle in the 2 tbsp Heavy Whipping Cream and 1 tbsp Corn Syrup.
Increase the speed to medium-high and whip for another 2-3 minutes. The frosting should become noticeably lighter in both color and texture. Watch for the ideal consistency: it should hold stiff peaks when you lift the beater, but still be smooth enough to pipe intricate designs. If it’s too stiff, add another teaspoon of milk; if too soft, a tablespoon more powdered sugar.
Step 4: Final Whip for Maximum Volume and Sheen
Switch to the whisk attachment and beat the frosting on high speed for a final 1-2 minutes. This last whipping incorporates maximum air and gives the frosting that professional sheen. You’ll see it transform from matte to slightly glossy, and the volume will increase by about 30%.
Stop occasionally to scrape the bowl and check the consistency. The perfect frosting should cling to the whisk in soft, billowy waves and hold its shape when piped. Test it by piping a small rosette—if it maintains clean edges without slumping, you’ve nailed the texture. If not, whip for another 30 seconds and test again.
Common Mistakes When Making This Recipe
Overmixing the Base
One of the most common mistakes I see is overmixing the BetterCreme base before adding sugar. While you want it smooth, beating it for more than 3 minutes can actually break down the structure. The ideal texture should resemble whipped butter—not melted. I use a timer to avoid overdoing it. 🕒
Adding Sugar Too Quickly
Dumping all 4 cups powdered sugar at once is a recipe for disaster. The sugar won’t incorporate evenly, leaving you with a grainy, lumpy mess. Add it 1 cup at a time on low speed, scraping the bowl between additions. This gradual approach ensures a silky-smooth finish every time.
Skipping the Sifting
I know sifting feels like an extra step, but trust me—it’s non-negotiable for this frosting. Unsifted powdered sugar creates tiny lumps that no amount of mixing can fully eliminate. I use a fine-mesh sieve right over my mixing bowl to catch any clumps before they ruin the texture.
Ignoring Room Temperature
Cold ingredients are the enemy of smooth frosting. Your BetterCreme base must be at room temperature (about 70°F) to blend properly. If it’s too cold, you’ll end up with a dense, greasy texture. I set mine out for 1-2 hours before starting—no shortcuts here!
Overthinning with Liquids
It’s tempting to keep adding milk when the frosting seems stiff, but too much liquid destroys the structure. Start with the recipe’s 2 tbsp milk, then add more by the teaspoon if needed. Remember: you can always add more liquid, but you can’t take it out once it’s in.
Underwhipping the Final Stage
The final whipping with the whisk attachment is where the magic happens. Many stop too soon, missing out on that professional sheen and volume. I whip on high speed for the full 2 minutes, watching for that glossy finish and 30% volume increase. It’s worth the extra effort! ✨
Nutrition Facts

- 6 Egg Cake Recipe with Oil: Light as Air With Buttery Moisture - October 4, 2026
- 4 Bean Casserole Recipe: One-Pan Heartiness With Smoky Paprika Depth - October 4, 2026
- 3-Ingredient Keto Mug Cake Recipe: Microwave Magic in 2 Minutes - October 4, 2026