
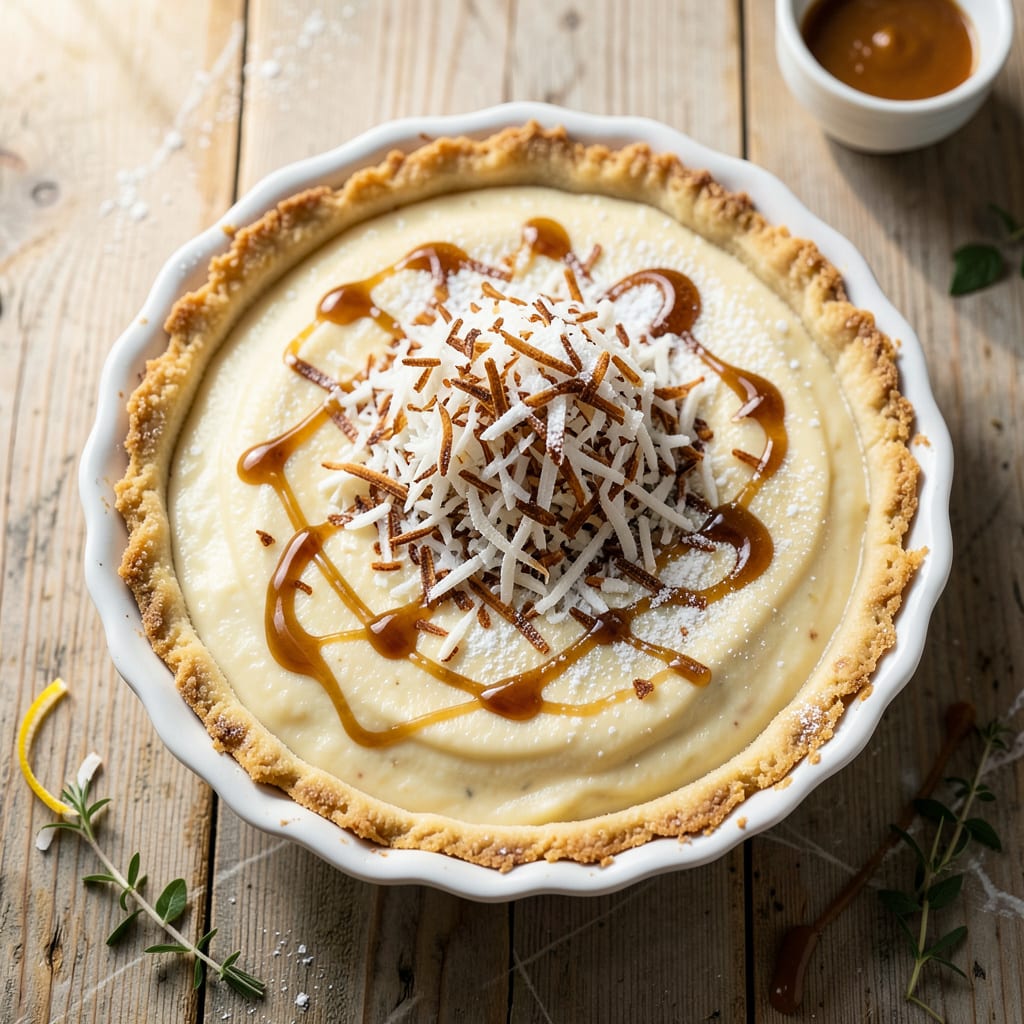
Coconut cream pie represents the golden age of American baking—a dessert that combines velvety custard, sweet coconut layers, and airy whipped topping in perfect harmony. This recipe stays true to the classic Betty Crocker tradition while ensuring modern reliability with foolproof techniques for each component.
The result is a pie with a crisp, buttery crust supporting layers of fluffy coconut custard and toasted coconut flakes, all crowned with billowy whipped cream. Every element works together to create that nostalgic yet impressive dessert experience—ideal for special occasions or when you want to bring retro charm to your table.
Ingredients for Betty Crocker Coconut Cream Pie
Classic ingredients for that nostalgic coconut cream pie—fluffy custard, toasted coconut, and billowy whipped cream.
| Ingredient | Amount | Notes |
|---|---|---|
| Pre-baked 9-inch pie crust 🥧 | 1 whole | Homemade or store-bought |
| Sweetened shredded coconut 🥥 | 2 cups | Divided for filling and topping |
| Granulated sugar 🍚 | ¾ cup | For custard filling |
| Cornstarch 🌾 | ⅓ cup | For thickening custard |
| Salt 🧂 | ½ tsp | Balances sweetness |
| Whole milk 🥛 | 3 cups | Full-fat for creaminess |
| Large egg yolks 🥚 | 4 whole | Room temperature preferred |
| Vanilla extract 🌿 | 1 tsp | Pure extract recommended |
| Heavy whipping cream 🥛 | 1 ½ cups | Chilled for whipped topping |
| Powdered sugar 🍚 | ¼ cup | For sweetening whipped cream |
| Coconut extract 🥥 | ½ tsp | For enhanced coconut flavor |
| Unsalted butter 🧈 | 2 tbsp | For custard enrichment |
[recipeingredientscaler]
The coconut makes this pie. Baker’s Angel Flake is the classic choice—sweetened, finely shredded, and perfect for both filling and topping. I grab mine at Walmart or Target (the baking aisle). For the custard, whole milk is non-negotiable—it gives that velvety texture. Don’t even think about skim. The pie crust can be homemade if you’re feeling fancy, but Pillsbury refrigerated crust works great and saves time (no shame).
No coconut extract? Vanilla extract plus 1/4 tsp almond extract gets you close. Out of heavy cream? Coconut cream from a can (chilled overnight) whips up beautifully—just skip the coconut extract. The cornstarch is key for thickening, but in a pinch, instant tapioca pudding mix works (use 1/4 cup). Egg yolks must be room temp—they blend smoother into the custard. If you’re nervous about curdling, temper them (worth the extra minute).
Store shredded coconut in the pantry for 6 months unopened, 1 month after opening. The pie keeps 3 days in the fridge—cover loosely with foil so the whipped cream doesn’t weep. Toast extra coconut flakes and keep them in a jar for 2 weeks (they’ll soften over time). Pro tip: toast the coconut for the topping just before serving—keeps it crisp.
Why You’ll Love This Recipe
- No-Fuss Filling: Honestly, the hardest part is waiting for it to chill. Just whisk sugar, cornstarch, and salt with milk on the stove—no fancy techniques, no tempering eggs. The coconut flakes toast while the filling thickens, so you’re multitasking without even trying.
- That First Bite: Between us, the contrast is everything: buttery crust, silky coconut custard, and the chewy-sweet crunch of toasted coconut on top. It’s not overly sweet like some pies—just balanced, with that hint of salt cutting through the richness.
- Potluck MVP: I’ve brought this to summer BBQs, holiday dinners, and even a last-minute book club meeting. A pre-baked crust means no oven stress, and it travels like a dream. (Yes, even on a Tuesday night when you need to impress the in-laws.)
- Makes Ahead Like a Dream: The filling sets beautifully overnight, so you can prep it the day before and toast the coconut fresh in the morning. Leftovers? They keep for three days—if your family doesn’t devour them first. My kid swipes slices straight from the fridge, crust and all.
Step-by-Step Instructions for Coconut Cream Pie
This classic pie comes together with simple techniques for that perfect fluffy filling and toasted coconut topping.
Step 1: Prepare the Coconut Custard Filling
In a medium saucepan, whisk together the granulated sugar, cornstarch, and salt. This dry mix ensures your custard thickens properly without lumps. Gradually whisk in the whole milk until completely smooth – you want no dry spots at the bottom of the pan.
Place the saucepan over medium heat and cook, stirring constantly with a wooden spoon, until the mixture begins to bubble around the edges. This should take about 5-7 minutes. Watch for those first tiny bubbles – that’s your cue the custard is heating evenly.
Step 2: Temper the Egg Yolks and Thicken the Custard
In a separate bowl, whisk the large egg yolks until smooth. Here’s the key step: slowly pour about 1 cup of the hot milk mixture into the yolks while whisking constantly. This tempering process prevents the eggs from scrambling when you add them back to the hot mixture.
Pour the tempered egg mixture back into the saucepan and return to medium heat. Cook for another 2-3 minutes, stirring constantly, until the custard thickens to pudding-like consistency. You’ll know it’s ready when it coats the back of your spoon and a finger drawn through it leaves a clear path. Remove from heat and stir in the unsalted butter, vanilla extract, and coconut extract until fully incorporated.
Step 3: Incorporate the Coconut and Fill the Crust
Stir 1½ cups of the sweetened shredded coconut into the hot custard. The residual heat will soften the coconut slightly while maintaining its texture. Let the filling sit for 5 minutes to cool slightly – this prevents it from melting the whipped cream topping later.
Pour the warm coconut custard into your pre-baked 9-inch pie crust, spreading it evenly with a spatula. The filling should come right to the top of the crust. Press plastic wrap directly onto the surface of the filling to prevent a skin from forming, then refrigerate for at least 2 hours or until completely chilled and set.
Step 4: Prepare the Whipped Cream Topping
In a chilled bowl, beat the heavy whipping cream with an electric mixer on high speed until soft peaks form. Gradually add the powdered sugar while continuing to beat until stiff peaks form. Be careful not to overbeat – you want billowy clouds, not butter.
Spread the whipped cream evenly over the chilled pie, creating decorative swirls with the back of a spoon. Sprinkle the remaining ½ cup of sweetened shredded coconut over the whipped cream, pressing lightly so it adheres. For extra flavor and texture, toast this coconut in a dry skillet over medium heat for 2-3 minutes until golden brown, stirring constantly.
Step 5: Chill and Serve
Return the pie to the refrigerator and chill for at least 1 additional hour before serving. This final rest time allows all the flavors to meld together and ensures clean slices when serving. The pie should feel firm when gently pressed on top.
When ready to serve, use a sharp knife dipped in hot water to make clean cuts. Each slice should showcase the creamy coconut filling, fluffy whipped cream, and toasted coconut topping in perfect harmony. The crust should remain crisp beneath the filling if you’ve properly chilled the pie.
Common Mistakes When Making Great betty crocker coconut cream pie
Overcooking the Custard
The moment you see bubbles forming around the edges, you’re in the danger zone. Custard thickens dramatically as it cools, so remove it from heat when it just coats the back of a spoon. If you cook it until it’s thick in the pan, you’ll end up with rubbery filling. I learned this the hard way with my first attempt—2 minutes too long turned my custard into pudding cement. 😅
Skipping the Tempering Step
Pouring hot milk directly into egg yolks is asking for scrambled eggs in your pie. Always temper by slowly whisking 1 cup of hot milk into the yolks first. I use a liquid measuring cup with a spout for controlled pouring while whisking constantly. This extra 2 minutes prevents a grainy, curdled disaster.
Under-Toasting the Coconut
Pale coconut flakes taste like sweetened cardboard. Toast them in a dry skillet over medium heat for 2-3 minutes, stirring constantly until golden brown. The difference is night and day—properly toasted coconut adds nutty depth and crunch. I check every 30 seconds after the first minute to avoid burning.
Rushing the Chilling Time
This pie needs at least 3 hours total in the fridge—2 hours for the custard to set and 1 hour after adding whipped cream. Cutting this short means a runny mess when you slice. I once tried serving after 90 minutes and ended up with custard puddles on the plates. Patience pays off with clean, beautiful slices.
Using Cold Egg Yolks
Room-temperature yolks blend smoothly into the custard, while cold ones can create lumps. Place your eggs in warm water for 5 minutes before separating. This small step makes whisking easier and gives you that silky texture. I keep a bowl of warm water ready while prepping other ingredients—it’s become my secret weapon.
Neglecting the Crust Shield
Even pre-baked crusts can get soggy from the moist filling. Press plastic wrap directly onto the custard surface before chilling to create a barrier. This prevents that unappetizing skin from forming on top. For extra insurance, I brush the crust with a thin layer of melted chocolate before adding filling—it creates a delicious moisture barrier.
Nutrition Facts
Frequently Asked Questions
Can I make this pie ahead of time?
The pie actually benefits from being made 1 day ahead. Prepare the custard filling and chill it in the crust overnight, then add the whipped cream topping 4-6 hours before serving. This gives flavors time to meld while keeping the whipped cream fresh.
What’s the best way to toast the coconut?
Spread coconut flakes in a dry skillet over medium-low heat. Stir constantly for 2-3 minutes until golden brown—watch closely as it burns quickly! For even toasting, use a light-colored pan so you can see the color change.
Why did my custard turn lumpy?
Lumps usually happen from either not whisking enough during cooking or adding eggs too quickly. Always temper the yolks by slowly whisking in 1 cup of hot milk first. If lumps form, strain the custard through a fine-mesh sieve before chilling.
Can I use coconut milk instead of whole milk?
While coconut milk adds flavor, it’s thinner than whole milk and may prevent proper thickening. For best results, use 2 cups whole milk + 1 cup coconut milk to maintain the custard’s structure while enhancing the coconut taste.

- 6 Egg Cake Recipe with Oil: Light as Air With Buttery Moisture - October 4, 2026
- 4 Bean Casserole Recipe: One-Pan Heartiness With Smoky Paprika Depth - October 4, 2026
- 3-Ingredient Keto Mug Cake Recipe: Microwave Magic in 2 Minutes - October 4, 2026