
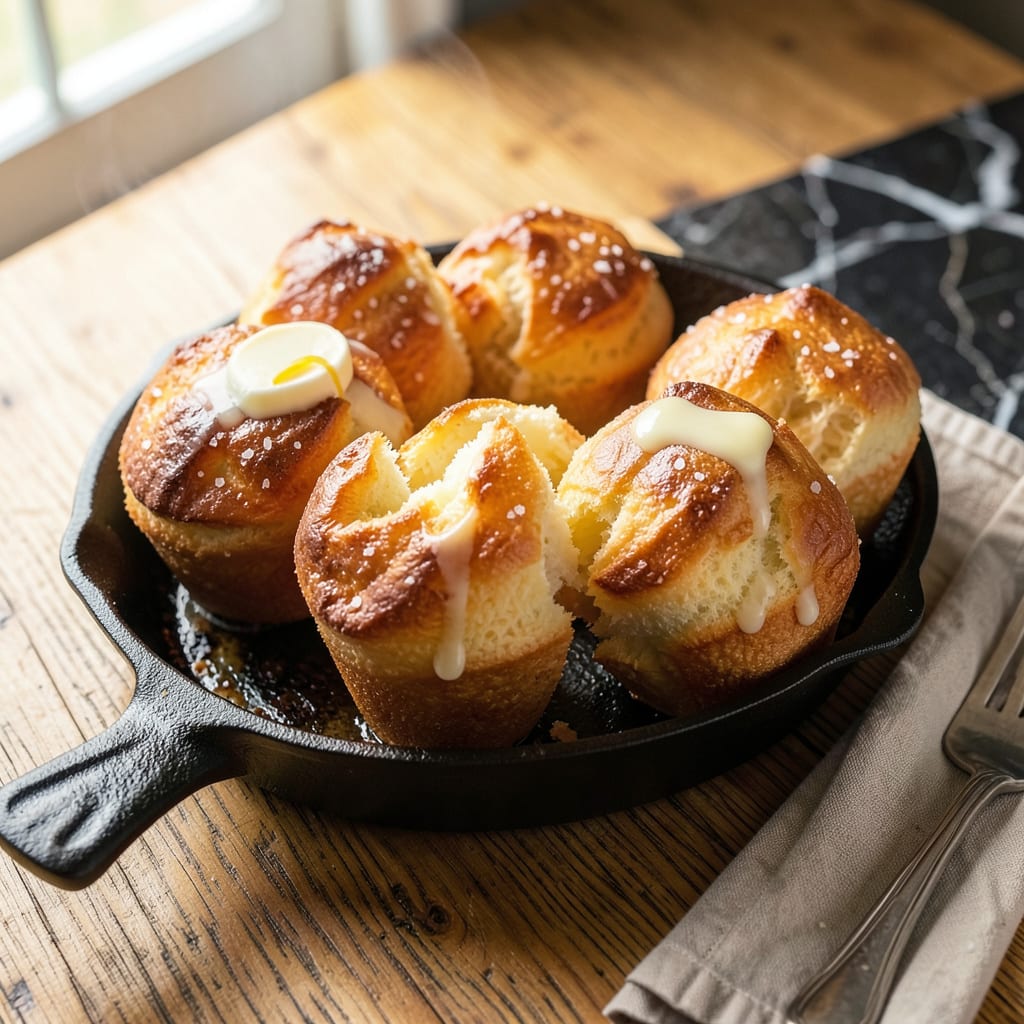
Achieving perfect popovers with towering height and golden crusts is simpler than you think. This recipe delivers the dramatic rise and hollow centers that make popovers so impressive, using just five basic ingredients and precise technique. The science is straightforward: steam trapped in the batter expands rapidly in a hot oven, creating those signature airy pockets.
What sets this method apart is the attention to critical details—preheating both the pan and oven thoroughly, mixing the batter just until combined, and resisting the urge to peek during baking. These steps ensure maximum lift and a crisp exterior every time. Whether served with sweet jam or savory gravy, these popovers will become your go-to for brunch or dinner rolls.
Ingredients for America’s Test Kitchen Popover
Five essential ingredients combine with precise technique to create these towering, golden popovers every time.
| Ingredient | Amount | Notes |
|---|---|---|
| All-Purpose Flour 🌾 | 1 ½ cups | Spoon and level for accuracy |
| Whole Milk 🥛 | 1 ½ cups | Room temperature preferred |
| Large Eggs 🥚 | 4 whole | Room temperature, size large |
| Unsalted Butter 🧈 | 3 tbsp | Melted and slightly cooled |
| Salt 🧂 | ¾ tsp | Fine sea salt recommended |
The flour is the foundation—King Arthur All-Purpose delivers consistent results due to its protein content. Measure by spooning into cups and leveling (never scoop directly). Whole milk provides the fat needed for structure; room temperature ensures even mixing. Eggs must also be room temperature to emulsify properly with the milk. For the butter, European-style unsalted (like Plugrá) gives superior flavor, but standard unsalted works fine. The salt enhances flavor without inhibiting rise—Diamond Crystal kosher salt is preferred for its clean taste and easy measurement.
No whole milk? Half-and-half mixed with water (1:1 ratio) works in a pinch, but avoid skim—fat content is critical. For a dairy-free version, full-fat coconut milk (canned, not carton) substitutes well. Eggs are non-negotiable for structure, but size matters: large eggs only (about 50g each). If you must reduce salt, do so by half at most—popovers need some for proper browning. The batter should resemble heavy cream; adjust milk by 1-2 tablespoons if needed for consistency.
Popover batter is best used immediately but can rest up to 30 minutes at room temperature (stir before using). Baked popovers keep 2 days in an airtight container, though they’re best served fresh. Reheat in a 350°F oven for 5-8 minutes to restore crispness. For make-ahead convenience, prepare batter the night before and refrigerate—bring to room temperature and whisk well before baking. The preheated pan is critical; never skip this step for maximum rise.
Why You’ll Love This Recipe
- No Mixer Needed: Honestly, I was shocked how little effort this takes. A whisk, a bowl, and five ingredients—no creaming butter or folding egg whites. The batter comes together faster than pancakes, and the oven does all the magic.
- That Golden Crunch: Here’s what sold me—the contrast. Warm, eggy interior with a shatteringly crisp butter crust, all from just milk, flour, and eggs. It’s like if a croissant and a custard had a delicious, puffy baby.
- Breakfast or Dessert?: Between us, I’ve served these with jam for brunch and drizzled with chocolate for dessert. They’re my secret weapon for impressing guests (yes, even on a Tuesday night) or making a lazy weekend feel special.
- Pocket-Friendly Feast: Five basic pantry staples, zero fancy ingredients. A dozen popovers cost less than a coffee shop muffin, and they’re way more satisfying. Leftovers? Toast them the next day—they’re even better.
Step-by-Step Instructions for America’s Test Kitchen Popovers
This method delivers consistently impressive results with minimal effort and maximum rise.
Step 1: Prepare the Popover Pan and Oven
Position an oven rack in the lower-middle position and preheat your oven to 450°F. Place a standard 6-cup popover pan (or muffin tin) in the oven while it preheats. The hot pan is crucial for creating that initial steam burst that makes popovers rise dramatically.
While the oven heats, melt the 3 tablespoons unsalted butter and let it cool slightly. I prefer using a microwave in 10-second bursts to avoid overheating. The butter should be liquid but not hot to the touch—this prevents it from cooking the eggs when combined.
Step 2: Blend the Batter to Perfect Consistency
In a blender, combine the 1.5 cups whole milk (room temperature), 4 large eggs, and cooled melted butter. Blend on low speed for 10 seconds until just combined. The eggs should be fully incorporated but not frothy—over-blending can create too many air bubbles that might collapse during baking.
Add the 1.5 cups all-purpose flour and 0.75 teaspoon salt to the blender. Pulse 3-4 times just until the flour disappears and the batter is smooth with the consistency of heavy cream. You’ll see small bubbles forming at the edges—that’s exactly what you want. Let the batter rest for 5 minutes while the oven finishes preheating.
Step 3: Fill the Hot Pan and Bake
Carefully remove the hot popover pan from the oven. Working quickly, spray the cups with nonstick cooking spray (even if your pan is nonstick). Fill each cup three-quarters full with batter—about ⅓ cup per popover. The batter will sizzle slightly when it hits the hot pan, which helps create that initial lift.
Return the pan to the oven immediately and bake at 450°F for 20 minutes. Don’t open the oven door during this time—the sudden temperature drop can cause popovers to collapse. You’ll see them puff dramatically through the oven window, rising well above the pan rims.
Step 4: Reduce Heat and Finish Baking
After 20 minutes, reduce the oven temperature to 350°F without opening the door. Continue baking for another 15-20 minutes until the popovers are deep golden brown all over. The lower temperature allows them to cook through completely while maintaining their height.
You’ll know they’re done when they feel firm to the touch and sound hollow when tapped lightly on the sides. The tops should have developed a crisp, golden crust while the interiors remain custardy and moist. If they’re browning too quickly, tent loosely with aluminum foil for the last 5 minutes of baking.
Step 5: Serve Immediately for Best Texture
Remove the popovers from the oven and immediately transfer them to a wire rack. Use a thin knife to loosen any that stick to the pan. Serve within 5 minutes of baking—they’re at their absolute best when still piping hot, with crisp exteriors and airy, tender interiors.
If you must make them ahead, reheat in a 375°F oven for 5-7 minutes to restore some crispness. The popovers will deflate slightly as they cool, but they’ll still taste delicious. For maximum effect, serve with additional melted butter for dipping or a dusting of powdered sugar for sweet variations.
Creative Variations of This Dish
Cheesy Herb Popovers
Fold in 1 cup shredded sharp cheddar and 2 tbsp chopped fresh chives to the batter before baking. The cheese adds richness while the chives provide a fresh, oniony brightness. I love this variation with tomato soup or as a savory breakfast treat. The cheese creates beautiful golden-brown patches on the crust. 🧀
Sweet Cinnamon Sugar
After baking, brush warm popovers with 2 tbsp melted butter and roll in a mixture of ¼ cup granulated sugar and 1 tsp cinnamon. This transforms them into a dessert-like treat perfect with coffee or hot chocolate. The cinnamon sugar caramelizes slightly on the hot crust.
Everything Bagel Twist
Before baking, sprinkle the tops with 1 tbsp everything bagel seasoning. The sesame seeds, poppy seeds, and garlic flakes create a flavorful crust that pairs wonderfully with cream cheese or smoked salmon. I use Trader Joe’s Everything But The Bagel Seasoning for convenience.
Jalapeño Cheddar Kick
Add 2 tbsp finely diced pickled jalapeños and 1 cup shredded pepper jack cheese to the batter. The jalapeños add tangy heat while the cheese creates stretchy pockets inside. Serve with ranch dressing for dipping to balance the spice. 🌶️
Lemon Blueberry
Gently fold 1 cup fresh blueberries and 1 tsp lemon zest into the batter. The berries create pockets of jammy sweetness while the lemon brightens the flavor. Dust with powdered sugar before serving for an elegant brunch option.
Garlic Parmesan
Mix ½ cup grated Parmesan and 1 tsp garlic powder into the batter, then sprinkle more on top before baking. The garlic infuses the popovers while the Parmesan creates a crisp, savory crust. These are incredible served with marinara sauce for dipping.
Nutrition Facts
Frequently Asked Questions
Why do my popovers collapse after baking?
Collapsing usually happens from opening the oven too soon or underbaking. The steam that creates the rise needs time to set the structure. Keep the oven closed for the full 20 minutes at 450°F, then reduce heat to 350°F for final baking.
Can I make popovers without a special pan?
A standard muffin tin works well—just preheat it and fill cups only halfway to allow room for rising. For extra height, use a custard cup or ramekin placed on a baking sheet. The key is using a metal pan for even heat conduction.
What’s the secret to extra-crispy popovers?
For maximum crispness, brush the hot pan with melted butter before adding batter. The butter creates a golden, crackly crust. Also, bake until deep golden brown—underbaking leaves them soft. Serve immediately, as they lose crispness as they cool.
Can I prepare the batter ahead of time?
The batter is best used immediately but can rest up to 30 minutes at room temperature. For overnight prep, refrigerate the batter and bring to room temperature before baking. Whisk well before using, as ingredients may separate. Cold batter won’t rise as dramatically.

- 6 Egg Cake Recipe with Oil: Light as Air With Buttery Moisture - October 4, 2026
- 4 Bean Casserole Recipe: One-Pan Heartiness With Smoky Paprika Depth - October 4, 2026
- 3-Ingredient Keto Mug Cake Recipe: Microwave Magic in 2 Minutes - October 4, 2026