
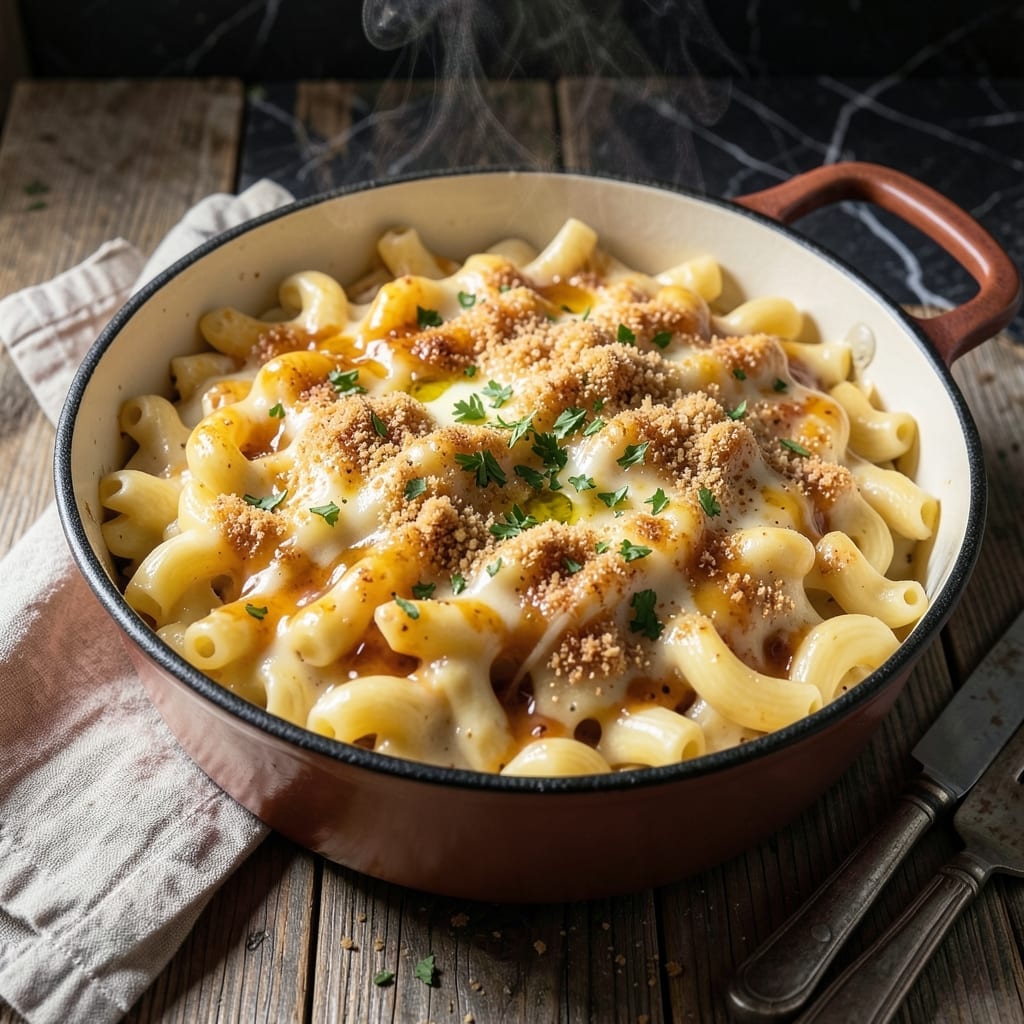
When feeding a crowd, nothing satisfies like a generous portion of rich, creamy mac and cheese that delivers comfort in every bite. This proven recipe scales perfectly for gatherings while maintaining that velvety texture everyone loves.
The secret lies in a proper roux base and a blend of cheeses that melt smoothly without separating. I’ve tested this method repeatedly to ensure it holds up even when multiplied for large groups, with no loss of quality or flavor.
You’ll achieve a sauce so luscious it clings to every noodle, with a golden top that forms naturally under the broiler. The result is consistent, crowd-pleasing perfection every time you make it.
Ideal for potlucks, holiday tables, or family dinners where seconds are guaranteed. Here’s how to execute it flawlessly.
Ingredients for Big Batch Mac and Cheese
These quality ingredients scale perfectly for a crowd. Rich, creamy, and utterly satisfying every time.
| Ingredient | Amount | Notes |
|---|---|---|
| Elbow Macaroni 🍝 | 4 lb | Uncooked, high-quality brand |
| Unsalted Butter 🧈 | 2 cups | For roux base |
| All-Purpose Flour 🌾 | 2 cups | Creates smooth roux |
| Whole Milk 🥛 | 2 cups | Full-fat for creaminess |
| Heavy Cream 🥛 | 4 cups | Essential for velvety texture |
| Sharp Cheddar Cheese 🧀 | 5 lb | Block cheese, freshly grated |
| Gruyere Cheese 🧀 | 2 lb | Block cheese, freshly grated |
| Parmesan Cheese 🧀 | 1 lb | Block cheese, freshly grated |
| Dijon Mustard 🟡 | ¼ cup | Adds depth to cheese sauce |
| Worcestershire Sauce 💧 | 2 tbsp | Vegetarian version required |
| Garlic Powder 🧄 | 2 tbsp | Enhances flavor profile |
| Onion Powder 🧅 | 2 tbsp | Balances cheese flavors |
| Salt 🧂 | 2 tbsp | Adjust to taste |
| Ground Black Pepper 🌶️ | 1 tbsp | Freshly ground preferred |
| Panko Breadcrumbs 🍞 | 4 cups | For crispy topping |
The cheese selection is critical for this dish. Sharp cheddar from Cabot or Tillamook melts beautifully, while Gruyere from Whole Foods adds complexity. Always buy blocks and grate yourself—pre-shredded contains anti-caking agents that make the sauce grainy. For the Parmesan, Parmigiano-Reggiano is worth the splurge. The pasta should be a high-quality brand like Barilla or De Cecco to hold up to the rich sauce.
Swapping cheeses is fine—Monterey Jack or Pepper Jack add a nice twist. No heavy cream? Half-and-half with a splash of milk works in a pinch (texture won’t be quite as luscious). For the vegetarian Worcestershire, Annie’s or Edward & Sons brands are reliable. The mustard can be regular yellow if that’s what you have, though Dijon adds more depth.
This mac and cheese holds well for buffets. Keep it warm in a slow cooker with a splash of milk if needed. Leftovers freeze for up to 3 months—just reheat in the oven with extra cheese on top. Best served within 24 hours for optimal texture.
Why You’ll Love This Recipe
- One Pot Wonder: I love that I can make this entire batch in a single pot—no colander, no extra bowls, just macaroni, butter, and cream coming together seamlessly.
- Rich and Creamy: The whole milk and heavy cream create this velvety sauce that clings to every elbow, so every bite is pure comfort.
- Feeds a Crowd: Honestly, this is my go-to for potlucks or family gatherings because it stretches easily to feed 10+ without breaking the bank.
- Leftovers for Days: Between us, the flavors only get better overnight, and I’ll be real—it reheats like a dream for lazy lunches.
Step-by-Step Instructions for Big Batch Mac And Cheese
Follow this professional method for consistently creamy, crowd-pleasing results every time.
Step 1: Cook the Elbow Macaroni Al Dente
Bring a large stockpot of salted water to a rolling boil. Add the 4 lb Elbow Macaroni and cook for 1 minute less than package directions suggests. You want it just shy of fully cooked because it will finish in the cheese sauce.
Stir occasionally to prevent sticking and test a piece at the 8-minute mark. The pasta should offer slight resistance when bitten but not be crunchy. Drain immediately in a colander and do not rinse—you need the surface starch for the sauce to cling properly.
Step 2: Create a velvety roux base
In the same stockpot, melt the 2 cups Unsalted Butter over medium heat. Once melted, whisk in the 2 cups All-Purpose Flour to form a smooth paste. Cook for 3-4 minutes, stirring constantly, until the mixture turns a light golden color and smells nutty.
This cooking process removes the raw flour taste and creates the foundation for your sauce. The mixture should bubble gently but not brown. If it starts to darken too quickly, lower the heat—you want gradual development of flavor, not burnt butter.
Step 3: Build the ultra-creamy cheese sauce
Gradually whisk in the 2 cups Whole Milk and 4 cups Heavy Cream, starting with small additions to prevent lumps. Once smooth, add the remaining liquid in a steady stream while whisking constantly. Bring to a gentle simmer over medium heat.
Add the 2 tbsp Garlic Powder, 2 tbsp Onion Powder, 2 tbsp Salt, 1 tbsp Ground Black Pepper, 0.25 cup Dijon Mustard, and 2 tbsp Worcestershire Sauce. Stir well to incorporate these flavor boosters evenly throughout the sauce.
Begin adding the cheeses: first the 5 lb Sharp Cheddar Cheese, then the 2 lb Gruyere Cheese, and finally the 1 lb Parmesan Cheese. Add in batches, allowing each addition to melt completely before adding more. The sauce should be smooth and coat the back of a spoon when ready.
Step 4: Combine pasta and sauce
Add the drained elbow macaroni to the cheese sauce and fold gently with a silicone spatula until every piece is evenly coated. This requires patience—work from the bottom of the pot upward to ensure complete coverage.
Continue folding until the pasta absorbs some of the sauce and plumps up slightly. The mixture should look glossy and creamy, not soupy. If it appears too thick, add a splash of warm milk, but remember the pasta will continue to absorb liquid as it sits.
Step 5: Add crispy topping and bake
Transfer the mac and cheese to a large baking dish or divide among multiple dishes. Sprinkle the 4 cups Panko Breadcrumbs evenly over the top, pressing down lightly so they adhere to the creamy surface.
Bake at 375°F for 15-20 minutes until the breadcrumbs turn golden brown and the edges bubble. Let it rest for 5 minutes before serving to allow the sauce to set slightly, ensuring each serving has the perfect creamy texture with a crispy topping.
Pro Tips For Making Big Batch Mac And Cheese
- Cook Pasta Al Dente: Boil the elbow macaroni for 1-2 minutes less than package instructions—it’ll finish cooking in the creamy sauce. I learned this the hard way after ending up with mushy mac and cheese more times than I’d like to admit.
- Warm Your Dairy: Take the whole milk and heavy cream out of the fridge 30 minutes before starting, or microwave them for 20-30 seconds. Cold dairy can make the sauce clumpy, and nobody wants lumpy mac and cheese.
- Skip the Pre-Shredded: If you’re adding cheese (and you should), grate it fresh instead of using pre-shredded—it melts smoother and doesn’t have that weird anti-caking powder aftertaste. Sounds like extra work, but it actually changes the outcome.
- Double the Roux: For a big batch, use a little more butter and flour than you think you need—about 6 tablespoons of each for every 4 cups of liquid. This thickens the sauce enough to coat all that pasta without turning into a thin, sad mess.
Make-Ahead Tips for This Dish
Prep Ahead Strategy
I always cook the pasta 1-2 days ahead and store it in the fridge with a bit of olive oil to prevent sticking. This saves significant time on party day. Just
Cheese Sauce Prep
You can make the cheese sauce a day in advance too. Prepare it completely, then store in an airtight container in the fridge. When ready to use, reheat gently over low heat while whisking constantly, adding a splash of milk if needed to restore creaminess.
Assembly Timing
Combine the pasta and sauce up to 6 hours before baking. Transfer to your baking dish, cover tightly with foil, and refrigerate. This allows flavors to meld beautifully. Just add the panko topping right before baking for maximum crispness.
Oven-Ready Storage
For ultimate convenience, assemble the entire dish (including topping) up to a day ahead. Cover with foil and refrigerate. When ready, bake at 375°F for 25-30 minutes instead of 15-20, as it’ll be cold from the fridge.
Transport Tips
If bringing to a potluck, assemble in disposable aluminum pans from the dollar store. They’re perfect for transport and easy cleanup. I line mine with parchment paper for even easier removal of servings. 🚗
Reheating Leftovers
Store leftovers in portion-sized containers. Reheat in the microwave with a damp paper towel for 1-2 minutes, or in the oven at 350°F for 15 minutes. Add a sprinkle of cheese on top before reheating to refresh the flavor.
Nutrition Facts
Frequently Asked Questions
Can I use pre-shredded cheese?
No, pre-shredded contains anti-caking agents that prevent smooth melting. Always buy blocks and grate yourself for the creamiest texture.
How do I prevent a grainy sauce?
Cook your roux to a light golden color and add dairy slowly while whisking constantly. Low and slow heat prevents curdling or graininess.
Can this be made ahead?
Yes! Assemble completely up to a day ahead, cover tightly, and refrigerate. Bake at 375°F for 25-30 minutes when cold from the fridge.
What’s the best way to transport it?
Use disposable aluminum pans lined with parchment. They’re sturdy for travel and make serving/cleanup effortless.

- 6 Egg Cake Recipe with Oil: Light as Air With Buttery Moisture - October 4, 2026
- 4 Bean Casserole Recipe: One-Pan Heartiness With Smoky Paprika Depth - October 4, 2026
- 3-Ingredient Keto Mug Cake Recipe: Microwave Magic in 2 Minutes - October 4, 2026