
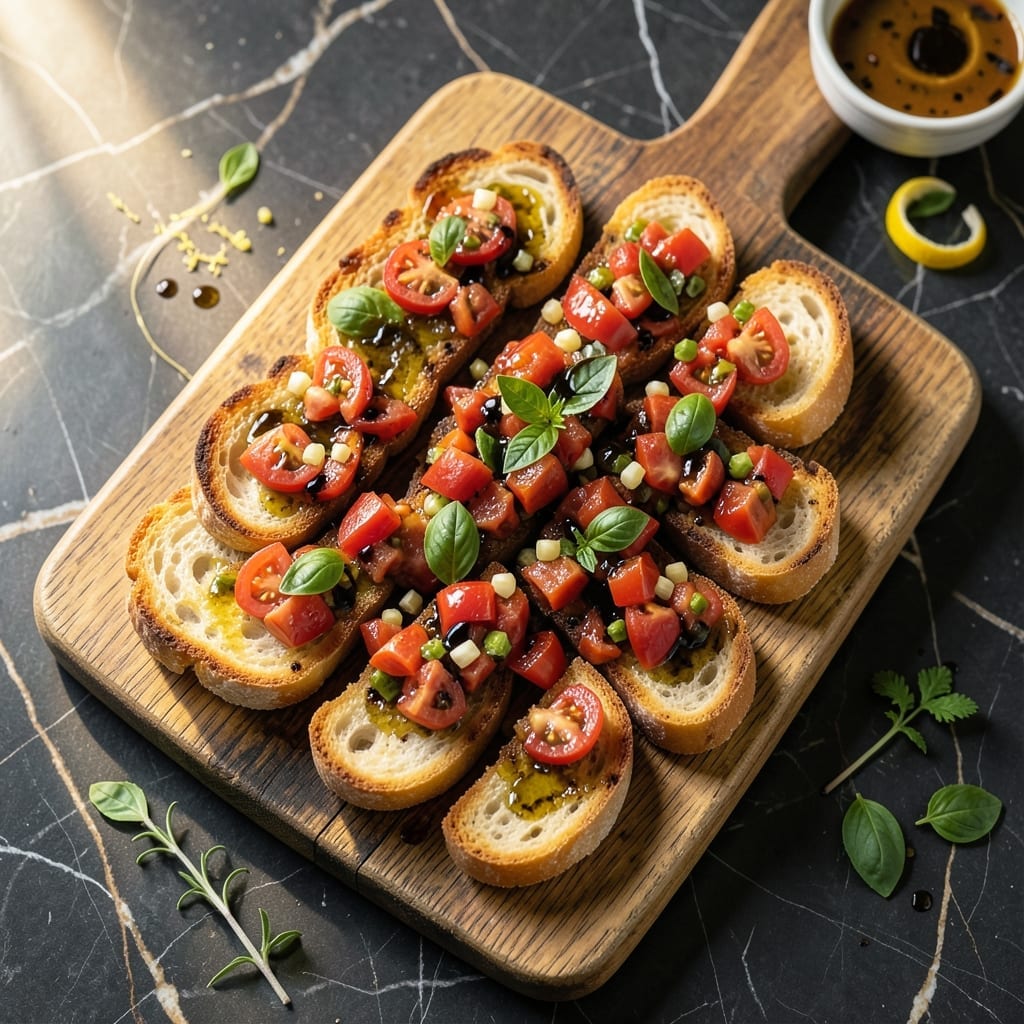
Canned tomatoes transform into a vibrant, flavorful topping that rivals fresh in this elegant appetizer. The secret lies in draining them well and combining with garlic, basil, and olive oil for authentic Italian taste.
This method ensures the bread stays crisp while the tomato mixture develops rich, concentrated flavor. Lightly toasting the baguette slices creates the perfect base for the fresh, herby topping.
What results is a restaurant-quality dish that comes together in 15 minutes using pantry staples. The contrast of crunchy bread and juicy tomatoes makes every bite satisfying.
Serve as a starter for dinner parties or a light lunch. The recipe scales easily for any gathering size.
Ingredients for Bruschetta Recipe with Canned Tomatoes
Pantry staples plus fresh herbs create this elegant Italian appetizer in minutes.
| Ingredient | Amount | Notes |
|---|---|---|
| Canned Diced Tomatoes 🍅 | 2 cups | Well-drained, no liquid |
| Baguette 🥖 | 1 whole | Fresh, sliced into 1/2-inch pieces |
| Garlic Cloves 🧄 | 3 cloves | Minced or pressed |
| Fresh Basil Leaves 🌿 | ½ cup | Chopped, loosely packed |
| Extra-Virgin Olive Oil 🫒 | ¼ cup | Divided for topping and bread |
| Balsamic Vinegar 🍷 | 1 tbsp | Aged for best flavor |
| Kosher Salt 🧂 | ½ tsp | Adjust to taste |
| Freshly Ground Black Pepper 🌶️ | ¼ tsp | Coarse grind preferred |
| Red Pepper Flakes 🔥 | ¼ tsp | Optional for heat |
| Parmesan Cheese 🧀 | ¼ cup | Freshly grated, optional |
| Lemon Juice 🍋 | 1 tsp | Freshly squeezed |
| Dried Oregano 🍃 | ½ tsp | Crushed between fingers |
The quality of canned tomatoes matters. San Marzano are ideal for their sweet, low-acid flavor, but any high-quality brand like Muir Glen or Hunt’s works well. Drain them thoroughly—this prevents soggy bread. For the baguette, a fresh loaf from a bakery or the in-store bakery at Whole Foods gives the best texture. Avoid pre-sliced bread; it dries out too quickly.
No fresh basil? Dried basil at one-third the amount works in a pinch, though the flavor won’t be as bright. Swap balsamic vinegar for red wine vinegar if that’s what you have. For a non-dairy option, nutritional yeast can replace Parmesan (use 2 tbsp). The olive oil should be something you’d drizzle on bread—California Olive Ranch is a reliable grocery store pick.
Assemble bruschetta just before serving to keep the bread crisp. Leftovers? The tomato topping keeps in the fridge for 2 days (store separately from the bread). Not recommended for freezing—tomatoes get mushy. Toast extra baguette slices and store at room temp in a paper bag for 1 day.
Why You’ll Love This Recipe
- I’ll be real: canned tomatoes keep this dish cheap without sacrificing that fresh, herby taste.
- No-Fuss Prep: I just dump the canned tomatoes, chop the basil, and toast the baguette—no peeling or seeding required.
- Garlic-Kissed Bites: The rub of raw garlic on warm bread with that olive oil drizzle? Pure magic in every bite.
- Party Starter: Honestly, it’s my go-to for last-minute get-togethers—looks fancy, but takes minutes.
Step-by-Step Instructions for Bruschetta With Canned Tomatoes
This method delivers bold Italian flavors with minimal effort and maximum freshness.
Step 1: Prepare the Tomato Topping
Drain the 2 cups Canned Diced Tomatoes thoroughly in a fine-mesh strainer, pressing gently with a spoon to remove all excess liquid. This prevents a watery topping. Transfer to a mixing bowl.
Add the 3 cloves Garlic Cloves (minced), 0.5 cup Fresh Basil Leaves (chopped), 1 tbsp Balsamic Vinegar, 0.25 cup Extra-Virgin Olive Oil, 0.5 tsp Kosher Salt, 0.25 tsp Freshly Ground Black Pepper, 0.25 tsp Red Pepper Flakes, 1 tsp Lemon Juice, and 0.5 tsp Dried Oregano. Stir to combine evenly.
Let the mixture sit at room temperature for 10-15 minutes to allow the flavors to meld. The tomatoes should release some juices but remain chunky.
Step 2: Toast the Baguette Slices
Preheat your oven to 375°F. Slice the 1 whole Baguette into ½-inch thick pieces on a diagonal. You should get about 12-16 slices. Arrange them in a single layer on a baking sheet.
Brush each slice lightly with some of the 0.25 cup Extra-Virgin Olive Oil (you’ll use about half for this). Toast in the oven for 5-7 minutes until the edges are light golden brown. Watch closely—they burn quickly.
Remove from the oven and let cool for 2 minutes. The bread should be crisp but still tender inside.
Step 3: Assemble the Bruschetta
Rub the toasted side of each baguette slice with a raw garlic clove if you like extra garlic flavor (optional). Spoon the tomato mixture generously onto each slice, allowing some juices to soak into the bread.
Drizzle the remaining Extra-Virgin Olive Oil over the top of each piece. The oil should glisten on the tomatoes. If using, sprinkle 0.25 cup Parmesan Cheese evenly across all the bruschetta.
Step 4: Serve Immediately
Arrange the bruschetta on a serving platter. The bread should still be warm and crisp when served. Any leftovers won’t keep well—the bread will soften, so I recommend assembling only what you’ll eat right away.
Check that each piece has a good balance of tomatoes, herbs, and oil. The tomatoes should look vibrant, not soggy, and the bread should maintain its structure without breaking apart.
The flavors peak when served fresh, with the contrast of crisp bread and juicy topping working perfectly together.
Pro Tips For Making Bruschetta Recipe With Canned Tomatoes
- Drain the Tomatoes: I learned this the hard way—dump the canned tomatoes in a strainer for 5 minutes to lose that excess liquid, or your bruschetta will be a soggy mess on the baguette.
- Toast the Baguette: Crank the oven to 400°F and toast the slices for 3-4 minutes until golden. Sounds obvious, but it’s the only way to keep them from turning to mush under the toppings.
- Rub Raw Garlic: After toasting, immediately rub the warm bread with a cut garlic clove—more flavor than mincing, and it actually sticks to the surface.
- Tear the Basil: Skip the knife and tear the basil with your hands to avoid bruising the leaves, which can make them taste bitter instead of fresh.
Essential Equipment for Great bruschetta recipe with canned tomatoes
Mixing Tools
For the tomato topping, I use a medium glass mixing bowl—about 8-10 cups capacity. Glass won’t absorb odors and lets you see the vibrant colors as you mix. A fine-mesh strainer is essential for draining the tomatoes properly; OXO Good Grips makes a sturdy one that fits over most bowls. 💛
Cutting Essentials
A sharp chef’s knife (I prefer Wüsthof 8-inch) makes quick work of the basil and baguette. The garlic needs mincing, so a garlic press saves time—Zyliss is my go-to brand. For the baguette, a serrated bread knife prevents crushing the soft interior while cutting.
Baking Setup
Use a half-sheet pan (about 13×18 inches) for toasting the bread. Line it with parchment paper for easy cleanup. A pastry brush helps distribute the olive oil evenly—I like the silicone-tipped ones from Wilton for precise control.
Serving Items
Presentation matters for this dish. A wooden serving board or slate platter adds rustic charm. Small tongs or a spoon make serving easier. Keep the tomato mixture in a separate bowl until ready to assemble to prevent sogginess.
Nutrition Facts
Frequently Asked Questions
Do I need to remove the seeds from the canned tomatoes?
No need! Canned diced tomatoes are pre-processed, so the seeds are soft and blend well into the topping. Just drain them thoroughly to avoid a watery mixture.
Can I make this ahead of time?
The tomato topping can be prepped 2 hours ahead and stored in the fridge. Toast the bread and assemble just before serving to keep it crisp.
What if my bread gets soggy?
Toast it longer next time at 375°F for 8-10 minutes until deeply golden. Also, drain the tomatoes extra well and assemble right before eating.
Can I use a different type of bread?
Yes! Ciabatta or sourdough work well. Slice them ½-inch thick and toast until crisp. Avoid soft sandwich bread—it won’t hold up.

- 6 Egg Cake Recipe with Oil: Light as Air With Buttery Moisture - October 4, 2026
- 4 Bean Casserole Recipe: One-Pan Heartiness With Smoky Paprika Depth - October 4, 2026
- 3-Ingredient Keto Mug Cake Recipe: Microwave Magic in 2 Minutes - October 4, 2026