
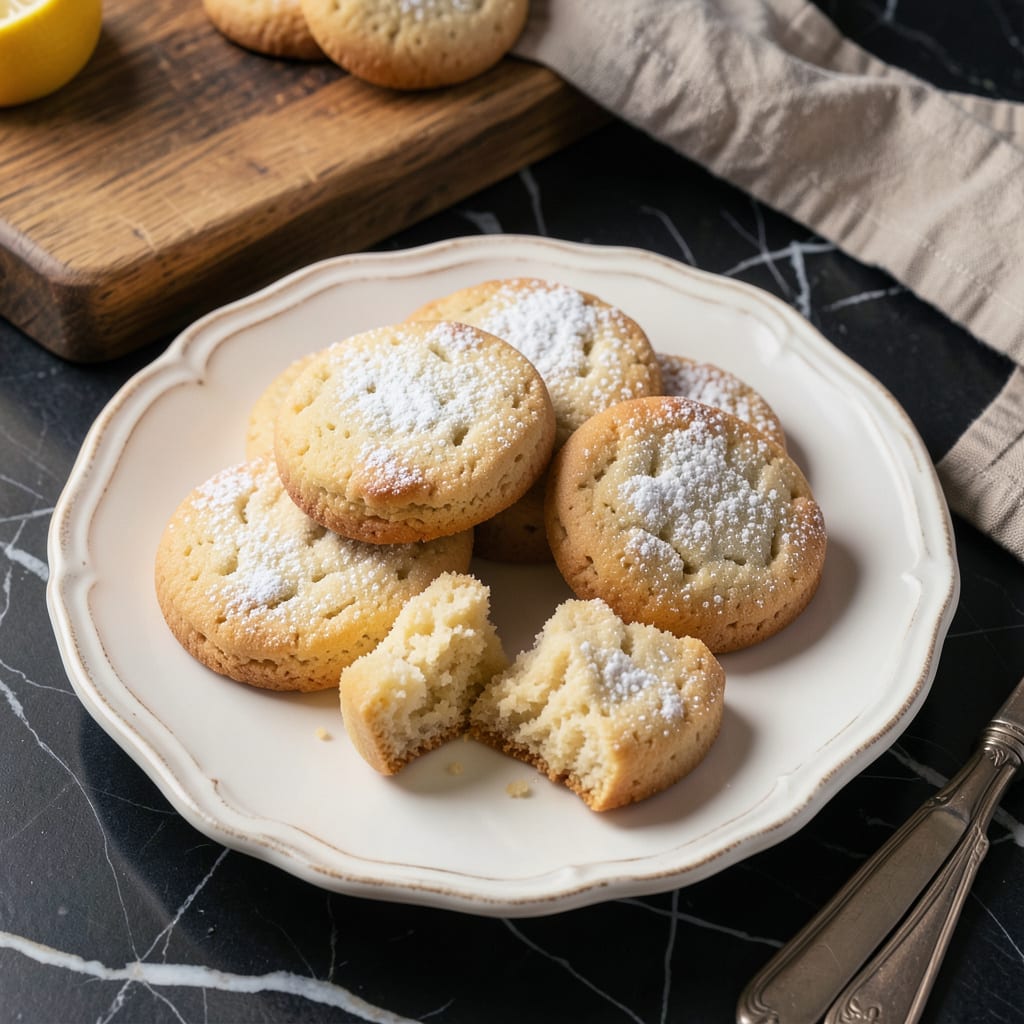
There’s something magical about that first bite of perfect shortbread—when it practically dissolves on your tongue, leaving just buttery richness behind. This Canadian-style version with cornstarch is my go-to for holiday baking because it delivers that signature melt-in-your-mouth texture every single time. No fancy equipment needed, just simple ingredients and one secret weapon: the cornstarch.
The cornstarch is what makes these different from regular shortbread—it creates a texture that’s tender without being crumbly, rich without being heavy. I’ve tested this recipe with everything from citrus zest to maple sugar, but honestly? The plain version is still my favorite. Just butter, sugar, flour, and that magical cornstarch working its texture magic in the oven.
Ingredients for Canada Cornstarch Shortbread
Seven simple ingredients transform into buttery, melt-in-your-mouth shortbread magic with cornstarch as the star.
| Ingredient | Amount | Notes |
|---|---|---|
| Unsalted Butter 🧈 | 1 lb | European-style preferred, cold and cubed |
| Powdered Sugar 🍚 | ¾ cup | Sifted for smooth texture |
| Cornstarch 🌾 | ½ cup | The secret texture weapon |
| All-Purpose Flour 🌾 | 2 cups | Spoon and level method |
| Vanilla Extract 💧 | 1 tsp | Pure extract, not imitation |
| Salt 🧂 | ¼ tsp | Fine sea salt preferred |
| Granulated Sugar 🍚 | 2 tbsp | For sprinkling (optional) |
[recipeingredientscaler]
The butter is everything here. European-style butter (like Plugrá or Kerrygold) gives that rich, melt-in-your-mouth quality—its higher fat content makes all the difference. Cornstarch is the secret weapon; I use Argo or Clabber Girl brands (find them in the baking aisle). Most grocery stores carry them, but if you can’t find cornstarch, check the international foods section—it’s sometimes labeled as ‘corn flour’ there (not the same as masa harina).
No cornstarch? Arrowroot powder or tapioca starch at 1:1 ratio works in a pinch, though the texture will be slightly different. For a richer flavor, replace 1 tbsp of flour with rice flour—it adds a delicate crumb. The vanilla extract can be swapped for almond extract at half the amount if you want a nutty twist. And if you’re out of powdered sugar, blend granulated sugar until fine (worth the extra minute).
The dough freezes beautifully for 3 months—roll it into logs before freezing, then slice and bake straight from frozen (add 2 minutes to bake time). Baked shortbread keeps in an airtight container for 1 week at room temperature, or 2 weeks in the fridge. I always double the batch because these disappear fast—holiday cookie tins aren’t complete without them.
Why You’ll Love This Recipe
- One-Bowl Magic: I swear this is the least messy baking I’ve ever done—just dump the butter, powdered sugar, cornstarch, flour, and vanilla into one bowl, mix, and you’re halfway to shortbread heaven. No stand mixer, no fancy tools, just a wooden spoon and five minutes of effort.
- Melt-in-Your-Mouth Texture: That cornstarch is the secret here. It turns what could be dense shortbread into something so tender it practically dissolves on your tongue—crisp edges with a center that’s almost cloud-like. Honestly, I’ve made this for cookie swaps, and it’s the first plate to empty.
- Freezer-Friendly Stash: Between us, I always double the batch. The dough logs freeze beautifully for up to three months, so I can slice-and-bake fresh shortbread whenever company drops by (or, let’s be real, when I need a 3 p.m. pick-me-up). No thawing required—just add 2 minutes to the bake time.
- Budget Bakery Hero: A pound of butter and pantry staples yield dozens of cookies. I’ve stretched this recipe to feed a book club, a classroom of teachers, and my kid’s soccer team—all for under $5. And because it’s butter-heavy, it stays fresh in a tin for over a week. No sad, stale cookies here.
Step-by-Step Instructions for Canada Cornstarch Shortbread
Here’s my foolproof method for achieving that signature melt-in-your-mouth texture these cookies are famous for.
Step 1: Cream the Butter and Sugar to Perfection
In a stand mixer fitted with the paddle attachment, beat the 1 lb unsalted butter (cold and cubed) with the 0.75 cup powdered sugar on medium speed for 3-4 minutes. You’re looking for the mixture to become pale and fluffy, nearly doubling in volume. This step is crucial—proper creaming incorporates air that contributes to the shortbread’s delicate crumb.
The butter should be cold but slightly pliable. If it’s too hard, let it sit at room temperature for 10-15 minutes before starting. Scrape down the sides of the bowl occasionally to ensure even mixing. You’ll know it’s ready when the mixture clings to the paddle and leaves clean tracks in the bowl.
Step 2: Incorporate Dry Ingredients for Ideal Texture
In a separate bowl, whisk together the 2 cups all-purpose flour, 0.5 cup cornstarch, and 0.25 tsp salt. The cornstarch is your secret weapon here—it creates that signature tender, crumbly texture that makes this shortbread special. Add this dry mixture to the butter-sugar combination in two additions, mixing on low speed just until combined after each addition.
After the first addition, you’ll notice the dough becoming crumbly. That’s perfect. Add the 1 tsp vanilla extract with the second half of the dry ingredients. The dough should come together but remain slightly crumbly—don’t overmix or the shortbread will become tough. The moment it forms a cohesive mass when pressed, stop mixing.
Step 3: Shape and Chill for Clean Cutting
Turn the dough out onto a lightly floured surface and gently press it into a 1-inch thick rectangle. Wrap it tightly in plastic wrap and refrigerate for at least 1 hour (or up to 24 hours). This chilling step is non-negotiable—it allows the flour to fully hydrate and the butter to firm up, which prevents spreading during baking.
For perfectly even cookies, I recommend using a ruler to square off the edges after the initial chill. This makes cutting uniform pieces much easier. If the dough becomes too hard to cut after extended chilling, let it sit at room temperature for 10-15 minutes before proceeding.
Step 4: Cut and Bake to Golden Perfection
Preheat your oven to 325°F and line two baking sheets with parchment paper. Unwrap the chilled dough and cut it into 24 equal rectangles (about 1.5×2 inches each). Place them 1 inch apart on the prepared sheets. For extra sweetness and crunch, sprinkle the tops lightly with the 2 tbsp granulated sugar—this creates a delicate, crisp exterior.
Bake for 20-25 minutes, rotating the pans halfway through, until the edges are just beginning to turn light golden brown. The centers should remain pale—they’ll firm up as they cool. Watch carefully during the last few minutes, as overbaking will compromise that tender texture you’ve worked so hard to create.
Step 5: Cool Completely for Best Texture
Remove the shortbread from the oven and let it cool on the baking sheets for 5 minutes before transferring to a wire rack. The cookies will be very soft when hot but will firm up as they cool. Allow them to cool completely—this takes about 1 hour—before serving or storing. The texture transforms dramatically during this time, becoming crisp yet tender.
Store the completely cooled shortbread in an airtight container at room temperature for up to 1 week, or freeze for up to 3 months. The flavor actually improves after a day as the vanilla mellows and the textures settle. Serve with tea or coffee for the perfect accompaniment to their rich, buttery goodness.
Best Sauces and Condiments for These Flavors
Classic Vanilla Glaze
A simple glaze elevates these buttery cookies without overpowering them. Whisk together 1 cup powdered sugar, 2 tbsp milk (I prefer whole for creaminess), and ½ tsp vanilla extract until smooth. Drizzle over cooled shortbread with a fork for that bakery-style finish. The glaze sets in about 30 minutes at room temperature. ✨
Maple Cream Drizzle
For a Canadian twist, swap vanilla for pure maple syrup. Mix ¾ cup powdered sugar, 2 tbsp heavy cream, and 1 tbsp maple syrup until silky. This pairs beautifully with the cornstarch’s delicate texture. I love using dark amber maple syrup for deeper flavor. Let it set 1 hour before serving.
Citrus Zest Dusting
Brighten up the richness with finely grated lemon or orange zest. Toss 1 tbsp zest with 2 tbsp granulated sugar and sprinkle over cookies before baking. The citrus oils release during baking, creating a fragrant contrast to the buttery base. I prefer Meyer lemon zest for its floral notes.
Chocolate Dip
Melt ½ cup semi-sweet chocolate chips with 1 tsp coconut oil for a smooth dipping consistency. Dip half of each cooled cookie and place on parchment until set (15 minutes). For extra flair, sprinkle with flaky sea salt while wet. I use Ghirardelli chocolate for its smooth melting properties.
Spiced Sugar Topping
Mix ¼ cup granulated sugar with ½ tsp cinnamon and ⅛ tsp cardamom for a warm, aromatic finish. Sprinkle over cookies before baking. The spices caramelize slightly during baking, adding depth. I love this version with chai tea—the flavors complement perfectly. 💛
Berry Compote Swirl
Simmer 1 cup frozen berries with 2 tbsp sugar and 1 tsp lemon juice until thickened. Cool completely, then dollop ½ tsp onto each cookie before baking. The tartness cuts through the richness beautifully. Raspberries or blackberries work best for their bold flavor.
Nutrition Facts

- 5 Star Tzatziki Sauce Recipe: Thick, Cool, and Herb-Packed Refreshment - October 4, 2026
- 303 Sauce Recipe: Smoky Chipotle and Tomato Base for Bold Flavors - October 4, 2026
- 00 Flour Pasta Recipe No Egg: Al Dente in 10 Minutes Without Gluten - October 4, 2026