
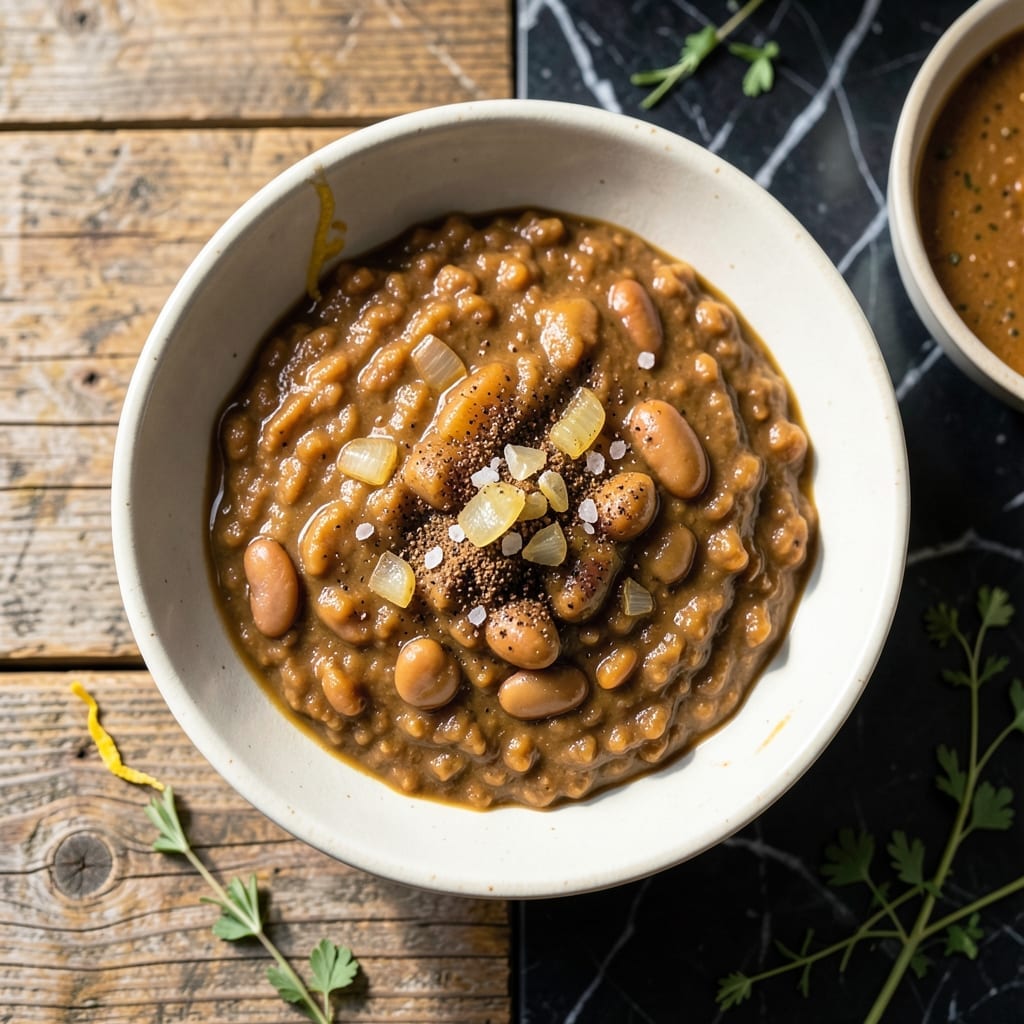
Preserving the rich, creamy texture of refried beans is easier than you think with this proven canning method. I developed this technique after years of perfecting shelf-stable versions of my favorite Mexican staples.
The process involves cooking dried beans until tender, mashing them with lard or oil, then canning using precise temperature and time controls. This ensures both safety and that signature smooth consistency you expect from quality refried beans.
What results is a pantry staple that maintains its creamy richness for months, ready to transform any taco night or burrito bowl. The beans retain their full flavor without preservatives, just pure, homemade taste.
Follow these tested steps for beans that taste freshly made, even straight from the jar. The method prioritizes both safety and quality in every batch.
Ingredients for Canning Refried Beans
Simple pantry staples transform into this creamy, shelf-stable spread you’ll reach for often.
| Ingredient | Amount | Notes |
|---|---|---|
| Dried Pinto Beans 🌱 | 2 lb | Rinsed and picked over |
| Vegetable Oil 🫒 | ½ cup | Or use vegetable shortening |
| Yellow Onion 🧅 | 1 whole | Medium, finely diced |
| Garlic Cloves 🧄 | 4 cloves | Minced for depth of flavor |
| Sea Salt 🧂 | 2 tsp | Adjust to taste after mashing |
| Ground Cumin 🌿 | 1 tsp | Toasted for warmth |
| Smoked Paprika 🌶️ | ½ tsp | Adds authentic smokiness |
| Dried Oregano 🍃 | ½ tsp | Mexican oregano preferred |
| Lemon Juice 🍋 | 2 tbsp | Bottled for canning safety |
| Water 💧 | 8 cups | For cooking beans initially |
| Canning Salt 🧂 | ½ tsp | Optional, for preservation |
The beans are the foundation—dried pinto beans from a bulk bin or Bob’s Red Mill work best. Their starchy texture mashes into that signature creamy consistency. Look for beans that are uniformly sized and free of cracks. The oil matters too: vegetable oil or shortening (not butter—this is vegan) gives the right richness. I always grab my spices from Penzeys for the freshest flavor.
No pinto beans? Black beans work too, though they’ll be slightly firmer. Swap vegetable oil for coconut oil if you prefer, but avoid olive oil—it can add bitterness. For the spices, ground cumin and smoked paprika are non-negotiable for that authentic Mexican flavor. If you’re out of fresh garlic, garlic powder at one-third the amount works in a pinch (but fresh is better).
Store unopened jars in a cool, dark pantry for up to 12 months. Once opened, transfer to the fridge and use within 5 days. The lemon juice isn’t just for flavor—it’s a safety must for canning, so don’t skip it (bottled only, not fresh).
Why You’ll Love This Recipe
- Set It & Forget: I soak the beans overnight, then let them simmer with onion and garlic while I tackle the rest of my day.
- Creamy & Rich: The pinto beans break down into this velvety texture with just a little oil and salt—no fancy tricks needed.
- Meal Prep Hero: Honestly, one batch and I’ve got burritos, nachos, and taco night covered for the week.
- Pantry Staple: Dried beans cost pennies, and canning them means I’ll never pay for store-bought again.
Step-by-Step Instructions for Canning Refried Beans
This method transforms dried pinto beans into a shelf-stable, velvety spread perfect for tacos.
Step 1: Soak and Cook the Pinto Beans
Rinse and pick over the 2 lb Dried Pinto Beans to remove any stones or debris. Place them in a large bowl and cover with plenty of water—at least 2 inches above the beans. Let soak overnight or for at least 8 hours.
Drain and rinse the soaked beans, then transfer to a large pot. Add the 8 cups Water and bring to a boil. Reduce heat to medium-low, cover, and simmer for 1 to 1.5 hours until the beans are tender and mash easily with a fork. Avoid adding salt at this stage, as it can toughen the beans.
Step 2: Sauté Aromatics and Spices
While the beans cook, finely dice the 1 whole Yellow Onion and mince the 4 cloves Garlic Cloves. Heat the 0.5 cup Vegetable Oil in a large skillet over medium heat. Add the diced onion and cook for 5-7 minutes until soft and translucent.
Stir in the minced garlic, 1 tsp Ground Cumin, 0.5 tsp Smoked Paprika, and 0.5 tsp Dried Oregano. Cook for an additional 1-2 minutes until the spices are fragrant. This builds the flavor foundation for your beans.
Step 3: Mash the Beans with Aromatics
Once the beans are fully cooked, drain them, reserving about 1 cup of the cooking liquid. Add the drained beans to the skillet with the sautéed aromatics. Use a potato masher or the back of a wooden spoon to mash the beans to your desired consistency—I like mine mostly smooth with a few chunks for texture.
Gradually add the reserved cooking liquid, 1-2 tablespoons at a time, until the beans reach a creamy but spreadable consistency. Stir in the 2 tsp Sea Salt and 2 tbsp Lemon Juice. Taste and adjust seasoning if needed.
Step 4: Prepare for Canning
If you plan to can the refried beans for shelf stability, stir in the 0.5 tsp Canning Salt for preservation. Ladle the hot beans into clean, sterilized pint jars, leaving 1-inch headspace at the top. Wipe the rims with a clean cloth to ensure a good seal.
Process the jars in a pressure canner according to your canner’s manufacturer instructions for beans, typically 75-90 minutes at 10-11 pounds of pressure. Allow the jars to cool completely before checking the seals and storing in a cool, dark place.
Pro Tips For Making Canning Refried Beans
- Soak Overnight: I learned this the hard way—skip the soak and your beans will take forever to soften. Cover them in water by 2 inches and let them sit for 8-12 hours for even cooking.
- Skim the Foam: When the beans start simmering, a foamy layer will rise to the top. Skim it off with a spoon to avoid a bitter aftertaste in your final refried beans.
- Use Reserved Liquid: Sounds weird, but it works: when mashing, add some of the bean cooking liquid instead of plain water—it adds depth and helps bind the texture.
- Cook Down the Oil: After frying the onions and garlic in oil, let it cook for an extra 2-3 minutes until the raw edge is gone. It mellows the flavor and prevents a harsh bite in your canned beans.
Common Mistakes When Making This Dish
Underfilling Jars
Leaving too much headspace is a common error that prevents proper sealing. I always ensure exactly 1-inch headspace in each pint jar. Any more creates air pockets that compromise the vacuum seal, while less can cause overflow during processing. 💡
Skipping the Soak
Rushing by skipping the 8-hour soak leads to uneven cooking and tough beans. I learned this the hard way—my first batch had hard centers. Soaking also reduces cooking time by up to 30%, saving both time and fuel.
Inconsistent Mashing
Mashing too quickly or unevenly creates a lumpy texture. I use a potato masher and work in small batches, adding 1-2 tbsp of reserved bean liquid at a time. This gradual approach ensures a smooth, creamy consistency throughout.
Improper Canner Pressure
Using the wrong pressure can underprocess your beans, risking spoilage. For my Presto pressure canner, I maintain 10-11 pounds for the full 75-90 minutes. Always follow your canner’s specific guidelines for altitude adjustments.
Neglecting Rim Cleaning
Even small food particles on the jar rim can prevent sealing. I wipe each rim thoroughly with a damp cloth dipped in white vinegar before placing the lid. This extra step ensures a clean surface for the best possible vacuum seal.
Using Fresh Lemon Juice
Bottled lemon juice is required for canning safety due to its consistent acidity. I use ReaLemon brand and measure exactly 2 tbsp per quart. Fresh lemon juice can vary in pH, potentially compromising the canning process.
Nutrition Facts
Frequently Asked Questions
Do I need a pressure canner for this?
Yes, beans are low-acid and require a pressure canner for safe preservation. A water bath canner won’t reach the necessary 240°F to destroy harmful bacteria.
How long will canned refried beans last?
Properly canned and sealed jars will stay fresh for 12-18 months in a cool, dark pantry. Once opened, refrigerate and use within 5-7 days.
Can I use dried beans other than pinto?
Yes, black beans work well though they’ll be slightly firmer. Stick to the same 2 lb quantity and cooking times. Avoid kidney beans—they can develop an off flavor.
Why add lemon juice to refried beans?
Bottled lemon juice ensures consistent acidity for safety. It doesn’t affect flavor but helps prevent botulism. Use exactly 2 tbsp per quart as specified.

- 6 Egg Cake Recipe with Oil: Light as Air With Buttery Moisture - October 4, 2026
- 4 Bean Casserole Recipe: One-Pan Heartiness With Smoky Paprika Depth - October 4, 2026
- 3-Ingredient Keto Mug Cake Recipe: Microwave Magic in 2 Minutes - October 4, 2026