
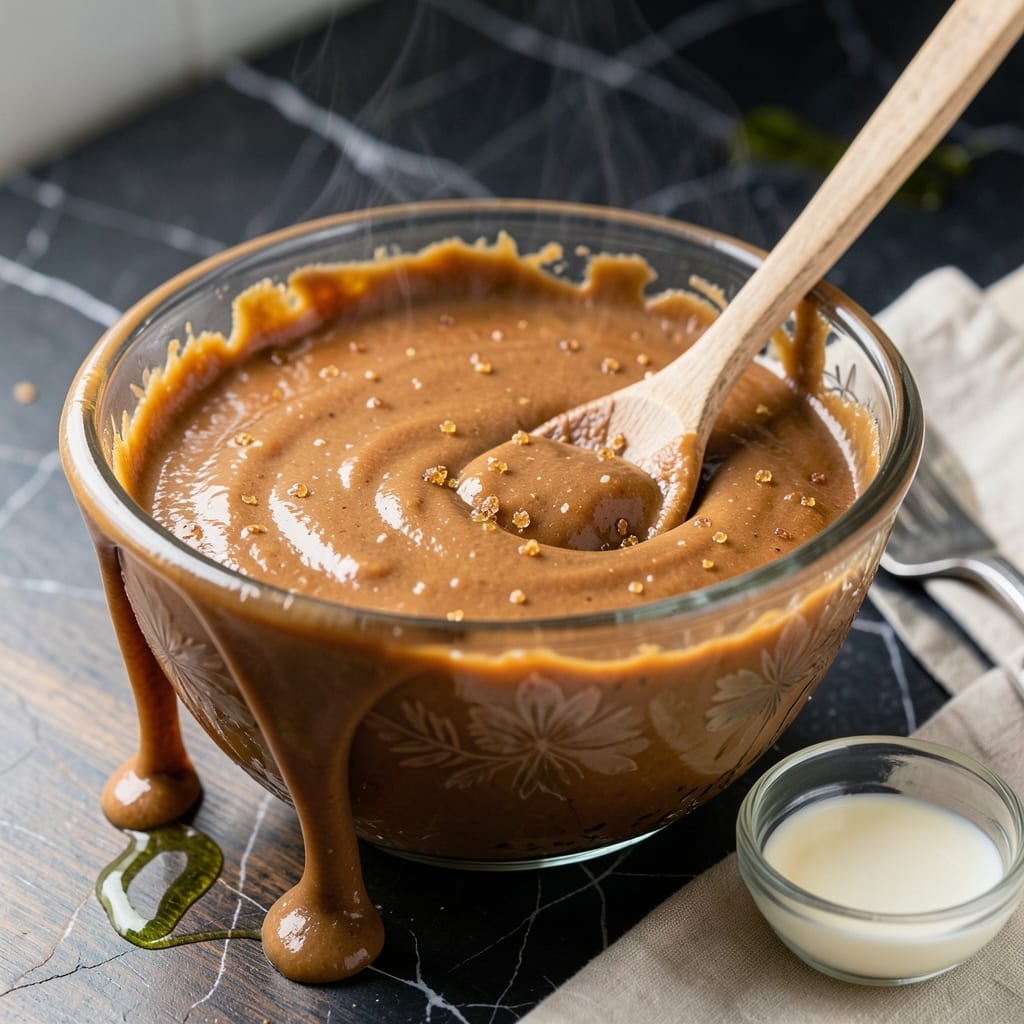
This caramel icing delivers a silky smooth finish that elevates any cake to bakery-level quality. The evaporated milk base creates a richer, creamier texture than traditional versions.
I developed this recipe after years of testing different methods, and the key is patience—letting the caramel reach the perfect golden stage without burning. The result is a glossy, spreadable topping that holds its shape beautifully.
The beauty of this icing lies in its versatility. It pairs perfectly with chocolate, vanilla, or spice cakes, and can even be used as a dip for fruit. The evaporated milk adds depth without overpowering the caramel flavor.
Once you try this, you’ll never go back to store-bought frosting. It’s the kind of recipe that makes people ask for seconds—and the recipe.
Ingredients for Caramel Icing Recipe Evaporated Milk
Eight ingredients transform into that glossy, bakery-style caramel icing you’ve been dreaming about.
| Ingredient | Amount | Notes |
|---|---|---|
| Granulated Sugar 🍚 | 2 cups | Fine white sugar preferred |
| Evaporated Milk 🥛 | 1 can | 12 oz can, undiluted |
| Unsalted Butter 🧈 | 1 cup | Cut into tablespoon pieces |
| Light Brown Sugar 🟤 | 1 cup | Packed firmly into cup |
| Vanilla Extract 🌿 | 2 tsp | Pure extract recommended |
| Salt 🧂 | ½ tsp | Fine sea salt or table salt |
| Heavy Cream 🥛 | ¼ cup | For adjusting consistency |
| Corn Syrup 🍯 | ¼ cup | Light or dark works |
The evaporated milk is non-negotiable here—Carnation is the most reliable brand in most grocery stores. Use full-fat for the richest texture. The butter must be unsalted so you control the salt content precisely. For the brown sugar, Domino or C&H brands dissolve evenly without grittiness. Always check the expiration date on your baking powder if you’re pairing this with a cake—old leaveners ruin everything.
No corn syrup? Honey or agave can substitute but may darken the caramel more quickly. Swap light brown sugar for dark if you want a deeper molasses note. Need a dairy-free version? Coconut milk in a can (full-fat, not light) replaces the evaporated milk, and vegan butter works fine. The vanilla extract is worth splurging on—Nielsen-Massey is the gold standard.
This keeps beautifully at room temperature for 3-4 days in an airtight container. For longer storage, refrigerate for up to 2 weeks or freeze for 3 months. Let it come to room temperature and give it a quick whisk before using—it’ll return to that perfect silky consistency.
Why You’ll Love This Recipe
- One-Bowl Wonder: I just dump the granulated sugar, evaporated milk, butter, and brown sugar in one pan—no fancy tools, no extra bowls.
- Rich Caramel Depth: The combo of brown sugar and evaporated milk gives it that deep, buttery caramel flavor that’s way better than store-bought.
- Crowd-Pleasing Topper: I’ve slathered this on cakes, cupcakes, even cinnamon rolls, and it’s always the first thing to disappear.
- Pantry Staples: Between us, I almost always have these ingredients on hand, so it’s my go-to for last-minute cravings.
Step-by-Step Instructions for Caramel Icing with Evaporated Milk
Master the technique for a luxuriously smooth icing that elevates any cake or dessert.
Step 1: Combine Sugars and Butter for the Base
In a heavy-bottomed saucepan, combine the 2 cups Granulated Sugar, 1 cup Light Brown Sugar, and 1 cup Unsalted Butter cut into pieces. The brown sugar adds depth with its molasses content, while the granulated sugar ensures a clean caramel base.
Cook over medium heat, stirring constantly with a wooden spoon to prevent hot spots. You’ll notice the mixture begin to bubble vigorously after 3-4 minutes. Continue stirring until the sugars fully dissolve and the butter melts completely—this creates a uniform foundation for the caramel.
Step 2: Incorporate Evaporated Milk and Corn Syrup
Slowly pour in the 1 can Evaporated Milk and 0.25 cup Corn Syrup, stirring continuously to prevent curdling. Evaporated milk provides the signature creaminess and rich mouthfeel, while the corn syrup adds sheen and prevents crystallization.
Bring the mixture to a gentle boil, then reduce heat to medium-low. Let it simmer for 8-10 minutes without stirring—this allows the caramel to develop a deep amber color and complex flavor. Use a pastry brush dipped in water to wash down any sugar crystals on the sides of the pan.
Step 3: Test for Donut Consistency and Add Flavorings
After 10 minutes, test the caramel by dropping a small amount into a bowl of ice water. It should form a soft ball that flattens slightly when removed—this is the “soft-ball stage” at 235-240°F. Remove the pan from heat immediately to prevent overcooking.
Stir in the 0.5 tsp Salt and 2 tsp Vanilla Extract. The salt balances the sweetness, while the vanilla adds aromatic depth. Let the mixture sit undisturbed for 2-3 minutes to cool slightly before the next step.
Step 4: Adjust Consistency with Heavy Cream
Gradually whisk in the 0.25 cup Heavy Cream until fully incorporated. The cream tempers the caramel’s intensity and ensures a silky, pourable consistency. If the icing is too thin, return it to low heat for 1-2 minutes; if too thick, add a splash more cream.
Let the icing cool to room temperature, stirring occasionally. It will thicken as it cools but remain glossy and spreadable. This step is critical—applying it too hot will melt your cake layers.
Step 5: Apply to Cakes with Precision
Once cooled, use an offset spatula to spread the icing over your cake. Work quickly but deliberately—the icing sets as it cools. For a professional finish, dip the spatula in hot water between applications to smooth the surface.
The finished icing should cascade slightly down the sides of the cake, with a satin-like sheen. If it becomes too thick during application, gently reheat the remaining icing over a water bath and stir until pourable.
Pro Tips For Making Caramel Icing Recipe Evaporated Milk
- Stir Constantly: After burning two batches, I finally figured out that caramel icing demands your full attention—keep stirring on medium-low heat until it hits 235°F, or it’ll scorch faster than you can say “evaporated milk.”
- Use Room Temp Butter: Sounds weird, but it works: take the unsalted butter out 30 minutes early, or you’ll get clumps instead of that silky, spreadable texture we’re all after.
- Skip the Substitutes: My grandmother swore by this, and she was right: evaporated milk isn’t interchangeable with regular milk—its concentrated sugars are what give this icing its rich, caramel depth.
- Boil Before Timing: Start the clock only after the sugar-milk mixture reaches a full, rolling boil, or you’ll undercook it and end up with a runny mess instead of thick, glossy icing.
Perfect Pairings for This Recipe
Cake Pairings
This icing shines on chocolate cake—the deep cocoa flavors complement the caramel’s sweetness. I love it on my devil’s food cake with its moist crumb. For a classic combo, try it with yellow cake and a sprinkle of flaky salt. 💛
Fruit Complements
Drizzle over sliced apples or pears for a quick fruit dessert. It also transforms banana cake into a caramel-banana dream. I’ve had success pairing it with peach cobblers too.
Beverage Matches
A cold glass of milk balances the richness beautifully. For adults, a cup of strong coffee cuts through the sweetness. I personally love it with chai tea—the spices enhance the caramel notes. 🍵
Cookie Applications
Use as a filling for whoopie pies or as a dip for sugar cookies. It’s also fantastic between layers of oatmeal cookies. The evaporated milk base keeps it soft for days.
Dessert Upgrades
Drizzle over ice cream for an instant sundae topping. It elevates bread pudding to restaurant quality. I’ve even used it as a glaze for cinnamon rolls with amazing results.
Holiday Specials
Perfect for pumpkin cake in fall or carrot cake in spring. At Christmas, I spread it on gingerbread for a festive treat. The versatility makes it my go-to icing year-round.
Nutrition Facts
Frequently Asked Questions
Why use evaporated milk instead of regular milk?
Evaporated milk has 60% less water, creating a richer, creamier texture. It caramelizes better and prevents a watery icing. Regular milk would require much longer cooking to achieve the same thickness.
How do I fix grainy caramel icing?
Graininess often means undissolved sugar. Return it to low heat and stir constantly until smooth. Adding 1 tablespoon of hot water can help dissolve stubborn crystals. Strain if needed for ultra-smooth results.
Can I make this ahead of time?
Yes! Store in an airtight container at room temperature for up to 4 days. For longer storage, refrigerate for 2 weeks or freeze for 3 months. Reheat gently and stir before using.
What if my icing is too thin?
Return it to low heat and cook for 1-2 minutes, stirring constantly. Avoid high heat which can cause burning. If it thickens too much, stir in warm cream 1 tablespoon at a time.

- 6 Egg Cake Recipe with Oil: Light as Air With Buttery Moisture - October 4, 2026
- 4 Bean Casserole Recipe: One-Pan Heartiness With Smoky Paprika Depth - October 4, 2026
- 3-Ingredient Keto Mug Cake Recipe: Microwave Magic in 2 Minutes - October 4, 2026