
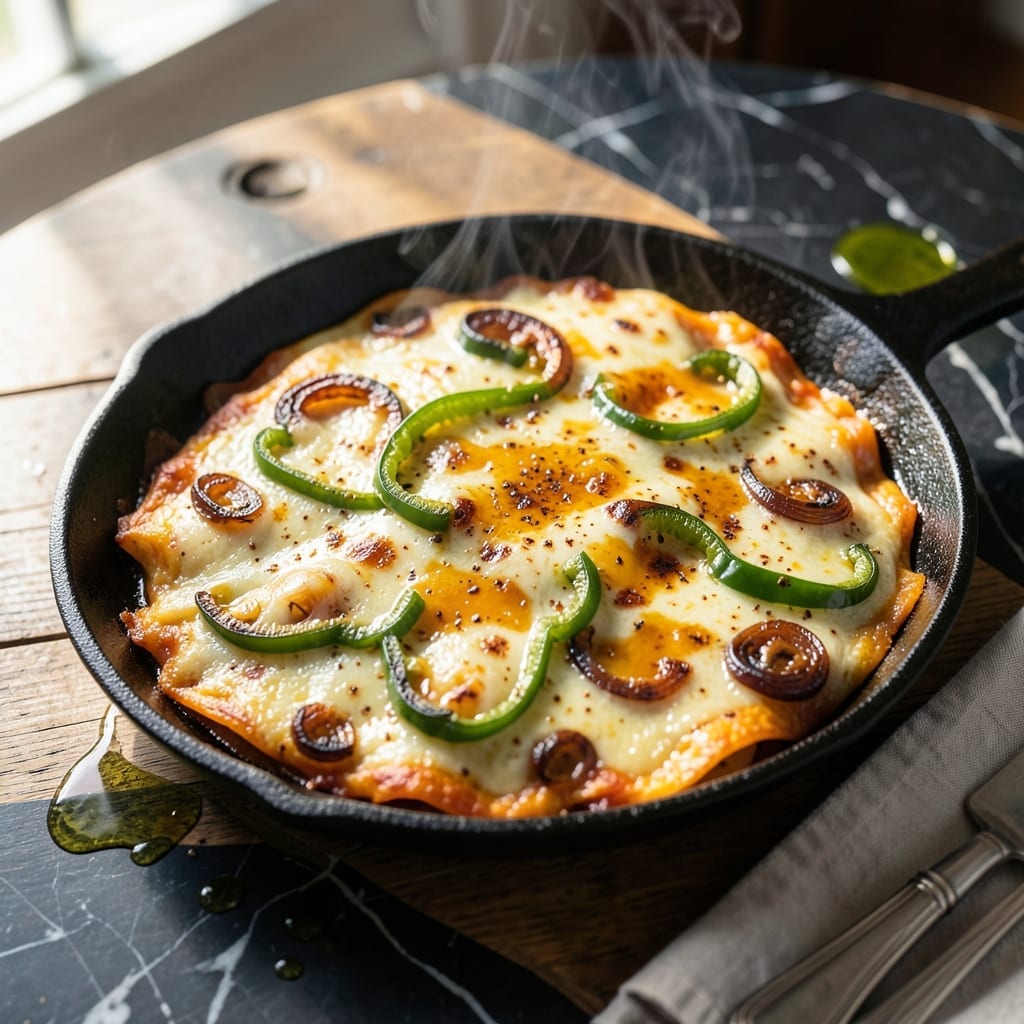
This copycat recipe brings the sizzling magic of Carlos O’Kelly’s famous cheese crisp to your kitchen. A Tex-Mex classic, it delivers that perfect blend of melted cheese and crispy edges we all crave.
The secret lies in the right cheese blend and precise cooking temperature. I’ve tested multiple variations to nail the restaurant-quality texture – crispy on the outside, gooey inside.
What you get is a sizzling platter of cheesy goodness that’s impossible to resist. The aroma alone will transport you right to your favorite Mexican restaurant.
Serve immediately with warm tortillas and your favorite fajita fillings. Here’s how to recreate this iconic dish at home.
Ingredients for Carlos O’kelly’s Fajita Cheese Crisp
Sharp cheddar and Monterey Jack bring that sizzling Tex-Mex magic to life in minutes.
| Ingredient | Amount | Notes |
|---|---|---|
| Sharp Cheddar Cheese 🧀 | 2 cups | Shredded from block for best melt |
| Monterey Jack Cheese 🧀 | 2 cups | Shredded from block for creaminess |
| All-Purpose Flour 🌾 | ½ cup | For dusting the skillet |
| Unsalted Butter 🧈 | 2 tbsp | For crisping the cheese |
| Flour Tortillas 🌮 | 4 pieces | Large, 10-inch for serving |
| Green Bell Pepper 🌶️ | 1 whole | Sliced thin for fajita filling |
| Red Bell Pepper 🌶️ | 1 whole | Sliced thin for fajita filling |
| Yellow Onion 🧅 | 1 whole | Sliced thin for fajita filling |
| Olive Oil 🫒 | 2 tbsp | For sautéing vegetables |
| Fajita Seasoning 🌿 | 1 tbsp | Or homemade blend |
| Lime 🍈 | 1 whole | Cut into wedges for serving |
| Sour Cream 🥣 | ½ cup | For serving on the side |
| Fresh Cilantro 🌿 | ¼ cup | Chopped for garnish |
The cheese blend is non-negotiable here. Sharp cheddar plus Monterey Jack gives you that restaurant-quality melt and stretch. Buy blocks and shred yourself—pre-shredded has anti-caking agents that make it clumpy. Kraft or Sargento work great, but any good sharp cheddar will do. The flour tortillas? Warm them up before serving so they don’t crack under that beautiful cheesy crisp.
No Monterey Jack? Pepper Jack at half the amount adds a nice kick. Skip the bell peppers? Onions alone still make great fajitas. Fresh out of fajita seasoning? Equal parts cumin, chili powder, and garlic powder gets you close. The butter can be swapped for oil, but butter gives that golden crisp you’re after. Don’t skip dusting the skillet with flour—it’s the secret to that perfect crust.
This is best eaten fresh while the cheese is still sizzling. Leftovers keep in the fridge for 2-3 days but won’t have that same magic. Reheat in a skillet to try to revive the crisp. The veggies and tortillas? Store separately and warm just before serving.
Why You’ll Love This Recipe
- I’ll be real: these taste even better the next day, if they last that long.
- One Pan Magic: I just melt the cheeses with butter and flour, then crisp it all in a tortilla—no fancy steps.
- That Cheese Pull: Sharp cheddar and Monterey Jack create this gooey, stretchy moment that’s pure comfort.
- Party or Snack: Honestly, it’s my go-to for game day or a lazy afternoon with zero guilt.
Step-by-Step Instructions for Carlos O’Kelly’s Fajita Cheese Crisp
Here’s how I create that sizzling cheese magic with perfectly crisp edges every time.
Step 1: Sauté the Fajita Vegetables
Heat the 2 tablespoons olive oil in a large skillet over medium-high heat. Add the sliced green bell pepper, red bell pepper, and yellow onion, then sprinkle with the 1 tablespoon fajita seasoning.
Cook for 6-8 minutes, stirring occasionally, until the vegetables soften and develop light char marks. The peppers should be tender but still hold their shape. Remove from the skillet and set aside—you’ll add them back later.
This step builds the fajita flavor foundation. Don’t rush it; you want those vegetables to absorb the seasoning and develop some color.
Step 2: Prepare the Skillet for the Cheese Crisp
Reduce heat to medium and add the 2 tablespoons unsalted butter to the same skillet. Once melted, sprinkle the 0.5 cup all-purpose flour evenly across the bottom. This creates a light crust that prevents sticking.
Let the flour cook for 30-60 seconds until it forms a thin, golden layer. This is your insurance against a cheese disaster—it keeps everything from adhering to the pan.
I’ve found this flour step is what makes the difference between a cheese crisp that holds together and one that sticks to the pan in a gooey mess.
Step 3: Layer and Melt the Cheeses
Sprinkle the 2 cups sharp cheddar cheese evenly over the floured surface, then top with the 2 cups Monterey Jack cheese. The cheddar gives you that tangy depth, while the Monterey Jack ensures a beautiful, stretchy melt.
Let the cheese melt undisturbed for 3-4 minutes until the edges begin to bubble and turn golden brown. Watch for the cheese to pull away slightly from the edges of the skillet—that’s your sign it’s ready.
Here’s the thing—don’t stir. Let the cheese form that crispy bottom layer. The contrast between the crisp cheese on the bottom and the gooey melted top is what makes this dish special.
Step 4: Add Vegetables and Finish
Once the cheese is melted and beginning to crisp, carefully spread the sautéed vegetables over half of the cheese. Press them down gently so they adhere to the melted cheese.
Let everything cook together for another 1-2 minutes until the cheese is fully melted and the bottom is deep golden brown and crispy. You should hear a slight sizzle when you shake the pan—that’s the music of a perfect cheese crisp.
I always let the vegetables warm through in the cheese. This gives them a chance to soak up some of that cheesy goodness while maintaining their fajita identity.
Step 5: Serve and Garnish
Slide the cheese crisp onto a large serving platter or cut it directly in the skillet. Use a spatula to divide it into portions. Serve immediately with the 4 pieces flour tortillas on the side.
Garnish with the 0.25 cup fresh cilantro and serve the 0.5 cup sour cream on the side. Don’t forget the lime wedges for a bright finish.
This dish is best served piping hot, while the cheese is still bubbly and the bottom is at its crispiest. The tortillas are perfect for scooping up every last bit of cheesy goodness.
Pro Tips For Making Carlos O’Kelly’S Fajita Cheese Crisp
- Pre-shred Your Cheeses: I learned this the hard way—pre-shredded cheese doesn’t melt as smoothly as freshly grated. Use a box grater and mix equal parts sharp cheddar and Monterey Jack for that perfect stretch.
- Chill the Dough: After mixing the flour, butter, and a splash of water, let the dough rest in the fridge for 20 minutes. It’s easier to roll out and stays flakier when fried.
- Heat the Tortillas: Skip cold tortillas—they’ll steam instead of crisp. Warm them for 10 seconds per side in a dry skillet before adding the cheese filling.
- Use Medium Heat: High heat burns the outside before the cheese melts. Cook the crisps at medium until golden brown, about 2-3 minutes per side.
Regional Styles of This carlos okellys fajita cheese crisp
Texas Style
In Texas, they love their cheese crisp extra thick with a bold flavor. I add 1 teaspoon smoked paprika to the cheese blend for that signature Lone Star smokiness. Use longhorn cheddar if you can find it—it’s a Texas favorite that melts beautifully.
New Mexico Green Chile
For a Southwestern twist, mix ½ cup chopped roasted Hatch green chiles into the cheese. The mild heat and earthy flavor pair perfectly with the fajita veggies. I also add 1 teaspoon ground cumin to the flour dusting for extra depth. 🌶️
Arizona Sonoran
In Arizona, they go big on the veggies. I double the bell peppers and onions, then add 1 sliced jalapeño for heat. Sprinkle 1 tablespoon crushed tortilla chips on top before serving for that extra crunch.
California Fusion
On the West Coast, they love adding fresh ingredients. I top the finished crisp with ½ cup diced avocado and ¼ cup pickled red onions. The creaminess and tang cut through the richness of the cheese beautifully.
Midwest Comfort
For a heartier version, I mix in ½ cup cooked ground beef seasoned with taco spices. It’s not traditional, but it’s a crowd-pleaser. Serve with extra shredded lettuce on the side for freshness. ✨
Florida Citrus
In Florida, they brighten it up with citrus. I add 1 teaspoon lime zest to the cheese blend and serve with extra lime wedges. It’s a refreshing twist that balances the richness of the dish perfectly.
Nutrition Facts
Frequently Asked Questions
What kind of skillet works best?
A heavy cast iron skillet is ideal for even heat distribution. Avoid nonstick as it won’t get hot enough for that perfect crisp.
Can I use pre-shredded cheese?
It’s better to shred from blocks. Pre-shredded contains anti-caking agents that prevent proper melting. The texture won’t be as smooth or stretchy.
How do I fix a cheese crisp that sticks?
Can I make this ahead of time? This dish is best served immediately. If you must prep ahead, cook the veggies and shred the cheese, but assemble and cook the crisp just before serving.

- 6 Egg Cake Recipe with Oil: Light as Air With Buttery Moisture - October 4, 2026
- 4 Bean Casserole Recipe: One-Pan Heartiness With Smoky Paprika Depth - October 4, 2026
- 3-Ingredient Keto Mug Cake Recipe: Microwave Magic in 2 Minutes - October 4, 2026