
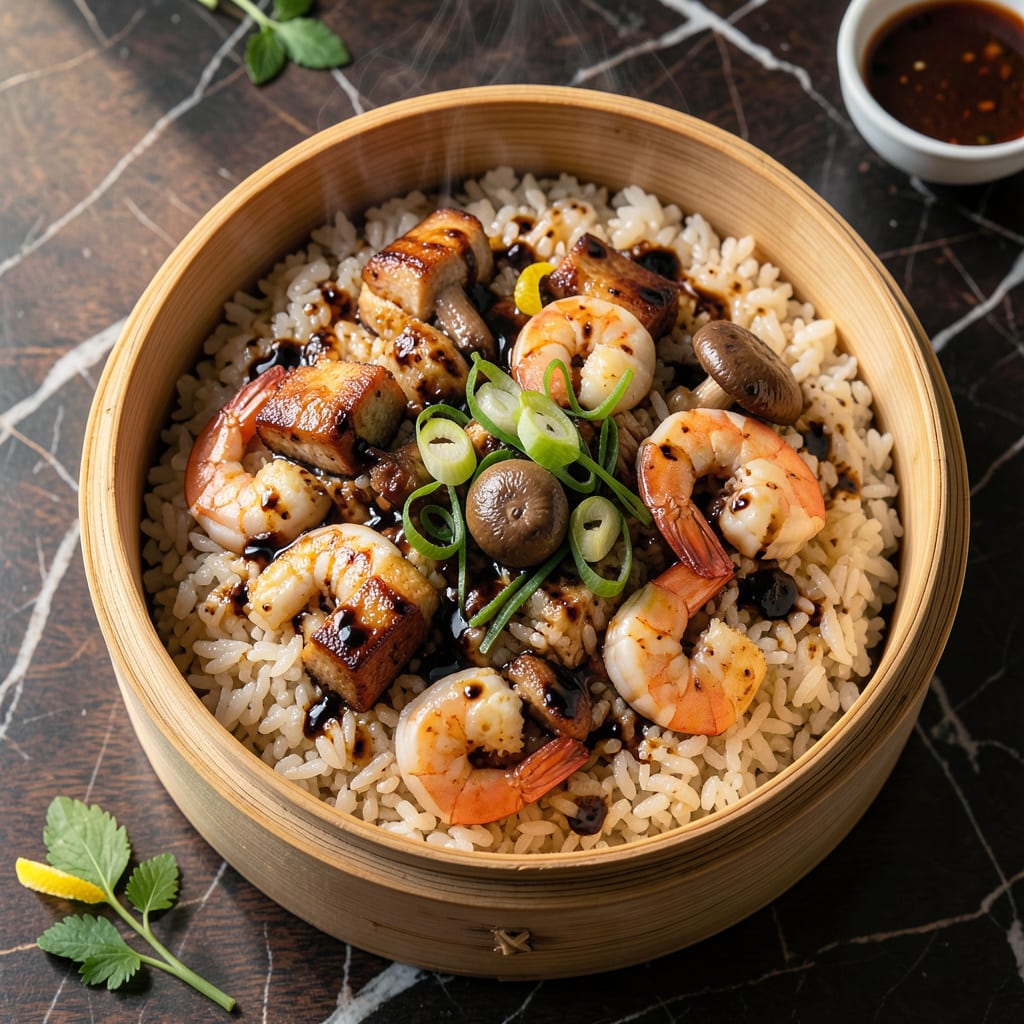
This Cebu-style dimsum rice delivers the soft, pillowy texture that makes these bites so beloved. The secret lies in the precise steaming method and the right ratio of rice to seasonings.
What results is a dish that’s tender yet slightly chewy, with a delicate flavor that pairs perfectly with dimsum classics. This version stays true to local traditions while being simple enough for home kitchens.
Ingredients for Cebu Dimsum Steamed Rice
A handful of quality ingredients come together for these tender, flavorful dimsum bites.
| Ingredient | Amount | Notes |
|---|---|---|
| Glutinous Rice 🍚 | 2 cups | Soaked overnight, drained |
| Pork Belly 🥓 | ½ lb | Diced into small cubes |
| Shrimp 🦐 | ½ lb | Peeled, deveined, chopped |
| Shiitake Mushrooms 🍄 | ½ cup | Dried, rehydrated, diced |
| Garlic Cloves 🧄 | 4 cloves | Minced finely |
| Green Onions 🧅 | 4 whole | Thinly sliced, green parts only |
| Soy Sauce 🫒 | 2 tbsp | Light or all-purpose variety |
| Oyster Sauce 🍚 | 1 tbsp | For umami depth |
| Sesame Oil 🫒 | 1 tsp | Toasted variety preferred |
| Salt 🧂 | ½ tsp | Adjust to taste |
| Black Pepper 🌶️ | ¼ tsp | Freshly ground |
| Chicken Stock 🍲 | ½ cup | Low-sodium preferred |
| Cornstarch 🌾 | 1 tbsp | For binding mixture |
The rice is the foundation here. Glutinous rice (also labeled sweet rice) is non-negotiable—regular rice won’t give you that signature sticky chew. Asian markets or the international aisle at major chains like Kroger usually stock it. For the pork belly, ask your butcher to dice it for you (saves time). Fresh shrimp from the seafood counter works best, but frozen is fine if thawed properly.
Short on time? Skip soaking the rice overnight—a 4-hour soak works in a pinch. No pork belly? Ground pork or even chicken thighs (diced small) can substitute, though texture will differ slightly. For a vegetarian version, mushrooms and tofu make a great base. Oyster sauce can be replaced with vegetarian oyster sauce or extra soy sauce if needed.
Steamed rice keeps in the fridge for 3-4 days—reheat by steaming again to restore texture. The filling mixture can be prepped a day ahead. For freezing, wrap individual portions in plastic before steaming again. Always use parchment paper in your steamer to prevent sticking.
Why You’ll Love This Recipe
- One Pot Wonder: I just dump everything—glutinous rice, pork belly, shrimp—into the steamer and let it work its magic.
- Umami Bomb: The garlic and shiitake mushrooms soak into the rice, making every bite ridiculously rich.
- Feeds a Crowd: I make a big batch for family gatherings, and it’s always the first dish to disappear.
- Leftovers? Yes Please: Honestly, it tastes even better the next day—if there’s any left.
Step-by-Step Instructions for Cebu Dimsum Steamed Rice
Master these steps to create perfectly textured dimsum rice with authentic Cebu flavors.
Step 1: Prepare the Glutinous Rice
Soak the 2 cups glutinous rice overnight in cold water, then drain completely. This extended soaking is essential—it softens the grains to achieve that signature sticky, pillowy texture. Spread the drained rice on a clean kitchen towel and pat dry to remove excess moisture.
Transfer the rice to a bowl and mix with the 1 tsp sesame oil. This thin coating prevents the grains from sticking together too aggressively during steaming while adding a subtle nutty aroma that complements the savory toppings.
Step 2: Create the Savory Topping Mixture
In a large bowl, combine the 0.5 lb diced pork belly, 0.5 lb chopped shrimp, 0.5 cup diced shiitake mushrooms, 4 minced garlic cloves, and 4 thinly sliced green onions. The combination of pork and shrimp gives this dish its characteristic Cebu richness.
Add the 2 tbsp soy sauce, 1 tbsp oyster sauce, 0.5 tsp salt, and 0.25 tsp black pepper. Mix thoroughly until all ingredients are evenly coated and the mixture becomes slightly sticky. This seasoning blend is the flavor backbone of your dimsum rice.
Step 3: Bind and Layer the Ingredients
Sprinkle the 1 tbsp cornstarch over the meat and vegetable mixture. Stir well to distribute evenly—this acts as a binder to keep the topping intact during steaming. Then gradually add 0.5 cup chicken stock, mixing until the mixture holds together but isn’t soupy.
The cornstarch also helps create a light sauce that coats the rice during cooking. You want the mixture moist but not wet enough to make the rice soggy. Let it rest for 5 minutes to allow the cornstarch to fully hydrate.
Step 4: Assemble and Steam to Perfection
Line a steamer basket with parchment paper or cabbage leaves, then spread half the prepared glutinous rice as the base layer. Top with all the meat mixture, spreading it evenly. Add the remaining rice on top, pressing down gently to compress the layers slightly.
Steam over boiling water for 45-50 minutes. Check that the water doesn’t touch the basket. The rice is done when it’s tender and translucent, and the topping has cooked through with juices absorbed into the grains. Maintain a steady boil throughout for even cooking.
Step 5: Rest and Serve
Remove from the steamer and let rest for 5 minutes before slicing. This brief rest allows the layers to set, making it easier to cut clean portions. The dimsum rice should hold its shape when sliced but still be tender and slightly sticky.
Serve warm in squares or wedges, allowing each portion to showcase the distinct layers of fragrant rice and savory topping. The texture should be soft and cohesive, with each bite delivering the full range of flavors from the seasoned meat mixture.
Pro Tips For Making Cebu Dimsum Steamed Rice
- Soak the Rice: Glutinous rice needs at least 4 hours in warm water—overnight is better. I learned this the hard way after ending up with crunchy bits in my first few attempts.
- Render the Fat: Start the pork belly in a cold pan to render the fat slowly, then crisp it up. After burning three batches, I finally figured out this method gives the best texture.
- Skip the Crowding: Steam the dimsum in batches if needed—overloading the steamer traps moisture and makes the rice gummy. Sounds weird, but it works.
- Dry the Shrimp: Pat the shrimp completely dry before chopping to prevent excess moisture in the filling. My grandmother swore by this, and she was right.
Make-Ahead Tips for This Dish
Prep the Rice Ahead
Soak the 2 cups glutinous rice the night before—this is non-negotiable for that perfect sticky texture. Drain and mix with 1 tsp sesame oil in the morning, then store covered in the fridge. 💡
Make the Topping Mix
Combine all topping ingredients (pork, shrimp, mushrooms, garlic, green onions) with sauces and seasonings up to 24 hours ahead. Store in an airtight container in the fridge.
Assemble Before Steaming
Layer half the rice, all the topping, then remaining rice in your steamer basket lined with parchment. Cover and refrigerate until ready to cook. This saves 10 minutes of prep time on cooking day.
Freeze for Later
Assemble completely in parchment-lined containers, wrap tightly, and freeze for up to 1 month. Thaw overnight in the fridge before steaming. I always make double batches this way.
Steam from Frozen
For a true time-saver, steam frozen portions directly—just add 15 minutes to the cooking time. Check that water stays boiling throughout. This method works surprisingly well. ❄️
Reheat Like a Pro
Leftover dimsum rice reheats beautifully by steaming again for 5-7 minutes. Microwaving works in a pinch, but cover with a damp towel to prevent drying out.
Nutrition Facts
Frequently Asked Questions
Can I use regular rice instead of glutinous rice?
No, glutinous rice is essential for the sticky, chewy texture. Regular rice won’t bind properly and will fall apart.
How do I prevent the rice from sticking to the steamer?
Line your steamer with parchment paper or cabbage leaves. This creates a non-stick surface and makes removal easier.
Can I substitute the pork belly with another protein?
Yes! Ground pork, chicken thighs, or tofu work well. Adjust cooking time if using leaner meats to avoid dryness.
Why did my dimsum rice turn out mushy?
Over-soaking the rice or adding too much liquid to the topping can cause this. Stick to the 45-50 minutes steaming time and measure ingredients precisely.

- 6 Egg Cake Recipe with Oil: Light as Air With Buttery Moisture - October 4, 2026
- 4 Bean Casserole Recipe: One-Pan Heartiness With Smoky Paprika Depth - October 4, 2026
- 3-Ingredient Keto Mug Cake Recipe: Microwave Magic in 2 Minutes - October 4, 2026