
Chana Masala Recipe Hebbar: Authentic North Indian Spiced Chickpea Curry

Chana Masala Recipe Hebbar: Authentic North Indian Spiced Chickpea Curry

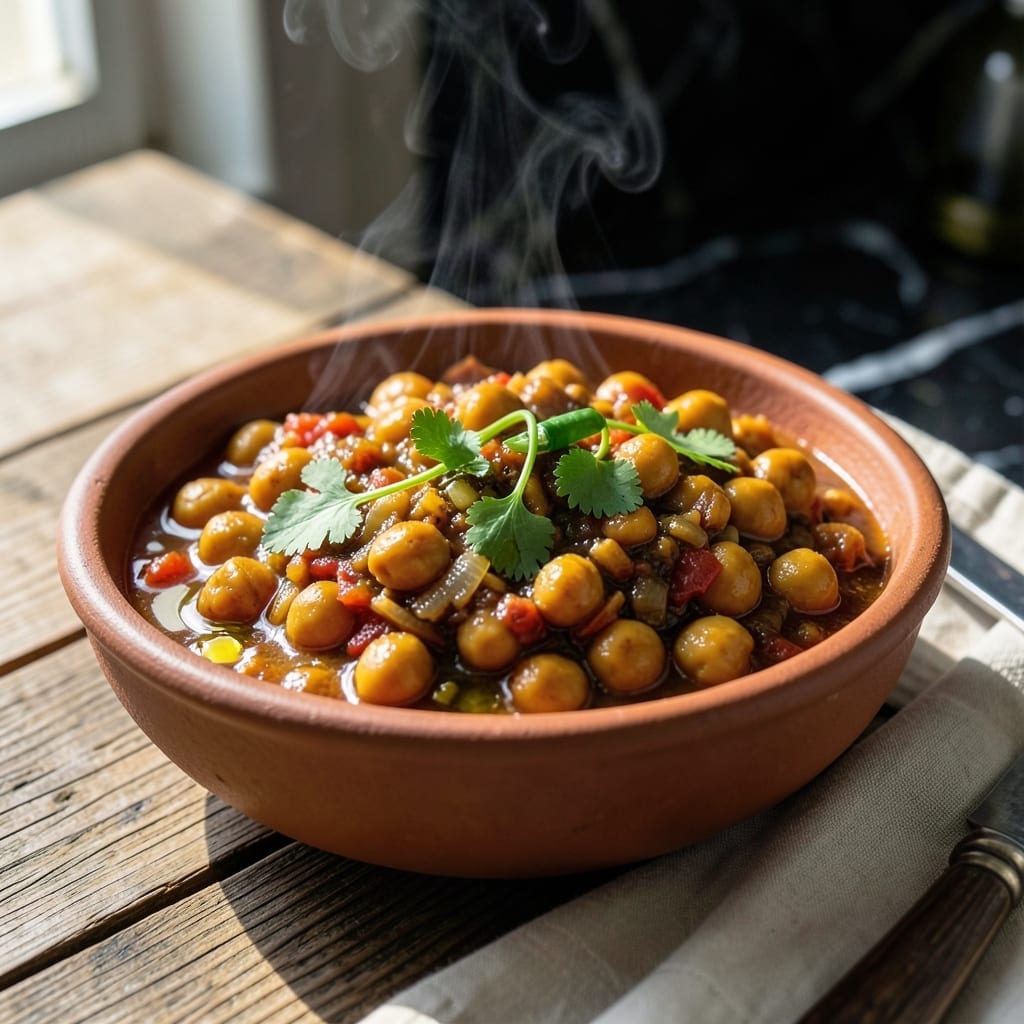
This authentic North Indian dish brings the vibrant flavors of traditional street food to your kitchen. The carefully balanced spices create a richly aromatic curry that’s both comforting and deeply satisfying.

I’ve perfected this version to capture the true essence of chana masala, using simple techniques that home cooks can master. The chickpeas absorb the complex spice blend, creating layers of flavor in every bite.

The result is a hearty, vegan curry with tender chickpeas in a thick, fragrant sauce. It’s the kind of dish that tastes even better the next day as the flavors meld together.

Serve with warm naan or steamed rice for a complete meal that’s sure to impress.

👨‍🍳
Difficulty
Medium
🌿
Diet
Vegetarian
⏱️
Total Time
30 min
🔥
Calories
Low Cal

Ingredients for Chana Masala Recipe Hebbar

Pantry staples and fresh aromatics build layers of authentic Indian flavor here.

Ingredient Amount Notes
Dried Chickpeas 🥜 1 ½ cups Soaked overnight, or use canned
Yellow Onion 🧅 1 whole Finely chopped for base
Garlic Cloves 🧄 4 cloves Minced for depth of flavor
Fresh Ginger 🌿 1 tbsp Grated for warmth and zing
Green Chili Pepper 🌶️ 1 whole Finely chopped, adjust to taste
Fresh Tomatoes 🍅 3 whole Diced for sauce base
Cumin Seeds 🌿 1 tsp Toasted for nutty aroma
Coriander Powder 🌿 1 tbsp Ground from whole seeds preferred
Turmeric Powder 🌶️ ½ tsp For color and earthiness
Garam Masala 🌶️ 1 tsp Freshly ground for best flavor
Red Chili Powder 🌶️ ½ tsp Adjust to heat preference
Salt 🧂 1 ½ tsp Adjust to taste as needed
Fresh Cilantro 🌿 ¼ cup Chopped for garnish
Vegetable Oil 🫒 3 tbsp Neutral flavor for cooking
Water 💧 1 cup For adjusting sauce consistency

The spices are everything in this. Look for cumin seeds and coriander powder at Indian grocery stores—they’re fresher and more potent than what you’ll find at regular supermarkets. Garam masala varies by brand, so I like MDH or Everest for that perfect balance. If you’re using dried chickpeas, soak them overnight (or at least 8 hours) for the creamiest texture.

No fresh ginger? Ground ginger at half the amount works in a pinch, but fresh is ideal. Swap green chili for serrano or jalapeño depending on heat preference. Can’t find fresh cilantro? Parsley works as garnish (though the flavor’s different). For extra richness, stir in a spoonful of coconut cream at the end.

Leftovers taste even better the next day—store in an airtight container for up to 4 days in the fridge. Freezes beautifully for up to 3 months. The chickpeas will soak up more flavor as it sits.

❤️

Why You’ll Love This Recipe

  • One Pot Wonder: I love that I can soak the chickpeas overnight, then toss everything into a single pot the next day—minimal cleanup, maximum flavor.
  • Flavor Bomb: The combo of fresh ginger, garlic, and green chili creates a depth that’s both spicy and aromatic without overpowering.
  • Meal Prep Hero: This tastes even better the next day, so I make a big batch for lunches all week. Honestly, it’s my secret to stress-free meals.
  • Budget Friendly: Dried chickpeas cost pennies, and the spices stretch across multiple meals. I’ll be real: it’s one of the most affordable dishes I make.

Step-by-Step Instructions for Authentic North Indian Spiced Chickpea Curry

This authentic method builds layers of flavor that transport you straight to Northern India.

Step 1: Prepare and Cook the Chickpeas

Begin by rinsing the 1.5 cups Dried Chickpeas thoroughly under cold water to remove any debris. Soak them overnight in plenty of water—they’ll plump up significantly. Drain and rinse again before cooking.

Transfer the soaked chickpeas to a pressure cooker with 1 cup Water and cook for 4-5 whistles until they’re tender but still hold their shape. If using canned chickpeas, simply drain and rinse them. I prefer the texture of freshly cooked chickpeas for this dish.

Step 2: Create the Aromatic Base

Heat 3 tbsp Vegetable Oil in a heavy-bottomed pan over medium heat. Add 1 tsp Cumin Seeds and let them sizzle for 30 seconds until they turn a shade darker and release their nutty aroma.

Immediately add the finely chopped 1 whole Yellow Onion and sauté for 6-8 minutes until it turns golden brown. This forms the sweet, caramelized foundation of your curry. Stir in the minced 4 cloves Garlic Cloves, grated 1 tbsp Fresh Ginger, and finely chopped 1 whole Green Chili Pepper, cooking for another 2 minutes until the raw smell disappears.

Step 3: Build the Spiced Tomato Sauce

Add the diced 3 whole Fresh Tomatoes to the pan and cook for 8-10 minutes, stirring occasionally, until they break down into a thick, pulpy mixture. This is when the magic starts happening.

Now add the dry spices: 1 tbsp Coriander Powder, 0.5 tsp Turmeric Powder, 0.5 tsp Red Chili Powder, and 1.5 tsp Salt. Stir well and cook for 3-4 minutes to allow the spices to bloom and lose their raw taste. The mixture should start to leave the sides of the pan and develop a rich, reddish-brown color.

Step 4: Combine and Simmer to Perfection

Add the cooked chickpeas to the spiced tomato mixture and stir to coat them evenly in the sauce. Pour in the 1 cup Water and bring to a gentle simmer. Reduce the heat to low and let it cook uncovered for 15-20 minutes.

This slow simmer allows the chickpeas to absorb all those beautiful flavors. Stir occasionally and watch as the sauce thickens to your desired consistency. About 5 minutes before serving, sprinkle in 1 tsp Garam Masala for that final aromatic touch. Taste and adjust the salt if needed.

Step 5: Finish and Garnish

Turn off the heat and let the curry sit for 5 minutes to allow the flavors to meld together. The chickpeas should be tender yet intact, swimming in a thick, fragrant sauce that coats the back of a spoon.

Garnish with the chopped 0.25 cup Fresh Cilantro just before serving. This curry tastes even better the next day as the flavors continue to develop. Serve hot with fresh naan or steamed basmati rice for the ultimate authentic experience.

👨‍🍳

Pro Tips For Making Chana Masala Recipe Hebbar

  • Soak Chickpeas Overnight: I learned this the hard way—dried chickpeas need a full 8-12 hours in water to soften properly, or they’ll stay tough no matter how long you simmer them.
  • Char the Onions: Cook the yellow onions until deep golden brown, almost caramelized—this builds the sweet, rich base that defines Hebbar’s version.
  • Crush Ginger-Garlic: Skip mincing and crush the ginger and garlic with a mortar and pestle instead; it releases more oils and makes the masala far more aromatic.
  • Simmer Uncovered: After adding the chickpeas, simmer the gravy uncovered for 10-15 minutes to thicken it naturally without a watery finish.

Essential Equipment for Perfect Results

Heavy-Bottomed Pan

A sturdy stainless steel or cast iron pan prevents hot spots that can burn your spices. I use my 12-inch All-Clad—it distributes heat evenly and has plenty of room for stirring. The heavy base keeps temperatures steady during that critical spice-blooming phase.

Pressure Cooker

For perfectly tender chickpeas, a pressure cooker cuts cooking time dramatically. My Instant Pot Duo handles 1.5 cups dried chickpeas in 4-5 whistles with 1 cup water. If you’re using canned, this step isn’t needed but fresh always tastes better. 💪

Wooden Spoon

A wooden spoon won’t scratch your cookware and is ideal for stirring the thick sauce. I keep one dedicated to my Indian cooking—it doesn’t absorb odors like plastic can. The flat edge helps scrape up those flavorful browned bits from the pan bottom.

Sharp Chef’s Knife

Precise chopping of onions, tomatoes, and aromatics ensures even cooking. I swear by my 8-inch Wüsthof for all the fine dicing this recipe requires. A sharp blade makes prep faster and safer too.

Keep it honed—dull knives slip and cause accidents. 🔥

Mortar and Pestle

For the freshest spice profile, grind your cumin seeds and coriander just before cooking. My granite mortar from India has the perfect texture. Even store-bought garam masala benefits from a quick grind to release oils.

Nutrition Facts

Servings 4
Amount Per Serving
Calories 280kcal
% Daily Value
Total Fat 12g15%
Saturated Fat 1g5%
Cholesterol 0mg0%
Sodium 580mg25%
Total Carbohydrate 38g14%
Dietary Fiber 10g36%
Sugars 6g
Protein 10g20%
Percent Daily Values are based on a 2,000 calorie diet. Your daily values may be higher or lower depending on your calorie needs.

Frequently Asked Questions

1

Can I use canned chickpeas instead of dried?

Drain and rinse 2 (15-oz) cans to replace 1.5 cups dried. Skip the soaking and pressure cooking—they’ll soften in the sauce during the 15-20 minute simmer.

2

How do I adjust the spice level?

Reduce or omit the green chili and red chili powder for mild heat. For extra kick, add 1/2 tsp cayenne or a pinch of black salt (kala namak) for complexity.

3

Why is my sauce too thin or watery?

Simmer uncovered for an extra 5-10 minutes to thicken. Mash a few chickpeas to release starch, or stir in 1 tsp cornstarch slurry. The sauce will thicken as it cools.

4

Can I make this ahead of time?

Yes! Flavors deepen after 24 hours in the fridge. Store in an airtight container for up to 4 days, or freeze for 3 months. Reheat gently with a splash of water.

★★★★★4.8(6 reviews)
Tyler Parker

Chana Masala Recipe Hebbar: Authentic North Indian Spiced Chickpea Curry

Chana Masala Recipe Hebbar: Authentic North Indian Spiced Chickpea Curry

This authentic North Indian dish brings the vibrant flavors of traditional street food to your kitchen. The carefully balanced spices create a richly aromatic curry that’s both comforting and deeply satisfying.

I’ve perfected this version to capture the true essence of chana masala, using simple techniques that home cooks can master. The chickpeas absorb the complex spice blend, creating layers of flavor in every bite.

The result is a hearty, vegan curry with tender chickpeas in a thick, fragrant sauce. It’s the kind of dish that tastes even better the next day as the flavors meld together.

Serve with warm naan or steamed rice for a complete meal that’s sure to impress.

👨‍🍳
Difficulty
Medium
🌿
Diet
Vegetarian
⏱️
Total Time
30 min
🔥
Calories
Low Cal

Ingredients for Chana Masala Recipe Hebbar

Pantry staples and fresh aromatics build layers of authentic Indian flavor here.

Ingredient Amount Notes
Dried Chickpeas 🥜 1 ½ cups Soaked overnight, or use canned
Yellow Onion 🧅 1 whole Finely chopped for base
Garlic Cloves 🧄 4 cloves Minced for depth of flavor
Fresh Ginger 🌿 1 tbsp Grated for warmth and zing
Green Chili Pepper 🌶️ 1 whole Finely chopped, adjust to taste
Fresh Tomatoes 🍅 3 whole Diced for sauce base
Cumin Seeds 🌿 1 tsp Toasted for nutty aroma
Coriander Powder 🌿 1 tbsp Ground from whole seeds preferred
Turmeric Powder 🌶️ ½ tsp For color and earthiness
Garam Masala 🌶️ 1 tsp Freshly ground for best flavor
Red Chili Powder 🌶️ ½ tsp Adjust to heat preference
Salt 🧂 1 ½ tsp Adjust to taste as needed
Fresh Cilantro 🌿 ¼ cup Chopped for garnish
Vegetable Oil 🫒 3 tbsp Neutral flavor for cooking
Water 💧 1 cup For adjusting sauce consistency

The spices are everything in this. Look for cumin seeds and coriander powder at Indian grocery stores—they’re fresher and more potent than what you’ll find at regular supermarkets. Garam masala varies by brand, so I like MDH or Everest for that perfect balance. If you’re using dried chickpeas, soak them overnight (or at least 8 hours) for the creamiest texture.

No fresh ginger? Ground ginger at half the amount works in a pinch, but fresh is ideal. Swap green chili for serrano or jalapeño depending on heat preference. Can’t find fresh cilantro? Parsley works as garnish (though the flavor’s different). For extra richness, stir in a spoonful of coconut cream at the end.

Leftovers taste even better the next day—store in an airtight container for up to 4 days in the fridge. Freezes beautifully for up to 3 months. The chickpeas will soak up more flavor as it sits.

❤️

Why You’ll Love This Recipe

  • One Pot Wonder: I love that I can soak the chickpeas overnight, then toss everything into a single pot the next day—minimal cleanup, maximum flavor.
  • Flavor Bomb: The combo of fresh ginger, garlic, and green chili creates a depth that’s both spicy and aromatic without overpowering.
  • Meal Prep Hero: This tastes even better the next day, so I make a big batch for lunches all week. Honestly, it’s my secret to stress-free meals.
  • Budget Friendly: Dried chickpeas cost pennies, and the spices stretch across multiple meals. I’ll be real: it’s one of the most affordable dishes I make.

Step-by-Step Instructions for Authentic North Indian Spiced Chickpea Curry

This authentic method builds layers of flavor that transport you straight to Northern India.

Step 1: Prepare and Cook the Chickpeas

Begin by rinsing the 1.5 cups Dried Chickpeas thoroughly under cold water to remove any debris. Soak them overnight in plenty of water—they’ll plump up significantly. Drain and rinse again before cooking.

Transfer the soaked chickpeas to a pressure cooker with 1 cup Water and cook for 4-5 whistles until they’re tender but still hold their shape. If using canned chickpeas, simply drain and rinse them. I prefer the texture of freshly cooked chickpeas for this dish.

Step 2: Create the Aromatic Base

Heat 3 tbsp Vegetable Oil in a heavy-bottomed pan over medium heat. Add 1 tsp Cumin Seeds and let them sizzle for 30 seconds until they turn a shade darker and release their nutty aroma.

Immediately add the finely chopped 1 whole Yellow Onion and sauté for 6-8 minutes until it turns golden brown. This forms the sweet, caramelized foundation of your curry. Stir in the minced 4 cloves Garlic Cloves, grated 1 tbsp Fresh Ginger, and finely chopped 1 whole Green Chili Pepper, cooking for another 2 minutes until the raw smell disappears.

Step 3: Build the Spiced Tomato Sauce

Add the diced 3 whole Fresh Tomatoes to the pan and cook for 8-10 minutes, stirring occasionally, until they break down into a thick, pulpy mixture. This is when the magic starts happening.

Now add the dry spices: 1 tbsp Coriander Powder, 0.5 tsp Turmeric Powder, 0.5 tsp Red Chili Powder, and 1.5 tsp Salt. Stir well and cook for 3-4 minutes to allow the spices to bloom and lose their raw taste. The mixture should start to leave the sides of the pan and develop a rich, reddish-brown color.

Step 4: Combine and Simmer to Perfection

Add the cooked chickpeas to the spiced tomato mixture and stir to coat them evenly in the sauce. Pour in the 1 cup Water and bring to a gentle simmer. Reduce the heat to low and let it cook uncovered for 15-20 minutes.

This slow simmer allows the chickpeas to absorb all those beautiful flavors. Stir occasionally and watch as the sauce thickens to your desired consistency. About 5 minutes before serving, sprinkle in 1 tsp Garam Masala for that final aromatic touch. Taste and adjust the salt if needed.

Step 5: Finish and Garnish

Turn off the heat and let the curry sit for 5 minutes to allow the flavors to meld together. The chickpeas should be tender yet intact, swimming in a thick, fragrant sauce that coats the back of a spoon.

Garnish with the chopped 0.25 cup Fresh Cilantro just before serving. This curry tastes even better the next day as the flavors continue to develop. Serve hot with fresh naan or steamed basmati rice for the ultimate authentic experience.

👨‍🍳

Pro Tips For Making Chana Masala Recipe Hebbar

  • Soak Chickpeas Overnight: I learned this the hard way—dried chickpeas need a full 8-12 hours in water to soften properly, or they’ll stay tough no matter how long you simmer them.
  • Char the Onions: Cook the yellow onions until deep golden brown, almost caramelized—this builds the sweet, rich base that defines Hebbar’s version.
  • Crush Ginger-Garlic: Skip mincing and crush the ginger and garlic with a mortar and pestle instead; it releases more oils and makes the masala far more aromatic.
  • Simmer Uncovered: After adding the chickpeas, simmer the gravy uncovered for 10-15 minutes to thicken it naturally without a watery finish.

Essential Equipment for Perfect Results

Heavy-Bottomed Pan

A sturdy stainless steel or cast iron pan prevents hot spots that can burn your spices. I use my 12-inch All-Clad—it distributes heat evenly and has plenty of room for stirring. The heavy base keeps temperatures steady during that critical spice-blooming phase.

Pressure Cooker

For perfectly tender chickpeas, a pressure cooker cuts cooking time dramatically. My Instant Pot Duo handles 1.5 cups dried chickpeas in 4-5 whistles with 1 cup water. If you’re using canned, this step isn’t needed but fresh always tastes better. 💪

Wooden Spoon

A wooden spoon won’t scratch your cookware and is ideal for stirring the thick sauce. I keep one dedicated to my Indian cooking—it doesn’t absorb odors like plastic can. The flat edge helps scrape up those flavorful browned bits from the pan bottom.

Sharp Chef’s Knife

Precise chopping of onions, tomatoes, and aromatics ensures even cooking. I swear by my 8-inch Wüsthof for all the fine dicing this recipe requires. A sharp blade makes prep faster and safer too.

Keep it honed—dull knives slip and cause accidents. 🔥

Mortar and Pestle

For the freshest spice profile, grind your cumin seeds and coriander just before cooking. My granite mortar from India has the perfect texture. Even store-bought garam masala benefits from a quick grind to release oils.

Nutrition Facts

Servings 4
Amount Per Serving
Calories 280kcal
% Daily Value
Total Fat 12g15%
Saturated Fat 1g5%
Cholesterol 0mg0%
Sodium 580mg25%
Total Carbohydrate 38g14%
Dietary Fiber 10g36%
Sugars 6g
Protein 10g20%
Percent Daily Values are based on a 2,000 calorie diet. Your daily values may be higher or lower depending on your calorie needs.

Frequently Asked Questions

1

Can I use canned chickpeas instead of dried?

Drain and rinse 2 (15-oz) cans to replace 1.5 cups dried. Skip the soaking and pressure cooking—they’ll soften in the sauce during the 15-20 minute simmer.

2

How do I adjust the spice level?

Reduce or omit the green chili and red chili powder for mild heat. For extra kick, add 1/2 tsp cayenne or a pinch of black salt (kala namak) for complexity.

3

Why is my sauce too thin or watery?

Simmer uncovered for an extra 5-10 minutes to thicken. Mash a few chickpeas to release starch, or stir in 1 tsp cornstarch slurry. The sauce will thicken as it cools.

4

Can I make this ahead of time?

Yes! Flavors deepen after 24 hours in the fridge. Store in an airtight container for up to 4 days, or freeze for 3 months. Reheat gently with a splash of water.

★★★★★4.8(6 reviews)
Tyler Parker